




Real Examples of Virtual Renovation Before-and-After Transformations

Share:
Table of Contents
- 1. The architecture of perception: What is virtual renovation?
- 2. Virtual renovation before and after: The power of visual transformation
- 3. Inspiring virtual renovation before-and-after examples
- 4. Why editing and outsourcing are essential for virtual renovation before-and-after photos
- 5. Why Fotober is the strategic powerhouse for realtors, photographers, and videographers
- 6. How to execute a successful virtual renovation project with Fotober
- 7. Conclusion
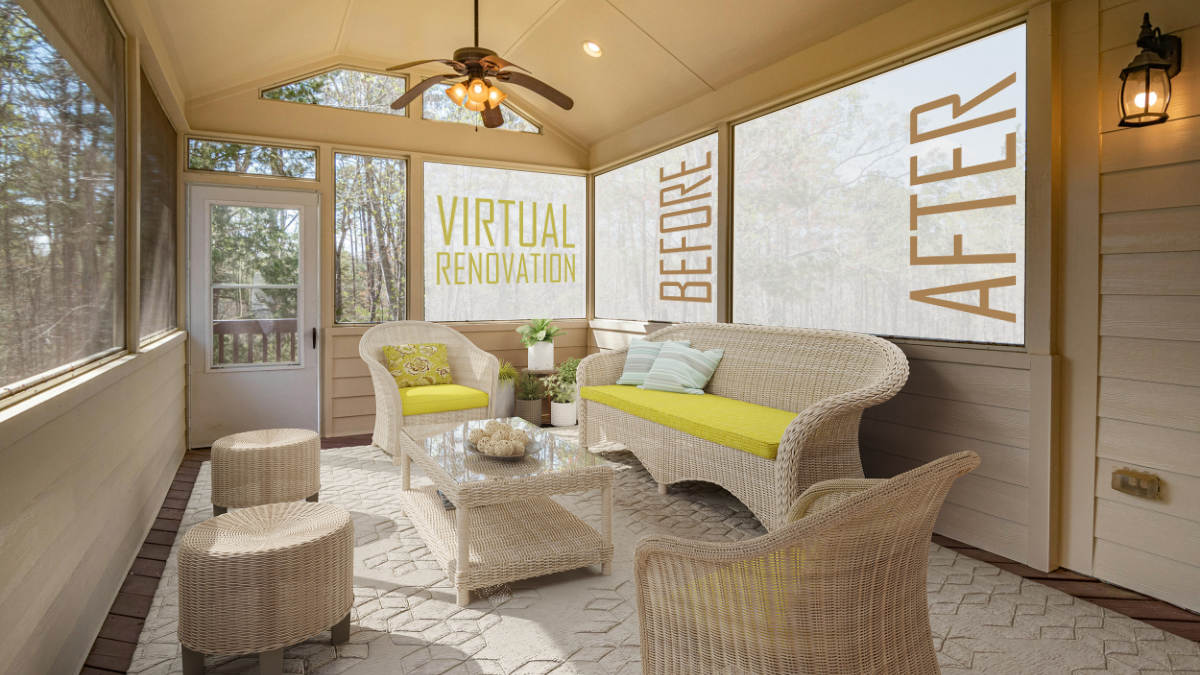
For real estate media, capturing a space isn't merely about documenting four walls; it is about articulating potential. However, we frequently encounter properties that fail to communicate that potential. Dated interiors, peeling paint, cluttered rooms, unfinished construction, or empty concrete shells can alienate buyers before they schedule a showing. Traditional physical staging and physical renovations are costly, time-consuming, and often logistically impractical for tight marketing timelines. This is where virtual renovation bridges the gap between raw architecture and high-end emotional storytelling. In this comprehensive guide, we will analyze the technical precision behind virtual renovation before-and-after workflows, explore inspiring virtual renovation examples, and examine why post-production outsourcing is vital for modern creative professionals to elevate your real estate visual suite.
1. The architecture of perception: What is virtual renovation?
Virtual renovation goes beyond basic virtual staging. While virtual staging typically involves inserting 3D digital furniture into a clean, empty room, virtual renovation digitally overhauls the property’s architectural structures, fixtures, and finishes.
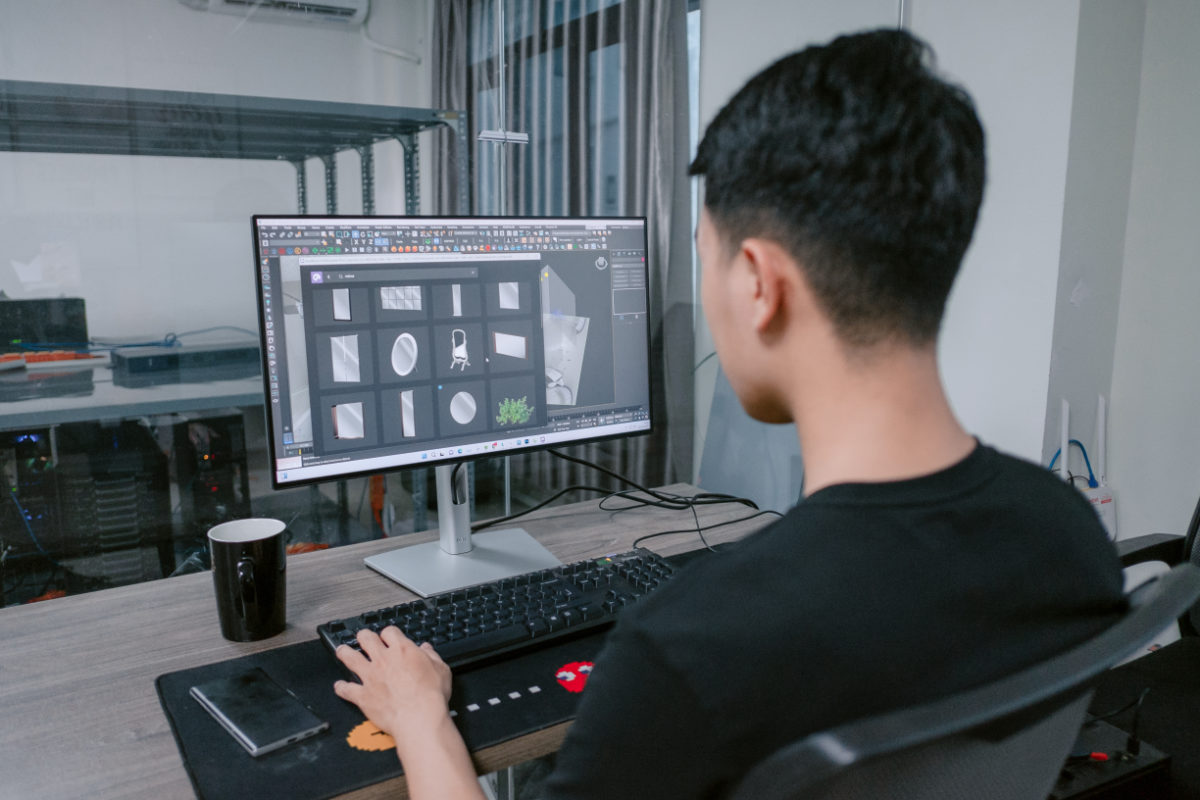
Through sophisticated 3D modeling, photorealistic rendering, and precise perspective matching, virtual renovation allows editors to modify physical elements of a photo or video frame, including:
- Changing outdated flooring (e.g., swapping worn carpet for modern herringbone hardwood).
- Demolishing non-load-bearing walls to showcase an open-concept layout.
- Updating kitchen cabinetry, countertops, backsplashes, and high-end appliances.
- Refinishing or repainting walls, trim, and ceiling details.
- Replacing outdated lighting fixtures with modern architectural fixtures.
- Enhancing curb appeal by replacing dead lawns, repainting facades, or adding modern exterior siding.
From a photographic and architectural perspective, virtual renovation requires an intimate understanding of visual physics: light propagation, shadow casting, material bounce, ambient occlusion, and lens geometry. When executed correctly, virtual renovation before-and-after photos make the line between reality and CGI disappear, allowing prospective buyers to experience a vision of what a home could become.
2. Virtual renovation before and after: The power of visual transformation
To understand the business and artistic value of virtual renovation, we must look closely at the shift in consumer psychology when viewing a listing image.
Most home buyers lack spatial visualization skills. When presented with a dark, 1980s-era kitchen featuring stained countertops and damaged linoleum flooring, their immediate reaction is to calculate virtual renovation cost, delay, and frustration. Their cognitive focus centers on the work required rather than the lifestyle offered.
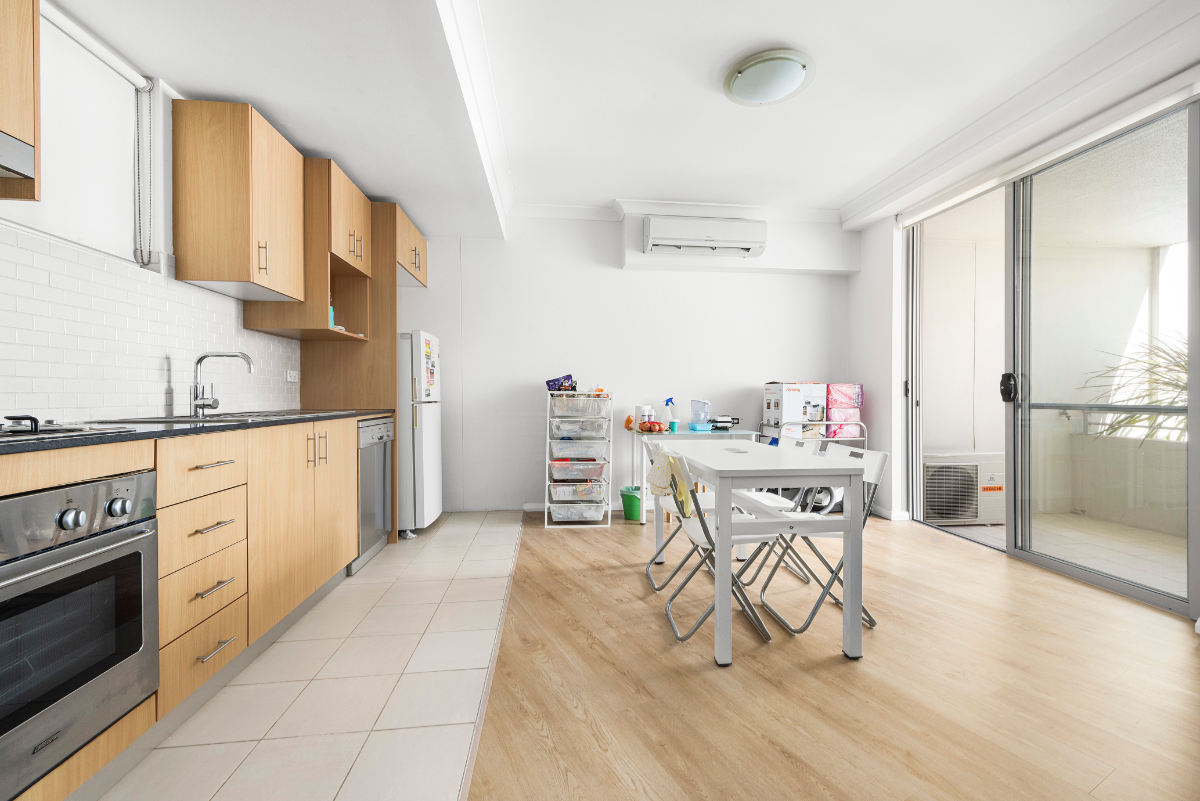
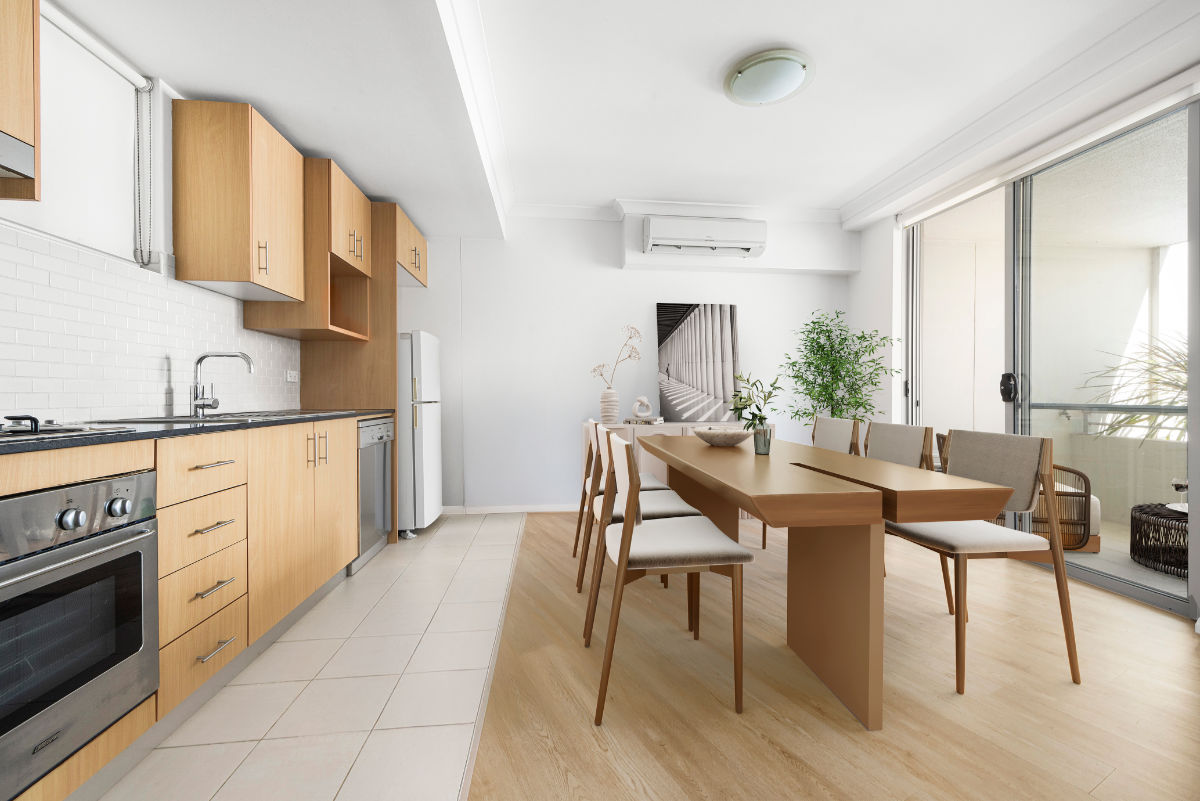
A hyper-realistic virtual renovation before-and-after image completely shifts this dynamic.
|
THE VISUAL SHIFT | |
|
BEFORE: Dark, dated, cluttered |
AFTER: Bright, modern, open |
|
Focus: Repair costs & friction |
Focus: Aspiration & potential |
2.1. The technical anatomy of a "before and after" transformation
Let’s break down what actually happens behind the scenes during a professional virtual renovation workflow:
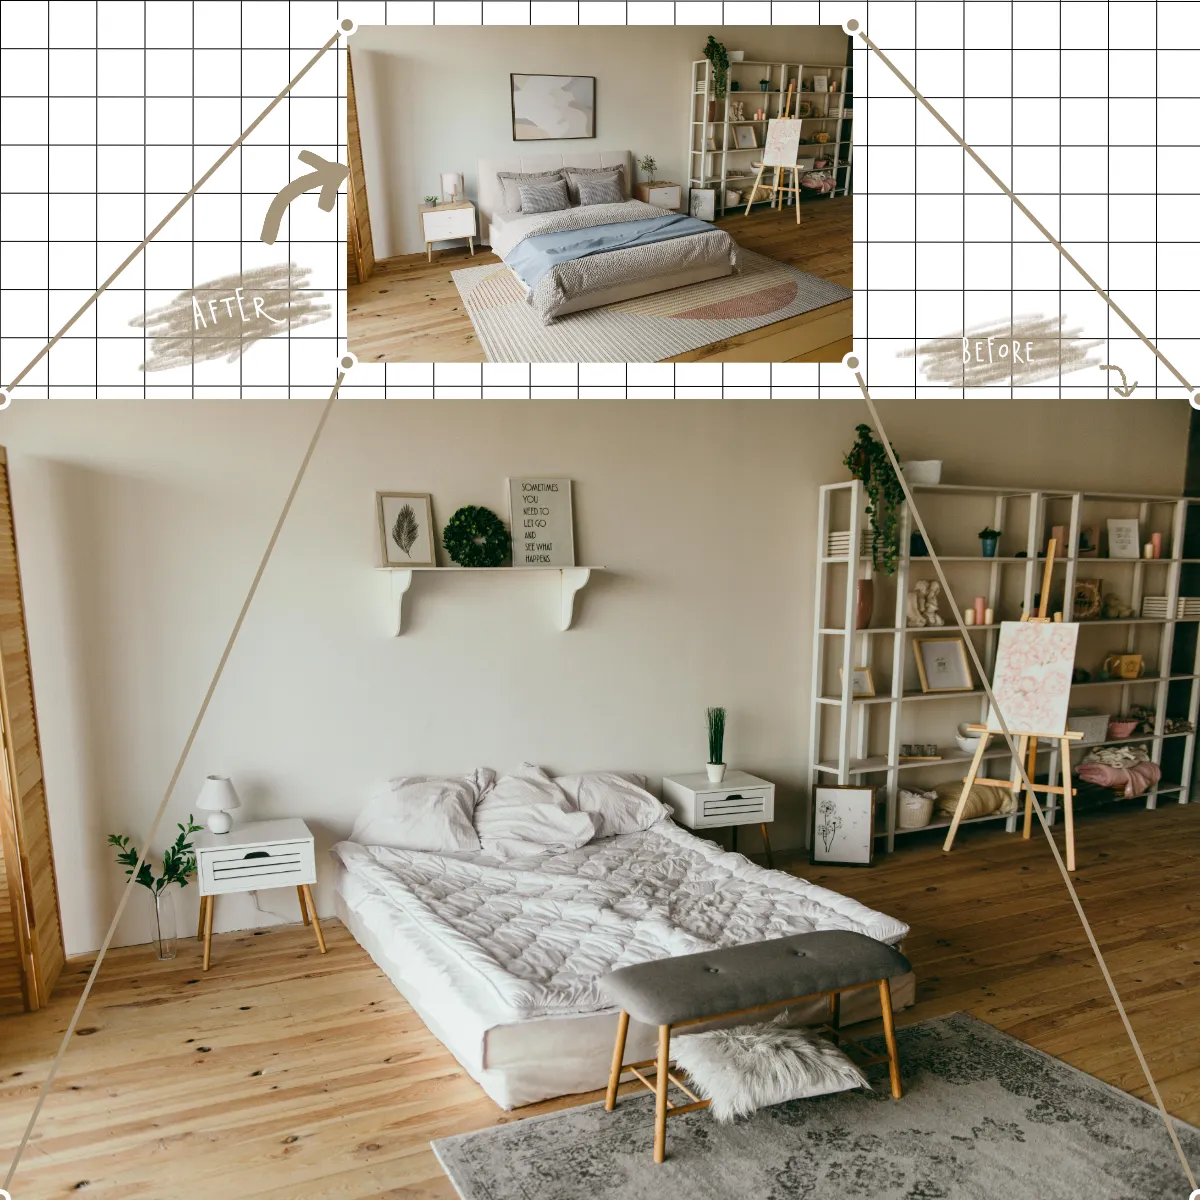
Photogrammetry & perspective calibration: The editor analyzes the camera metadata, focal length, sensor size, aperture, and pitch/yaw angles, to establish a mathematically precise 3D grid over the original photograph. This ensures that every digitally added asset adheres strictly to the real-world geometry of the space.
Digital demolition & cleaning: Before adding new features, the "before" image must be prepped. Outdated fixtures, damaged walls, or unwanted furniture are painstakingly removed using advanced cloning, content-aware synthesis, and manual plate painting. The underlying structural plates are reconstructed.
Material synthesis & texturing: Rather than dropping flat 2D textures onto surfaces, professional editors apply Physically Based Rendering (PBR) materials. A marble countertop, for instance, reflects light dynamically according to its specular map, while wood flooring features subtle micro-bump maps to catch key lights naturally.
Lighting alignment & shadow matching: The single most critical step in creating a believably renovated space is light matching. The digital illumination sources, like sunlight through a window, recessed ceiling lights, or ambient fill, must match the color temperature, intensity, and direction of the original environment's natural light.
3. Inspiring virtual renovation before-and-after examples
To see how these principles apply in commercial and residential scenarios, let’s explore four practical virtual renovation examples that consistently yield high returns on investment for listings.
3.1. Example 1: The modernized chef’s kitchen
The "before" scenario: A 1970s kitchen with dark oak cabinets, yellowed laminate countertops, dated brass hardware, and fluorescent ceiling lighting. The space feels cramped, dark, and visually heavy.
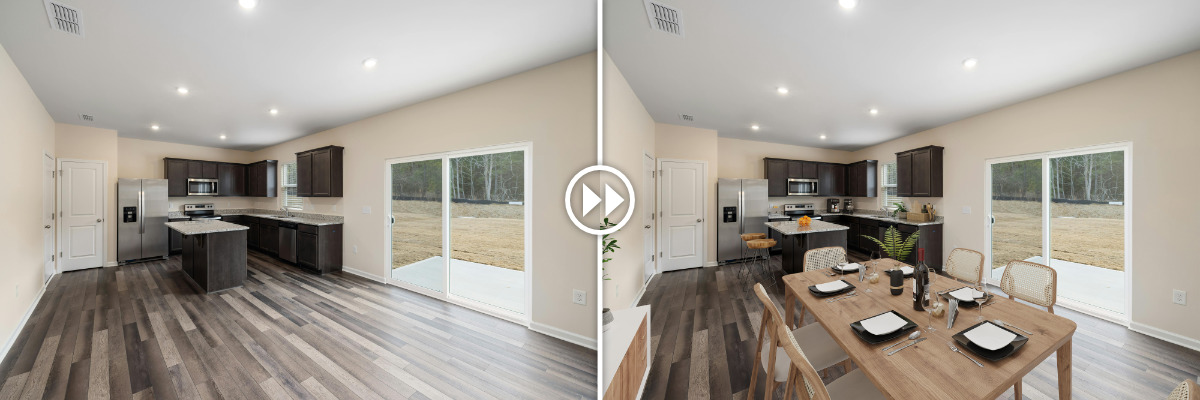
The virtual renovation process:
- Digital removal of upper wall cabinets to create visual breathing room.
- Application of smooth, white shaker-style lower cabinets with matte black hardware.
- Installation of a waterfall quartz island with subtle grey veining.
- Addition of modern pendant lights casting a warm, inviting 3000K glow.
The result: The space converts from a costly fixer-upper into an aspirational culinary environment, drastically increasing listing click-through rates.
3.2. Example 2: Structural wall removal for open-concept living
The "before" scenario: A segmented floor plan where a non-load-bearing partition wall separates a dark dining room from an underutilized living room.
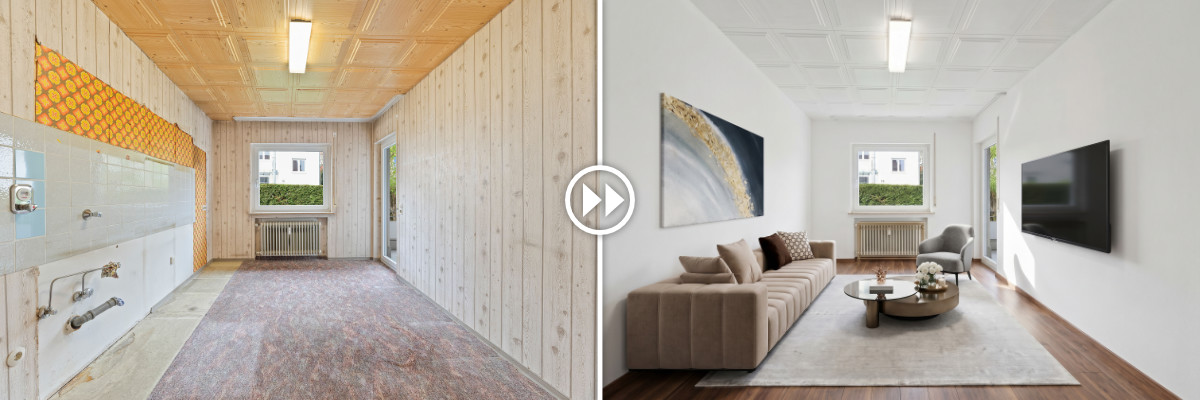
The virtual renovation process:
- Virtual removal of the dividing partition wall.
- Reconstruction of a continuous ceiling line and continuous light-toned white oak flooring across both zones.
- Harmonizing the lighting sources between both previously separated rooms to create a unified focal plane.
The result: Buyers immediately perceive greater square footage and modern flow without the listing agent having to pay for physical structural changes prior to a sale.
3.3. Example 3: Exterior facade & curb appeal transformation
The "before" scenario: A home with cracked stucco, an overgrown/brown lawn, an outdated wooden garage door, and flat afternoon light.
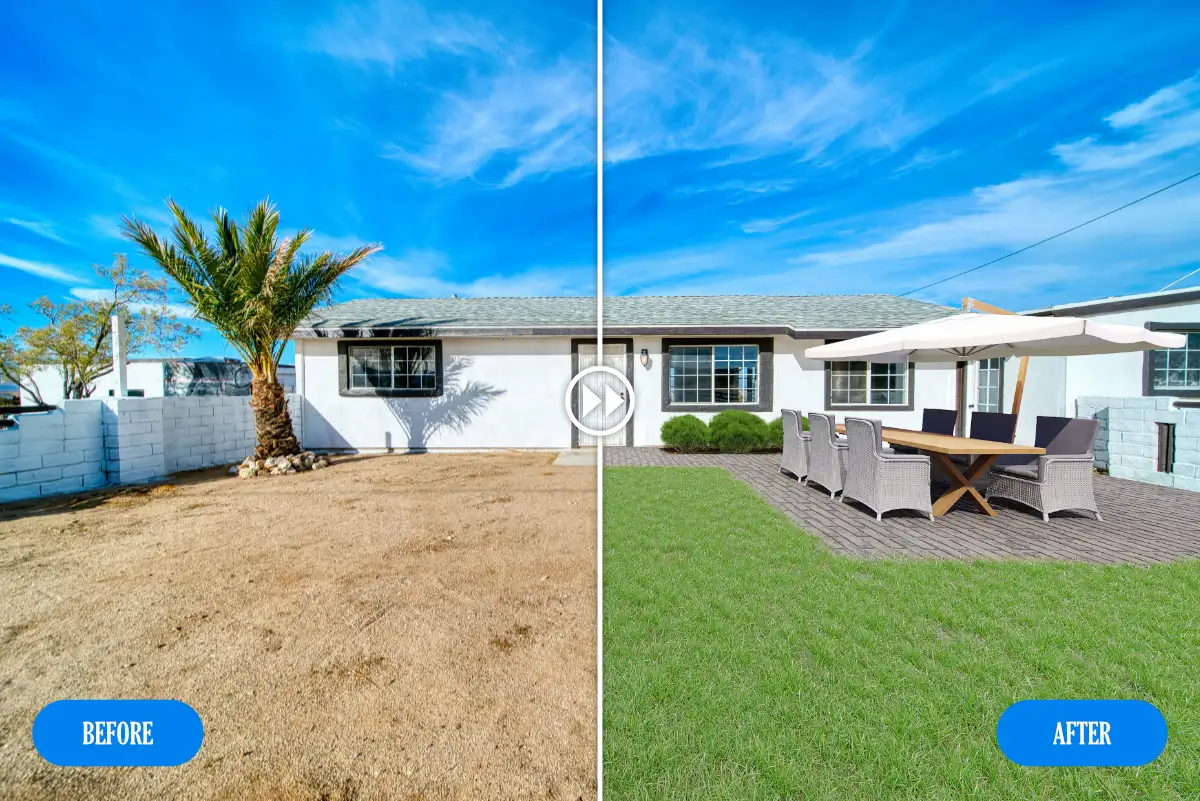
The virtual renovation process:
- Repairing and recoloring the stucco facade to a contemporary charcoal grey or crisp off-white.
- Replacing the garage door with a modern glass-and-aluminum panel design.
- Replacing dead grass with lush green turf, manicured foundation plants, and modern walkway lighting.
- Converting the flat sky into a dramatic "Twilight" golden-hour setting.
The result: The primary hero shot of the property commands attention on search portals, inviting buyers to click and explore further.
3.4. Example 4: Unfinished commercial or residential basements
The "before" scenario: Bare concrete floors, exposed ceiling joists, ductwork, and exposed block walls.
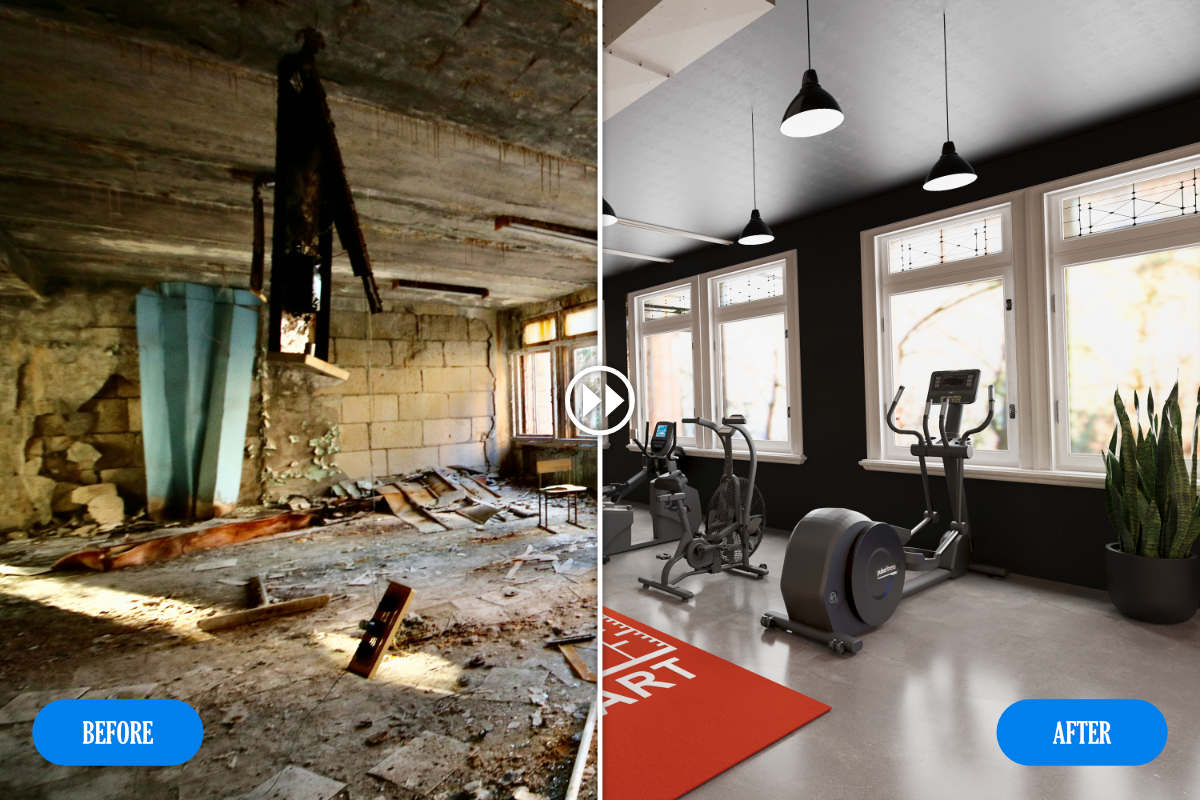
The virtual renovation process:
- Adding drywall, sleek recessed LED lighting, painted trim, and luxury vinyl plank (LVP) flooring.
- Staging the space as a multi-functional home theater, gym, or executive home office.
The result: Unusable, cold utility space is recast as high-value square footage in the buyer’s mind.
4. Why editing and outsourcing are essential for virtual renovation before-and-after photos
For architectural photographers, videographers, and real estate visual strategists, producing top-tier imagery involves a delicate balance between technical artistry and business efficiency.
|
The real estate creative’s time dilemma | |
|
TIME SPENT SHOOTING: 30% |
TIME SPENT IN POST-PRODUCTION: 70% |
While taking the photo requires sharp intuition for composition, camera height, and lighting balance, post-production is where the magic happens. However, editing, especially complex virtual renovation, is a massive operational bottleneck.
4.1. The high skill barrier of architectural 3D rendering
Standard photo editing involves exposure blending, color correction, and perspective adjustments in tools like Adobe Lightroom or Photoshop. However, photorealistic virtual renovation before-and-after transformation requires specialized skills in CAD modeling, 3D software (such as 3ds Max, Blender, or V-Ray), texture mapping, and physics-based rendering engine management.
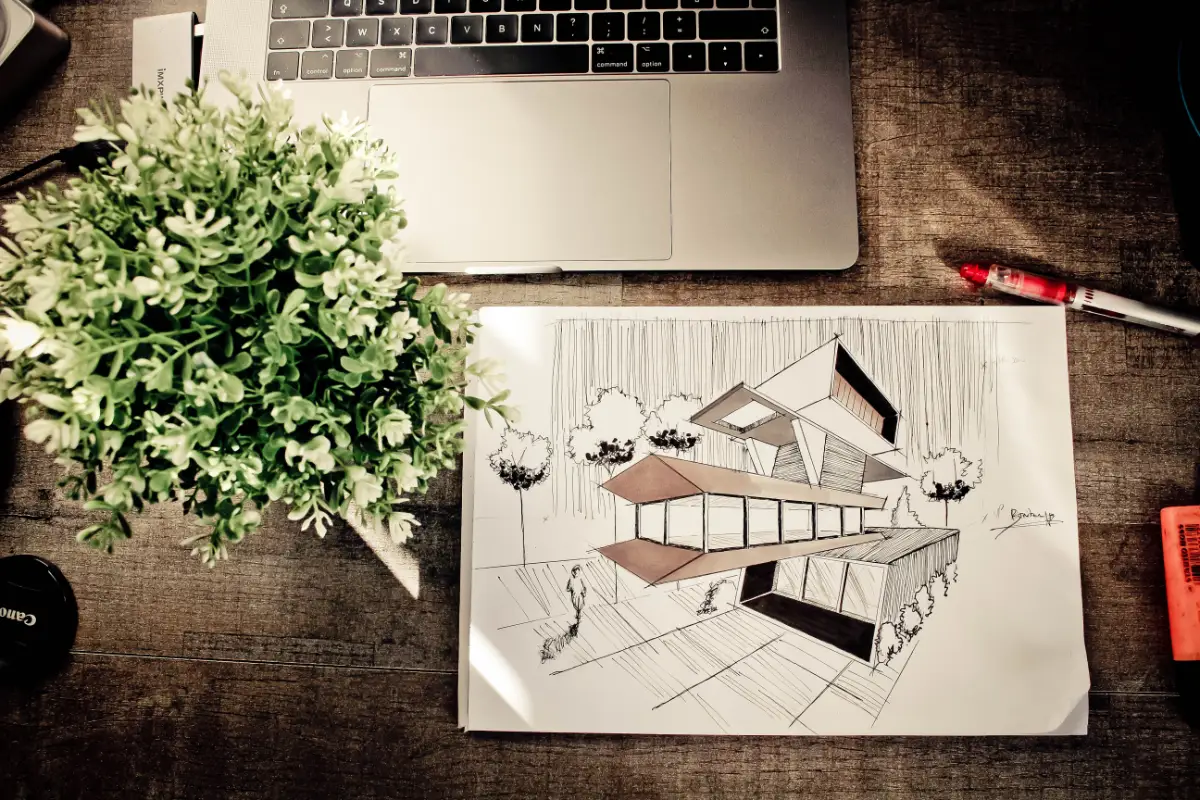
For a photographer or real estate agent to master these tools, hundreds of hours of training are required, time taken away from client acquisition, shooting, and closing deals.
4.2. Time equity vs. hourly revenue
A single, high-quality virtual renovation image can take anywhere from 2 to 6 hours of detailed digital work. If a professional photographer spends late nights wrestling with 3D software:
- Their daily shoot capacity drops from 4–5 houses to 1–2.
- Burnout increases significantly.
- Business growth plateaus because operational capacity is tied directly to editing hours.

4.3. Client expectations for turnaround times
The real estate market moves rapidly. Realtors often require fully edited media suites, including floor plans, HDR imagery, video walkthroughs, and virtual renovations, within 24 to 48 hours of a shoot. Attempting to execute complex structural digital edits in-house under tight deadlines compromises either image quality or turnaround speed.

Outsourcing post-production work is not a compromise on quality; it is a strategic business decision that frees up time, ensures consistency, and allows creators to scale their service offerings effortlessly.
5. Why Fotober is the strategic powerhouse for realtors, photographers, and videographers
When outsourcing complex post-production services like virtual renovation, choosing the right partner is paramount. The market is saturated with low-end automated filters and budget outsourcing hubs that output flat, unrealistic, cartoonish images.
Fotober stands apart as an elite post-production partner designed specifically to serve real estate media companies, professional photographers, videographers, and premier real estate agencies. Here is how Fotober empowers every key player in the real estate visual pipeline to create the most refined virtual renovation before-and-after photos:
5.1. For real estate photographers: Scale without sacrificing quality
As a photographer, your brand relies on your unique visual style, correct camera height, accurate exposure, and clean compositions. Fotober acts as an invisible backend team that honors your unique visual signature.
- Expanded service portfolio: By leveraging Fotober, you can immediately start offering virtual staging, virtual renovation, item removal, dusk conversions, and floor plans without spending a dime on additional software or render farms.
- Focus on shooting: Hand off the tedious 3D modeling and light-matching tasks to Fotober’s dedicated editors. Shoot more properties during optimal lighting hours while Fotober handles the post-production work overnight.
- Consistency at scale: Whether you submit 5 photos or 500 photos during peak real estate season, Fotober’s team maintains rigorous quality control standards, ensuring every image meets high architectural standards.
5.2. For videographers: Comprehensive visual ecosystems
Modern real estate video production demands more than simple pan-and-tilt shots. Clients frequently want static visual overlays or digital representations of unfinished spaces integrated alongside video walkthroughs.
Fotober supports media creators by delivering high-resolution, matching virtual renovation stills that integrate seamlessly into video timelines, presentation decks, and virtual tour platforms.
5.3. For realtors and real estate agencies: Faster sales & maximum ROI
For real estate agents, dynamic visuals mean faster sales cycles and higher offers. Physical staging for a whole home can cost thousands of dollars per month, with upfront design fees. Physical remodeling to prepare a property for market can take months and cost tens of thousands.
- Unrivaled cost-efficiency: Fotober’s virtual renovation services allow agents to showcase a home's full potential at a fraction of physical costs.
- Unlocking fixer-uppers: Homes that would otherwise sit stagnant on the market due to outdated interiors can be presented as modern dream homes, attracting broader demographics.
- Fast time-to-market: Get property listings live in days rather than weeks, keeping sellers happy and momentum high.
6. How to execute a successful virtual renovation project with Fotober
To achieve the best possible virtual renovation before-and-after results when ordering, a smooth collaborative workflow makes all the difference. Here is a step-by-step guide on how creators and realtors can work effectively with the Fotober team:
6.1. Step 1: Capture high-quality base photography
The quality of the input image dictates the fidelity of the output image.
- Use a steady tripod: Ensure camera stability to avoid micro-blur and provide accurate vertical lines.
- Shoot at eye/waist level: Maintain natural human perspective height (around 4–5 feet off the ground for interiors) so that the rendered 3D elements sit naturally in the scene.
- Capture adequate ambient light: Even if a room is dark, bracket your exposures (HDR) so Fotober’s team has shadow and highlight detail to work with during plate reconstruction.
6.2. Step 2: Provide clear architectural direction
When submitting an order to Fotober, clear communication leads to precise execution:
- Specify materials: Indicate preferred flooring (e.g., light oak herringbone, concrete, dark walnut), countertop styles (e.g., Carrara marble, black granite), and paint swatches.
- Identify elements to keep or remove: Clearly mark structural elements that must stay (e.g., structural pillars, fireplace chimneys) versus cosmetic elements to be removed (e.g., old cabinetry, wallpapers).
- Reference style guides: Share mood boards or visual examples of your desired interior design aesthetic (e.g., Japandi, Scandinavian Modern, Industrial Chic, Modern Farmhouse).

6.3. Step 3: Digital transformation by Fotober
Fotober’s specialized editors perform plate cleaning, 3D structure alignment, photorealistic object placement, light bounce calibration, and high-resolution rendering.
6.4. Step 4: Final quality check & delivery
Receive photorealistic, print-and-MLS-ready images back within short lead times. Use them in marketing collateral, social media reels, digital brochures, and online portal galleries.
7. Conclusion
In an increasingly competitive property market, visual storytelling wins listings and closes deals. Static, dated, or cluttered photography actively turns away potential buyers. While physical updates remain expensive and slow, virtual renovation offers an immediate, photorealistic, and highly persuasive alternative.
For photographers, videographers, and real estate professionals, trying to handle complex 3D virtual renovation workflows in-house drains time and restricts business growth. By partnering with Fotober, you gain an experienced, high-precision post-production department that transforms raw digital frames into inspiring, architectural-grade visual media. Elevate your portfolio, impress your clients, and scale your business effortlessly.
Ready to transform your listings and streamline your post-production workflow?
Explore Fotober today to submit your first project and experience the power of hyper-realistic virtual renovation before-and-after transformations!
- Facebook: fotobermedia.co
- YouTube: Fotober
- TikTok: @fotober
- Instagram: fotober_media.
Related posts

Cincinnati Housing Market 2026: Prices, Trends, and What It Means for Buyers, Sellers, and Investors
October 20, 2026

Modern Luxe Interior Design: Elements, Style Guide and How to Stage It
October 10, 2026

Minimalist Interior Design: Characteristics, Style Guide, and Staging
October 8, 2026

Coastal Interior Design: Style Definition & Staging Guide
September 30, 2026
