
How to Shrink an Image in Photoshop Without Losing Quality

Share:
Table of Contents
Photoshop offers remarkable flexibility when it comes to resizing images, but if done incorrectly, you can end up with blurry or pixelated results. Whether you’re preparing visuals for real estate listings, marketing campaigns, or professional portfolios, knowing how to shrink an image in Photoshop without losing quality is essential. This guide from Fotober will walk you through key considerations, efficient resizing methods, and best practices for professional use.
1. Key Considerations Before Resizing
Before you dive into resizing, it’s crucial to understand what affects image quality. Each digital photo is made up of pixels - the tiny dots that form the image. When you reduce an image’s dimensions, Photoshop must decide which pixels to keep and which to discard. If handled improperly, this process leads to detail loss, jagged edges, or unwanted blur.
Resolution and File Type
Start by checking your image’s resolution - measured in pixels per inch (PPI). For online use, 72 PPI is standard, while for printing, you need at least 300 PPI. Choosing the right resolution before shrinking helps you maintain visual clarity. Also, use lossless file formats such as TIFF or PNG during editing. JPEGs may degrade further each time they are saved.
Purpose of the Image
Your resizing approach depends on where the image will be used.
- Web use: Focus on reducing file size while keeping sharpness.
- Print: Maintain maximum resolution and avoid compressing too much.
- Real estate photography: Ensure colors, lighting, and texture details remain natural - prospective buyers often zoom in on property details.
Before you proceed, duplicate your original image. Always edit a copy to preserve the source in case you need to revert later.
2. Quick Methods to Shrink Images Without Losing Quality
Photoshop provides several powerful tools to scale down an image while retaining detail. Understanding these features will help you achieve clean, professional results.
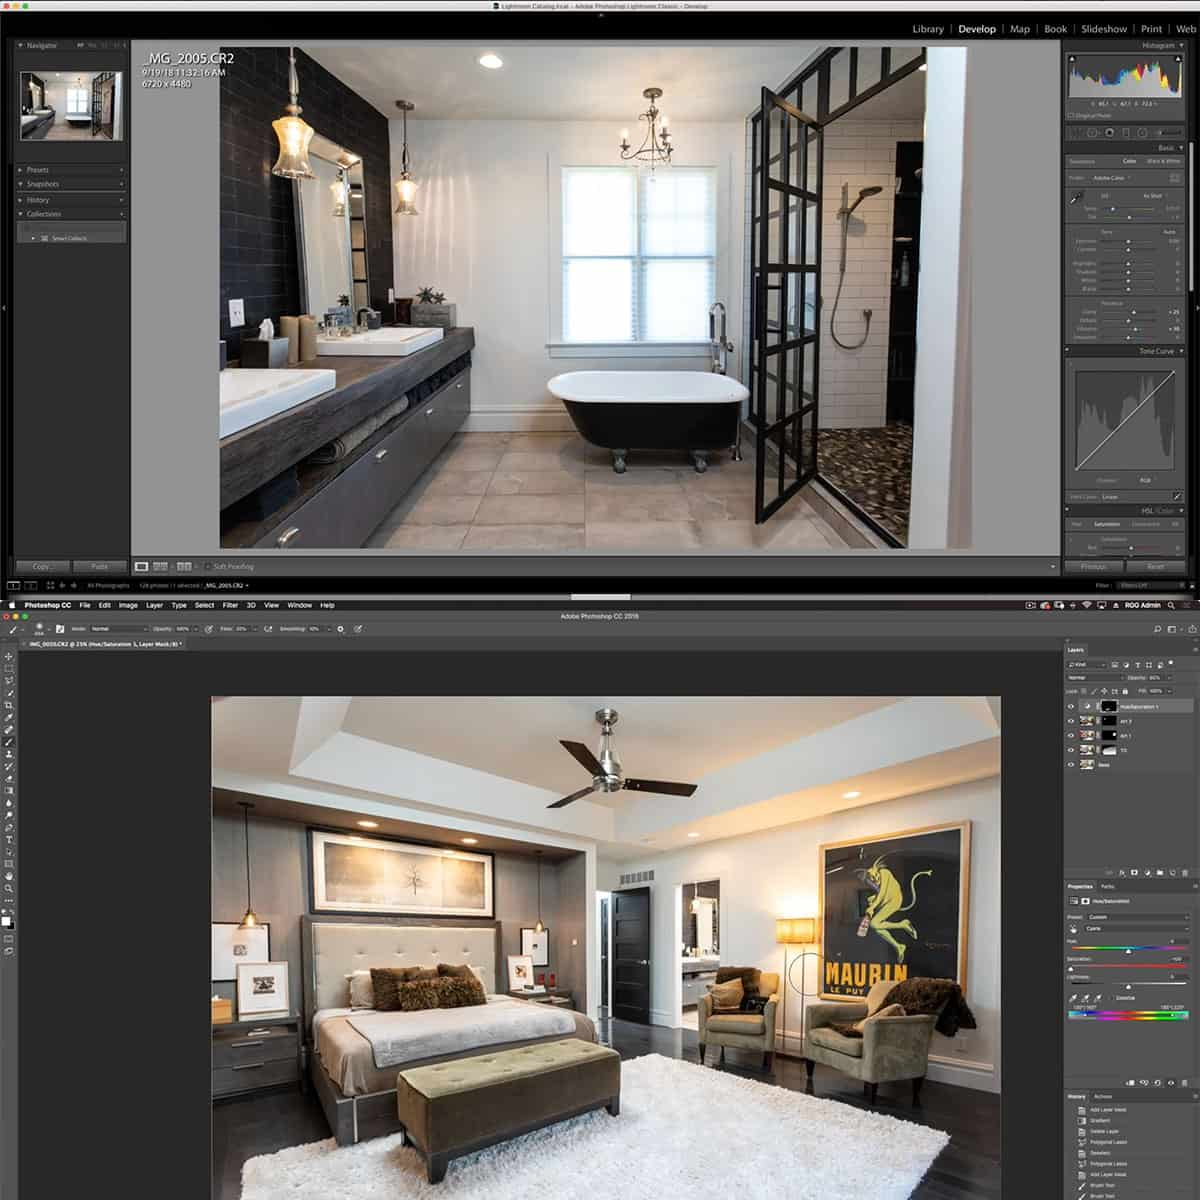
Using Image Size with Smart Objects
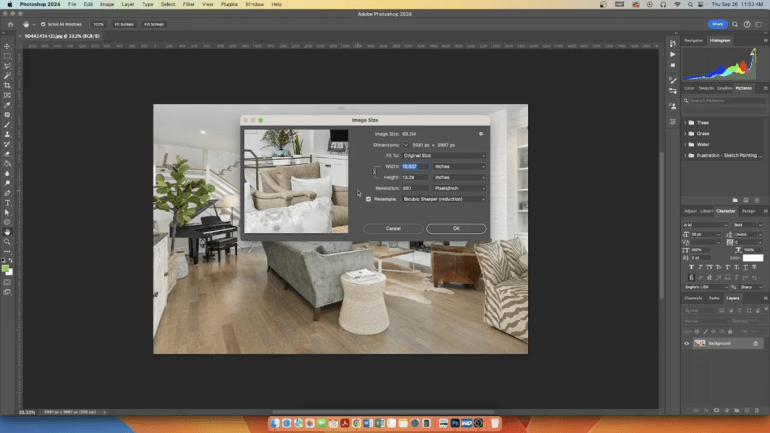
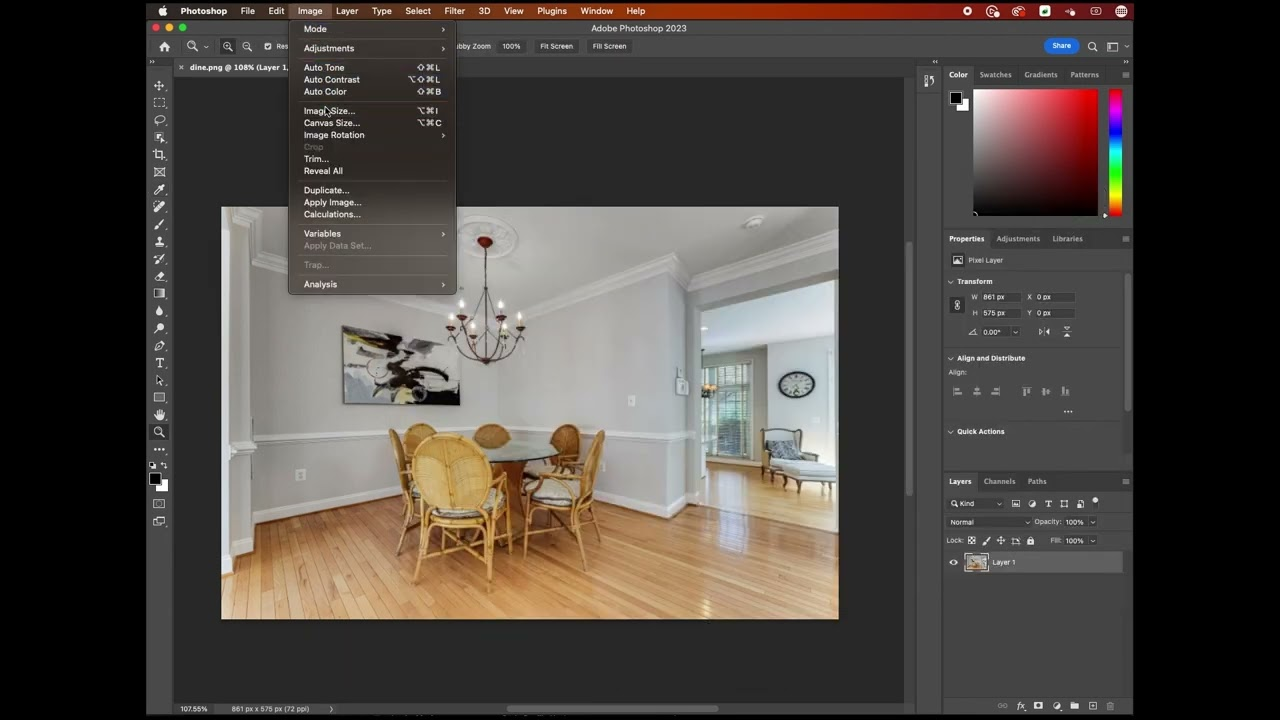
The most straightforward way to shrink an image is by using the Image Size dialog box. However, to avoid destructive editing, you should first convert your image layer into a Smart Object.
- Open your image in Photoshop.
- Right-click the layer and choose Convert to Smart Object.
- Go to Image → Image Size (or press Ctrl + Alt + I).
- Ensure the Resample option is checked.
- Select a resampling method like Bicubic Sharper (reduction) for best results.
- Adjust the dimensions to your desired size and click OK.
By using Smart Objects, Photoshop stores the original data, allowing you to resize multiple times without permanently altering quality. This approach is particularly useful when preparing large real estate images for web listings, where flexibility matters.
Resampling and Preserving Details
Resampling determines how Photoshop calculates new pixel information when scaling an image. The “Preserve Details 2.0” algorithm, available in newer Photoshop versions, offers the highest quality reduction.
To enable it:
- Go to Edit → Preferences → Technology Previews and activate Preserve Details 2.0.
- Then, in Image Size, choose it from the Resample dropdown menu.
- Adjust the Reduce Noise slider to fine-tune sharpness.
When used correctly, this method lets you shrink large, high-resolution property photos while keeping edges crisp and fine details intact.
3. Optimizing for Web, Print, and Real Estate Listings
Each platform demands a different optimization strategy after resizing. You’re not just shrinking - you’re tailoring images for performance and visual impact.
Web Optimization
For websites and online portfolios, balance size and speed. Use Save for Web (Legacy) under File → Export to compress images efficiently. Choose JPEG format with 60–80% quality for minimal loss. Keep dimensions suitable for your layout (e.g., 1200–1600 px width for real estate galleries).
Print Optimization
When resizing for print, never downsample excessively. Set resolution to 300 PPI and use TIFF or PNG. Always preview the image at 100% zoom before printing - what looks sharp on screen may blur in print.
Real Estate Listings
For property marketing, resized images must remain bright, sharp, and consistent across all listings. Over-compressed photos can make interiors look dull or less inviting. Test the resized image on multiple screens to ensure lighting and detail appear natural, especially for exterior shots where skies and building lines need clarity.
By mastering how to shrink an image in Photoshop without losing quality, you ensure that every real estate image looks professional and market-ready.
4. Avoiding Common Resizing Mistakes
Many users assume resizing is straightforward, but small oversights can drastically affect quality. Here are the most frequent issues - and how to prevent them.
- Resizing multiple times without Smart Objects: Each resize can reduce clarity. Always convert layers before scaling.
- Ignoring aspect ratio: Distorted proportions make rooms or products appear unnatural. Keep the chain icon linked in the Image Size dialog to maintain aspect ratio.
- Excessive compression: Overusing JPEG compression leads to artifacts. For web upload, test at different quality levels before finalizing.
- Resizing in the wrong order: Apply color correction and noise reduction before resizing to avoid magnifying flaws.
- Neglecting sharpening: After resizing, apply Unsharp Mask or Smart Sharpen slightly to restore crispness.
These details may sound technical, but they are what separate amateur edits from professional-grade results - especially in high-stakes industries like real estate photography.
5. Why Choose Fotober for Real Estate Image Editing
Even with precise techniques, resizing dozens or hundreds of real estate photos can be time-consuming. That’s where Fotober comes in.
Fotober specializes in real estate photo and video editing services for global clients, ensuring every image looks sharp, bright, and realistic - even after resizing. The team applies professional workflows that go beyond shrinking images: color correction, exposure balance, perspective alignment, and sky replacement are all part of the process.
When you need a consistent portfolio - for agencies, property listings, or marketing materials - Fotober ensures that resized images maintain clarity without losing depth or tone. If you’re unsure about how to shrink an image in Photoshop without losing quality, Fotober’s experts can deliver optimized versions that load fast online and print beautifully in brochures.
Conclusion
Resizing images in Photoshop doesn’t have to mean sacrificing quality. By understanding resolution, resampling, and Smart Object workflows, you can efficiently reduce image dimensions while keeping details intact. Whether you’re editing for web, print, or professional real estate portfolios, the key lies in using the right methods and avoiding common pitfalls.
For those who prefer a streamlined, professional approach, Fotober offers expert real estate photo editing solutions that maintain visual precision across all formats.
Master how to shrink an image in Photoshop without losing quality, and you’ll ensure every image - no matter the size - continues to make a strong visual impression.
Related posts

Double Your Booking: Airbnb Photography Tips for World Cup Host Cities
July 15, 2026

The Legacy of Sam Neill Real Estate: Vineyard & His Private Sanctuary
July 14, 2026

World Cup 2026 Host City Real Estate: Overview & Marketing Strategies
July 13, 2026
Most Common Photography Mistakes California Realtors Should Avoid
July 10, 2026
