
HDR Real Estate Photography: Step-by-Step Tips 2025
.png)

Share:
Table of Contents
- 1. Understanding HDR in Real Estate Photography
- 2. Essential Equipment for HDR Real Estate Photography
- 3. Camera Settings and Techniques
- 4. Step-by-Step Guide to Processing HDR Images
- 5. Common Mistakes to Avoid in HDR Real Estate Photography
- 6. Fotober: Professional HDR Photo Editing Service for Real Estate
- Conclusion
- Frequently Asked Questions (FAQs)
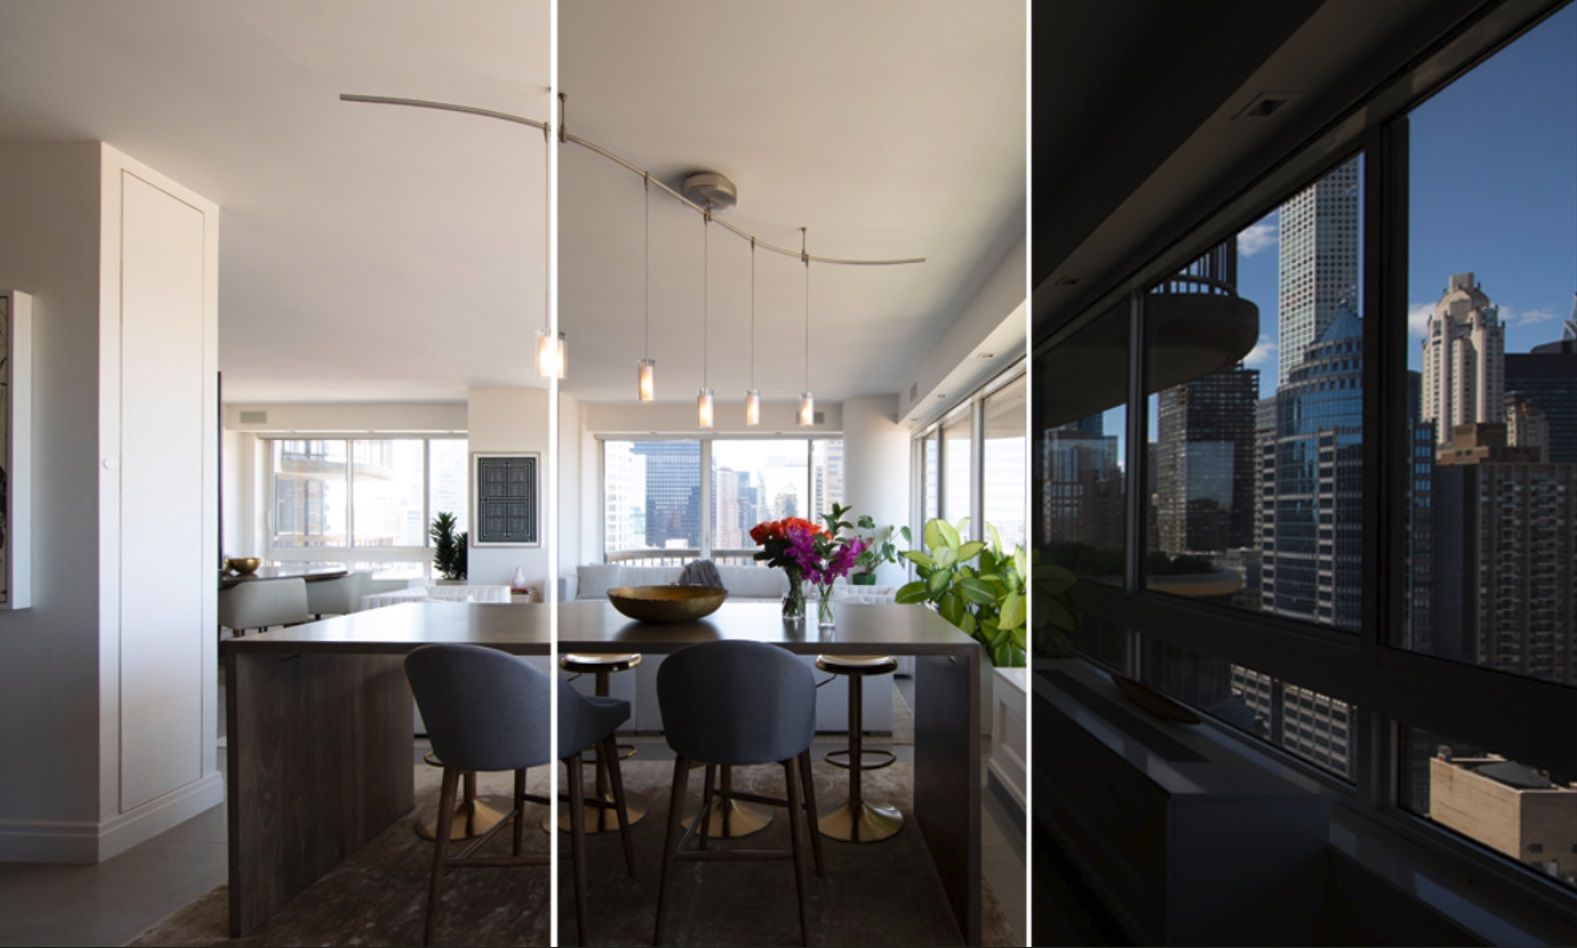
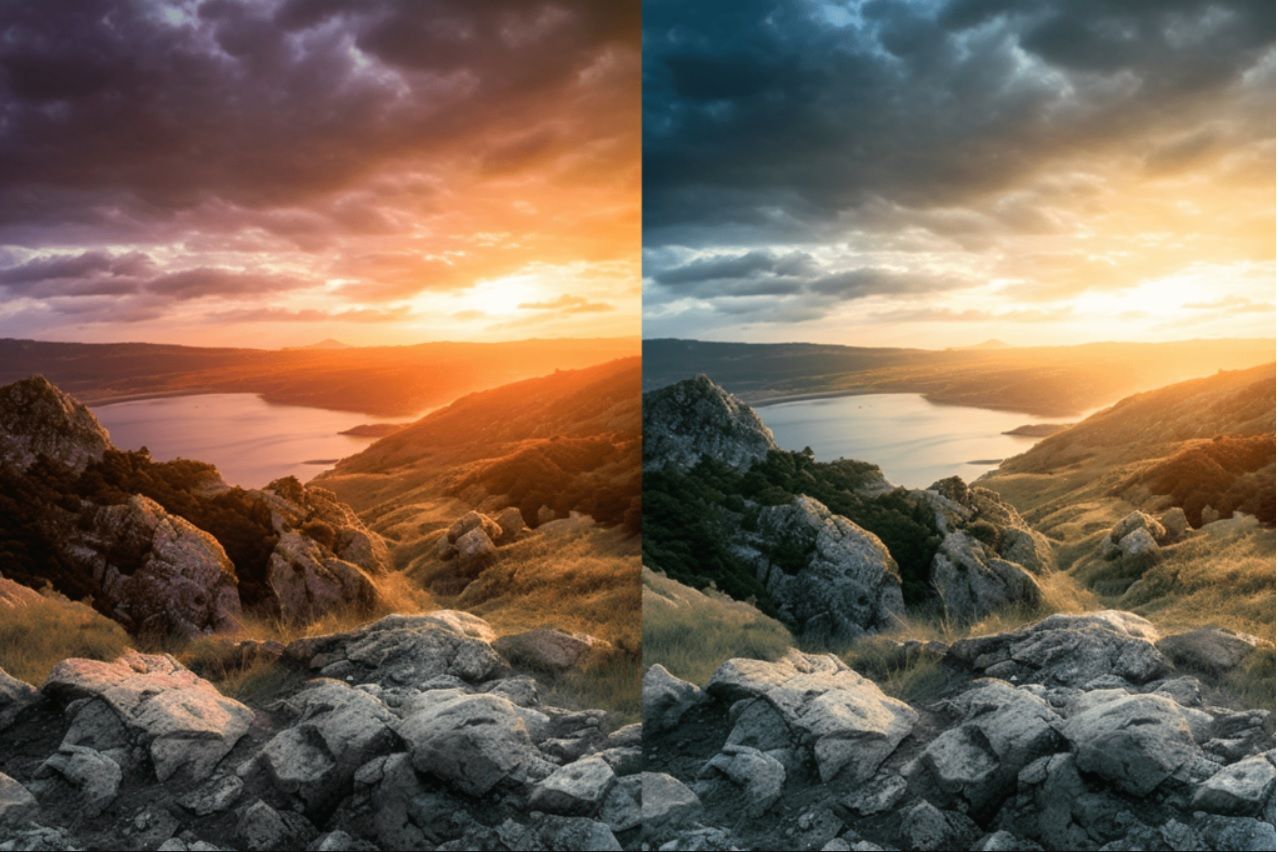
High Dynamic Range (HDR) photography has revolutionized real estate imaging, solving the challenge of capturing both bright and dark areas in interior spaces. According to the National Association of Realtors, properties with HDR photos receive 61% more views online compared to those with standard images. In this comprehensive guide by Fotober, we walk you through the essential equipment, processing steps, and techniques needed to master HDR real estate photography.
1. Understanding HDR in Real Estate Photography
HDR (High Dynamic Range) photography is a core technique in modern property marketing. It involves combining multiple exposures of the same scene to capture the full range of light visible to the human eye. In real estate photography, this method is absolutely essential for dealing with the massive contrast between bright windows and dark interior corners.
The fundamental process of HDR real estate photography requires taking at least three different exposures, known as bracketing:
- Highlight Exposure: Captures detail in the brightest areas (like the view outside windows).
- Mid-tone Exposure: Captures detail in the average areas (walls, furniture).
- Shadow Exposure: Captures detail in the darkest areas (deep corners and shadows).
For maximum control, professional photographers often use five or seven exposures. This technique allows you to effectively capture the full dynamic range in real estate photography. While standard cameras capture around $12-14$ stops of dynamic range, real estate scenes often contain $16-20$ stops—a gap that HDR real estate photography successfully bridges. The final HDR real estate photo is realistic, professional, and dramatically enhances your listing images.
2. Essential Equipment for HDR Real Estate Photography
Having the right equipment is essential for successful HDR real estate photography. It ensures you capture well-exposed, stunning images that showcase the property’s best features. The key gear includes a quality camera, lens, and supporting tools like tripods and lighting equipment.
Camera and Lens
For effective HDR real estate photography, specific camera features and lens characteristics are necessary.
Key Camera Features for HDR:
- Auto Exposure Bracketing (AEB) function
- Manual mode capability
- RAW file format support
- Built-in HDR preview (optional)
- Remote trigger compatibility
- Minimum 24MP resolution
The Best Lens for Real Estate Photography for HDR work combines excellent optical quality with practical focal lengths. While wide-angle lenses are typically the go-to choice, the ideal selection should be based on the property type and specific shooting conditions.
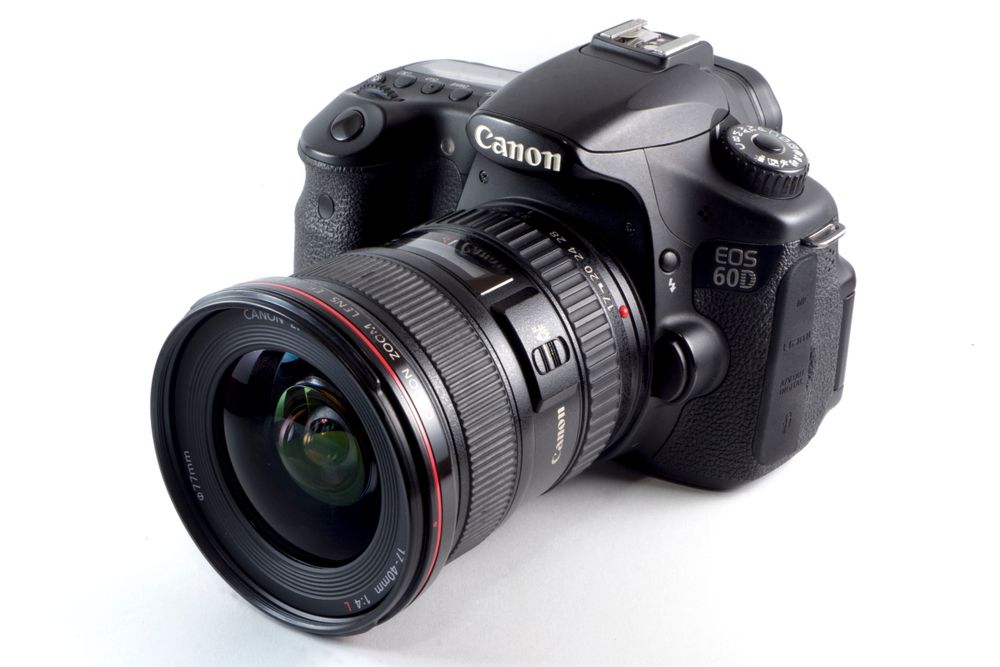
Recommended Lens Specifications:
- Focal Length: 16-35mm
- Maximum Aperture: f/2.8-f/4
- Image Stabilization
- Weather Sealing
- Minimal distortion
In addition to HDR, another technique popular among real estate photographers is flambient real estate photography, which combines ambient light and flash to create perfectly lit images without the need for excessive editing.
Tripod
A sturdy tripod is vital for HDR photography. Since HDR requires multiple shots with varied exposures, any camera movement between those shots can ruin the sequence. Stability is key.
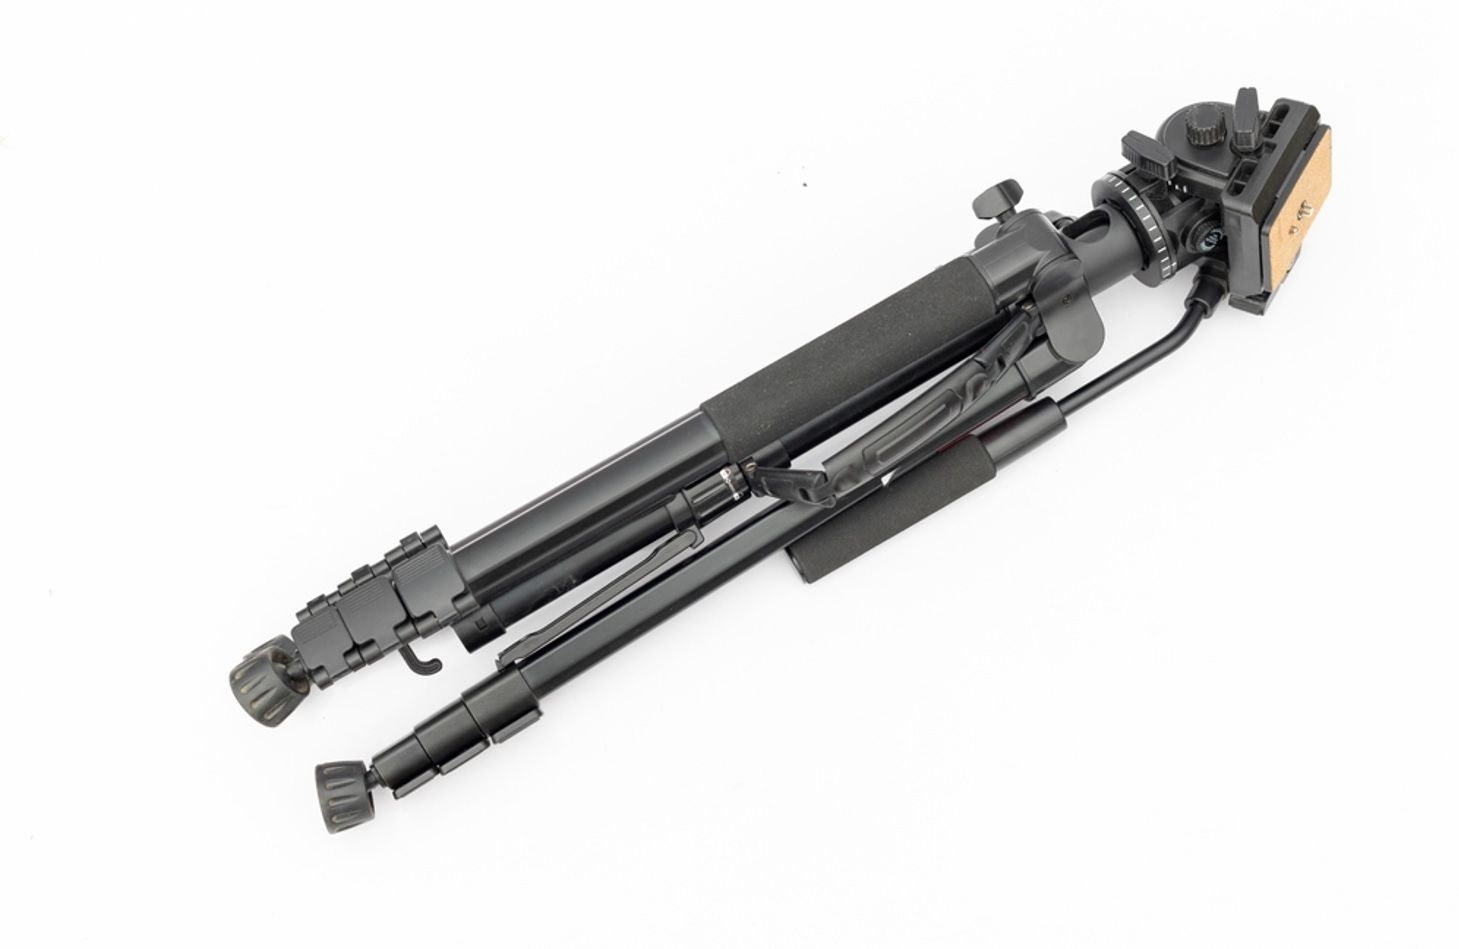
Essential Tripod Features:
- Weight Capacity: 2-3x camera/lens weight
- Height Range: 25-65 inches
- Built-in Bubble Level
- Quick-release Plate
- Carbon Fiber or Aluminum Construction
Professional photographers recommend using high-quality tripod heads. Ball heads offer flexibility, and geared heads allow precise adjustments, especially for architectural shots. A tripod with a solid head locks in place to maintain consistent framing across multiple exposures.
Lighting Equipment
While HDR works primarily with available light, supplementary lighting can enhance results significantly. To complement HDR photography, consider adding.
Recommended Lighting Gear:
- LED panels for fill light
- Speedlights for accent lighting
- Light stands and modifiers
- Color correction gels
- Diffusion materials
Subtle use of fill lighting can reduce contrast ratios and improve shadow details, ultimately refining the quality of your HDR photos. Knowing when to incorporate lighting can help elevate your HDR real estate photos to a professional standard.
3. Camera Settings and Techniques
Understanding and mastering the camera settings for real estate photography is key to capturing the best HDR real estate photos. By focusing on the essential settings and techniques, photographers can ensure consistent, high-quality images that showcase properties in their best light.
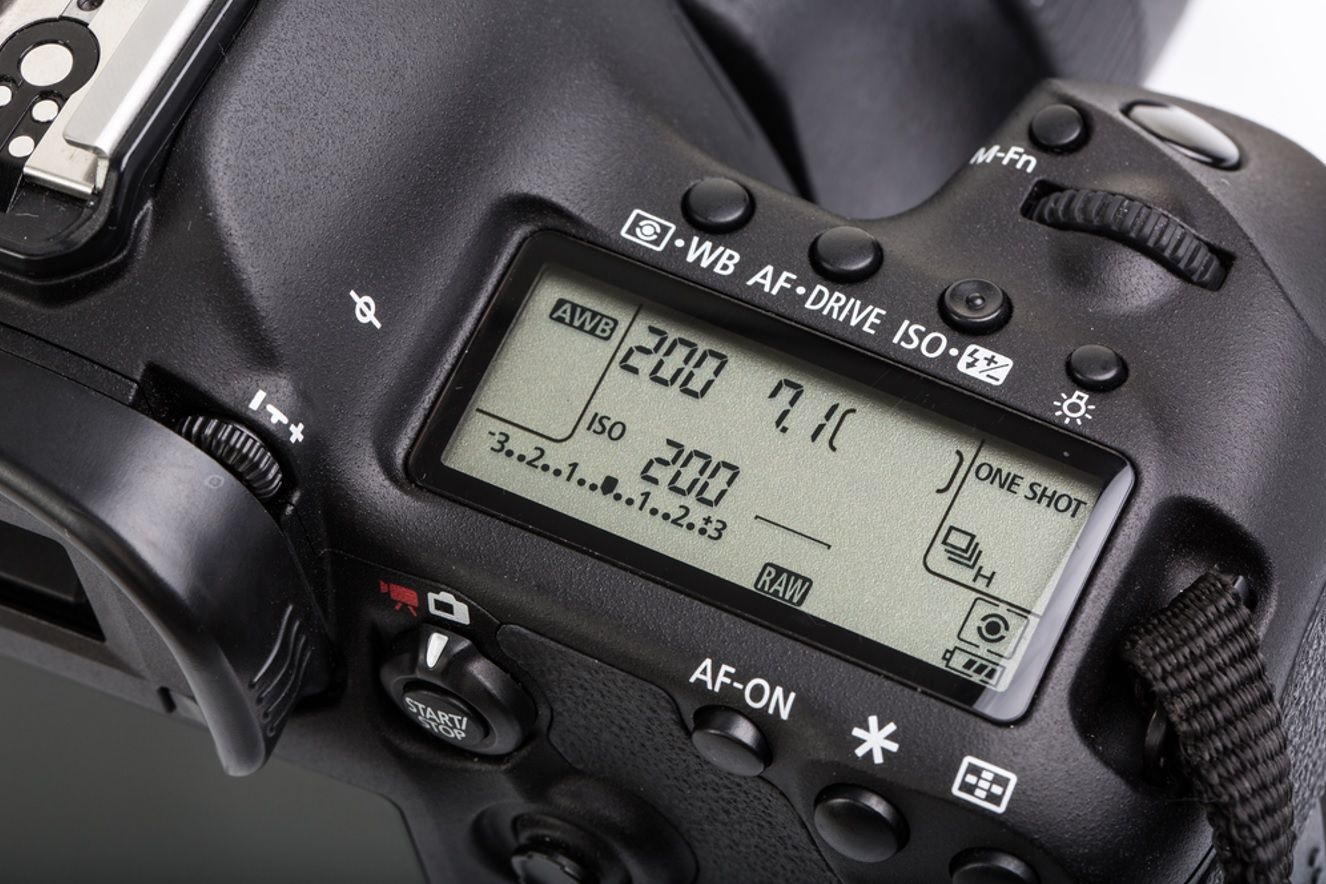
Aperture, Shutter Speed, and ISO
The exposure settings you choose greatly influence the final HDR result. To begin, use the following base settings:
- Aperture: f/8 to f/11
- ISO: 100 or lowest native
- White Balance: Manual
- Focus Mode: Manual
- Image Format: RAW
It’s crucial to maintain consistent aperture across all your exposure bracketing to ensure uniform depth of field. Adjust the shutter speed for variations in exposure, while keeping ISO constant to avoid noise. This will give you clean and detailed HDR shots that can handle both bright and dark areas effectively.
Exposure Bracketing
Exposure bracketing is a fundamental part of HDR photography. It ensures that you capture the entire dynamic range of a scene:
- Standard 3-shot Sequence: -2EV, 0, +2EV
- Extended 5-shot Sequence: -4EV, -2EV, 0, +2EV, +4EV
- Bracket Interval: 1-2 stops
- Timer Delay: 2 seconds
Professional photographers often begin with a wider bracket in high-contrast scenes to ensure all details are covered. Once you capture a bracketed sequence, check the histogram and review the exposures to ensure proper coverage before continuing.
Focus and Depth of Field
For HDR real estate photography, keeping the entire scene in sharp focus is essential. Focus on the hyperfocal distance to maximize the depth of field, especially in interior shots.
Focus Guidelines:
- Focus Distance: 1/3 into scene
- Aperture: f/8-f/11 for optimal sharpness
- Review at 100% magnification
- Use Live View for precision
- Enable focus lock
Ensure to check focus at both the nearest and farthest points of the scene to guarantee that all important elements are sharply captured.
4. Step-by-Step Guide to Processing HDR Images
HDR image processing is as crucial as capturing the perfect shot. Proper post-processing enhances the image quality, making your HDR real estate photo suitable for showcasing properties effectively. Here’s a detailed guide on how to process HDR real estate photos from start to finish.
Selecting Software
The choice of HDR processing software can significantly influence the final result. Integrating the right tool into your workflow is a key part of successful HDR real estate photography.
- Integrated Suites: Adobe Lightroom/Photoshop provides seamless workflow integration, especially if you already use the Adobe ecosystem.
- Dedicated HDR Programs: Tools like Aurora HDR, Photomatix Pro, SNS-HDR, and HDR Merge Pro often offer more precise control over the merging and tone mapping processes.
Each of the best real estate photo editing software programs offers unique strengths. Adobe's suite provides seamless workflow integration, while dedicated HDR programs often offer more precise control over merging and tone mapping.
Merging Exposures
The merging process is vital to create the perfect final HDR real estate photo. This step combines the bracketed exposures into a single file with an expanded dynamic range.
- Check Alignment: Ensure all bracketed shots are perfectly aligned before merging.
- Deghosting: Use deghosting tools selectively to remove artifacts (e.g., movement from a person or tree) between exposures.
- Noise Reduction: Enable noise reduction during the merge, especially for shots taken in low light.
- Initial Settings: Start with conservative merging settings and review the highlight/shadow protection to achieve a natural-looking result that truly represents the property.
Post-Processing Techniques
Once the HDR images are merged, it’s time to refine them further. These post-processing techniques are essential to maintain the natural look and enhance the visual appeal of your final HDR real estate photo.
- Perspective Correction: Adjust vertical and horizontal lines to ensure walls are straight and the image looks professional.
- Lens Distortion: Remove barrel or pincushion distortion caused by wide-angle lenses.
- Tonal Refinement: Apply global contrast enhancement, selective shadow recovery, and highlight protection for a balanced look.
- Color Accuracy: Correct the color balance and saturation to ensure the image accurately represents the property's true colors.
Crucial Tip: Aim for balanced, realistic HDR images. Avoid excessive adjustments and extreme tone mapping, as over-editing can result in unnatural-looking photos that detract from the property's appeal.
5. Common Mistakes to Avoid in HDR Real Estate Photography
While HDR real estate photography is powerful, it is also easy to misuse. Avoiding these common mistakes will ensure your images remain professional, realistic, and highly attractive to potential buyers.
Over-Processing (The "HDR Look"):
One of the biggest mistakes in HDR real estate photography is over-processing. Beginners often overdo the HDR effect, resulting in unnatural images with harsh contrasts, exaggerated colors, and noticeable halos around windows. Solution: Subtle adjustments work best. The goal is to enhance dynamic range while maintaining a realistic appearance.
Inconsistent Lighting and Color:
Mixing natural light with various indoor light sources (e.g., warm tungsten and cool LED) creates inconsistent color casts, uneven shadows, and distracting reflections. Solution: Professional photographers take time to balance lighting before shooting by setting a Custom White Balance or using gel filters on flashes to match ambient light.
Poor Composition and Perspective:
Even a technically perfect, well-exposed HDR real estate photo will look unprofessional if the composition is flawed. Common pitfalls include distorted vertical lines and poor framing. Solution:
- Use a tripod to ensure stability.
- Shoot from chest level ($4-5$ feet) to create a natural viewpoint.
- Properly align doorways and windows to ensure vertical lines are perfectly straight, creating a balanced, professional look.
6. Fotober: Professional HDR Photo Editing Service for Real Estate
While mastering HDR techniques is essential, partnering with a professional photo editing service for real estate can elevate your real estate photography to new heights. Fotober specializes in processing HDR real estate images, offering expertise that helps photographers deliver consistent, high-quality results while saving valuable time.
Their editing team excels at handling complex HDR merges and maintaining natural-looking results. Fotober's processors understand the delicate balance required in HDR real estate photography, ensuring windows retain proper detail while interior spaces appear bright and inviting. They work with various HDR methods, from traditional bracketed exposures to single-RAW HDR processing.
Fotober's comprehensive HDR editing services include:
- Multiple exposure blending
- Window masking and enhancement
- Color temperature correction
- Perspective adjustment
- Vertical line straightening
- Sky replacement when needed
- Selective detail enhancement

Their quality control process ensures every image meets professional standards before delivery. Each photo undergoes multiple reviews, focusing on natural appearance, proper exposure balance, and accurate color representation. This attention to detail helps real estate photographers maintain consistency across their entire portfolio.
Working with Fotober streamlines the post-processing workflow, allowing photographers to focus on shooting more properties. Their quick turnaround times, competitive pricing, and reliable customer service—covering photo editing, real estate video editing, and virtual staging—make them an ideal partner for busy real estate professionals looking to scale their business while maintaining top-quality visuals.
Conclusion
At Fotober, we know that mastering HDR real estate photography is more than just technique—it’s about capturing spaces in a way that feels natural and inviting. By combining the right gear, smart exposure bracketing, and polished post-processing, you create images that stand out. With consistency and care, HDR becomes a powerful tool to elevate listings and exceed client expectations.
Frequently Asked Questions (FAQs)
1. What is HDR real estate photography and why is it important?
HDR real estate photography combines multiple exposures to capture details in both bright and dark areas. This technique is important because real estate interiors often have strong contrasts between windows and interior shadows, and HDR helps produce natural, well-balanced images.
2. How many exposures do I need for HDR real estate photography?Most photographers use a 3-exposure bracket (−2EV, 0, +2EV). For high-contrast scenes, 5 or even 7 exposures provide more detail and smoother tonal transitions.
3. What camera settings work best for HDR real estate photography?The ideal starting settings include: aperture f/8–f/11, ISO 100, manual white balance, manual focus, and RAW format. Shutter speed should vary between exposures while keeping aperture and ISO constant.
4. What are the most common mistakes in HDR real estate photography?Common mistakes include over-processing (extreme HDR look), color inconsistencies between light sources, distorted vertical lines, and misaligned bracketed shots. Proper lighting balance and careful post-processing help avoid these issues.
5. Does Fotober offer HDR editing services for real estate photographers?Yes. Fotober provides professional HDR blending, window masking, vertical correction, color balancing, and complete post-processing to ensure natural-looking, high-quality real estate photos with fast turnaround.

.png)
.png)
.png)
