
How to Edit Real Estate Photos in Photoshop: Simple Guide 2025
.png)

Share:
Table of Contents
- 1. The Significance of High-Quality Real Estate Photography
- 2. Why Editing Real Estate Photos in Photoshop is Essential
- 3. Preparing for Photo Editing in Photoshop
- 4. Basic Adjustments in Photoshop
- 5. Advanced Editing Techniques for Real Estate Photos
- 6. Batch Processing for Consistency
- 7. Final Adjustments and Exporting
- 8. Fotober's Professional Real Estate Photo Editing Services
- Conclusion
- FAQ: How to Edit Real Estate Photos in Photoshop
Adobe Photoshop is the leading software for professional real estate photo editing. Studies show that listings with professionally edited photos receive 118% more views online. In this comprehensive guide by Fotober, we will show you how to edit real estate photos in Photoshop using powerful editing tools to enhance your listings and attract more buyers.
1. The Significance of High-Quality Real Estate Photography
High-quality real estate photography plays a vital role in boosting property sales. The statistics are compelling: Listings with professionally edited photos sell 32% faster and tend to command higher prices than those with basic images. This dramatic difference reflects modern buyers’ preference for visually appealing content when making purchasing decisions in the digital age.

-
Digital Demand: The digital age demands polished and attractive real estate photos that authentically represent the property and highlight its best features. Learning how to edit real estate photos in Photoshop is now a fundamental requirement for achieving this professional quality.
-
Marketing Impact: Photoshop editing transforms regular photos into powerful marketing tools, capturing the attention of qualified buyers and significantly increasing inquiries.
-
Consistency Across Platforms: Professional real estate photo editing ensures consistency across various marketing platforms, including mobile devices and printed materials. This versatility is essential for reaching a wide range of buyers and maintaining a strong, professional brand image.
2. Why Editing Real Estate Photos in Photoshop is Essential
Photoshop is the go-to tool for real estate photo editing, offering unmatched control over image enhancement. Unlike basic editing software, Photoshop provides precise, powerful tools to address common challenges faced in real estate photography. How to enhance image quality in Photoshop is one of the essential aspects for professionals.
The software’s layer-based editing system allows for non-destructive adjustments and complex compositing. This flexibility gives editors the ability to tackle various issues while retaining the option to redefine or undo something in Photoshop at any stage of the process.
Real estate professionals rely on Photoshop’s advanced features to tackle difficult lighting conditions, correct perspective errors, and showcase properties in the best possible light. Photoshop's comprehensive toolset ensures every image is edited to professional standards, helping listings stand out in a competitive market.
3. Preparing for Photo Editing in Photoshop
Setting up your workspace properly ensures efficient editing and consistent results. Professional editors organize their Photoshop interface to access frequently used tools quickly while maintaining a clear view of their images. This preparation significantly impacts workflow efficiency.
Essential workspace elements include:
- Custom panel arrangements
- Frequently used tool presets
- Color-managed monitors
- Efficient keyboard shortcuts
- Organized layer structure
File organization proves equally crucial for managing multiple property photos. Professional editors recommend creating structured folders for each property and maintaining consistent naming conventions for all files and versions.
4. Basic Adjustments in Photoshop
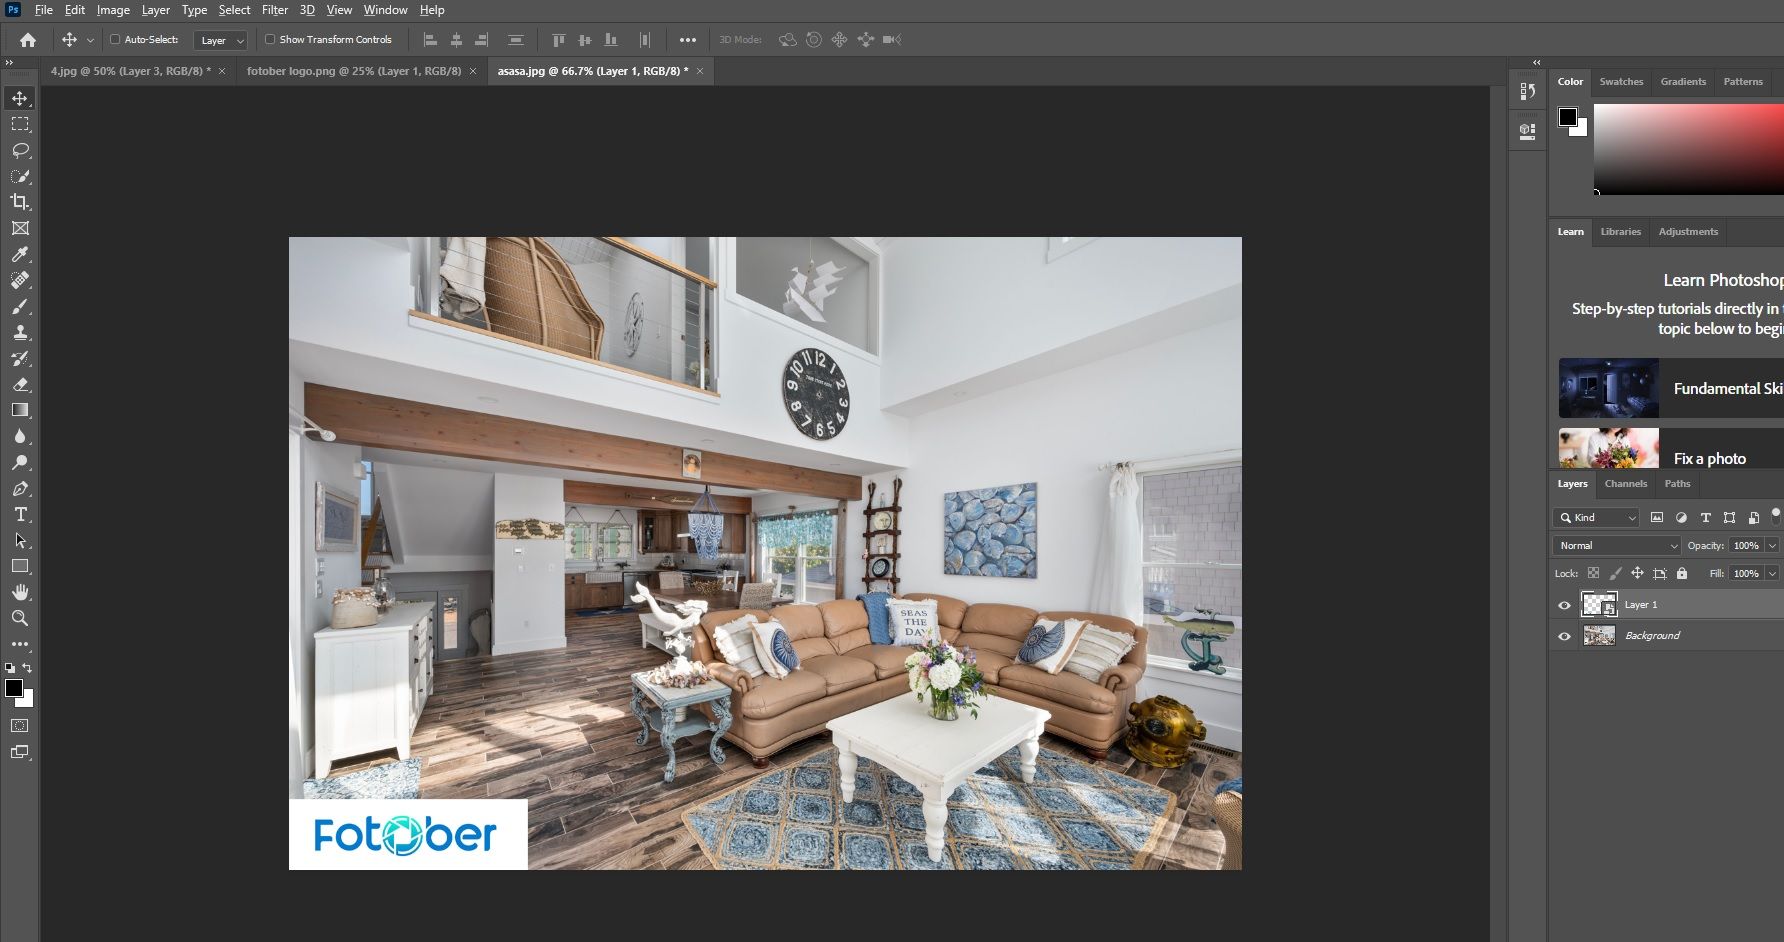
Before detailed edits, start with basic adjustments like exposure, contrast, and color. These foundational tweaks ensure the property is showcased in its best light, enhancing the photo’s quality.
4.1. Adjusting Exposure, Contrast, and Color
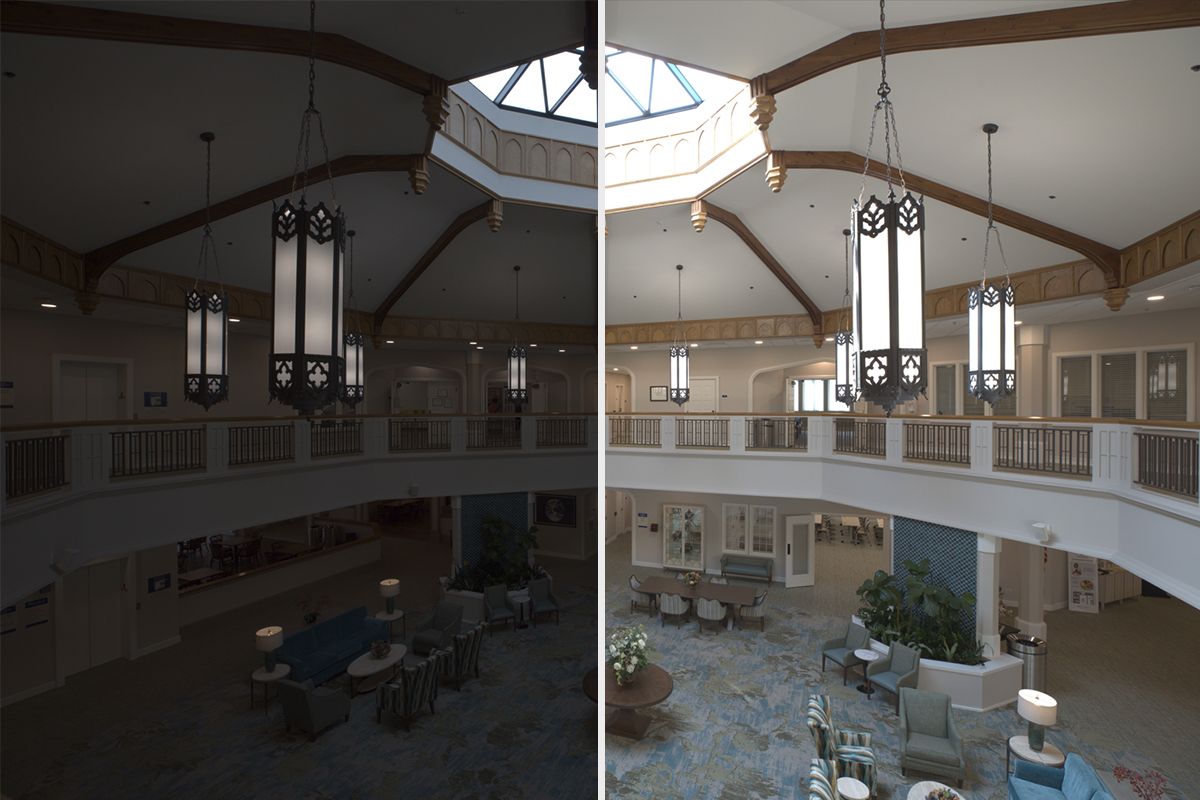
Exposure adjustments are key in real estate photo editing, as they set the foundation for the final image. Begin by adjusting overall brightness using Camera Raw or adjustment layers, ensuring proper exposure across both interior and exterior areas. Using multiple layers for adjustments allows for fine-tuning of specific sections of the photo.
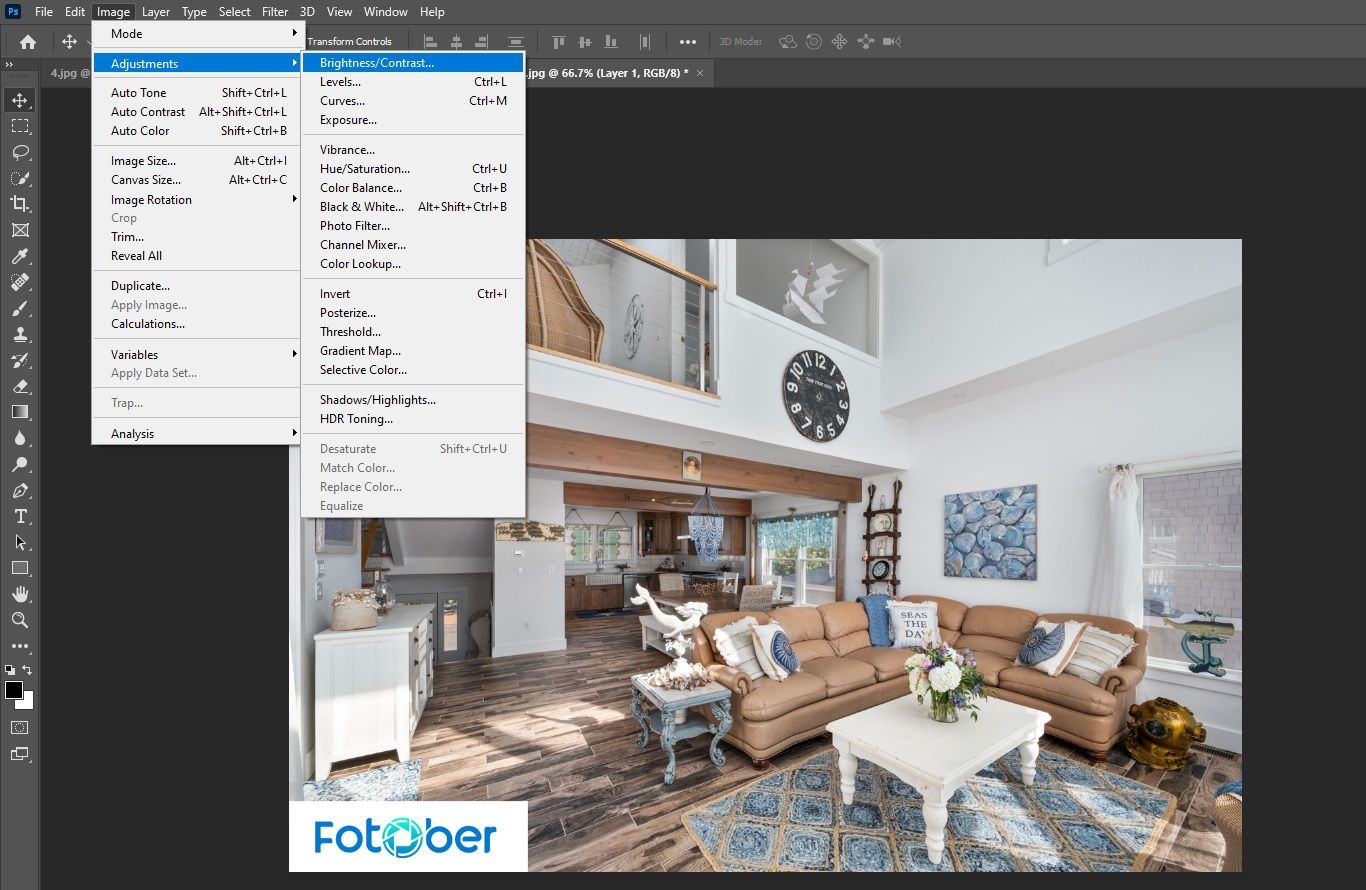
Enhancing contrast defines the architectural details and adds depth to the photo. Curves and levels adjustments are useful for emphasizing the structure without making it appear artificial. The aim is to make subtle improvements that highlight the property’s features in a natural way.
Color correction is essential to ensure that materials and finishes appear accurate and lifelike. Adjust the white balance in Photoshop for a neutral base, especially in mixed lighting. Selective color adjustments and HSL controls help refine specific tones, ensuring a harmonious overall look while keeping the integrity of the scene intact. Color correction in real estate photography helps elevate the quality of your images by ensuring they accurately reflect the true colors of the property.
In some cases, you may need to remove unwanted colors from a photo to maintain its professional quality. Learning how to remove a specific color in Photoshop can be particularly useful when dealing with color casts or distractions. Using tools like the Select Color Range and Hue/Saturation adjustments, you can target and remove specific hues, ensuring that the final image maintains its true-to-life appearance.
4.2. Cropping and Straightening Images
Proper composition through cropping and straightening dramatically impacts image presentation. When resizing images, it’s crucial to ensure that proportions remain intact. How to resize an image in Photoshop without distortion is an essential technique for ensuring your images look professional and are correctly formatted for various platforms.

Essential alignment tools include:
- Ruler tool for precise measurements
- Grid overlay for alignment
- Content-aware crop options
- Perspective crop tool
- Transform controls
Maintaining proper aspect ratios during cropping ensures images display correctly across different platforms. Professional editors often create multiple crops optimized for different marketing channels.
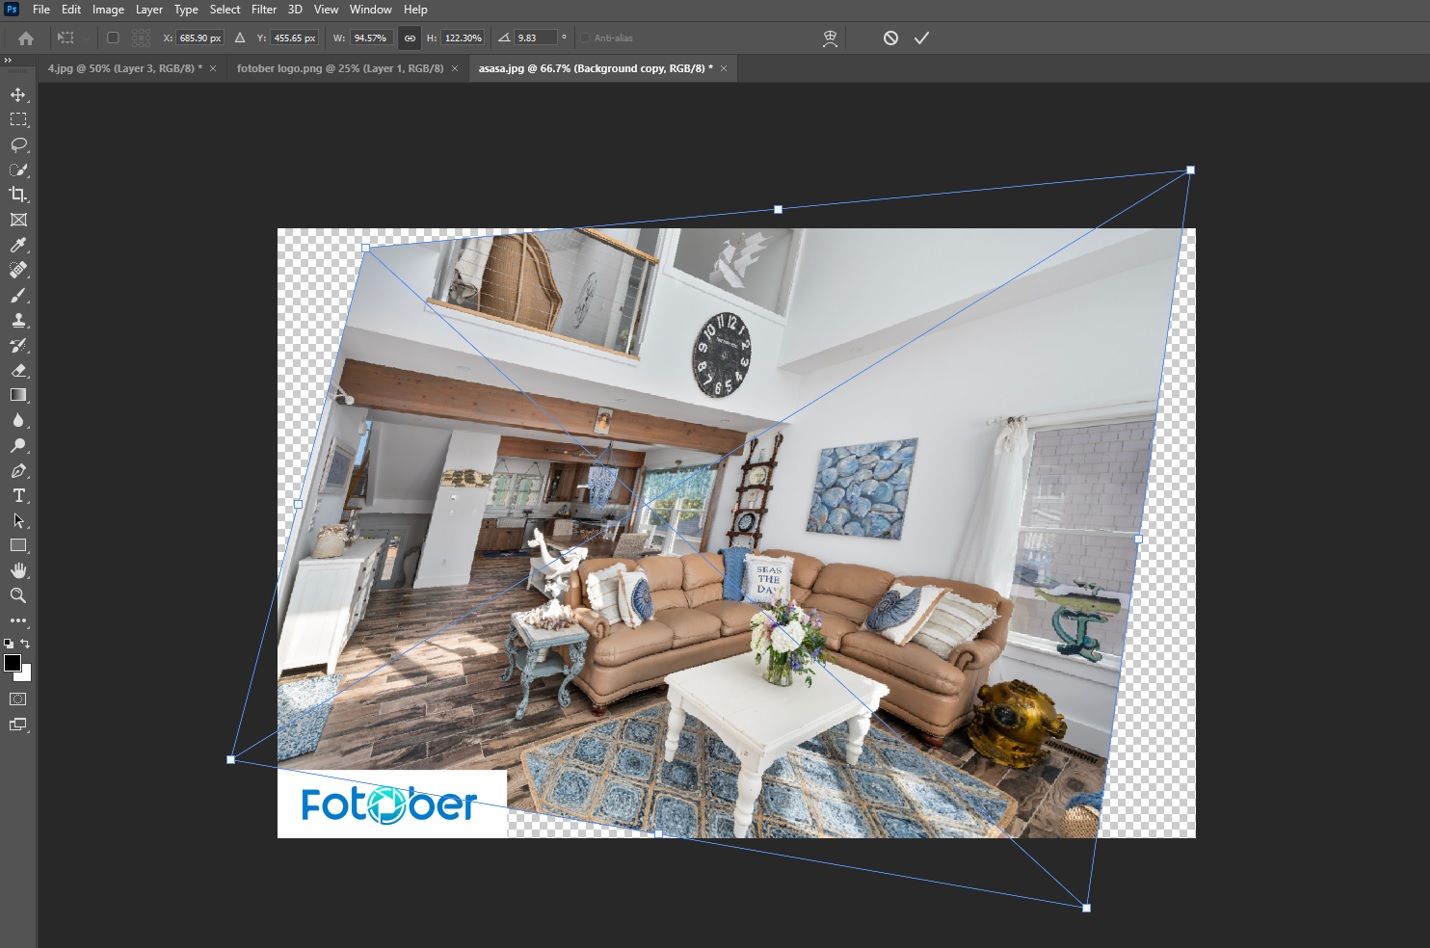
4.3. Correcting Perspective and Distortion
Perspective correction addresses common issues in real estate photography, particularly when shooting interiors with wide-angle lenses. Professional editors use a combination of transform tools and lens corrections to ensure proper architectural alignment and spatial representation.
Critical correction tools include:
- Vertical alignment tools
- Horizontal straightening
- Lens profile corrections
- Warp transformations
- How to scale in photoshop
The goal is to maintain a natural perspective while correcting obvious distortions. Professional editors often balance technical correctness with aesthetic appeal to create compelling final images.
4.4. Basic Adjustments in Lightroom
Lightroom is a powerful tool for editing real estate photos, with optimized features for handling lighting and color. If you want to enhance your real estate photos with high accuracy, how to edit real estate photos in Lightroom will help you improve the quality without losing the natural look of the image. In Lightroom, you can easily adjust exposure, contrast, and white balance to ensure that the property’s features are clearly showcased and stand out.
In addition to basic adjustments like exposure and contrast, one of the essential techniques is how to remove shadow in Lightroom. Lightroom provides tools to reduce shadows in overexposed areas, making the image brighter while preserving detail.
5. Advanced Editing Techniques for Real Estate Photos
To take your real estate photos in photoshop to the next level, advanced editing techniques such as using layers and masks are essential. These methods provide the flexibility and control needed for precise, professional results.
5.1. Using Layers and Masks
Layer-based editing is a cornerstone of how to edit real estate photos in photoshop effectively. By understanding how to use adjustment layers, masks, and blending modes, editors can make precise, reversible adjustments while maintaining the integrity of the image, including how to color match in Photoshop.
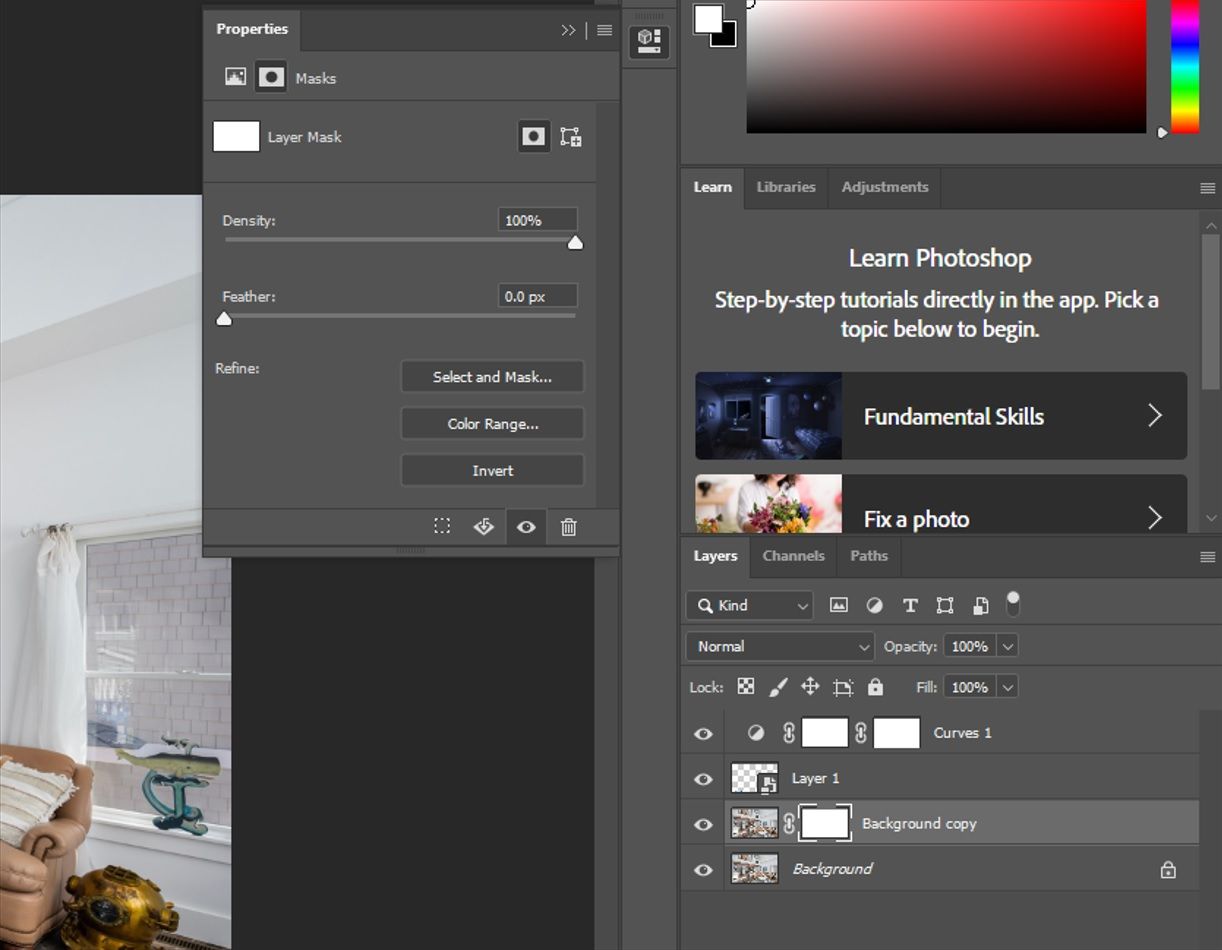
Essential layer techniques include:
- Adjustment layer hierarchy
- Layer mask precision
- Blending mode options
- Opacity control
- Smart object integration
Professional editors organize layers logically, ensuring each one is named for easy reference and grouped for related adjustments. This systematic approach ensures that even the most complex edits remain manageable and easily adjustable throughout the editing process, making how to edit photos for real estate more efficient and effective.
5.2. HDR Merge
HDR (High Dynamic Range) merging is an advanced technique that significantly enhances real estate photos in photoshop, capturing the full range of light and shadow. By combining multiple exposures, this method creates a balanced image that highlights both bright and dark areas, ensuring no detail is lost. Photoshop’s HDR merging tools allow for seamless blending of exposures while maintaining natural color tones and contrasts.
Key steps in HDR merging include:
- Aligning bracketed exposures
- Adjusting tonal range and contrast
- Fine-tuning exposure balance
- Reducing noise and halo artifacts
- Enhancing clarity and depth
Professional editors use HDR merging to showcase a property’s true essence-from sunlit windows to shadowed interiors. With careful attention to detail, HDR merges ensure the final image feels natural, inviting, and accurately represents the property’s appeal. Well-executed HDR merges transform ordinary photos into stunning, market-ready visuals, making how to edit photos for real estate more effective.
5.3. Sky Replacement and Adding Visual Appeal
Sky replacement has become a standard technique in exterior real estate photography. Photoshop's AI-powered sky replacement tool streamlines this process while maintaining natural lighting and reflections across the entire image.
One additional technique to enhance the appeal of your photos is how to add grass in Photoshop. Adding grass can make your exterior photos look more vibrant and welcoming, especially if the existing lawn is sparse or damaged. Using tools like the brush tool or content-aware fill, you can seamlessly add lush green grass to your property’s grounds, improving the overall aesthetic of the image.
Essential elements for sky enhancement:
- Edge detection refinement
- Light direction matching
- Color temperature balance
- Reflection updates
- Shadow consistency
Professional editors ensure new skies complement the property while maintaining realistic lighting conditions. The key lies in selecting appropriate sky images and fine-tuning the integration for natural results.
5.4. Removing Unwanted Elements
Object removal requires both technical skill and ethical consideration in real estate photography. Professional editors use various tools to remove temporary distractions while maintaining architectural integrity and marketing honesty.
One additional technique that can be useful is how to smudge in Photoshop. The Smudge Tool can be used to blend areas that need to look more natural, such as smoothing out harsh lines or blending textures for a seamless effect. It's particularly effective in areas where subtle adjustments are needed, like softening edges around removed objects or blending in the background.
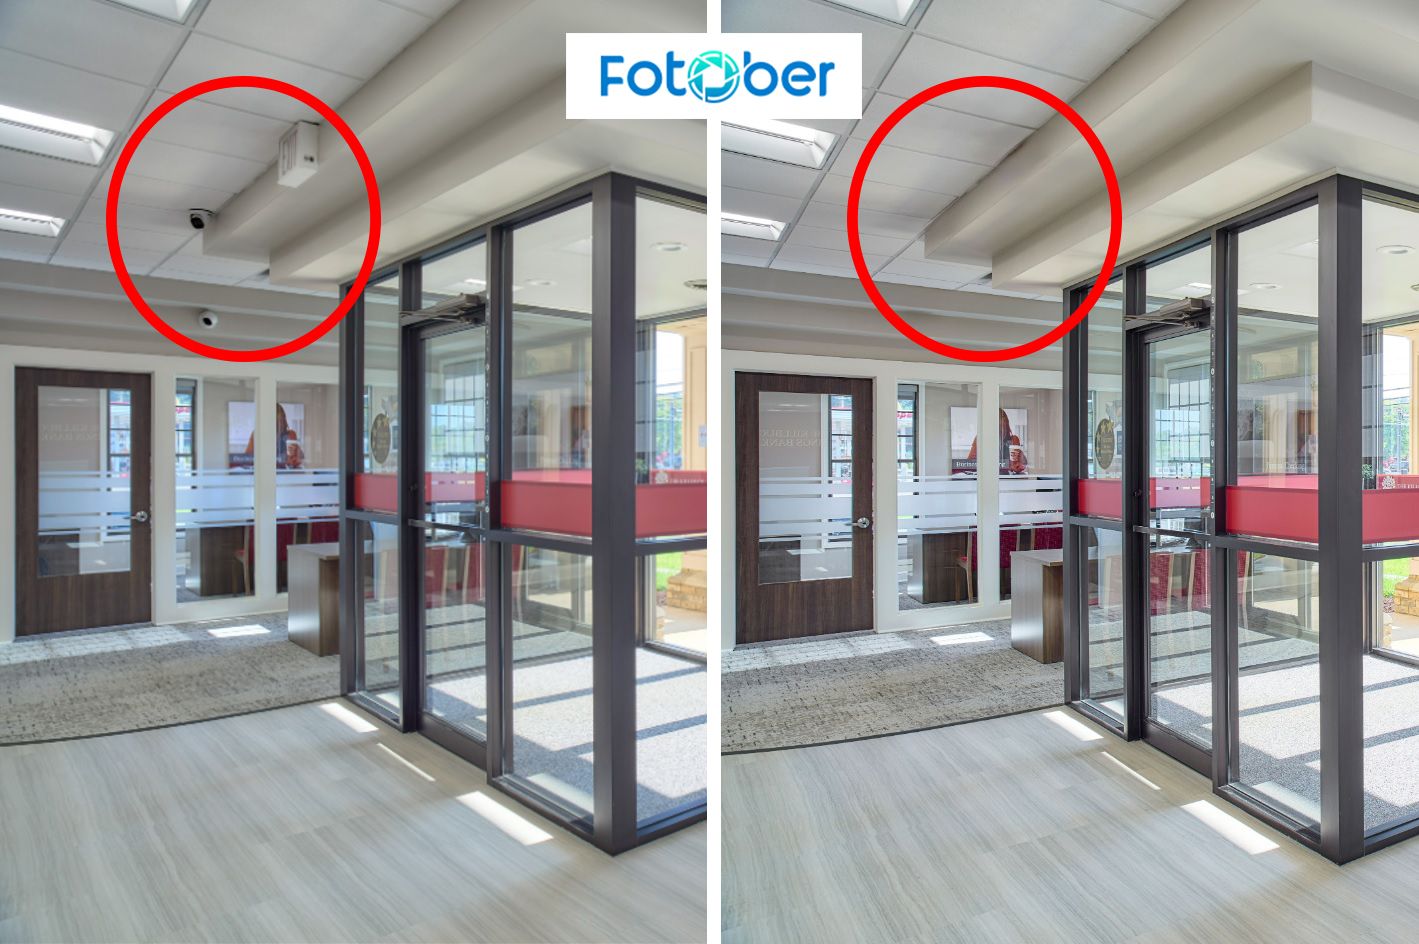
Common professional removal tools include:
- Content-aware fill
- Healing brush
- Clone stamp
- Patch tool
- Spot healing
The goal is to enhance property presentation while maintaining authenticity. Professional editors focus on removing temporary elements rather than permanent property features. How to remove lens flare in Photoshop is also essential in this section to clean up images with distractions.
5.5. Shadow Adjustment Techniques in Photoshop
Shadow adjustment techniques in Photoshop are essential for enhancing the depth and realism of your real estate photos. Shadows play a crucial role in creating a sense of space and highlighting architectural details. By mastering these techniques, you can improve the overall look of your photos, making them more appealing and professional.
Using tools like the shadow/highlight slider, curves adjustments, and gradient maps, you can manipulate the shadows to create a balanced and visually compelling image. Whether you need to lighten dark areas or deepen certain shadows to add contrast, these techniques allow for precise control, ensuring the property is showcased in the best possible light.
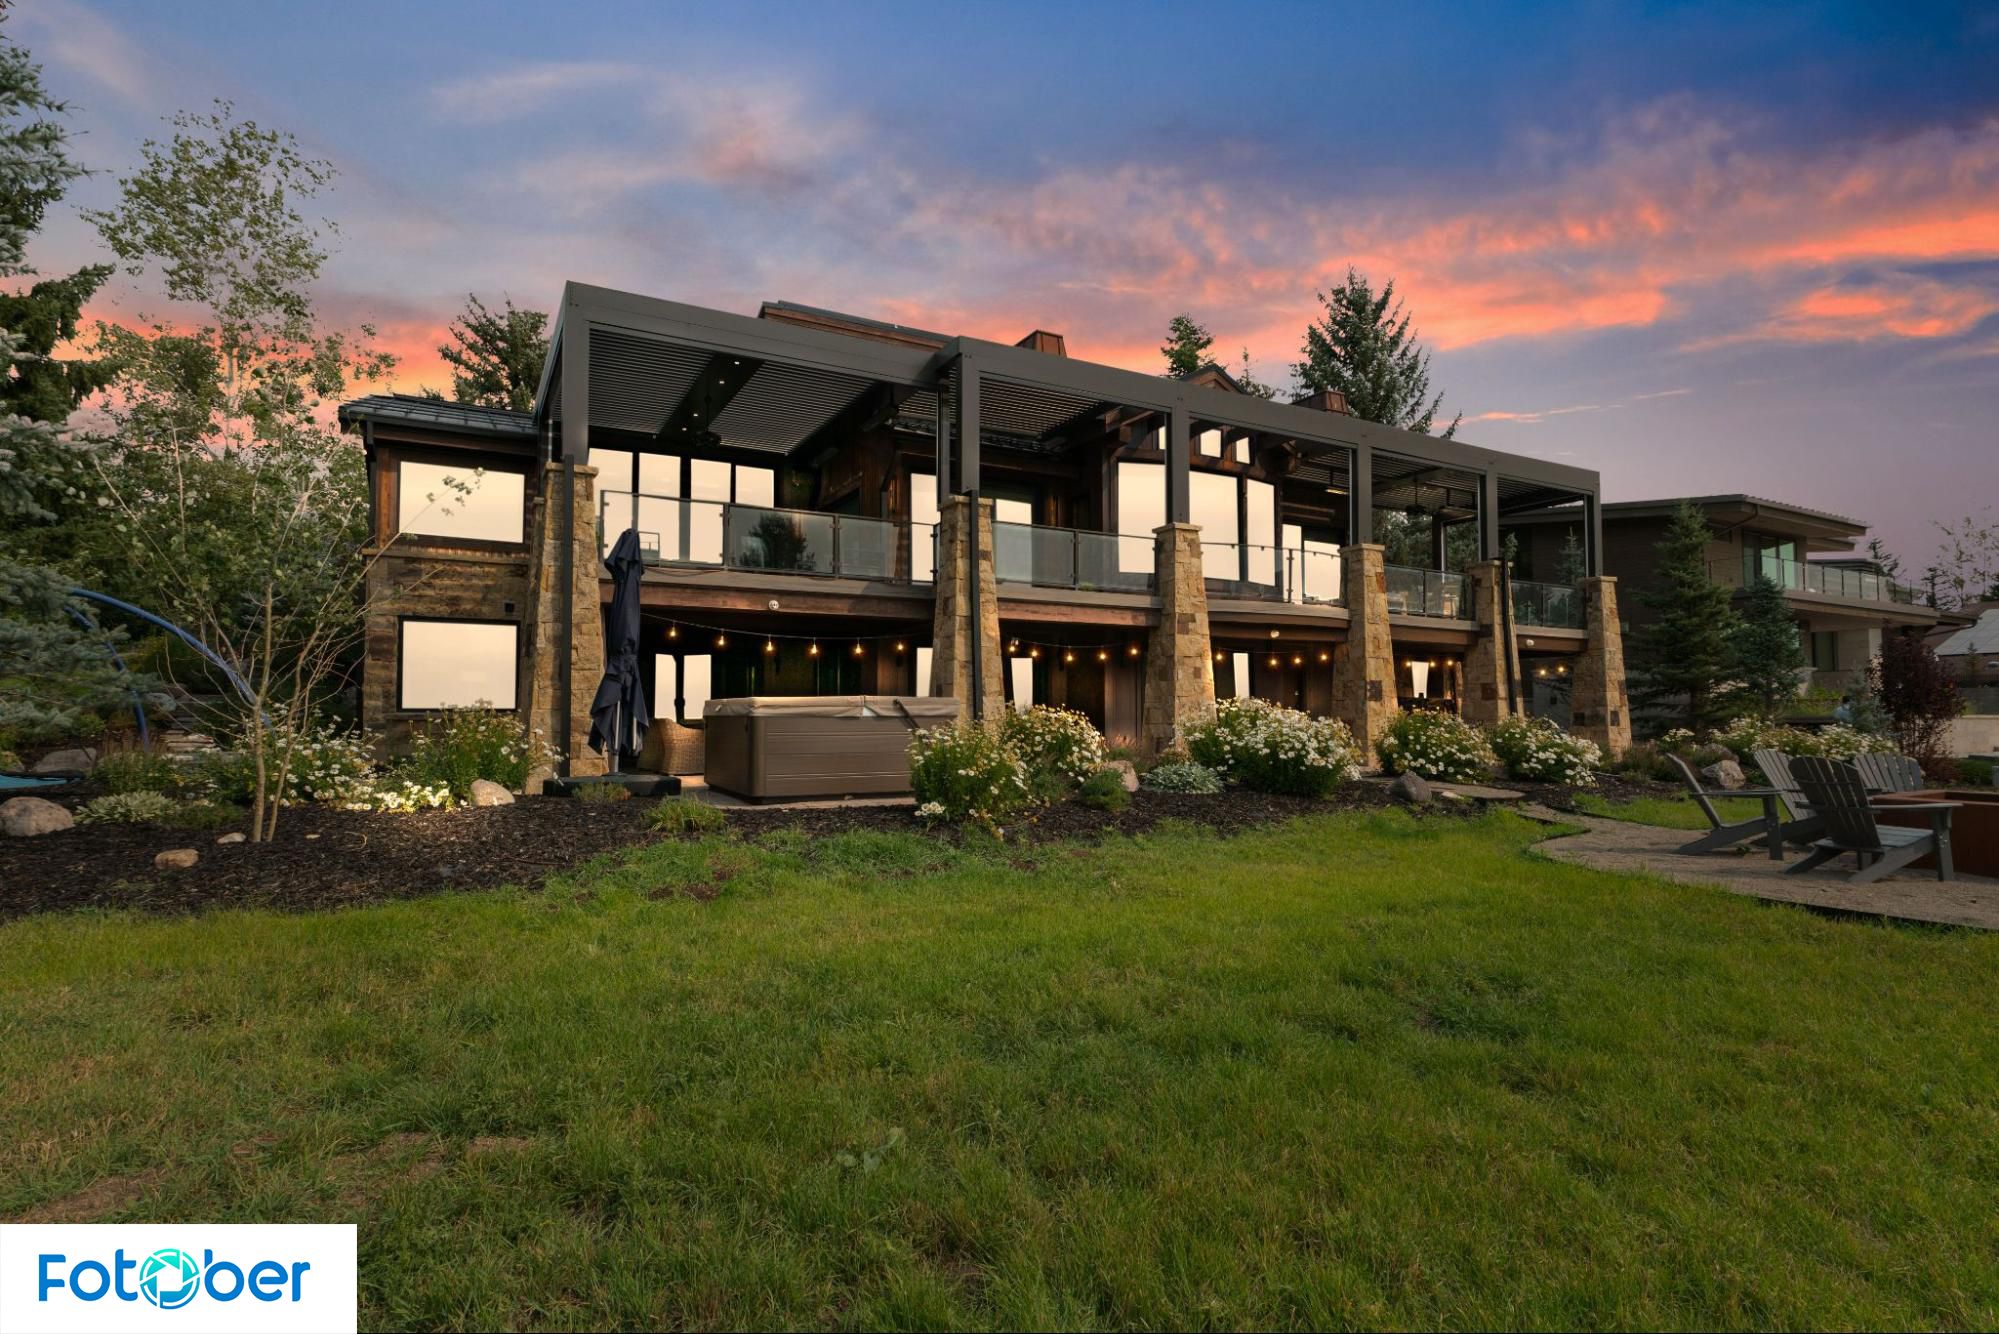
5.6. Day to Dusk Photo Editing in Photoshop
One of the most advanced techniques for enhancing real estate photos is day to dusk photo editing in Photoshop. This technique allows you to take a standard daytime photo and turn it into a twilight-style image, adding a dramatic effect that highlights the property’s charm.
This process involves replacing the sky with a sunset or twilight image, adjusting the lighting for a warmer tone, and sometimes adding effects like window glow to simulate natural lighting. Day to dusk photo editing in Photoshop requires careful manipulation of layers, exposure adjustments, and color grading to achieve a natural yet visually captivating effect.
6. Batch Processing for Consistency
Batch processing is vital for maintaining consistency across multiple property images while saving valuable editing time. Professional editors leverage this systematic approach to maintain quality standards across entire property portfolios, especially when learning how to edit real estate photos in Photoshop efficiently.
- Workflow Efficiency: Creating standardized actions and presets helps maintain a consistent visual style, which is crucial for branding and significantly reduces the total time spent editing.
- Essential Batch Processes (in Photoshop):
- Action Recording: Recording a sequence of editing steps (e.g., lens correction, resizing) into a single, repeatable action.
- Droplet Creation: Creating a miniature application that automatically applies an action when you drag image files onto it.
- Batch Naming Conventions: Setting up an automated system to consistently rename all exported files.
- Color Preset Application: Applying a standardized color correction or exposure balance preset across the entire set of images.
- Export Parameters: Defining consistent file size, resolution, and color space for final delivery.
Professional editors regularly refine these automated processes to optimize efficiency without compromising the quality of the final real estate photos.
7. Final Adjustments and Exporting
The export process ensures edited photos maintain their quality across various marketing platforms. Professional editors pay careful attention to final adjustments and output settings to guarantee optimal presentation across different devices and media types.
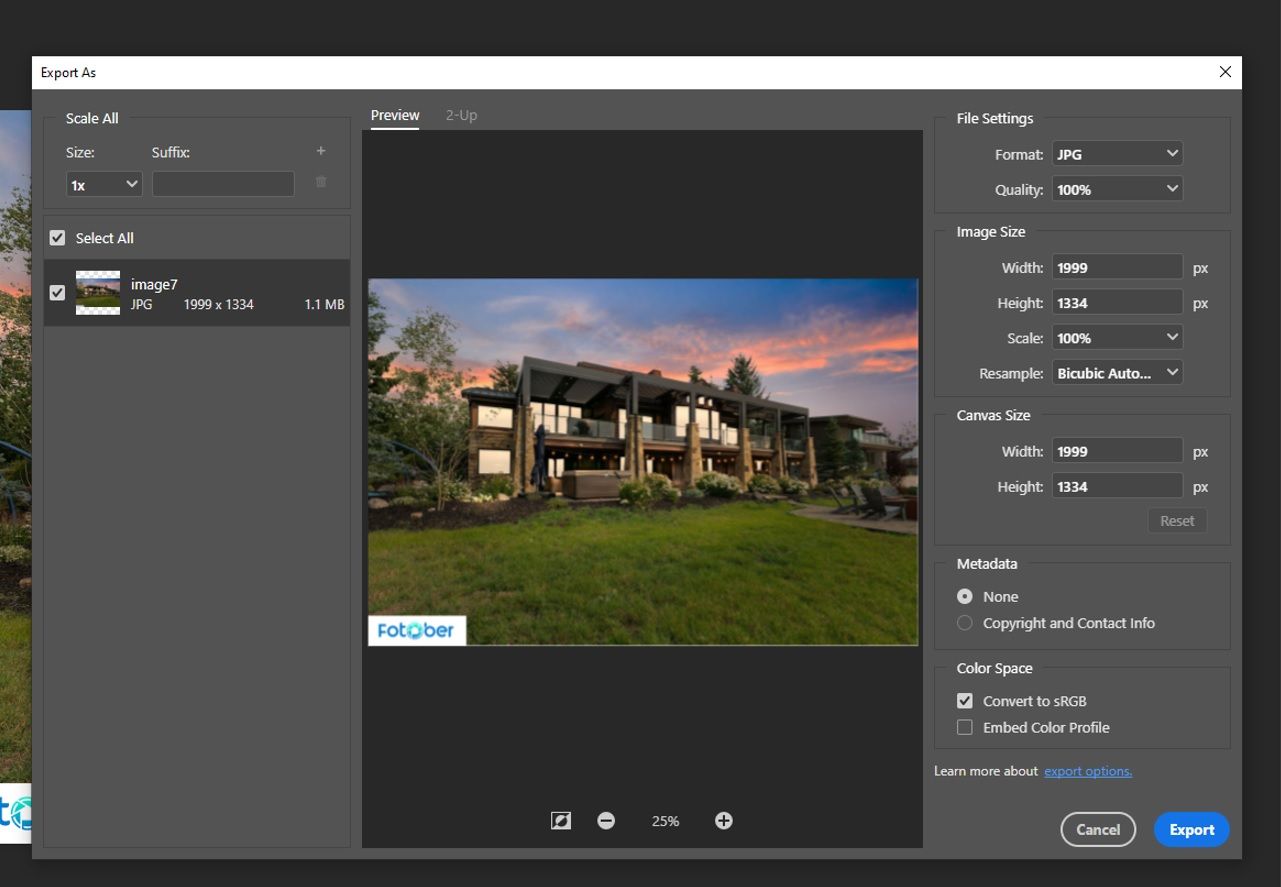
Critical export considerations include:
- Resolution optimization
- Color space selection
- Compression levels
- File format options
- Metadata inclusion
One crucial decision during this stage is determining the right file format for your images. Raw vs jpeg photography plays a significant role in this decision. RAW files provide more flexibility for post-processing with higher quality, but they take up more storage space. On the other hand, JPEG files are smaller and easier to handle, but they come with some compression loss. Deciding between RAW and JPEG depends on your specific needs, such as the desired level of detail, file size, and intended use of the image (e.g., online listings, print materials, etc.).
Professional editors often create multiple versions optimized for different uses, from high-resolution files for printing to web-optimized images for online listings.
8. Fotober's Professional Real Estate Photo Editing Services
While Photoshop provides powerful editing capabilities, many professionals partner with specialized editing services like Fotober to optimize their workflow. Their expertise in real estate photo editing ensures consistent, high-quality results while saving valuable time.
Fotober's comprehensive services include:
- Advanced color grading
- Architectural alignment
- HDR processing
- Virtual home staging
- Twilight conversion
- Detail enhancement
Their editors combine technical expertise with market awareness to deliver images that attract potential buyers while maintaining authentic property representation.
Conclusion
Mastering Photoshop for real estate photo editing requires understanding both technical tools and aesthetic principles. Success comes from developing efficient workflows while maintaining attention to detail and natural appearances. Whether handling basic adjustments or complex enhancements, remember that the goal is to showcase properties effectively while maintaining marketing integrity.
The investment in learning proper Photoshop techniques pays dividends through improved marketing results and increased property interest. By following this guide's principles and practicing these techniques, photographers can deliver professional-quality images that help properties stand out in competitive markets. When combined with professional services like Fotober, these skills enable the creation of compelling visual narratives that drive real estate sales success.
FAQ: How to Edit Real Estate Photos in Photoshop
- Why is real estate photo editing in Photoshop so important?
Real estate photo editing in Photoshop is essential to showcase properties in their best light, ensuring they stand out to potential buyers, increasing visibility, and ultimately speeding up sales.- How can Photoshop improve real estate photos?
Photoshop enhances real estate photos by adjusting exposure, color balance, perspective, and shadows, allowing editors to create polished, professional images that highlight a property’s best features.- What are the basic adjustments to make when editing real estate photos in Photoshop?
Basic adjustments include exposure correction, contrast enhancement, color correction, cropping, straightening, and correcting perspective to ensure that the property looks its best in all images.- What are the advanced techniques for editing real estate photos in Photoshop?
Advanced techniques include HDR merging, sky replacement, shadow adjustments, and using layers and masks to achieve a more professional and polished look, particularly for complex lighting situations.- How can I improve shadow details in my real estate photos?
You can enhance shadows in Photoshop using tools like the shadow/highlight slider, curves adjustments, and gradient maps, which provide control over light and dark areas for a balanced image.- How does day to dusk editing work in Photoshop?
Day to dusk editing in Photoshop involves adjusting the lighting and replacing the sky to give a photo a twilight look, creating a dramatic effect that emphasizes the property’s charm.- Can I outsource real estate photo editing?
Yes, you can outsource real estate photo editing to professionals like Fotober, who offer expert services to ensure your photos are optimized for marketing and make the property stand out.

.png)
.png)
.png)
