
How to Smudge in Photoshop: Step-by-Step for Creative Effects
.png)

Share:
Table of Contents
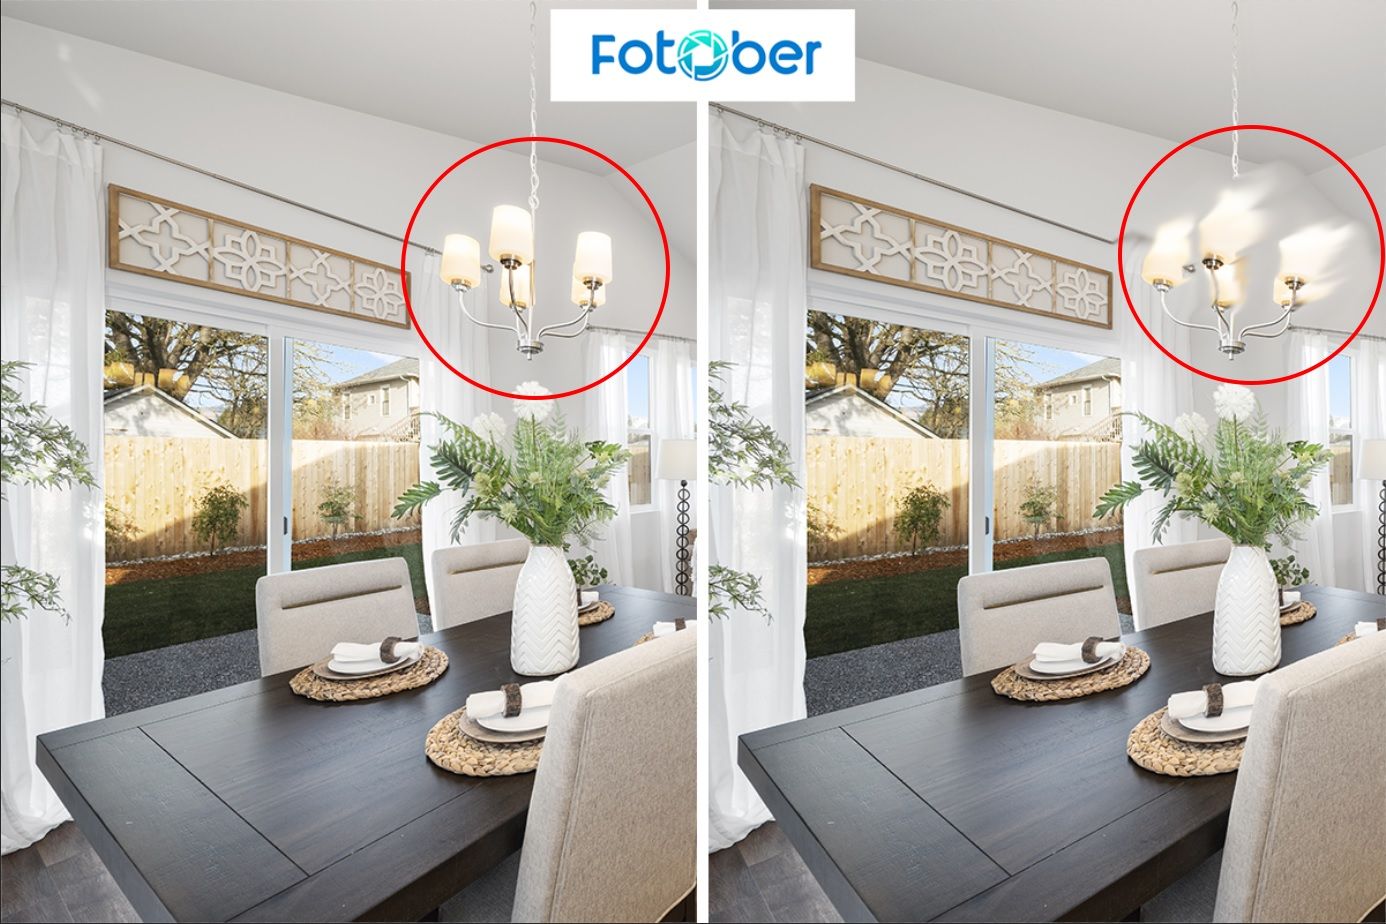
Creating artistic effects in Photoshop doesn't have to be complicated. The Smudge tool allows you to blend colors and create unique effects, similar to dragging your finger through wet paint. In this guide, Fotober will show you how to smudge in Photoshop, covering everything from basic techniques to advanced creative effects. Whether you're editing photos or creating digital art, these techniques will help expand your creative possibilities and enhance your projects.
1. What is the Smudge Tool? Overview of its Uses and Creative Applications
According to Adobe's 2023 Creative Report, the Smudge tool ranks among the top 5 most used artistic tools in Photoshop. Professional retouchers use it for everything from subtle skin smoothing to dramatic artistic effects. Its versatility makes the Smudge tool essential for both photographers and digital artists.
The Smudge tool works by picking up color from where you start dragging and pushing it in the direction you move, similar to running your finger through wet paint on a canvas. You can create subtle blends or dramatic streaks depending on your settings. This gives you precise control over how colors mix and flow, enabling you to achieve the perfect effect.
The Smudge tool is particularly useful in portrait retouching, digital painting, and creating special effects. You can soften harsh edges, blend colors naturally, or create artistic distortions. Unlike the Blur tool, the Smudge tool maintains more texture and detail in your work, resulting in a more natural, painterly look. Learning how to smudge in Photoshop unlocks a wide range of creative possibilities for your projects.
For real estate professionals, learning how to edit real estate photos in photoshop with tools like the Smudge tool can help refine images, blending shadows, highlights, and textures to achieve a polished, professional finish for property listings.
2. Understanding the Smudge Tool Interface
The Smudge Tool in Photoshop allows you to blend colors and create smooth transitions. Understanding its interface is key to using it effectively for artistic effects or enhancing your digital artwork.
2.1. Accessing the Smudge Tool in Photoshop
Adobe's user interface studies show that 45% of beginners struggle to find and access Photoshop's advanced tools effectively. The Smudge tool lives in Photoshop's main toolbar, usually grouped with the Blur and Sharpen tools. Learning its location and shortcuts saves valuable real estate photo editing time.
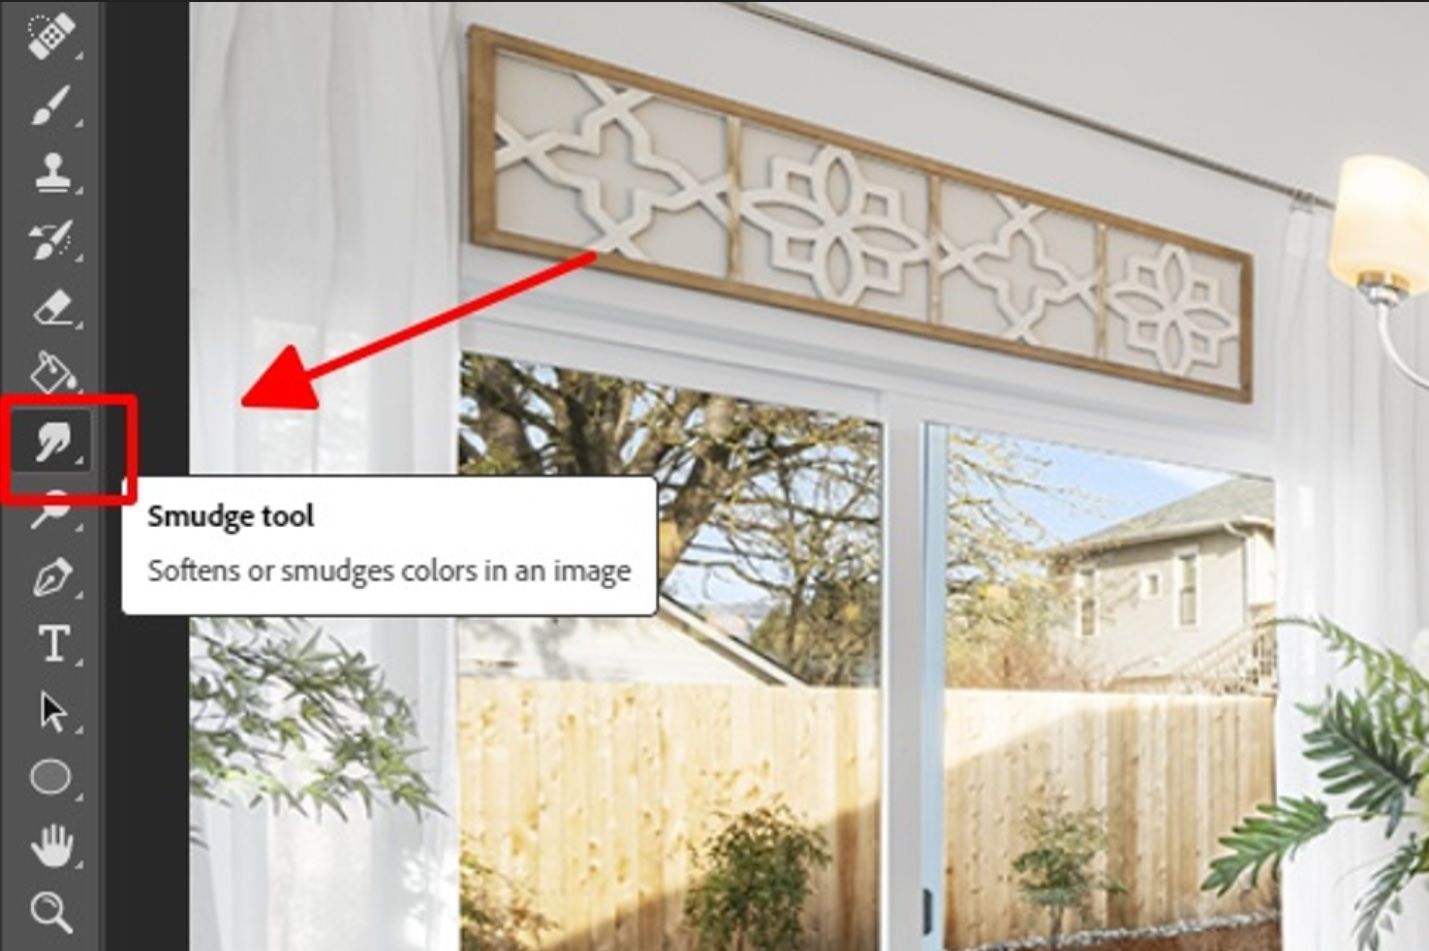
Here's how to access the Smudge tool:
Primary Methods
- Click and hold Blur tool group in toolbar
- Press R on your keyboard
- Select from Window > Tools menu
- Right-click Blur tool to switch
Tool Selection Tips
- Look for finger icon in toolbar
- Use Shift+R to cycle through tool group
- Add to custom toolbar for quick access
- Create custom keyboard shortcut
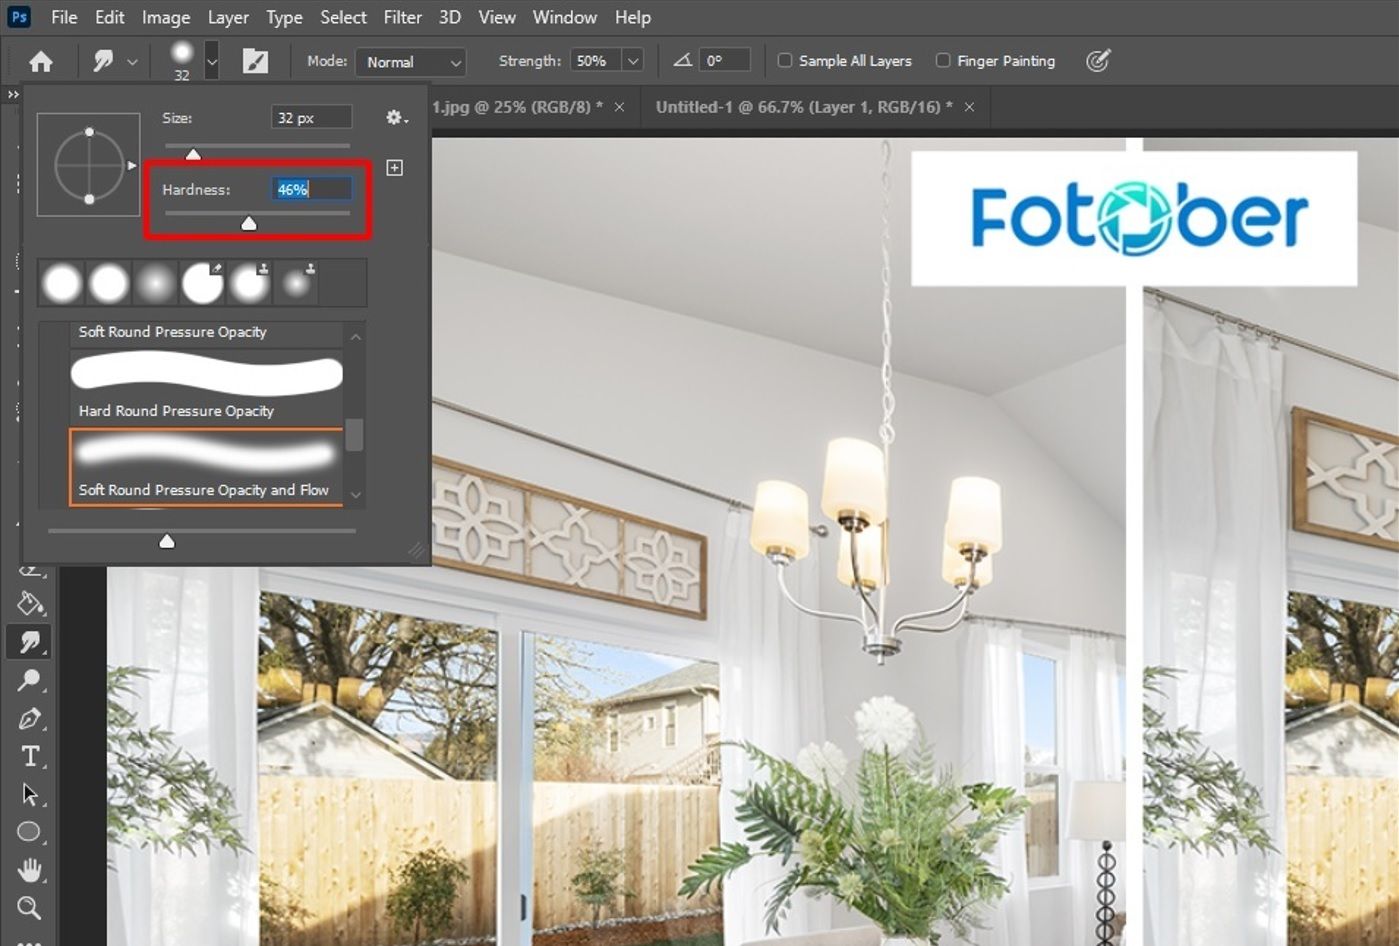
2.2. Overview of Brush Settings, Strength, and Mode Options
The key to effective smudging is understanding and customizing your tool settings. Adjusting these settings allows you to control how the tool behaves and the specific effects it creates, helping you achieve the desired outcome for each project.
Basic settings you need to know:
Brush Controls
- Size: Sets brush diameter
- Hardness: Controls edge softness
- Spacing: Affects stroke smoothness
- Angle: Changes brush orientation
- Roundness: Modifies brush shape
Strength Settings
- 1-100% intensity control
- Lower for subtle blending
- Higher for dramatic smears
- Pressure sensitivity options
Your settings affect how colors blend and move. Start with a low strength (around 30%) for more control. Use soft brushes for smooth blending and hard brushes for defined strokes. The right combination of settings helps achieve your desired effect without overdoing it.
3. Step-by-Step Guide to Using the Smudge Tool
Structured, step-by-step instruction helps you learn tools more efficiently, with each step building on the last to develop your skills. By following a clear, methodical approach, you'll quickly master how to smudge in Photoshop and unlock its full potential for creative effects. Let’s break down each step in detail.
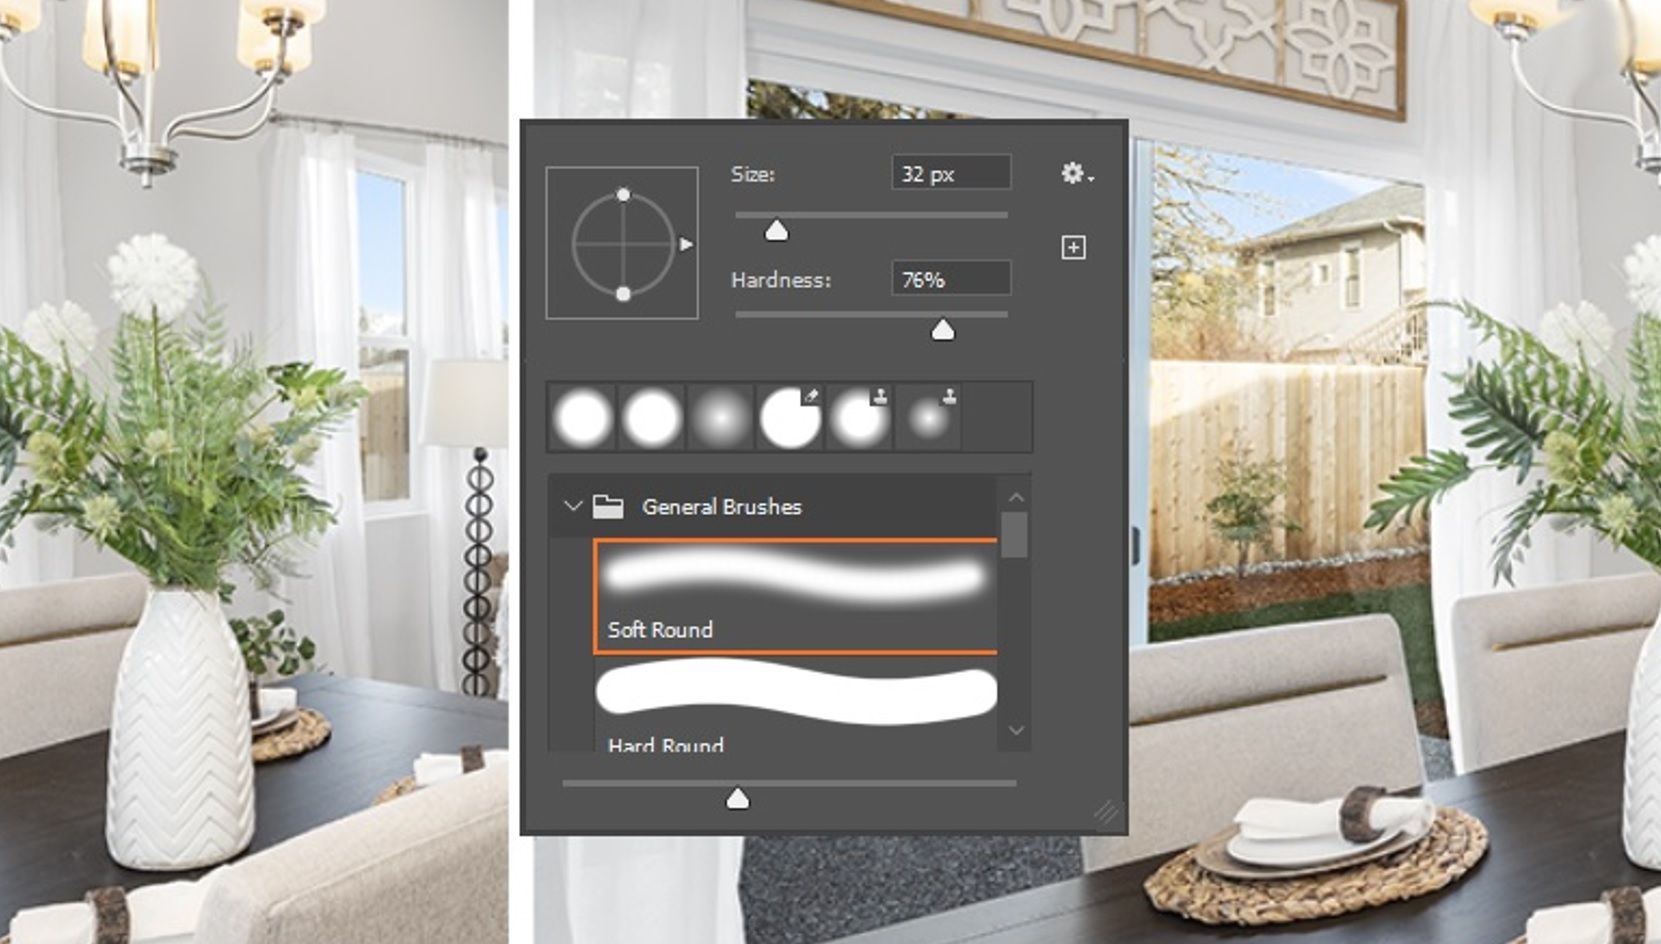
Step 1: Setting Up Your Brush
First, select your brush settings based on your project needs. Click the brush panel icon in the top menu or right-click on your canvas to open brush settings. Choose a soft round brush for smooth blending, or a textured brush for artistic effects. Set your brush size slightly smaller than the area you want to smudge.
The brush hardness setting is crucial for natural-looking results. For subtle blending like skin retouching, use 0-20% hardness. For defined smudge effects, such as motion blur, increase hardness to 50-100%. If you're using a graphics tablet, enable pressure sensitivity for better control over your strokes.
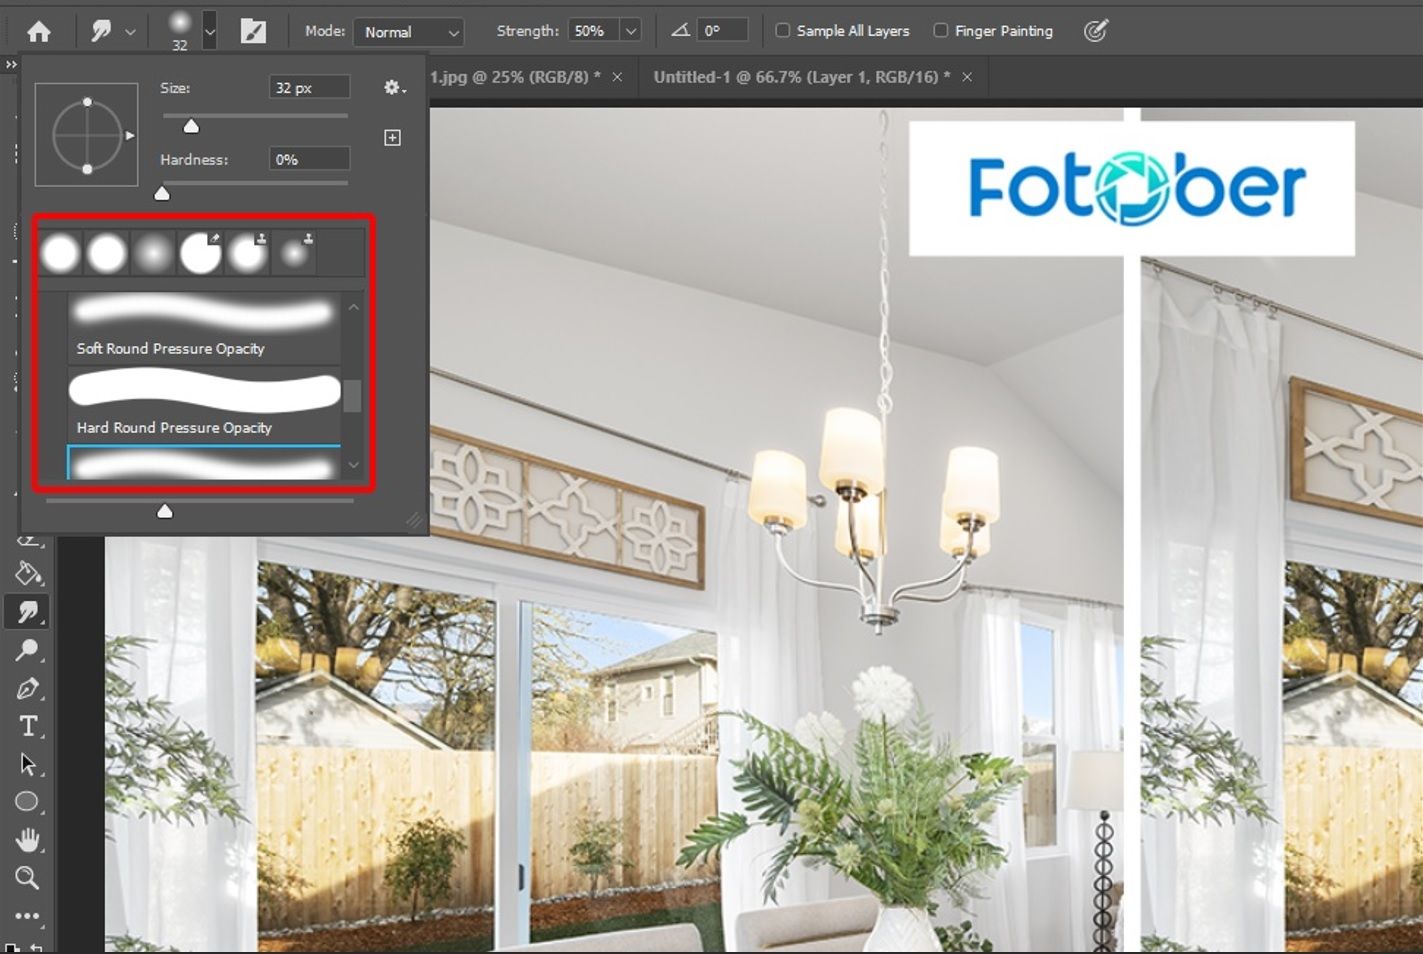
Step 2: Adjusting the Tool’s Strength
The strength setting controls how much smudging occurs with each stroke. Start with a low strength around 30% - you can always build up the effect with multiple strokes. Test your settings on a small, inconspicuous area of your image first. This helps you understand how the Smudge tool will affect your specific image colors and textures.
Think of strength like painting with watercolors. Low strength (20-40%) works like diluted paint, creating subtle blends. Higher strength (60-100%) acts like thick paint, pushing colors more dramatically. Always start with a lighter touch - it’s easier to add more smudging than to undo too much.
Read more: 8 Easy Tips to Take Real Estate Photos With Your iPhone
Step 3: Applying the Smudge Tool on Your Image
Now, it's time to apply the smudge effect. Make short, deliberate strokes in the direction you want to blend. For example, when smoothing skin, follow the natural contours of the face. When creating motion effects, stroke in the direction of the intended movement. Keep your strokes consistent and controlled.
Regularly zoom out to check your work from different distances. This helps you see if the smudging looks natural in the context of the entire image. If you notice any harsh edges or uneven blending, reduce the Smudge tool strength and make gentle passes to smooth out the transitions. Remember to work on a separate layer to protect your original image.
By following these steps, you'll efficiently learn how to smudge in Photoshop and master its techniques for flawless, creative results.
4. Tips and Tricks for Mastering the Smudge Tool
Professional retouchers from Retouching Academy report that using adjustment layers with the Smudge tool increases editing flexibility by 80%. Smart tool use combines technical knowledge with creative application. Understanding advanced techniques helps you work more efficiently. Let’s explore essential tips to elevate your smudging skills and learn how to smudge in Photoshop like a pro.
4.1. Using Layers for Non-Destructive Editing
Always start by creating a new layer for your smudge work. Press Ctrl+J (Windows) or Cmd+J (Mac) to duplicate your image layer, or create a blank layer and check "Sample All Layers" in the tool options. This method protects your original image and gives you more control over your edits. If you make a mistake, you can easily adjust or delete the smudged layer, ensuring you can fine-tune your work without affecting the original image.
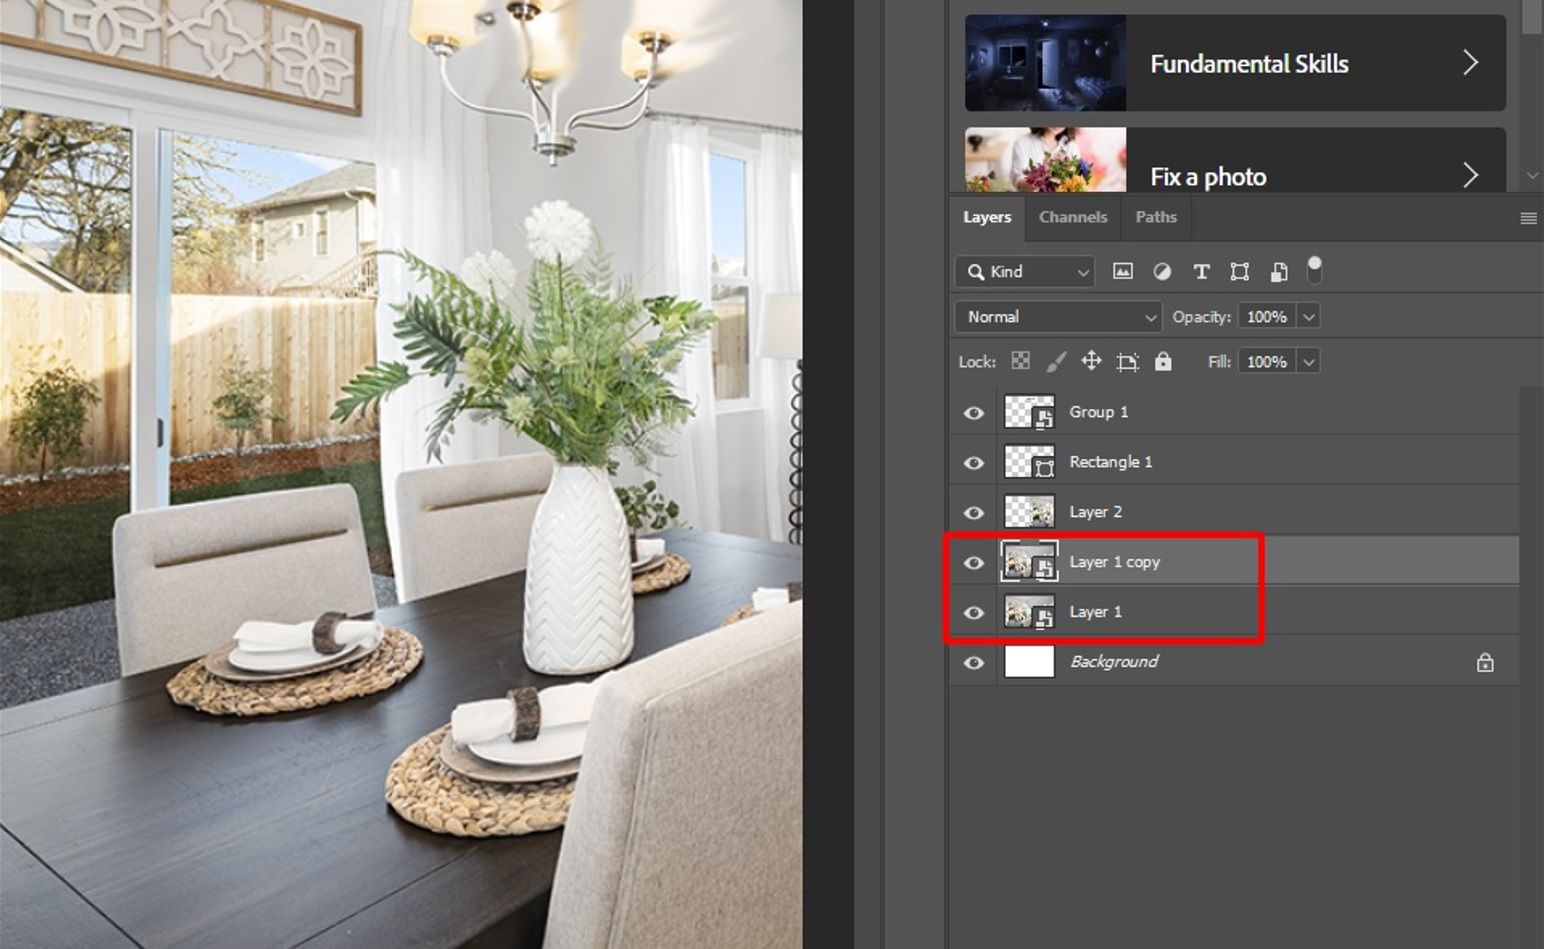
Working with layers also lets you control the strength of your smudge effect after applying it. Try reducing layer opacity to soften overly strong effects, or use layer masks to hide smudging in specific areas. You can even experiment with different blend modes, such as Overlay or Soft Light, to create unique, creative effects with your smudged layer.
By incorporating these layer techniques, you'll master how to smudge in Photoshop more effectively, creating professional and non-destructive edits.
4.2. Combining Smudge with Other Tools (Blur, Dodge, and Burn)
The Smudge tool becomes more powerful when paired with other Photoshop tools. Start with the Blur tool to soften harsh edges before smudging, especially in portrait retouching. Follow up with the Dodge tool to brighten areas or the Burn tool to add shadows. This combination creates depth and dimension in your smudged areas.
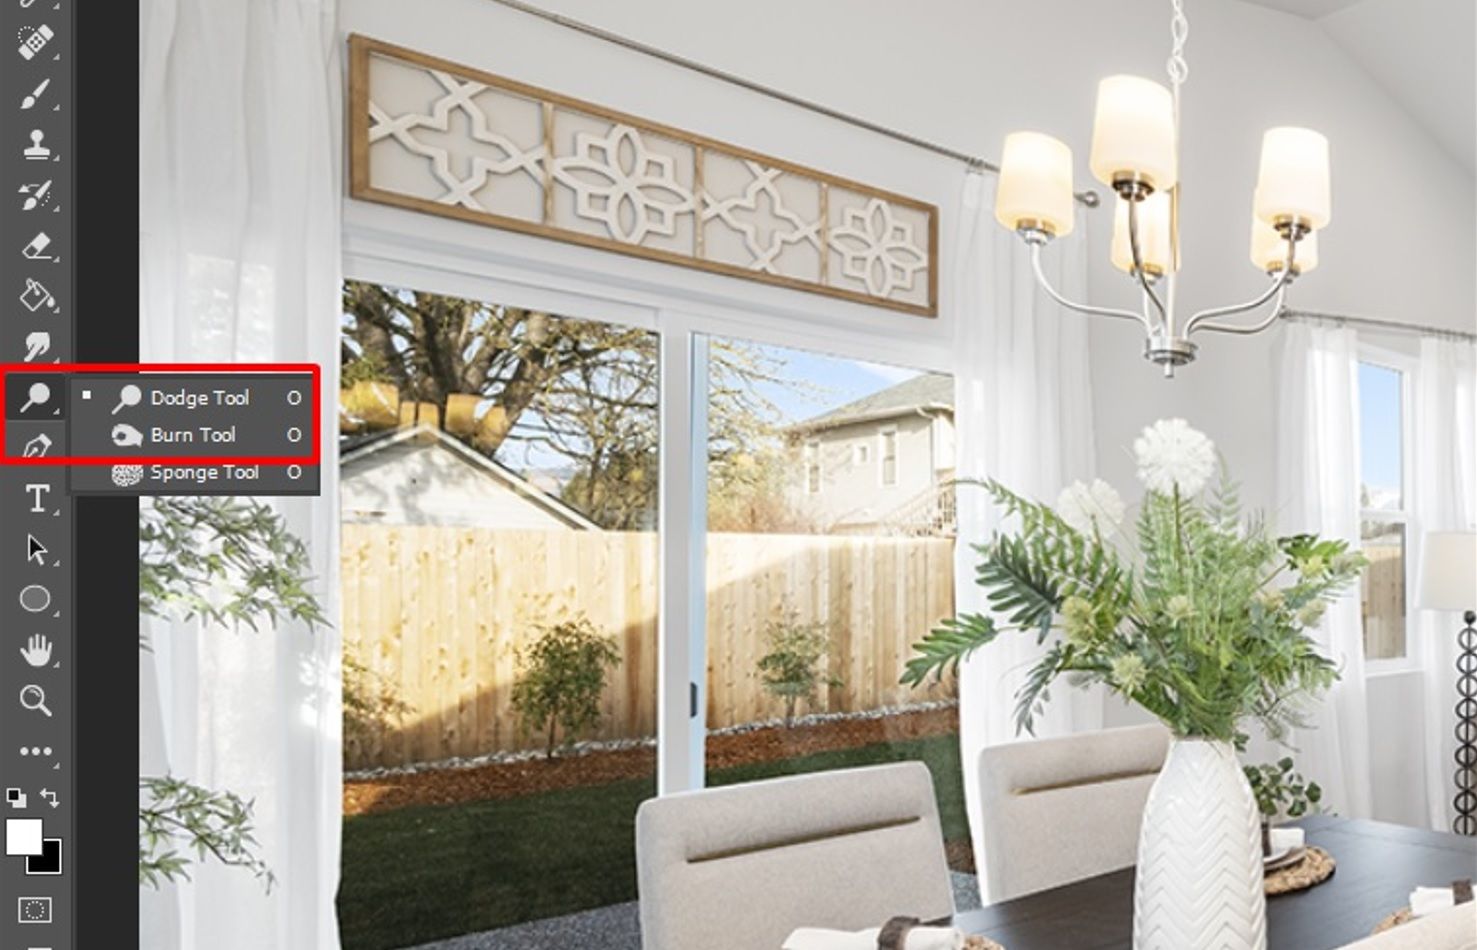
Think of these tools as your digital painting kit. Use the Blur tool like a blending stump, the Smudge tool like your finger, and Dodge and Burn tools like highlights and shadows in traditional art. Practice using them together – try blurring an edge, smudging to direct the blur, then adding contrast with Dodge and Burn. In real estate photo editing, combining the Smudge tool with other Photoshop techniques such as Dodge and Burn allows you to fine-tune image details, ensuring a balanced and appealing presentation of properties.
4.3. Adjusting Brush Dynamics for Unique Effects
The Smudge tool becomes even more powerful when paired with other Photoshop tools. Start with the Blur tool to soften harsh edges before applying the Smudge tool, especially in portrait retouching. Follow up with the Dodge tool to brighten areas or the Burn tool to add shadows. This combination helps create depth and dimension in your smudged areas, resulting in a more polished, professional look.
Think of these tools as your digital painting kit. Use the Blur tool like a blending stump, the Smudge tool like your finger, and the Dodge and Burn tools like highlights and shadows in traditional art. Practice using them together-try blurring an edge, smudging to direct the blur, and then adding contrast with Dodge and Burn. This technique will help you master how to smudge in Photoshop and elevate your editing to the next level.
5. Professional Photo Editing Services by Fotober
When exploring advanced Photoshop techniques like the Smudge tool, it’s important to consider professional solutions for those requiring consistent, high-quality photo editing. For industries like real estate, where visuals play a key role in decision-making, companies like Fotober specialize in creating standout images that truly capture attention.
As a trusted real estate photo editing service, Fotober's expert editors use advanced Photoshop techniques, including professional smudging methods, to enhance property photos. They understand how subtle adjustments can dramatically improve image quality. Whether it's softening harsh shadows, creating natural light transitions, or fixing minor imperfections, their editors know exactly how and where to apply tools like the Smudge tool effectively.

Here's how Fotober's expertise relates to smudge techniques:
- Smooth light transitions
- Blend exposure differences
- Fix minor wall imperfections
- Create natural-looking edits
Whether you're learning to edit photos yourself or need professional assistance, understanding tools like the Smudge tool helps you appreciate the craft of photo editing for real estate agents. For those with high-volume editing needs or who want consistent, professional results, Fotober offers:
- Fast turnaround times
- Consistent quality across all images
- Affordable pricing packages
- Expert Photoshop technicians
- Real estate photography specialization
6. Conclusion
Mastering the Smudge tool opens up endless creative possibilities in Photoshop. Start with basic techniques and simple projects to build your confidence. Practice each technique until it feels natural. Remember that even complex effects start with understanding the basics.
The Smudge tool in Photoshop becomes more powerful as you explore its capabilities. Keep experimenting with different settings and combinations. Study how other artists use the tool and adapt their techniques to your style. With practice and patience, you'll create stunning effects that enhance your digital artwork and photos.
.png)
.png)
.png)
