
How to Add Green Grass in Photoshop for Stunning Results
.png)

Share:
Table of Contents
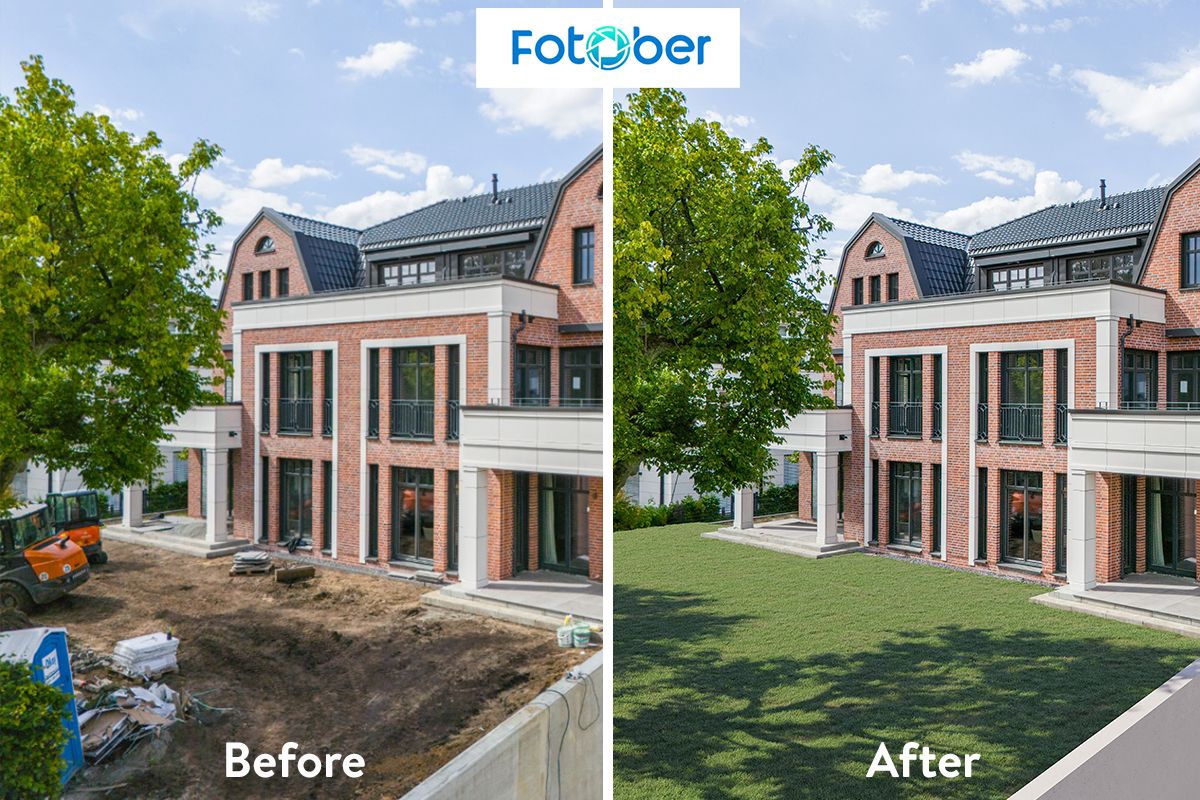
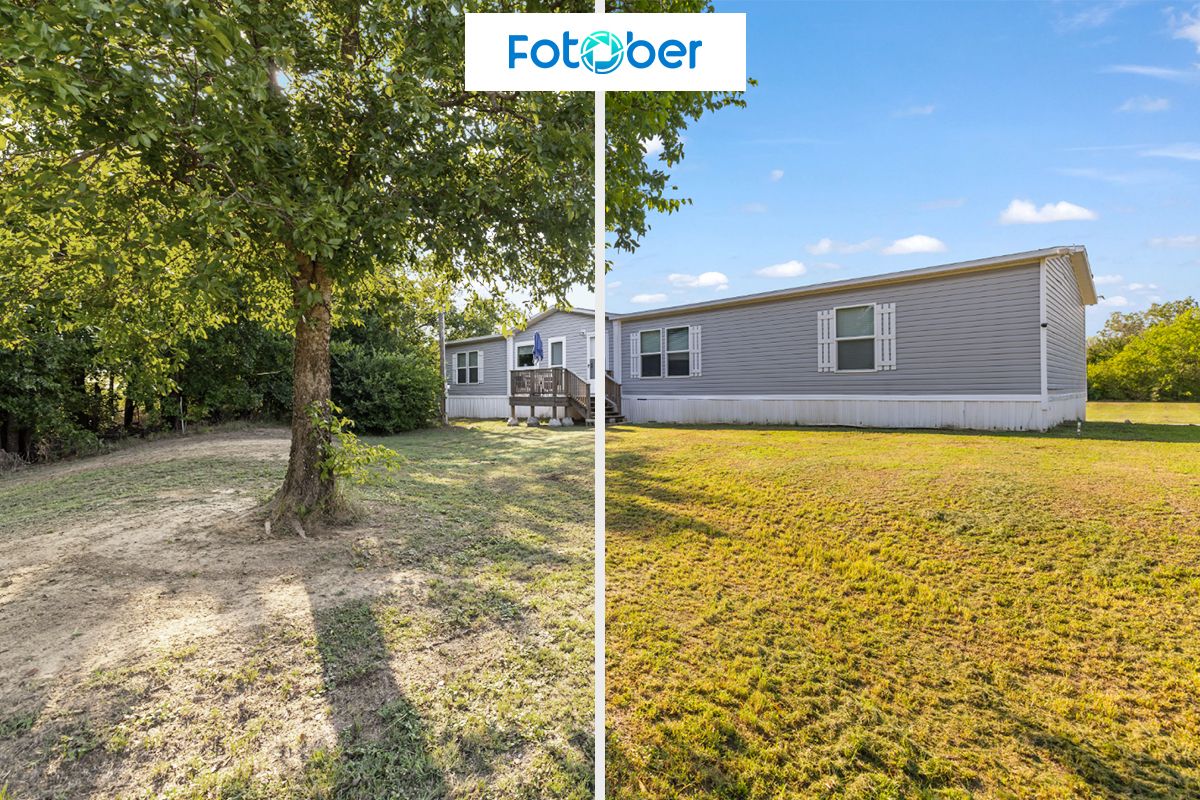
A well-maintained lawn can significantly enhance a property's appeal, but capturing perfect greenery in every real estate photo isn't always possible. Weather conditions, seasonal changes, or construction can leave outdoor spaces looking dull. In this article, we’ll explore how to add grass to photo seamlessly, creating vibrant, eye-catching visuals that elevate property listings and attract potential buyers.
1. Importance of a lush green lawn in real estate photography
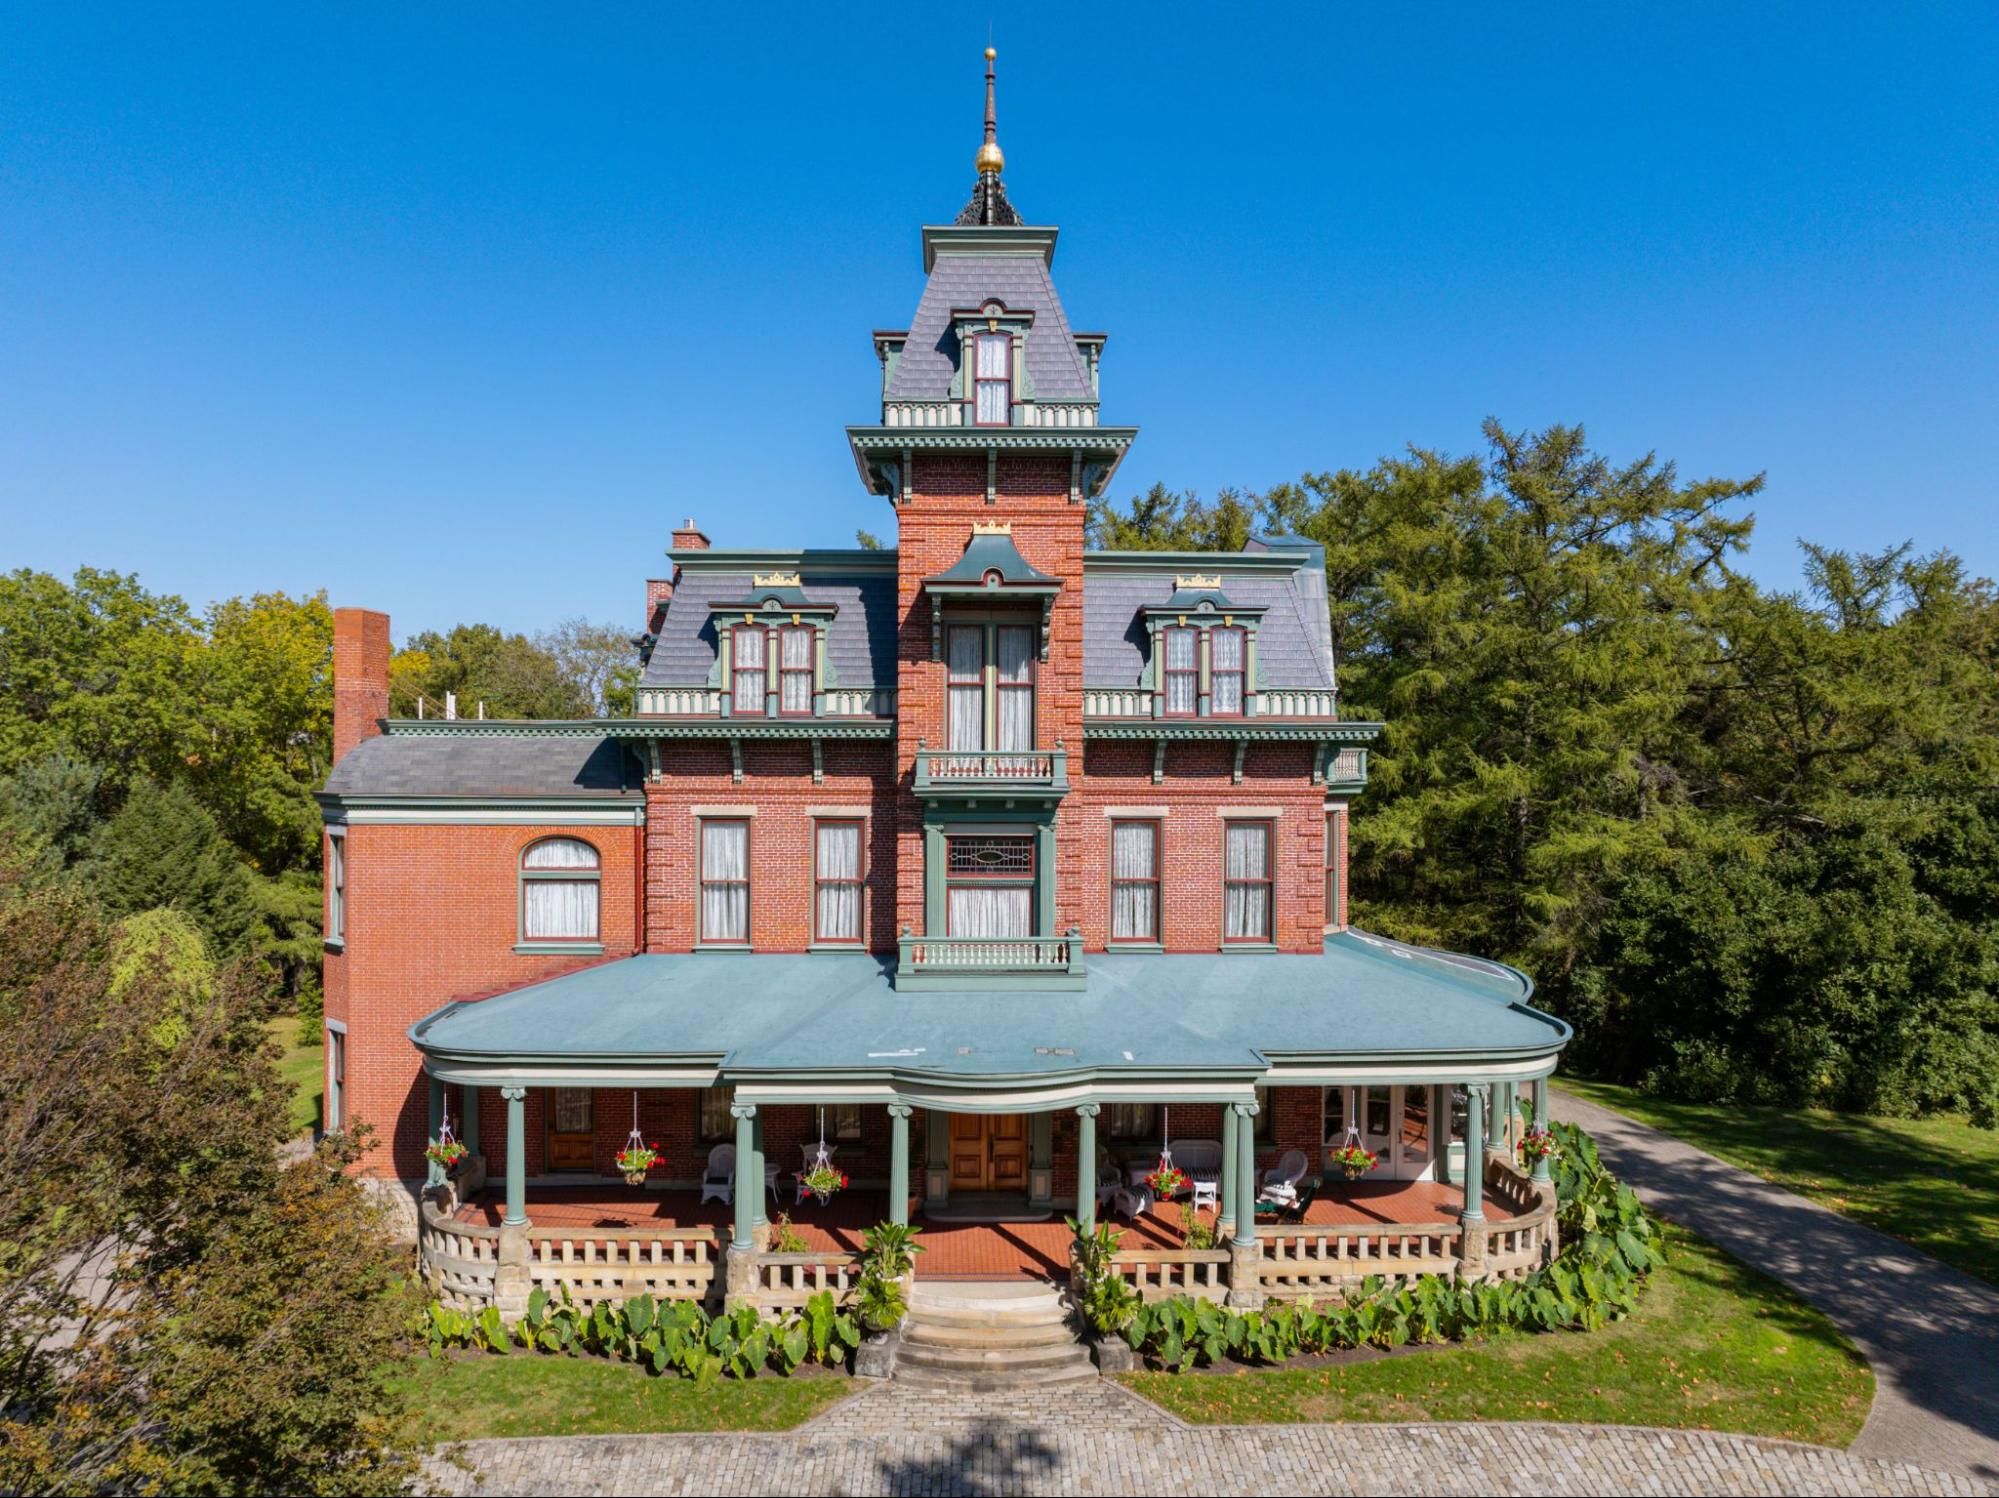
Properties with attractive landscaping tend to sell significantly faster than those without. A well-maintained lawn leaves a strong first impression in property listings, enhancing the appeal of exterior photos. Its presentation plays a key role in capturing buyer interest and influencing how potential buyers perceive the property’s value.
Poor lawn appearance can significantly impact property marketing:
- Brown or patchy grass
- Uneven coloring
- Seasonal dormancy
- Weather damage
Studies show that potential buyers spend 60% more time viewing listings with attractive landscaping. Professional real estate photographers often schedule shoots during optimal lawn conditions. However, weather, seasons, and maintenance issues can affect lawn appearance. Using digital techniques to add grass to photo helps overcome these challenges while maintaining natural appearances. Learning how to edit real estate photos in photoshop effectively, such as adding grass or enhancing lawn appearances, can significantly elevate your property listings and provide a competitive edge in real estate marketing.
2. Preparing Your Workspace to add grass to your image
Professional editors recommend specific Photoshop settings for lawn enhancement work, especially when they need to add grass to photo seamlessly. Start by ensuring your color settings are set to Adobe RGB for optimal color range. Create a dedicated workspace with essential panels easily accessible. Regular backup saves prevent loss of work during complex real estate photo editing processes.
Establish a systematic approach to managing your real estate photos. Create specific folders for original images and edited versions. Use descriptive file names that include property address and edit type. This organization helps maintain efficiency when handling multiple property edits.
3. Techniques for Creating a Green Lawn in Photoshop
3.1. Using Hue and Saturation Adjustments
Selecting and isolating the lawn area
Professional photo editors recommend starting with precise lawn area selection. Using the best app for real estate photo editing can streamline this process, ensuring accurate and natural-looking results. Use the Quick Selection tool with a soft-edged brush (hardness set to 60%) for natural-looking edges. Hold the Alt key while clicking to remove unwanted areas from your selection. When you add grass to photo, creating a layer mask from your selection ensures non-destructive editing for a seamless result.
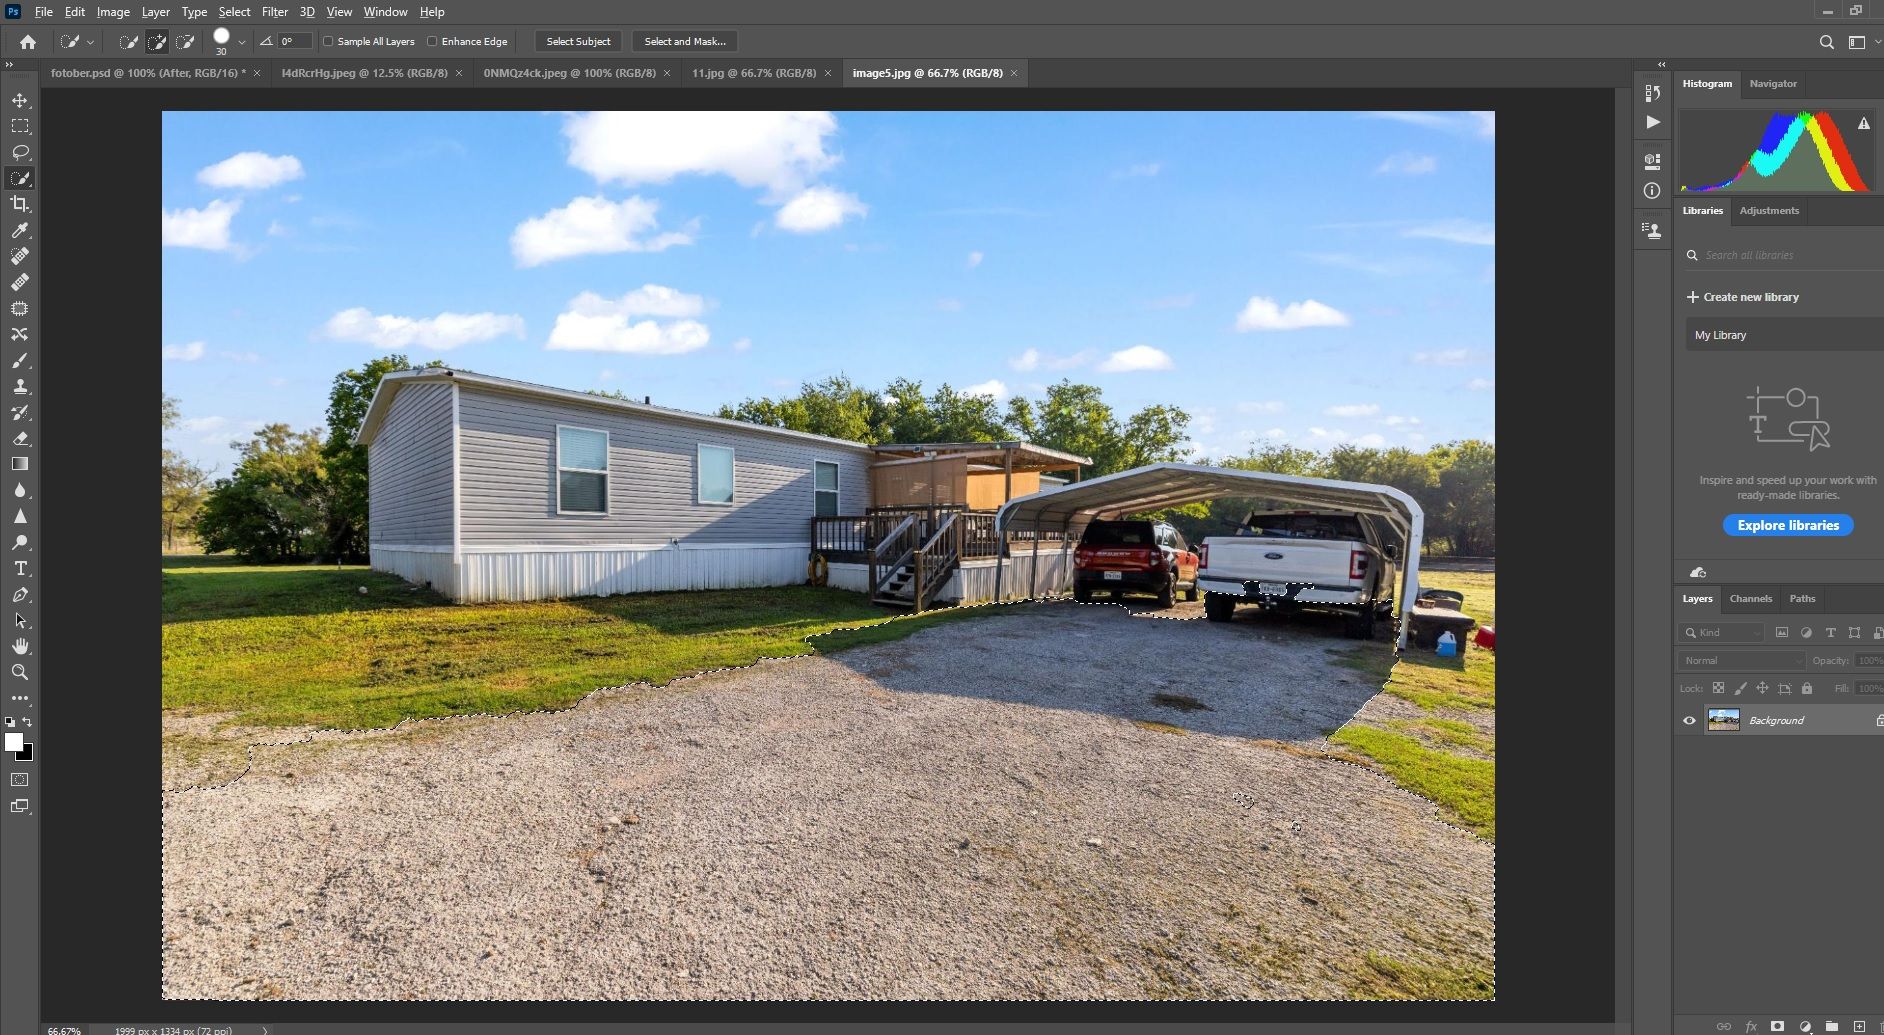
For complex lawn shapes, try these selection methods:
- Quick Selection Tool for larger areas
- Object Selection Tool for precise edges
- Magnetic Lasso for clear boundaries
- Brush Tool for manual refinements
After making your initial selection, refine the edges using Select and Mask (formerly Refine Edge). Set the radius between 1-3 pixels to capture fine grass details along borders. Use the Smart Radius option for varying edge types within your selection. This refinement helps create natural transitions between enhanced and unenhanced areas.
Adjusting hue and saturation to achieve a natural green
Create a new Hue/Saturation adjustment layer with your lawn mask applied. Start by adjusting the Master hue slightly (+5 to +10) to shift existing colors toward natural grass tones. Increase saturation gradually (between +15 and +25) to enhance grass vibrancy without appearing artificial. Monitor the preview carefully to maintain realistic coloring.
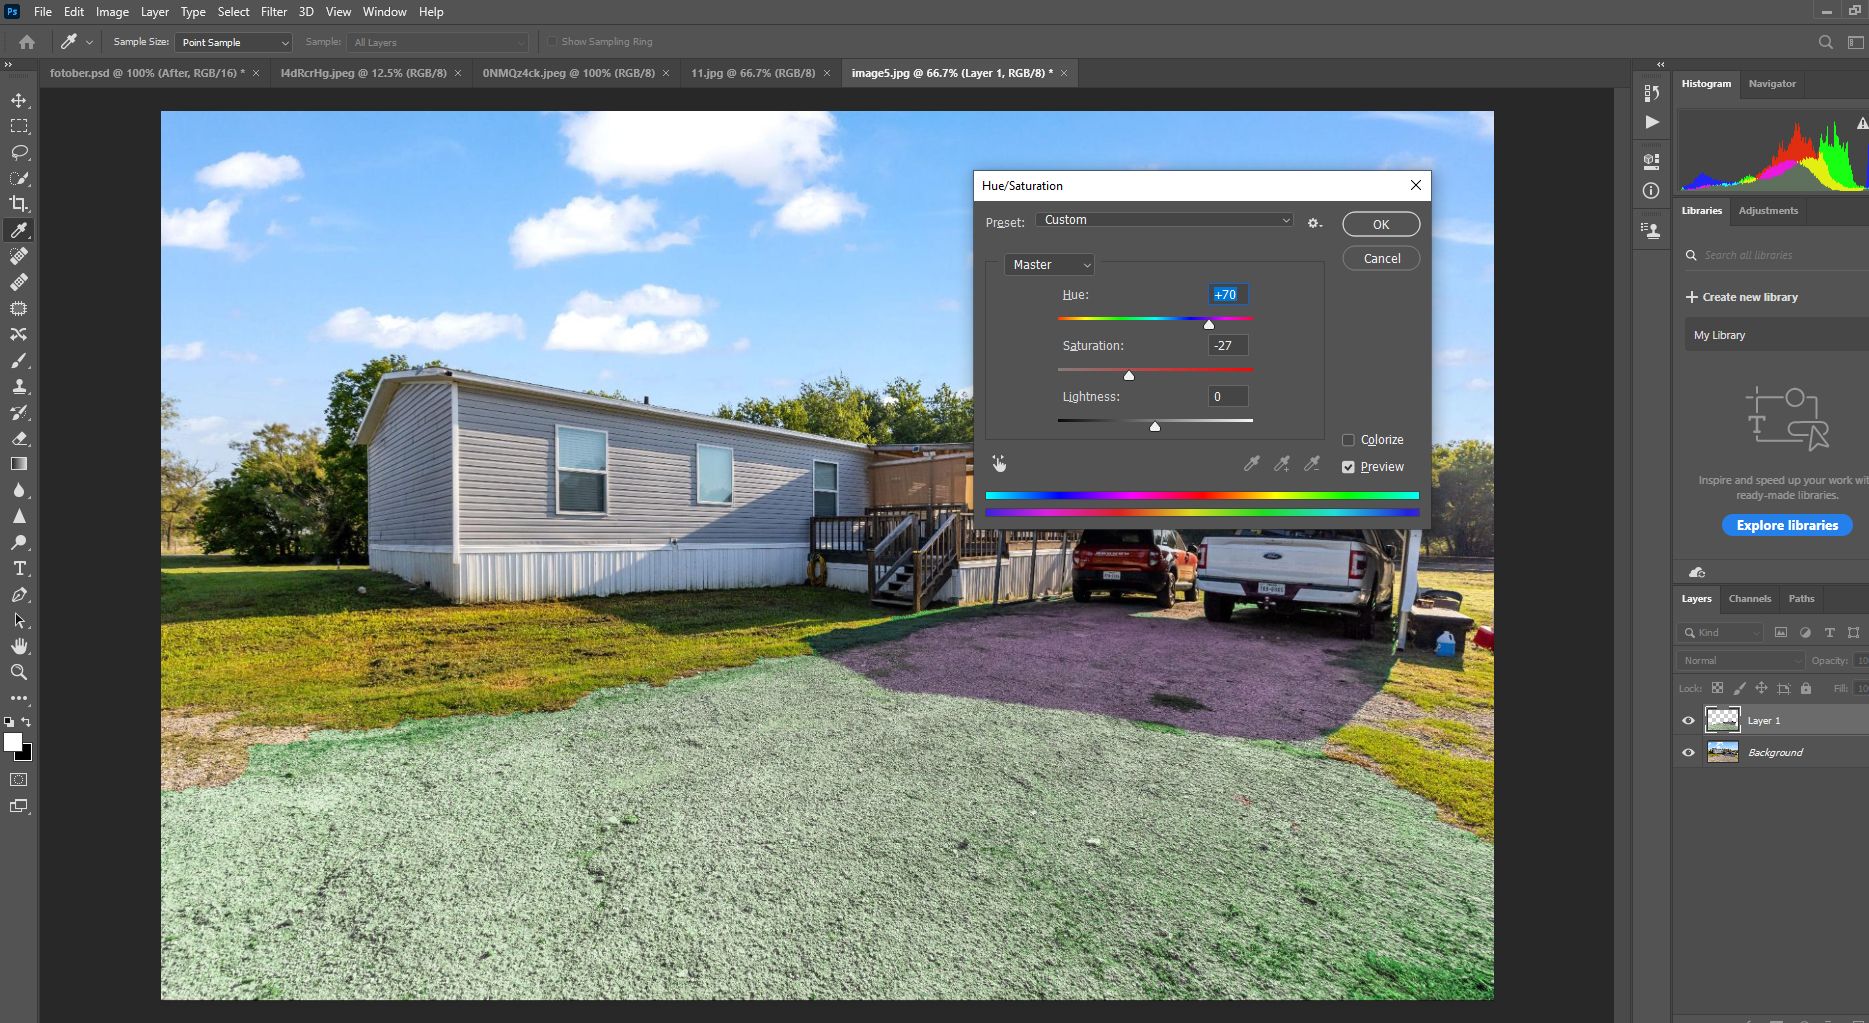
For precise color control, switch to the Greens channel in your Hue/Saturation panel. Adjust the hue range sliders to target specific grass tones in your image. Professional editors recommend keeping lightness adjustments minimal (-5 to +5) to preserve natural shadows and highlights. Create multiple adjustment layers for different grass areas if needed.
Fine-tune your adjustments by:
- Test different green hues (30-80 range)
- Adjust saturation gradually
- Maintain natural variations
- Preserve existing shadows
Review your enhancements at different zoom levels to ensure natural appearance. Use the layer mask to paint out adjustments in areas that look too processed. Consider adding a slight noise texture (1-2%) to match the original image quality. Professional editors often reduce the adjustment layer opacity to 85-95% for subtle, realistic results.
3.2. Applying Color Overlay with Blending Modes
Creating a new layer for color overlay
Start by creating a new layer above your background image. Use the same selection or mask from your lawn area to contain the color overlay. To add grass to photo effectively, fill the selection with a natural grass color (RGB: 85,140,45 is a good starting point). Name your layer "Grass Overlay" for better organization and easy identification.
Professional editors recommend creating multiple overlay layers for complex lawns:
- Base green overlay
- Shadow areas
- Highlight areas
- Texture details
Choosing appropriate blending modes for realism
Set your overlay layer's blending mode to "Overlay" or "Soft Light" for natural integration. Start with the layer opacity at 50% and adjust based on your needs. "Overlay" provides stronger color enhancement while "Soft Light" offers subtler results. Test different modes to find the best match for your specific image.
Different blending modes create distinct effects:
- Overlay: Best for significant color enhancement
- Soft Light: Ideal for subtle improvements
- Color: Maintains underlying luminosity
- Multiply: Enhances darker grass areas
Adjust layer opacity to balance the enhancement with the original grass texture. Most professional editors keep opacity between 30-70% depending on the original lawn condition. Use a layer mask to control the effect's intensity in different areas of the lawn. Paint with black (0% opacity) to reveal original grass in areas that look too processed.
Create natural variations by:
- Adding multiple color overlay layers
- Varying opacity across the lawn
- Using different blending modes in combination
- Preserving existing texture and shadows
Apply selective brightness adjustments to maintain natural lighting patterns. Add subtle noise (1-2%) to match the original image grain. Consider adding a slight Gaussian blur (0.5-1.0 pixels) to help blend the overlay naturally.
3.3. Utilizing the Camera Raw Filter
Enhancing grass color using Camera Raw adjustments
Convert your layer to a Smart Object before applying Camera Raw Filter. This allows for non-destructive adjustments that you can modify later. Access Camera Raw Filter through Filter > Camera Raw Filter in Photoshop. Professional editors prefer Camera Raw for its comprehensive color control and natural-looking results.
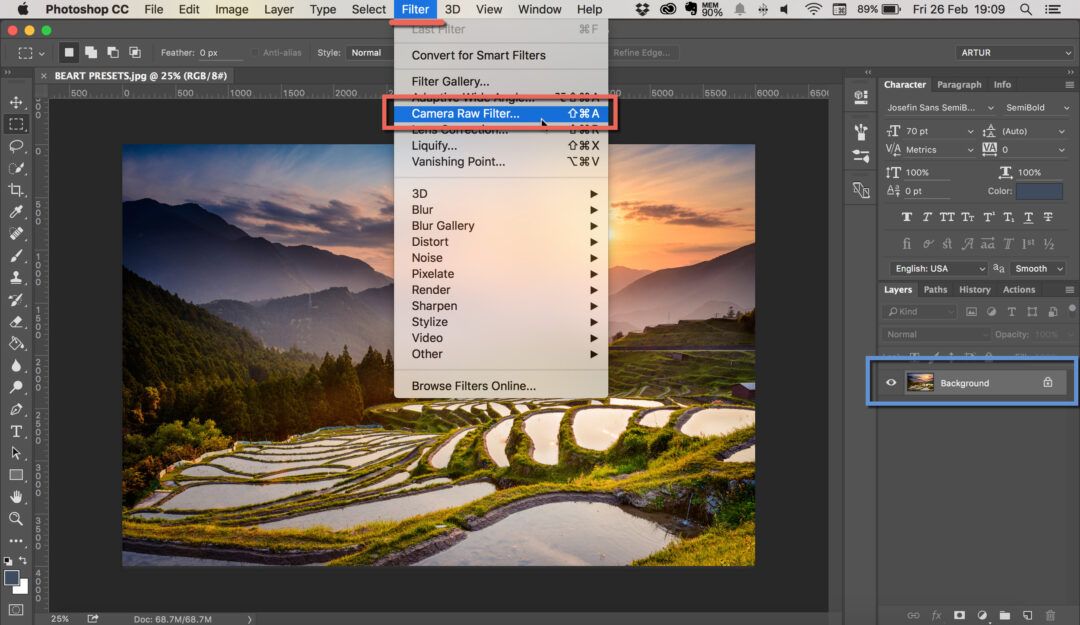
Start with these baseline adjustments:
- Temperature: +5 to +10
- Tint: -5 to +5
- Vibrance: +15 to +25
- Saturation: +10 to +20
Use the HSL/Color panel for precise grass color enhancement:
- Increase Greens saturation (+20 to +30)
- Adjust Green Hue toward yellow (+5 to +15)
- Fine-tune Yellow Hue for natural variation
- Balance Blue tones for shadow areas
Fine-tuning exposure and contrast for consistency
Navigate to the Basic panel to adjust overall exposure and contrast. Start with subtle exposure adjustments (-0.3 to +0.3) to maintain natural lighting. Use Highlights and Shadows sliders to preserve detail in bright and dark areas. The Texture slider helps enhance grass detail without creating artificial patterns.
Professional editors recommend these settings:
- Clarity: +10 to +20
- Texture: +15 to +25
- Dehaze: +5 to +15
- Whites/Blacks: Minimal adjustment
Use the Calibration panel for advanced color refinement. Adjust the Green Primary Hue and Saturation for precise grass color control. Save your settings as a preset for consistent results across multiple images. Consider using masked adjustments for different areas of the lawn.
Add final touches through:
- Local adjustment brushes
- Selective color grading
- Noise reduction if needed
- Edge refinement
3.4. Replacing the Lawn with Stock Images
Selecting suitable stock photos of grass
Choose high-resolution grass images that match your property's lighting conditions. Look for stock photos taken at a similar angle to your original image. Professional editors recommend selecting images with natural color variations and texture. The stock photo's resolution should be equal to or higher than your original image.
Important selection criteria include:
- Consistent lighting
- Natural grass patterns
- Similar grass type
- Proper perspective
Aligning and blending the new lawn seamlessly
Start by placing your stock grass image on a new layer above the original. To add grass to photo seamlessly, use Transform tools (Ctrl/Cmd + T) to match the perspective of your original lawn. Enable Free Transform's perspective and distort options for precise alignment. Match the scale and angle carefully to maintain realism.
Professional blending techniques:
- Create a layer mask for natural transitions
- Use the Gradient Tool on the mask for smooth edges
- Apply Transform > Warp for contour matching
- Adjust opacity to blend with surroundings
Match the lighting and color of the new grass with the original scene. Use Curves and Color Balance adjustment layers to harmonize the stock grass with surrounding elements. Add subtle shadows where the lawn meets buildings or other objects. Professional editors often add a slight noise texture to match the original image quality.
Final refinement steps include:
- Matching shadow directions
- Adding environmental reflections
- Blending edge transitions
- Color temperature matching
Professional tip: Save frequently used grass textures in a dedicated library for future projects. Create different presets for various lighting conditions and grass types. This preparation speeds up future photo editing for real estate agents work while maintaining consistency across projects.
4. Fotober - Professional Editing Solutions for Real Estates Photography
Fotober's editing team excels in transforming problematic lawn areas into appealing green spaces with the help of add grass to photo techniques. We understand the challenges of seasonal changes and weather damage in real estate photography. Our editors carefully enhance grass appearance while maintaining natural textures and lighting. Each photo receives individual attention to ensure realistic results that boost property appeal.

Our lawn enhancement services include:
- Brown grass correction
- Color enhancement
- Texture preservation
- Shadow matching
We help real estate photographers and agents overcome common lawn presentation challenges. Our quick turnaround ensures you never miss listing deadlines due to poor lawn conditions. Professional enhancement helps properties maintain strong curb appeal year-round. This attention to detail helps your listings stand out in competitive markets.
Conclusion
Creating natural-looking lawn enhancements in Photoshop requires both technical skill and artistic judgment. Learning how to add grass in Photoshop offers specific advantages for different lawn conditions and editing needs. Professional editors stress maintaining realism while improving grass appearance, ensuring compelling property presentations that attract potential buyers.
Remember that successful lawn enhancement takes practice and attention to detail. Start with subtle adjustments and build up gradually to achieve natural-looking results. Regular practice with different techniques helps develop professional-level editing skills. With proper technique and patience, you can transform problematic lawns into attractive features that enhance property marketing.
.png)
.png)
.png)
