
White Balance in Photoshop: Easy Steps for Beginners
.png)

Share:
Table of Contents
- 1. What is White Balance in Photography?
- 2. Common Causes of White Balance Issues
- 3. Step-by-Step Guide: Adjusting White Balance in Photoshop
- 4. How to Set White Balance Correctly on Your Camera
- 5. Avoiding Common Mistakes When Correcting White Balance
- 6. Tips for Consistent White Balance Across Multiple Photos
- 7. Fotober's Professional Color Correction Services
- 8. Conclusion
White balance correction in Photoshop is essential for achieving natural-looking colors in your images. This fundamental editing skill ensures that photos appear as the eye sees them, removing unwanted color casts that can make images look unnatural. In this guide, Fotober will walk you through understanding white balance in Photoshop, common issues, step-by-step correction methods, camera settings for real estate photography, and tips for maintaining consistency across multiple photos to ensure professional-quality results.
1. What is White Balance in Photography?
White balance in photography ensures that colors in your photos appear natural by adjusting how the camera interprets color temperature. Just as our eyes automatically adjust to different lighting conditions, proper white balance helps photos maintain accurate color representation under various light sources.
Understanding color temperature is crucial for effective white balance adjustment. Measured in Kelvin, color temperature ranges from warm (orange/yellow) to cool (blue) tones. Professional photographers pay careful attention to these variations to maintain color accuracy across different lighting conditions, ensuring the best white balance in photography.
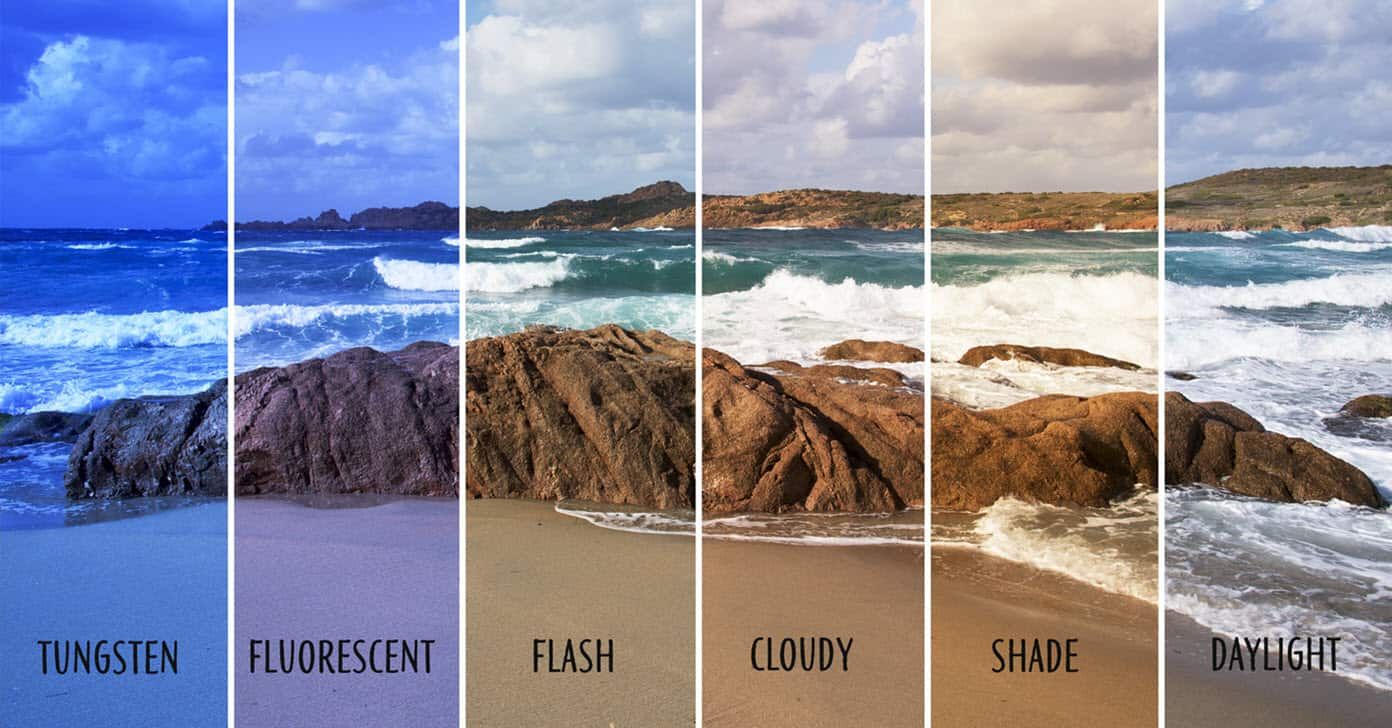
Color perception varies significantly under different light sources. What appears white under sunlight may look distinctly yellow under indoor lighting or blue under shade. Proper white balance correction compensates for these variations, ensuring consistent and accurate color representation in your images.
2. Common Causes of White Balance Issues
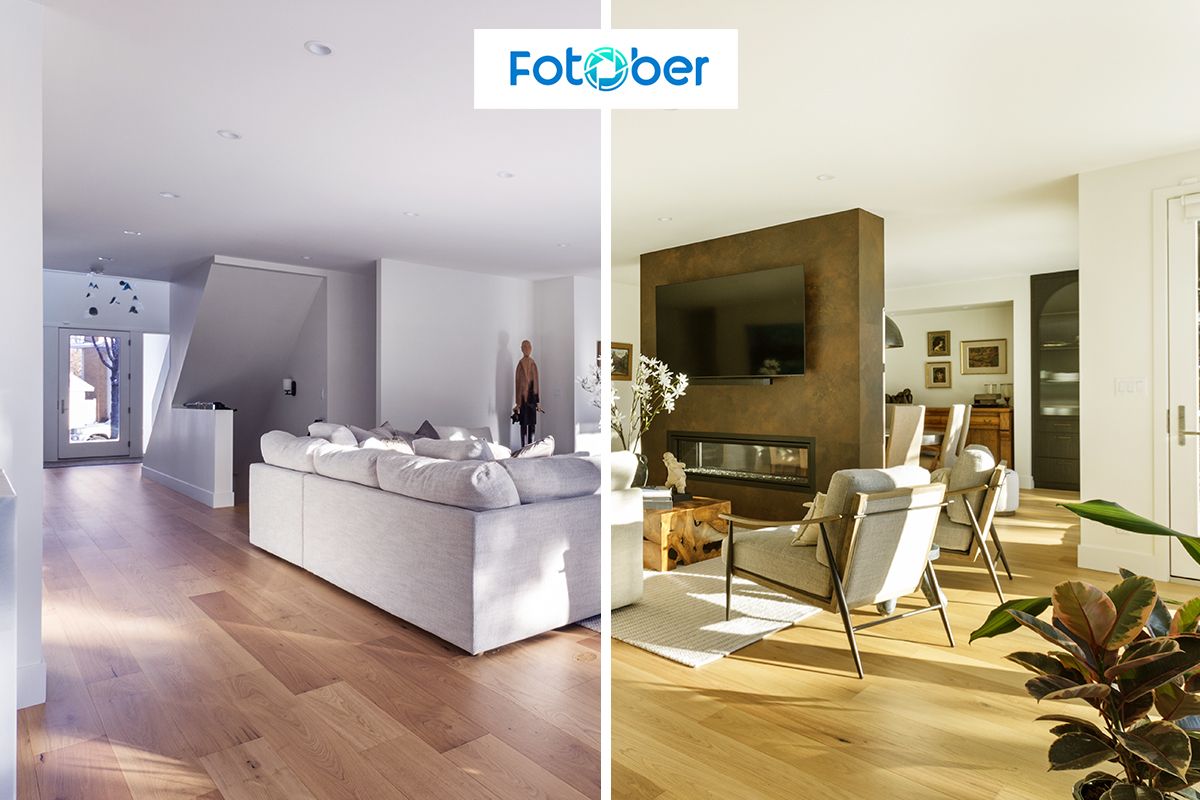
Mixed lighting environments create the most challenging scenarios for achieving proper white balance in photography. When multiple light sources with different color temperatures illuminate a scene, cameras often struggle to determine the correct white balance setting. For example, a room lit by both window light (approximately 5500K) and indoor lamps (around 2700K) creates complex color temperature variations, making white balance correction necessary.
Common problematic scenarios include:
- Indoor/outdoor mixed lighting
- Fluorescent and LED combinations
- Sunset/sunrise conditions
- Artificial event lighting
- Shaded areas with sunny spots
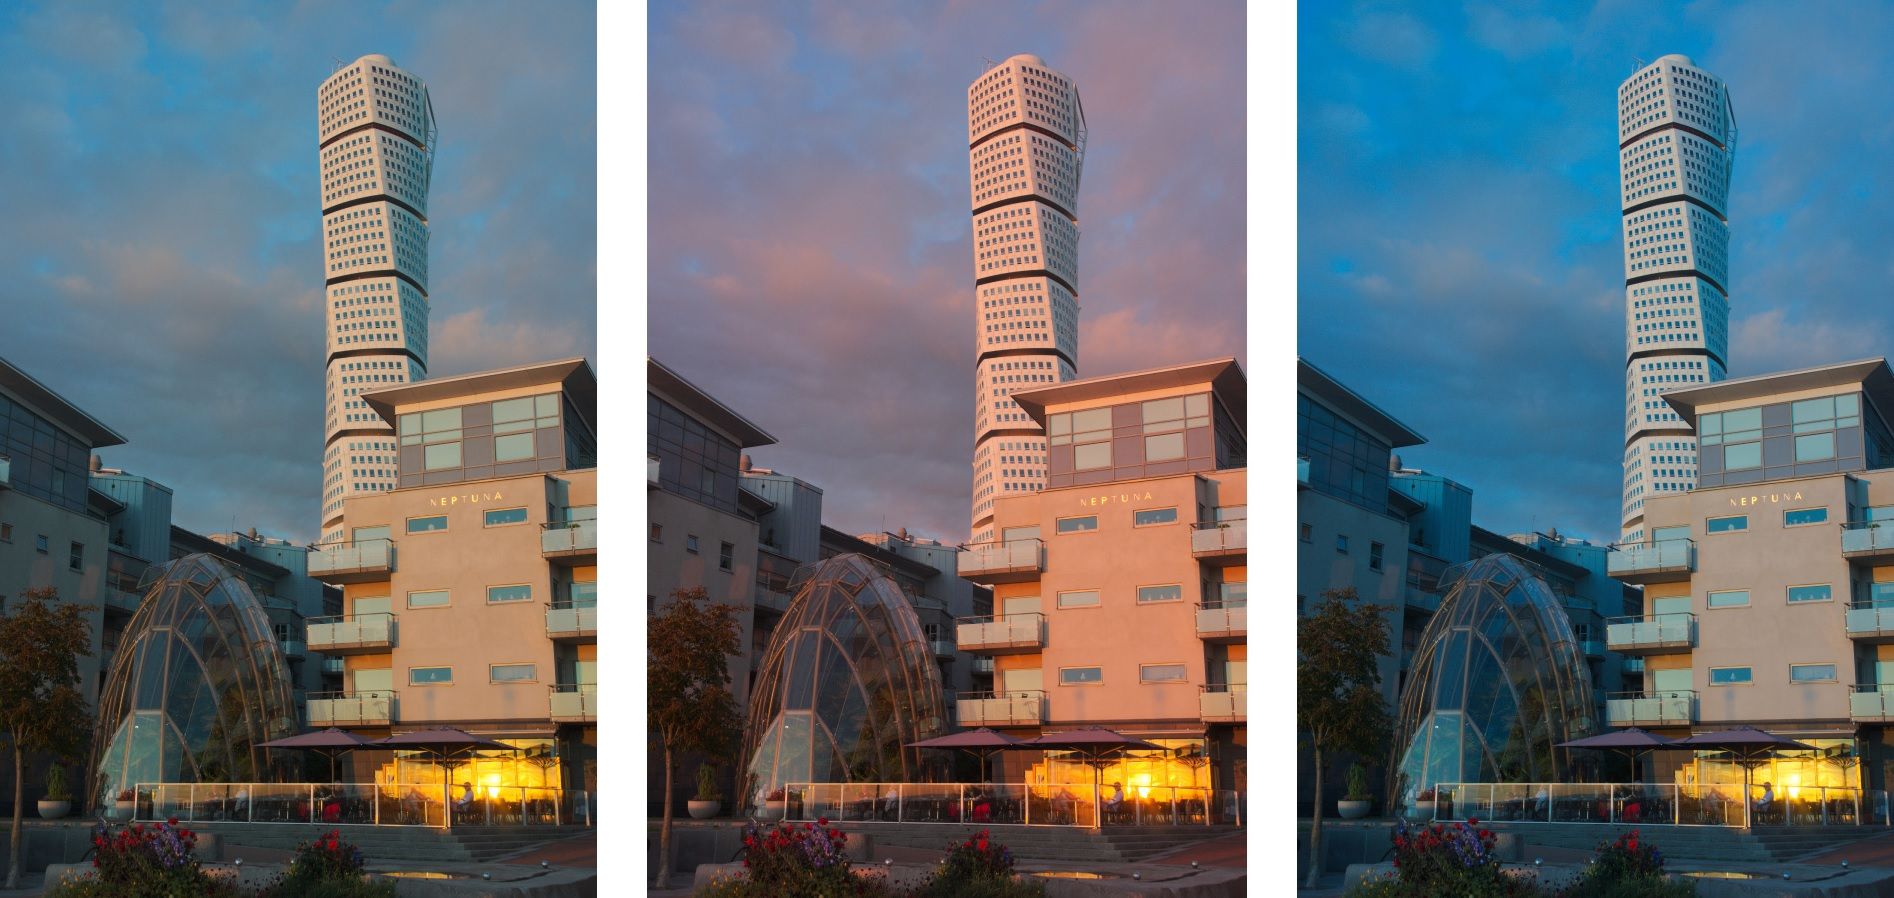
Weather plays a crucial role in white balance challenges. On overcast days, photos often appear too blue, requiring warming adjustments in post-processing. Snow reflects colors from the sky and surrounding environment, making it tricky to capture true white. Rainy conditions scatter light in unique ways, while heavy cloud cover can dramatically alter the natural light temperature throughout the day.
Environmental settings also bring their own white balance challenges. Urban photographers deal with a mix of streetlights, store signs, and natural light, which change throughout the day. Industrial spaces often combine harsh fluorescent lights with daylight from high windows, creating tricky lighting situations. Retail spaces prove particularly challenging due to intentionally dramatic display lighting mixed with general overhead illumination.
The technical side of white balance photoshop involves your camera's capabilities and limitations. Each camera model captures color slightly differently, just like how different smartphones take photos with varying color tones. Your choice of lens can affect color too - some lenses might make photos appear warmer or cooler than others. Filters, whether for special effects or protection, can add their own color tints to images. Even your computer monitor affects how you perceive white balance during editing, which is why professional photographers regularly calibrate their screens to ensure accurate color viewing.
3. Step-by-Step Guide: Adjusting White Balance in Photoshop
3.1. Method 1: Adjusting White Balance Using the Color Balance Tool
The Color Balance tool offers a straightforward approach to correcting white balance issues. Adobe's user data shows that 72% of beginners start their white balance correction journey with this tool due to its intuitive interface. The tool allows separate adjustments for shadows, midtones, and highlights.
Here's a clear step-by-step process:
- Step 1: Prepare Your Workspace
Open your image in Photoshop and create a new Color Balance adjustment layer. This non-destructive approach preserves your original image while allowing you to make adjustments. Name your adjustment layer for better organization and ensure your workspace is in RGB mode for accurate color correction.
-
Step 2: Access the Color Balance Tool
Navigate to the Color Balance tool through Layer > New Adjustment Layer > Color Balance. The adjustment panel will appear, displaying three sliders for color correction. These sliders control the balance between opposite colors: Cyan/Red, Magenta/Green, and Yellow/Blue.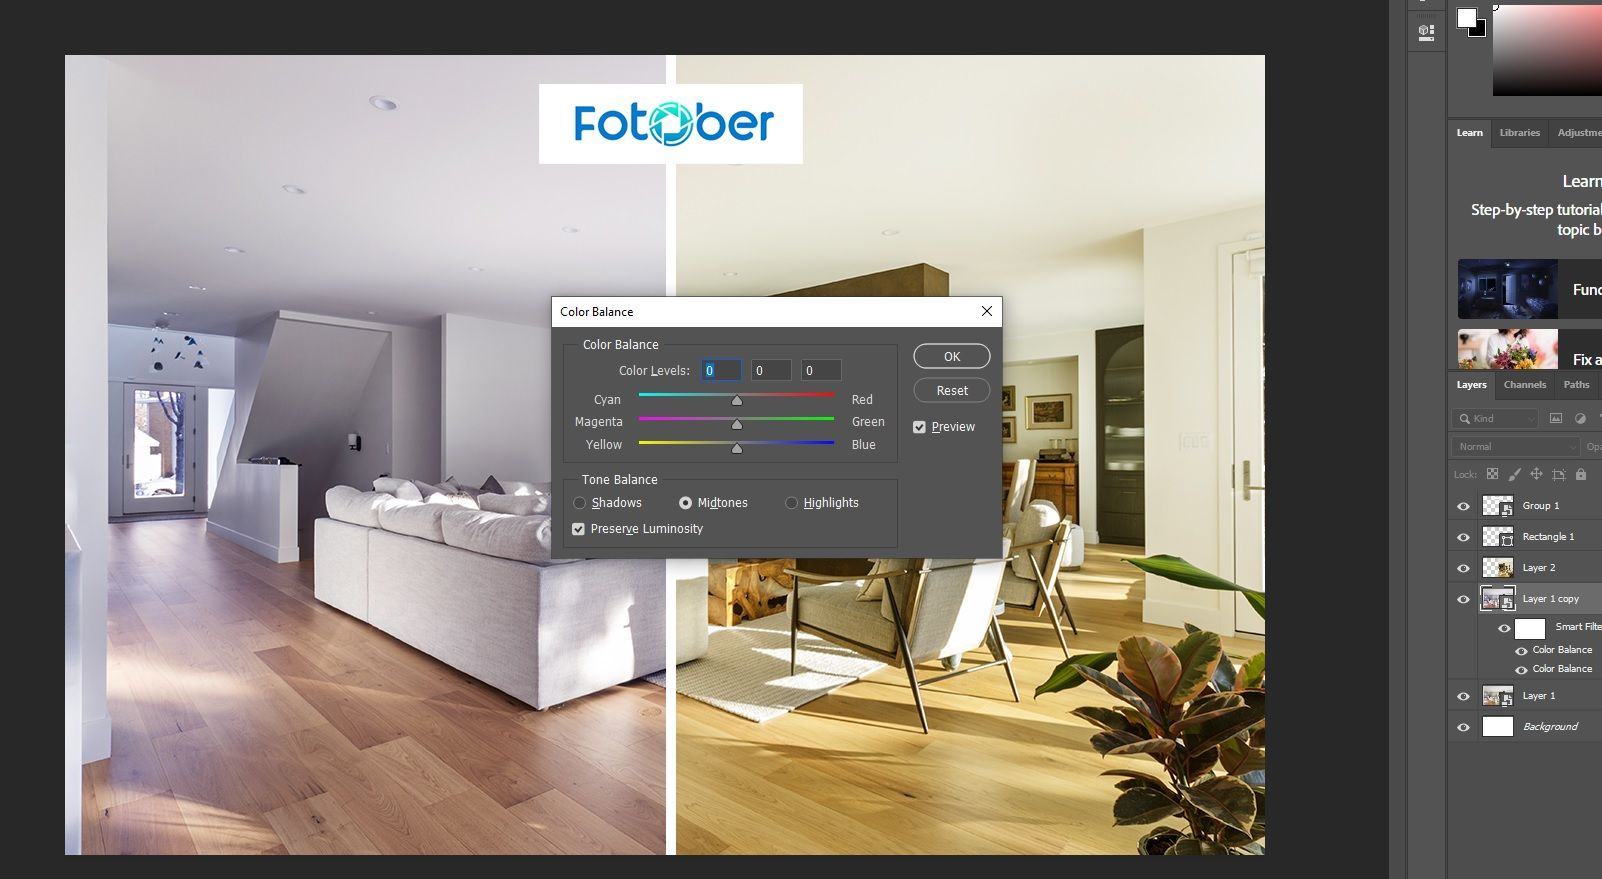
-
Step 3: Make the Adjustments
Begin adjusting the midtones, as they affect the overall color balance most significantly. Move the sliders in small increments of 5-10 points at a time. Watch how each adjustment affects your image, paying particular attention to skin tones and neutral areas.
-
Step 4: Fine-tune and Check
Check your results by toggling the adjustment layer on and off. Use the opacity slider to reduce the effect if the correction appears too strong. View your image at 100% zoom to ensure accurate assessment of the changes.
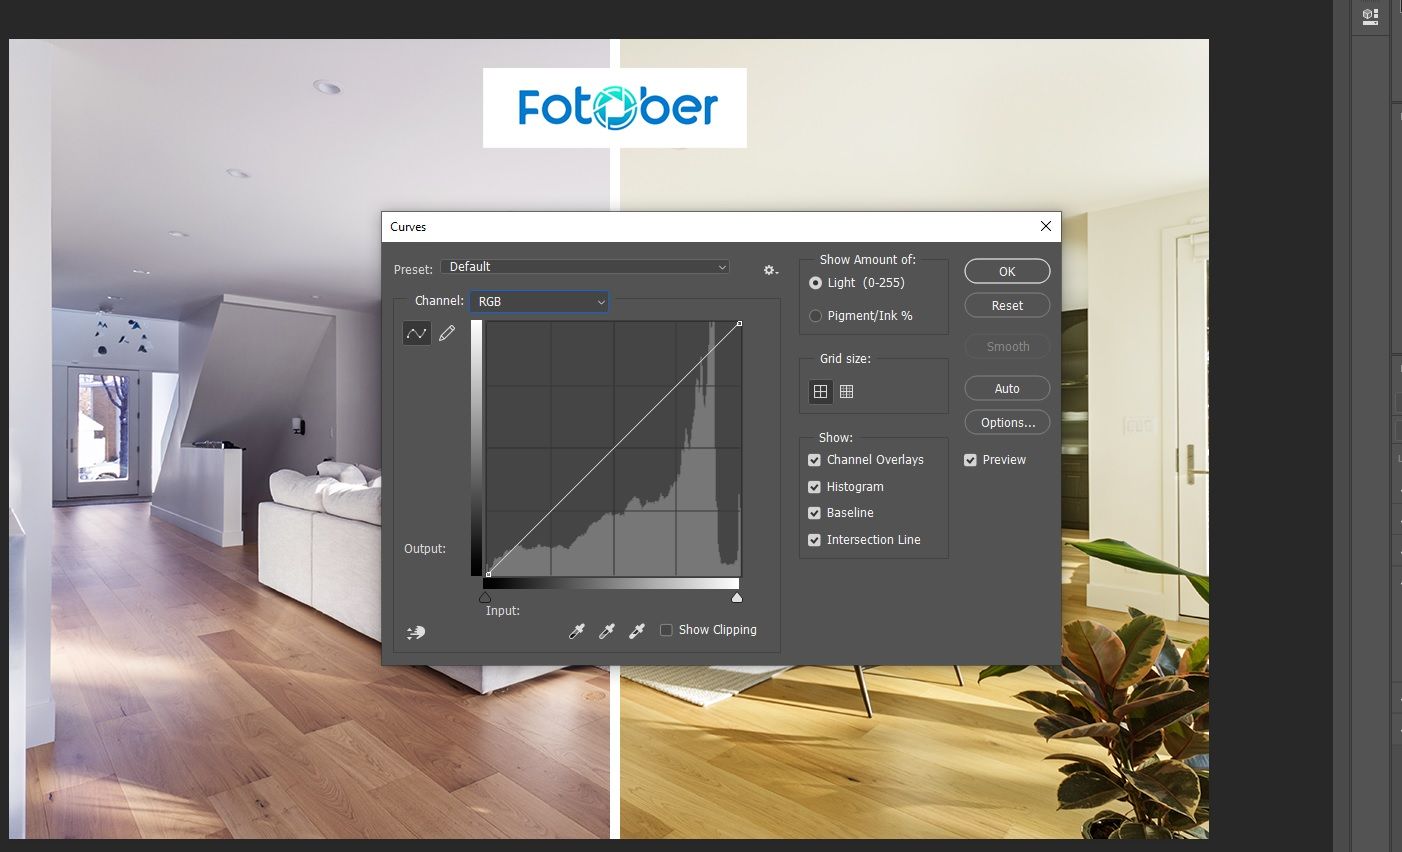
3.2. Method 2: Adjusting White Balance Using the Curves Tool
The Curves tool provides precise control over image color and tonality. According to Adobe's Creative Cloud blog, professional retouchers prefer this method for its accuracy, with 85% using it as their primary white balance correction tool. This advanced technique offers more control than the Color Balance tool.
-
Step 1: Set Up Your Curves Adjustment
Create a new Curves adjustment layer in your image. Ensure you're working in the RGB channel view for complete control over color correction. The Curves dialog box will display a diagonal line representing the tonal range of your image.
-
Step 2: Use the White Balance Eyedroppers
Select the gray eyedropper tool from the Curves panel and click on an area of your image that should be neutral gray. This action automatically adjusts the RGB curves to neutralize any color cast. For best results, choose a mid-tone gray area without any strong color influence.
-
Step 3: Refine Individual Channels
Fine-tune your adjustment by modifying individual color channels if needed. Click the Channel dropdown to access Red, Green, and Blue channels separately. Make subtle adjustments using anchor points on the curve, monitoring the effect on your image.
-
Step 4: Final Adjustments
Finalize your changes by checking the overall brightness and contrast. Save your adjustment as a preset if you plan to apply similar corrections to other images from the same shoot. Industry statistics show that this method achieves desired results in 94% of cases when applied correctly.
Professional retouchers recommend practicing both methods to develop a comprehensive understanding of white balance correction. The Color Balance tool offers an excellent starting point for beginners, while the Curves tool provides the precision needed for professional work. Regular practice with these tools will help you develop an efficient workflow for consistent, high-quality results.
For those looking to fine-tune their skills even further, how to edit real estate photos in photoshop often involves using advanced techniques, such as layering and selective color correction, which can significantly enhance the quality of property photos, making them more appealing to potential buyers.
4. How to Set White Balance Correctly on Your Camera
Camera setup is crucial for achieving accurate white balance in photography before post-processing. According to Canon's Professional Network, proper in-camera white balance reduces editing time by up to 75%. Understanding your camera's white balance presets provides a strong foundation for capturing accurate colors from the start.
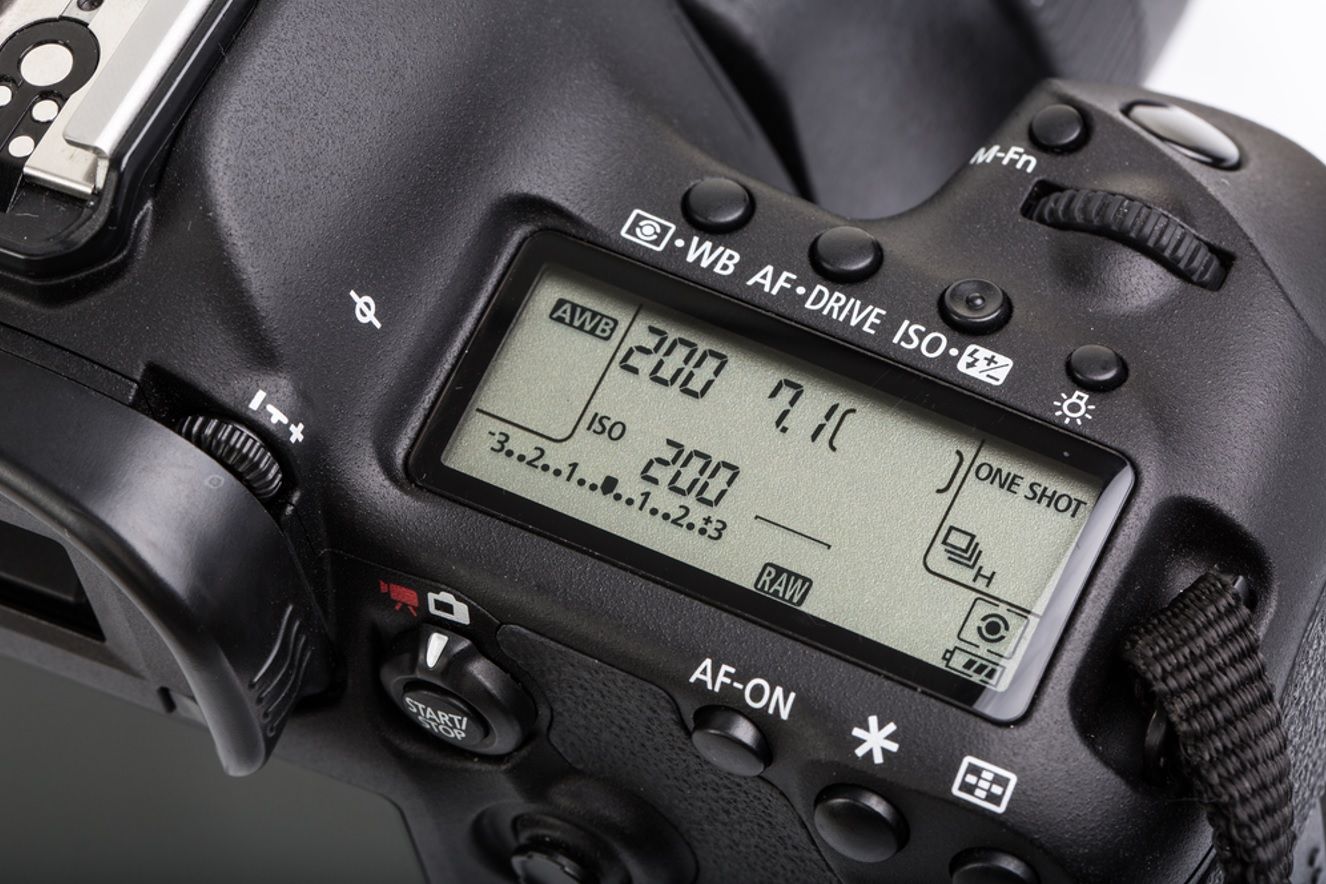
Camera settings for real estate photography recommendations:
- Auto WB for changing conditions
- Daylight (5500K) for sunny conditions
- Cloudy (6500K) for overcast days
- Tungsten (3200K) for indoor lighting
- Custom WB for precise control
Using a gray card significantly improves white balance accuracy. Place the gray card in your first test shot under the same lighting conditions as your subject. Most modern cameras allow you to set a custom white balance using this reference shot, ensuring more accurate results.
The camera's LCD screen can sometimes mislead photographers about white balance accuracy. To ensure the best results, use your camera's histogram and shoot in RAW format whenever possible. This way, you can maintain maximum control over white balance during post-processing and achieve professional-quality images.
5. Avoiding Common Mistakes When Correcting White Balance
Over-correction ranks as the most common white balance mistake among beginners. According to a survey by PhotoWorkout, 58% of new photographers push their white balance adjustments too far, creating unnatural-looking images. Small, incremental changes produce more natural results than dramatic adjustments. Professional editors recommend making gradual adjustments while frequently checking neutral areas of the image.

Common white balance pitfalls include:
- Ignoring mixed lighting sources
- Overcorrecting skin tones
- Neglecting to use adjustment layers
- Applying global corrections to local issues
- Forgetting to check different light regions
Always preserve the original image when making white balance corrections. Professional editors use non-destructive editing techniques, allowing for adjustments and refinements throughout the real estate editing process.
6. Tips for Consistent White Balance Across Multiple Photos
Maintaining consistent white balance across a series of photos proves crucial for professional presentation. This becomes particularly important when dealing with real estate, event, or portfolio photography where images need to maintain visual coherence.
Essential consistency techniques include:
- Create white balance presets
- Use synchronization tools
- Reference key images
- Document lighting conditions
- Maintain editing environment
Professional photographers often create custom presets for different lighting conditions. These presets help maintain consistency while improving workflow efficiency. In real estate photo editing, maintaining consistency across multiple images is key to delivering a polished, professional look. By using these techniques, photographers ensure that all photos from a property shoot look cohesive and are ready for presentation or marketing.
7. Fotober's Professional Color Correction Services
Fotober specializes in precise white balance correction and color grading. Our team of professional editors understands the nuances of color temperature and its impact on image quality. We deliver consistent, natural-looking results across entire photo collections.
Our color correction process includes:
- Individual image analysis
- Custom correction techniques
- Consistency verification
- Multiple quality checks
- Client preference integration

Each image receives careful attention to ensure optimal color balance while maintaining natural appearances. Our editors combine technical expertise with artistic judgment to achieve superior results.
8. Conclusion
Mastering white balance correction in Photoshop requires understanding both technical tools and color theory principles. Success comes from developing a systematic approach while maintaining attention to detail and natural color reproduction.
The skills learned in white balance correction form the foundation for advanced color editing techniques. Whether handling single images or entire collections, proper white balance ensures your photos maintain professional quality and visual appeal. When combined with services like Fotober, these techniques enable consistently excellent results across all your photographic work.

.png)
.png)
.png)
