
The Ultimate Real Estate Photography Guide (Equipment, Lighting & Editing)

Share:
Table of Contents
- 1. What is real estate photography?
- 2. Essential equipment for real estate photography
- 3. Real estate photography composition tips
- 4. Lighting techniques for real estate photography
- 5. Real estate photography shot list
- 6. Common real estate photography mistakes
- 7. Professional real estate photo editing services
- 8. Conclusion
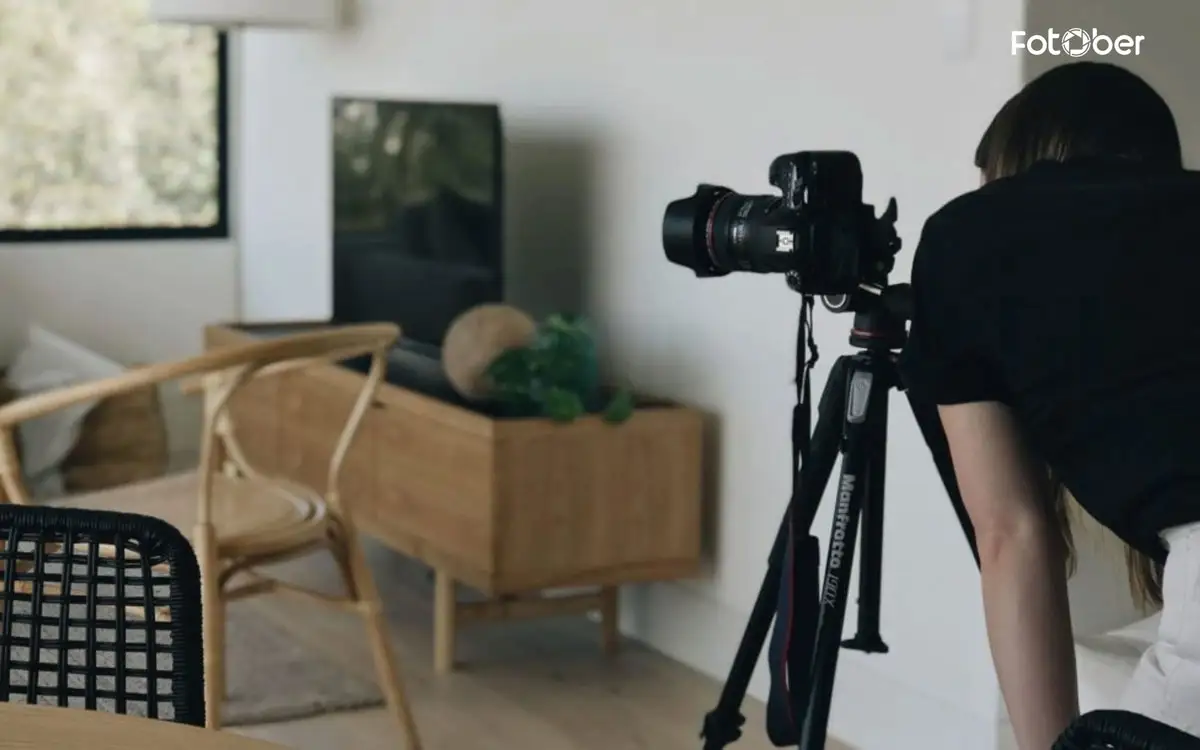
When people search for a home online, the photos are often the first thing that captures their attention. Before reading the description or checking the floor plan, most buyers quickly scroll through listing images to decide whether a property is worth exploring further. In many cases, the visual presentation alone can determine if someone schedules a showing or simply moves on to the next listing.
Because of this, strong images play a much bigger role than many beginners expect. Clear, bright, and well-composed photos help buyers imagine themselves inside the space, while poorly executed photos can make even a beautiful home feel less appealing. That’s why learning the fundamentals of property photography is essential for anyone working in the real estate market.
This real estate photography guide is designed to walk you through the core skills needed to create effective listing images. You’ll learn how to choose the right equipment, apply practical composition techniques for interiors, and use lighting to make rooms feel open and inviting. We’ll also explore a simple editing workflow that helps transform raw photos into polished marketing images.
Whether you are just starting out or looking to refine your approach, these real estate photography tips will help you build a reliable process for producing professional-looking results.
1. What is real estate photography?
At its core, real estate photography is the practice of photographing homes and properties for marketing purposes. The goal is not simply to document a space, but to present it in a way that attracts potential buyers and highlights its best features. These images are typically used across multiple platforms, including MLS listings, real estate websites, property brochures, and social media marketing.
Good property photography focuses on clarity, space, and atmosphere. A well-executed photo helps viewers understand the layout of a room, notice architectural details, and imagine how the space might feel in real life. Because most buyers begin their search online, strong visuals often determine whether a listing receives more clicks and inquiries.
Another important role of real estate photography is storytelling. Instead of just showing rooms individually, the photos should work together to guide viewers through the property—from the exterior entrance to the living areas and private spaces. This visual journey helps buyers mentally walk through the home before they ever visit in person.
A complete real estate photography guide usually covers several types of images commonly used in property marketing, including interior photography for living spaces, exterior shots that showcase curb appeal, twilight photography that creates a warm evening atmosphere, and drone photography that highlights the surrounding area and lot size.
2. Essential equipment for real estate photography
Having the right tools can make a huge difference in the quality and consistency of your listing photos. While creativity and technique matter most, choosing the proper real estate photography equipment helps you capture cleaner images, balanced lighting, and accurate perspectives. Most photographers featured in any comprehensive real estate photography guide rely on a few essential pieces of gear that form the foundation of their workflow.
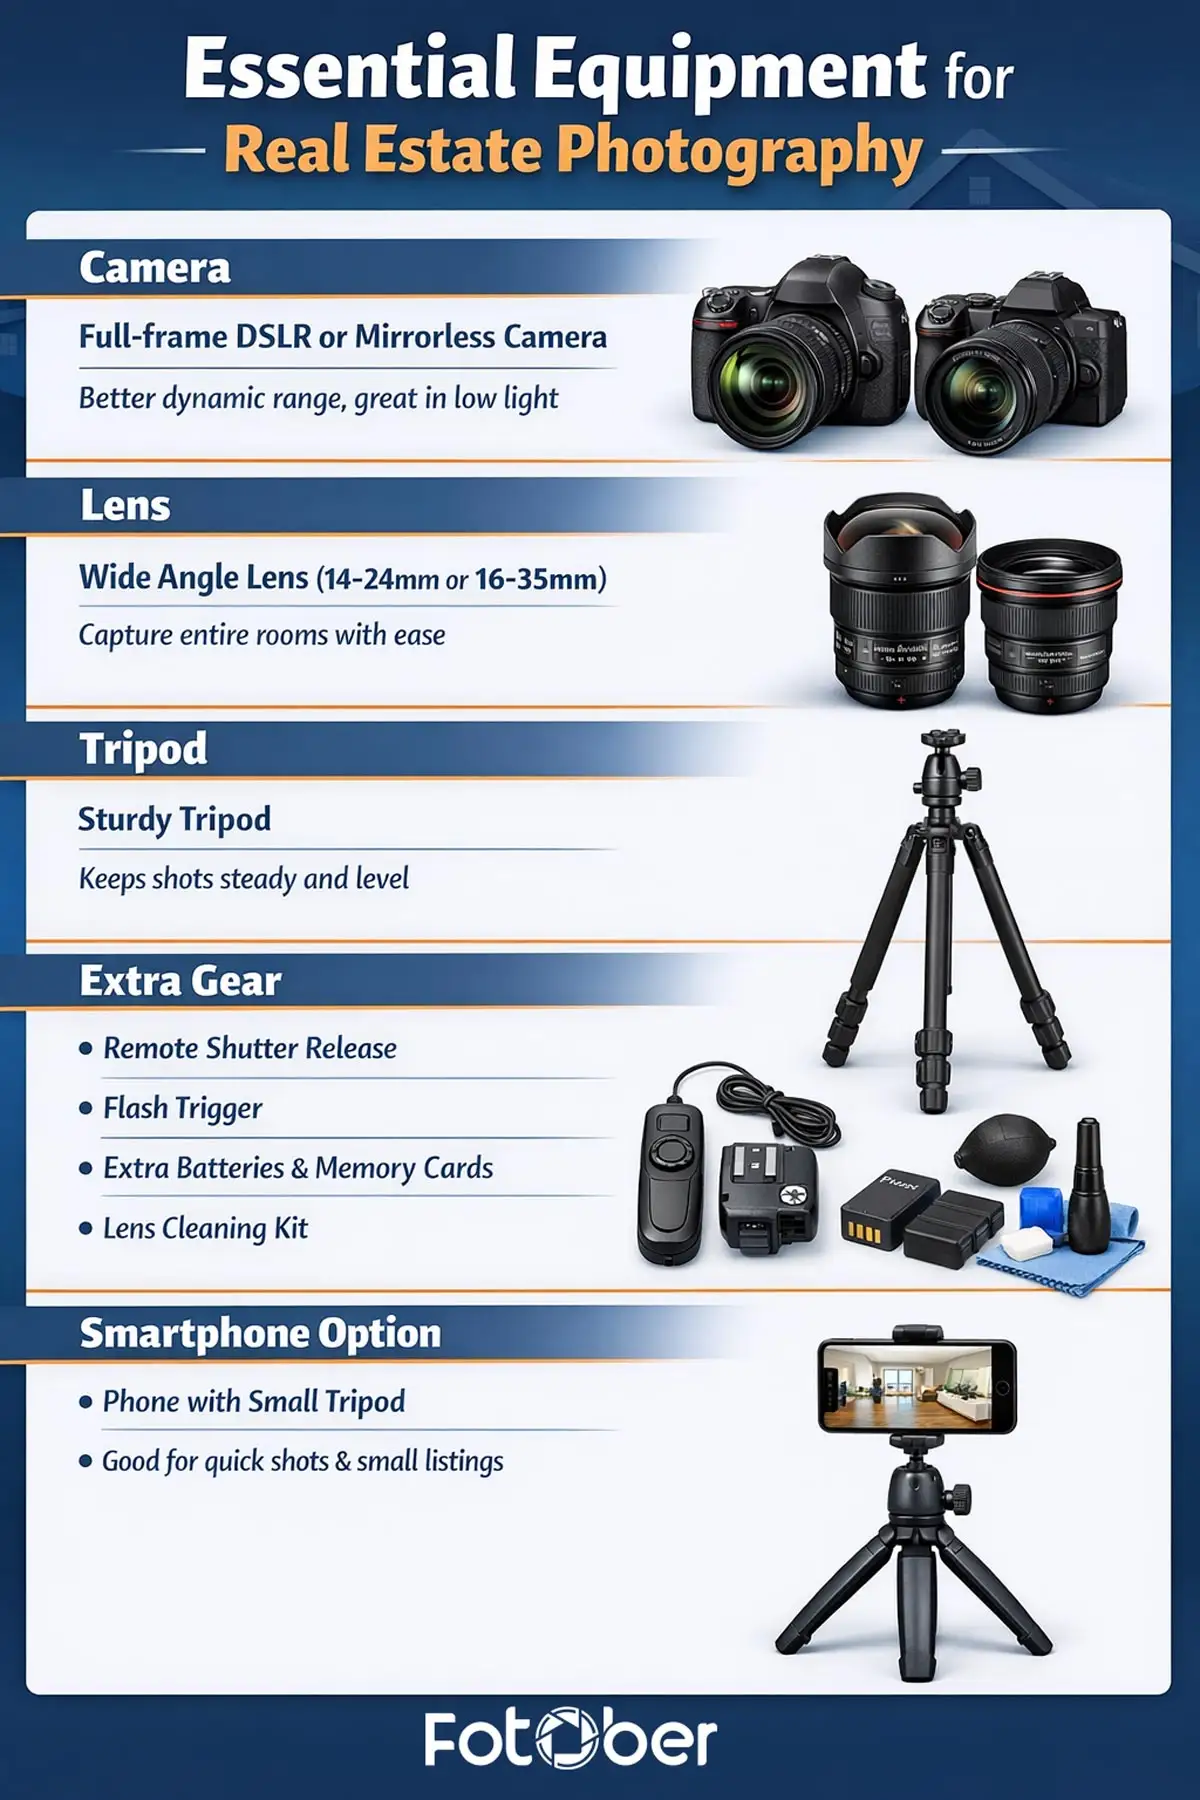
2.1. Camera
A reliable camera is the starting point. Many professionals use DSLR or mirrorless cameras because they offer strong image quality and flexible manual controls. Full-frame models are particularly popular since they provide better dynamic range and improved performance in low-light interiors. This allows photographers to capture both bright windows and darker room details with greater clarity.
2.2. Lens
A good lens is just as important as the camera body. A wide angle lens real estate photography setup typically falls between 14–24mm or 16–35mm, allowing photographers to capture an entire room without needing to stand too far back. These lenses help show the layout of a space and make rooms feel open and inviting. However, it’s important to use them carefully—extremely wide angles can introduce distortion if the camera is tilted or positioned incorrectly.
2.3. Tripod
A sturdy tripod real estate photography setup is often considered essential. Using a tripod keeps vertical lines straight and ensures the camera remains perfectly level while shooting interiors. It also allows photographers to capture multiple exposures for HDR bracketing, which is useful when balancing bright windows with darker interior spaces.
2.4. Extra Gear
A few smaller accessories can also make shoots smoother and more efficient:
-
Remote shutter release to avoid camera shake
-
Flash triggers for controlled lighting setups
-
Extra memory cards and batteries for longer shoots
-
A lens cleaning kit to keep glass free from dust and fingerprints
2.5. Smartphone Option
While dedicated cameras offer the best results, smartphone real estate photography can still work for smaller listings or quick marketing needs. Pairing a phone with a small tripod or stabilizer can help keep shots level and improve overall image consistency.
3. Real estate photography composition tips
Even with great gear, composition is what truly shapes how a property appears in photos. Understanding real estate photography composition helps photographers present rooms clearly, highlight architectural features, and guide viewers through a home visually. Small adjustments in framing and positioning can dramatically improve the final image.
3.1. Rule of thirds
One of the most widely used techniques in photography is the rule of thirds real estate photography approach. Instead of placing key elements directly in the center of the frame, photographers divide the image into thirds and position important features along those lines.
This works well in spaces like:
-
Living rooms with large windows
-
Kitchen islands or dining tables
-
Bedrooms with centered beds or décor
The result is a balanced photo that feels natural and visually engaging.
Real estate photography guide for you guys.
3.2. Leading lines
Leading lines help guide the viewer’s eyes through the image. In property photography, these lines often come from architectural elements such as hallways, countertops, or staircases. By positioning the camera so these lines point toward the main feature of the room, the photo naturally draws attention to the space you want to highlight.
3.3. Keep vertical lines straight
Maintaining clean vertical lines real estate photography is one of the most important technical details. If the camera tilts too far up or down, walls and door frames can appear slanted or distorted. This common mistake makes rooms feel unstable or unrealistic. Keeping the camera level—or correcting verticals during editing—helps maintain a professional look.
3.4. Shooting height
For most interiors, photographers shoot at about chest height, typically around 1.2–1.5 meters from the floor. This perspective feels natural to viewers and keeps furniture proportions balanced within the frame.
3.5. Decluttering before shooting
Composition also depends on preparation. Before taking photos, remove personal items, tidy surfaces, and simplify décor where possible. A clean environment keeps the focus on the space itself and allows the room’s layout and design to stand out clearly.
4. Lighting techniques for real estate photography
Lighting plays a major role in how a property feels in photos. Even a beautifully designed home can look dull if the lighting is poorly handled, while a well-lit image can make a simple space feel warm and welcoming. Understanding the basics of real estate photography lighting helps photographers create images that look bright, balanced, and true to life. In most cases, the goal is to make rooms appear natural while still highlighting important details.
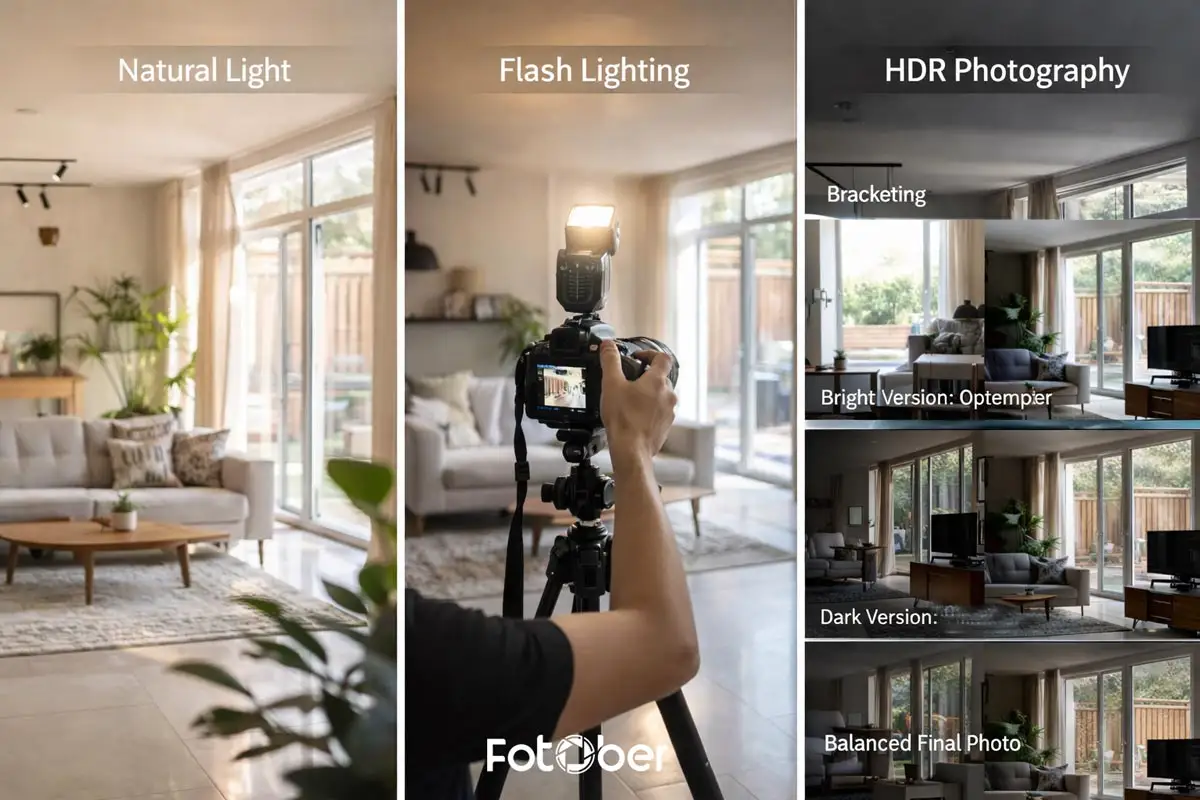
4.1. Natural light
Many photographers prefer natural light real estate photography because it produces soft, realistic images that feel inviting to potential buyers. Daylight entering through windows often creates a comfortable atmosphere that helps viewers imagine themselves living in the space.
To make the most of natural light:
-
Open curtains and blinds to let in as much daylight as possible
-
Turn off mixed indoor lighting if it creates color imbalance
-
Shoot in the morning or late afternoon when the sunlight is softer
These simple adjustments can significantly improve how interiors appear in photos.
4.2. Flash lighting
Sometimes natural light alone isn’t enough, especially in darker interiors or basement areas. In those situations, photographers may introduce flash lighting to fill shadows and maintain even exposure across the room. Flash can also help balance scenes where bright windows contrast sharply with darker furniture or walls.
The key is subtlety. Flash should support the natural lighting rather than overpower it, ensuring the final image still feels authentic.
4.3. HDR photography
Another common technique is HDR real estate photography. HDR, or High Dynamic Range, helps balance scenes where bright windows and darker interiors appear in the same frame. Instead of capturing a single exposure, photographers take several images at different brightness levels.
A typical workflow involves:
-
Bracketing exposures to capture both highlights and shadows
-
Blending the images during editing to create a balanced final photo
Many photographers rely on HDR to achieve consistent results, especially when shooting multiple rooms in one property. However, blending several exposures for every image can become time-consuming when managing multiple listings. For busy professionals following a comprehensive real estate photography guide, this is often the stage where editing support can help streamline the workflow.
5. Real estate photography shot list
Planning ahead can make a real estate shoot far more efficient. One of the easiest ways to stay organized is by creating a real estate photography shot list before arriving at the property. A simple checklist ensures that every important space is photographed and reduces the risk of missing key areas during the shoot.

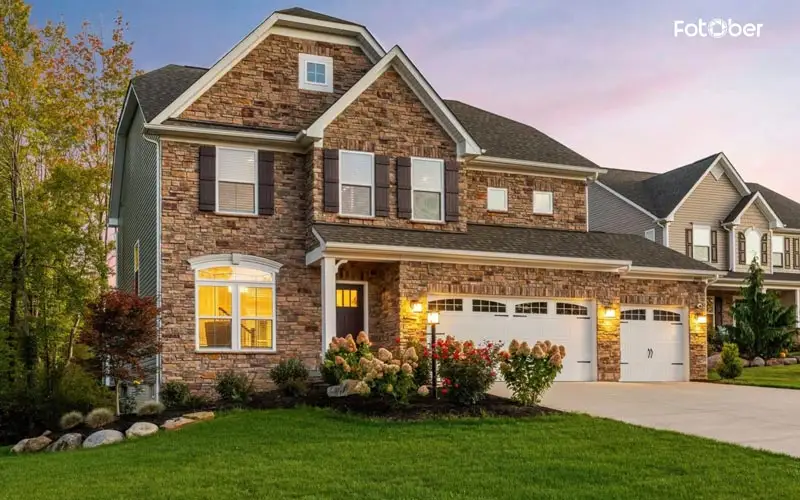
A standard real estate photography checklist usually begins with exterior views of the property. These images introduce the home and establish its curb appeal. Typical exterior shots include:
-
Front of the house
-
Backyard or outdoor living area
-
Driveway or garage entrance
-
Garden or landscaping features
After capturing the exterior, photographers move indoors. Interior images should clearly show the main living areas so viewers can understand the layout of the home. Common interior photos include:
-
Living room
-
Kitchen
-
Bedrooms
-
Bathrooms
-
Dining area
Beyond the main spaces, it’s also helpful to photograph details that add character to the property. These might include architectural features such as built-in storage, fireplaces, decorative staircases, or large windows with attractive views.
Using a structured shot list keeps the workflow consistent from property to property. It helps photographers move through the home more quickly, avoid forgetting important rooms, and reduce the chance of returning for a reshoot later. For beginners following a real estate photography guide, this simple preparation step can make the entire shoot smoother and more professional.
6. Common real estate photography mistakes
Even experienced photographers can run into small technical mistakes that affect the final result of their images. Learning to recognize these issues early can help you improve your workflow and produce more professional listing photos. Many beginners notice these challenges when following their first real estate photography guide, especially when shooting interiors for the first time.
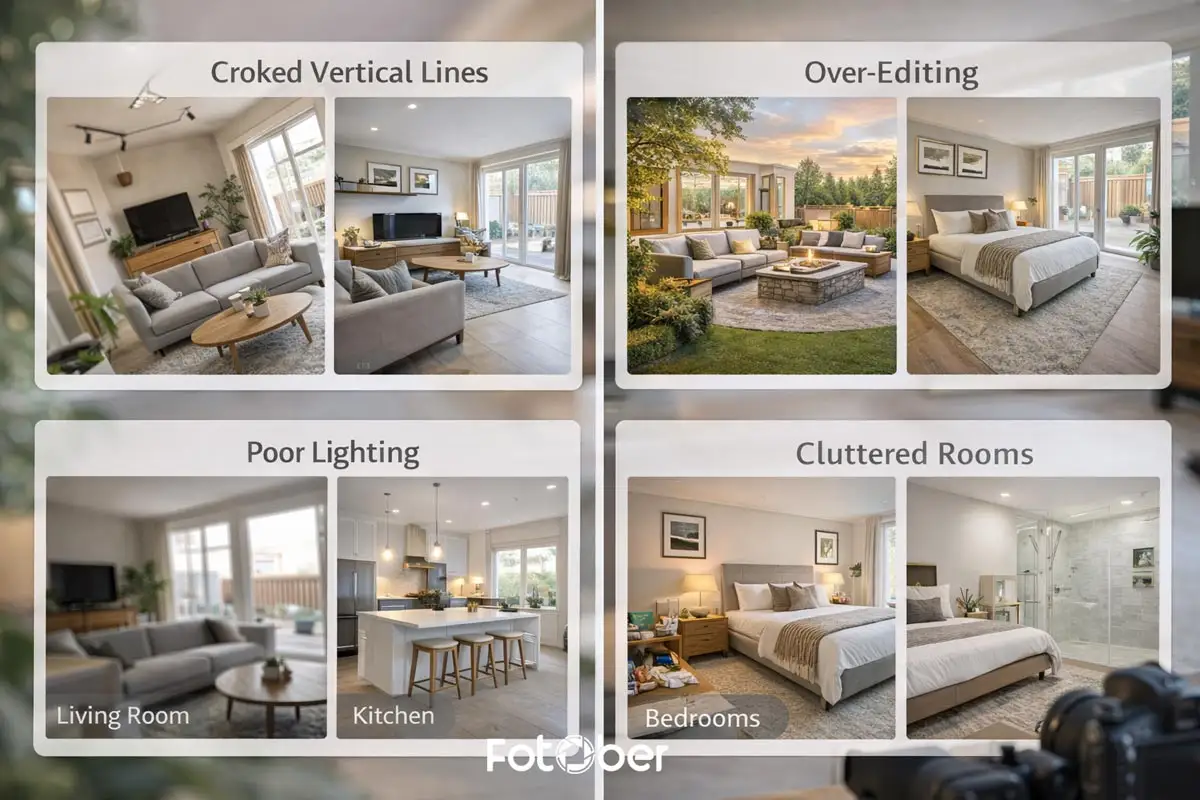
6.1. Crooked vertical lines
One of the most common mistakes in property photography is crooked vertical lines. When the camera tilts too far upward or downward, walls, doors, and windows start to look slanted. This distortion can make a room appear unnatural or poorly photographed. Keeping the camera level and correcting verticals during editing helps maintain a clean, professional look.
6.2. Over-editing
Editing is important, but too much editing can make images look unrealistic. Overusing HDR effects may create photos that feel overly bright, artificial, or “fake.” Buyers want images that accurately represent the property, so the goal should always be natural-looking adjustments rather than dramatic effects.
6.3. Poor lighting
Lighting issues can also weaken an otherwise strong photo. Common problems include dark corners that hide room details or blown-out windows that appear completely white. Balancing exposure during shooting—or correcting it carefully in post-processing—helps create a more balanced image.
6.4. Cluttered rooms
Another frequent problem has nothing to do with the camera itself: clutter. Personal items, messy surfaces, or too many decorative objects can distract from the space. Preparing the room before shooting—tidying surfaces, removing unnecessary items, and simplifying décor—helps the property stand out clearly.
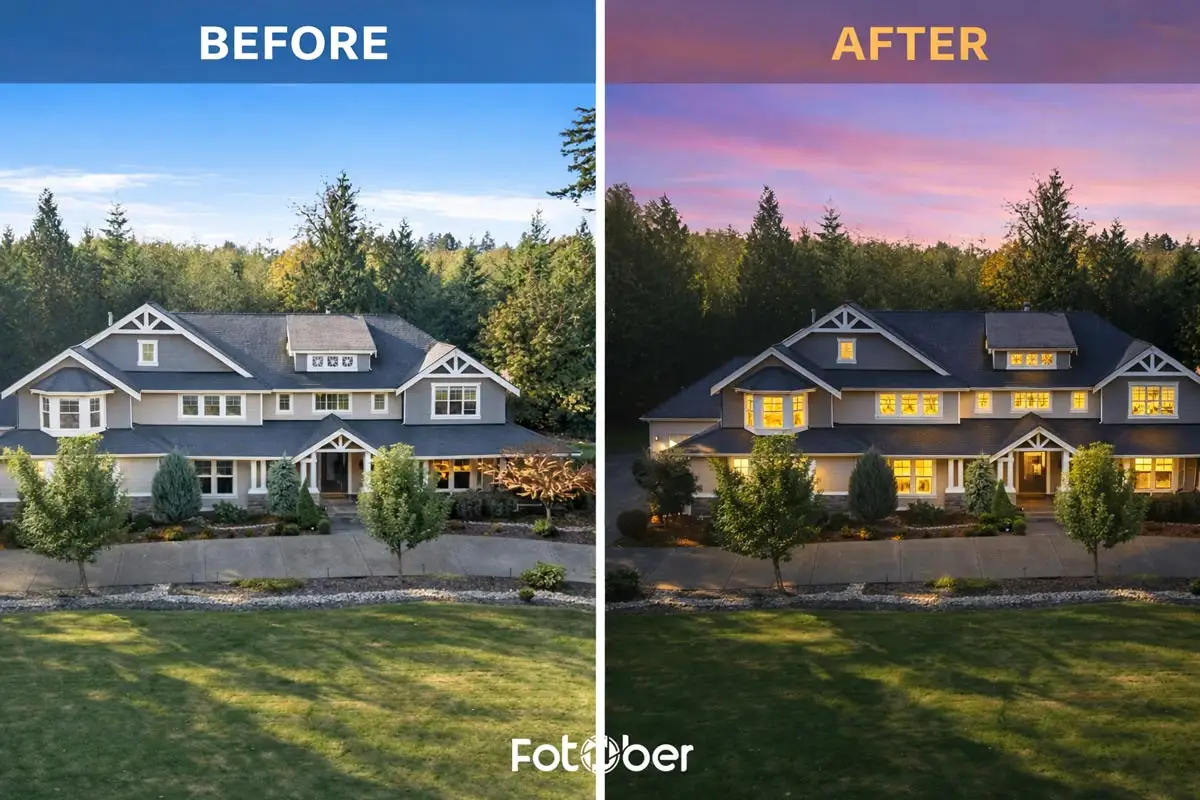
7. Professional real estate photo editing services
Even when the photos are captured correctly, editing can quickly become the most time-consuming part of the process. Tasks like HDR blending, color correction, and object removal often take hours to complete, especially for photographers handling multiple listings each week. That’s why many professionals eventually explore editing support as part of their real estate photography guide workflow.
7.1. The challenge
A typical editing process may involve:
-
HDR blending to balance window light and interior exposure
-
Color correction for natural tones
-
Removing distracting objects from the scene
While these steps improve image quality, they can also slow down delivery times when workloads increase.
7.2. The solution
Fotober provides specialized real estate photo editing services designed for property photographers and agencies. Our team handles the technical post-production work so photographers can focus more on shooting and client relationships.
Services include:
-
Professional real estate photo editing
The benefits
Working with an experienced editing team offers several advantages:
-
Fast turnaround for property listings
-
Consistent image quality across projects
-
MLS-ready photos prepared for marketing platforms
Working with a professional editing team allows photographers to focus on shooting more listings while maintaining high image quality.
8. Conclusion
Creating compelling property images requires more than simply pointing a camera at a room. Successful photographers combine the right equipment, thoughtful composition, effective lighting, and a reliable editing workflow to produce images that truly represent a home.
When these elements work together, listing photos becomes more than documentation—they become a powerful marketing tool. Bright, well-composed images help properties stand out in crowded marketplaces and encourage buyers to explore the listing further.
This real estate photography guide has covered the key foundations needed to improve your workflow and capture more engaging property photos. With consistent practice and attention to detail, photographers can create visuals that not only showcase a home but also help listings attract more attention and generate stronger buyer engagement.
Follow us:
-
Facebook: fotobermedia.co
-
YouTube Channel: Fotober
-
TikTok Channel: @fotober
-
Instagram: fotober_media
-
Email support: [email protected]
-
Hotline: +84 942 110 297
Related posts

Luxury Real Estate Marketing Trends California Agents Love in 2026
July 27, 2026
Reno Real Estate Photography: Top Studios for Selling Homes Faster
July 27, 2026

Las Vegas Virtual Staging: Best Platforms to Enchant Your Listings
July 23, 2026

Best Austin Real Estate Photography Options for Perfect Listing Photos
July 22, 2026
