
How to Remove Unwanted Color Cast in Real Estate Photos for a Clean Look

Share:
Table of Contents
- 1. Why does color cast happen in interior photography?
- 2. How to remove unwanted color cast in real estate photos: Yellow / orange cast
- 3. Fixing blue window tint in real estate photos
- 4. Balancing and correcting mixed lighting interiors
- 5. When color editing in real estate photos requires advanced retouching
- 6. Why you should outsource real estate photo editing
- Conclusion
We are so used to crystal clear real estate photos with perfectly balanced tones from edge to edge. Certainly, nothing ruins a high-end interior shot faster than muddy, unnatural tones. Whether it’s an orange glow from an old lamp or a cold blue tint leaking through a window, learning how to remove unwanted color cast in real estate photos is a fundamental skill for every professional photographer.
Achieving perfect color correction in real estate photography ensures that walls look clean, whites stay crisp, and the home feels inviting rather than dated. In this guide, we’ll explore the science of lighting and provide actionable techniques to restore true-to-life colors to your property images.
1. Why does color cast happen in interior photography?
To master color correction in real estate photography, you first have to understand that your camera doesn’t see the world the same way you do. While the human brain is incredibly efficient at "filtering" light, a process known as chromatic adaptation, a digital sensor simply records the physical wavelengths of light hitting it. This discrepancy is the root cause of every "yellow room" or "blue window" you’ve ever had to fix.
The science of color temperature
Light is measured on the Kelvin scale, which describes its "warmth" or "coolness." In a typical interior shoot, you are rarely dealing with a single light source. Instead, you are battling a collision of different temperatures:
- Tungsten/Incandescent (2,700K - 3,000K): These traditional bulbs produce a heavy orange or yellow glow.
- Daylight/Overcast sky (5,500K - 6,500K): Natural light is significantly cooler, often appearing blue when compared to indoor lighting.
- Fluorescent (4,000K - 5,000K): Often found in kitchens or garages, these can cast a sickly green or magenta tint.
 Understanding of color temperature is the foundation of learning how to remove unwanted color cast in real estate photos
The biological factor vs. digital sensors
When you walk into a sunlit room with the lamps turned on, your brain automatically adjusts so that a white wall looks white. However, a camera must choose a single White Balance setting. If it balances for the indoor lamps, the windows turn neon blue. If it balances for the sunlight, the interior looks like it’s on fire.
Common environmental culprits
Beyond the bulbs themselves, "color bleed" is a major offender. This occurs when light bounces off a saturated surface and carries that color onto neutral areas:
- Exterior foliage: Sunlight bouncing off a lush green lawn can flood a white living room with a subtle green tint.
- Interior features: A bright red accent wall or dark mahogany floors can "stain" white ceilings with warm, muddy tones.
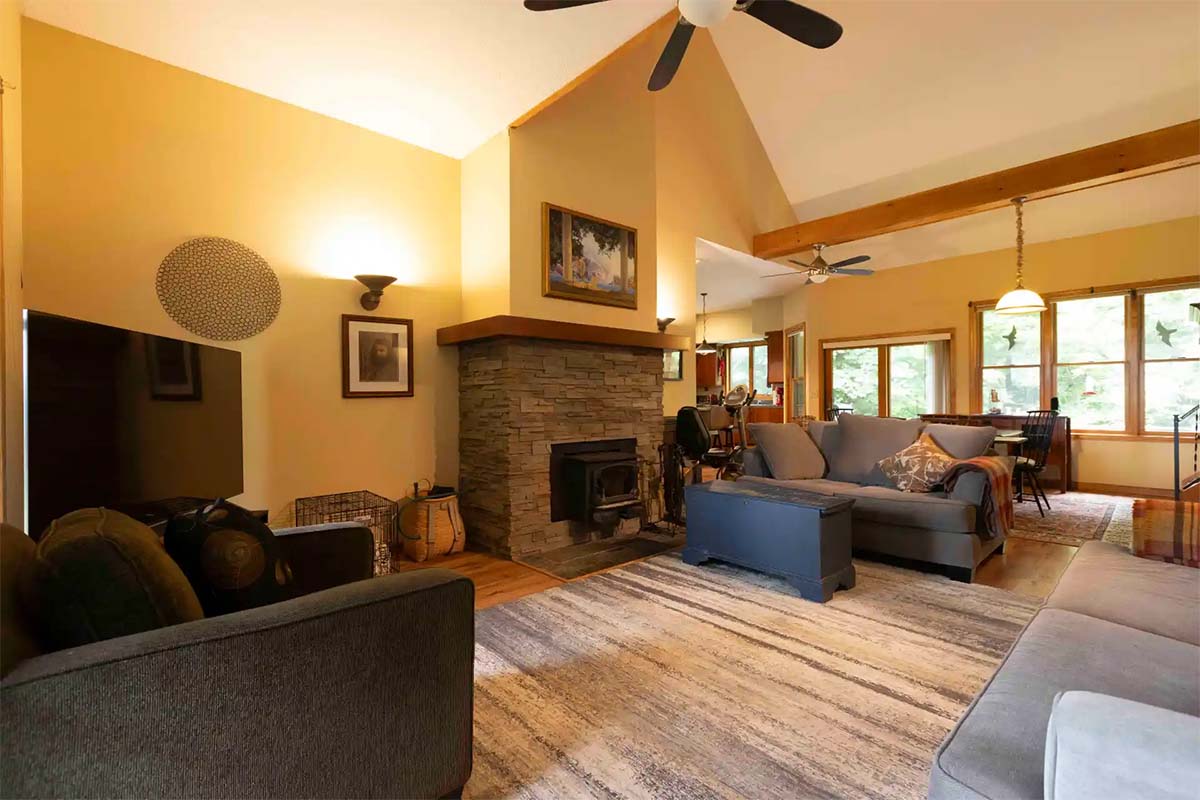
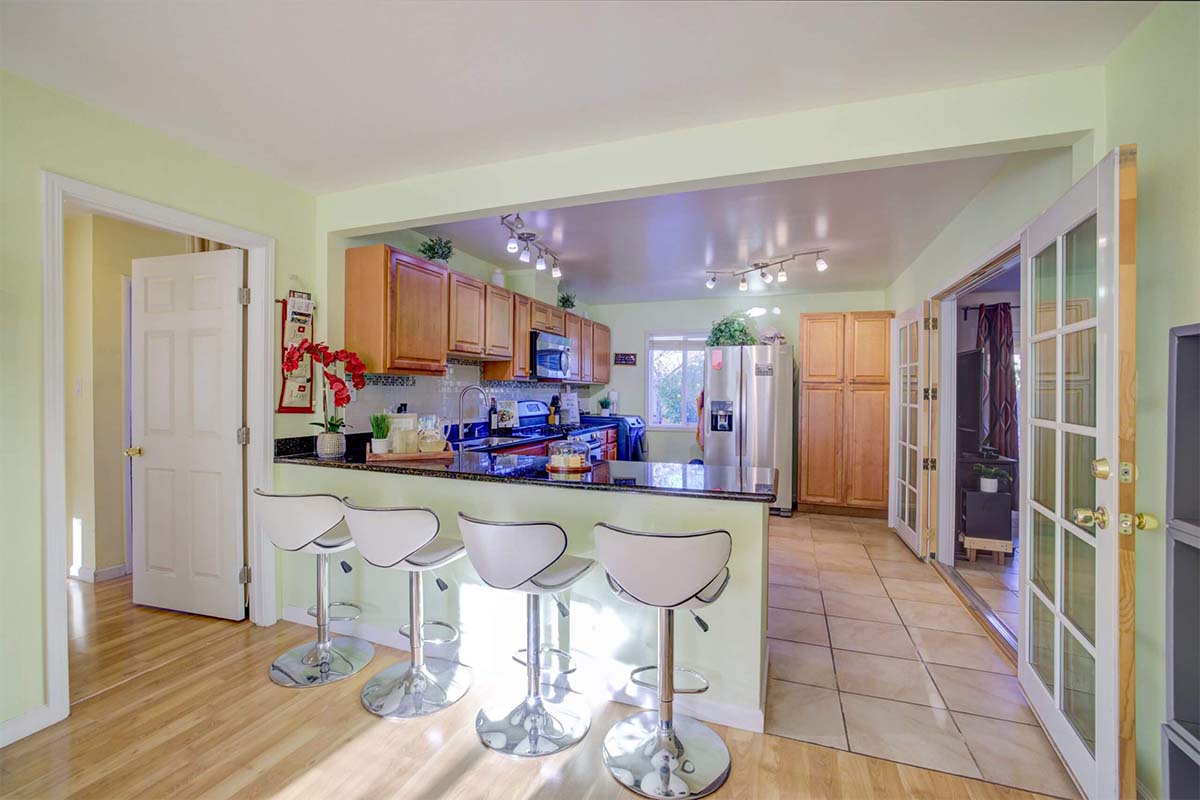
 Sometimes the ambient light overwhelms everything in the frame with obtrusive color casts
2. How to remove unwanted color cast in real estate photos: Yellow / orange cast
One of the most frequent challenges in color correction for real estate photography is dealing with the warm, heavy glow of tungsten or incandescent bulbs. While these lights create a cozy atmosphere in person, they often translate to an unattractive yellow wall cast on camera. This "muddy" look can make a room appear smaller, dimmer, and even unhygienic. To achieve the bright, airy aesthetic that attracts high-end buyers, you must master the art of neutralizing these warm tones.
The global adjustment strategy
Your first line of defense is the White Balance tool in Lightroom or Adobe Camera Raw. Start by using the White Balance Selector (Eyedropper). Click on a neutral area that should be white or light gray, such as a baseboard, a ceiling, or a marble countertop. This will automatically shift the "Temp" slider toward the blue end of the spectrum to counter the orange. While this works for the overall scene, global changes can sometimes make natural wood floors or leather furniture look unnaturally "dead."
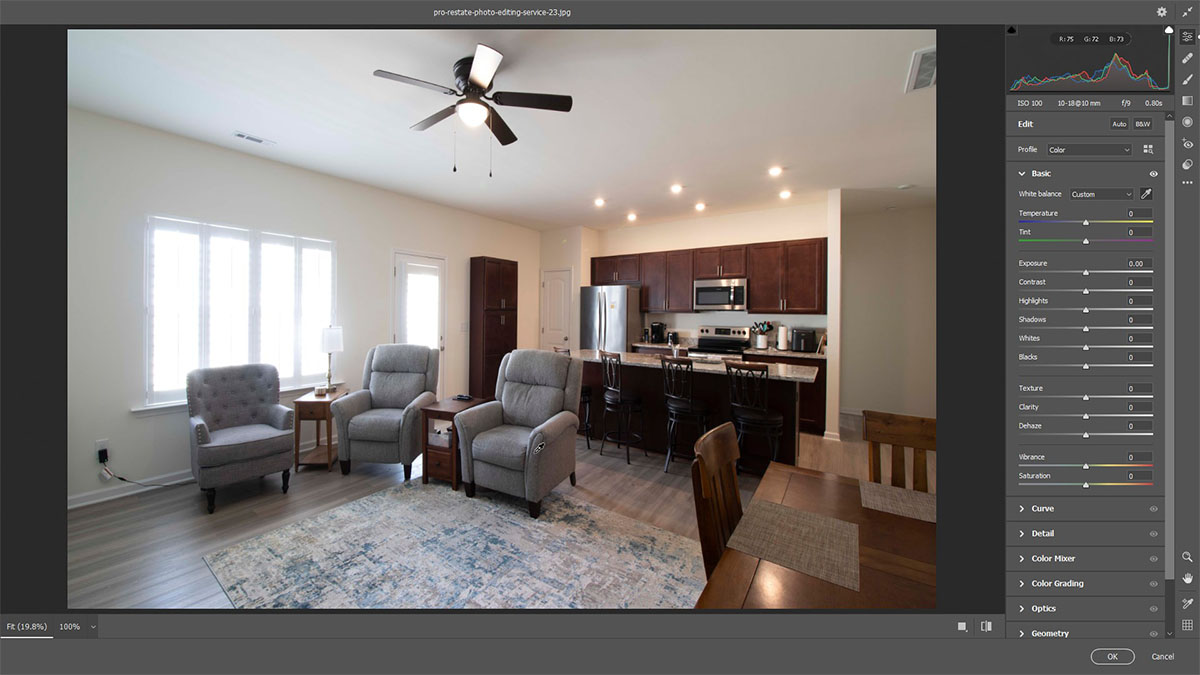 Editors figuring out how to remove unwanted color cast in real estate photos should start with basic white balancing
Targeted fixes via the HSL panel
To specifically remove yellow wall cast without affecting the entire image, the HSL (Hue, Saturation, Luminance) panel is your best friend.
1. Saturation: Locate the Yellow and Orange sliders. Gradually pull them to the left. This "sucks" the unwanted color out of the walls and ceilings.
2. Luminance: Switch to the Luminance tab and increase the sliders for Yellow and Orange. This makes those previously yellowed areas appear brighter and whiter, simulating a clean coat of paint.
The precision of local masking
For rooms with strong "hot spots", like a corner directly hit by a bedside lamp, global and HSL edits might not be enough. Use the Adjustment Brush or Masking tool to "paint" over the specific area. Once masked, you can lower the Saturation and increase the Temperature (adding blue) locally. This ensures the rest of the room stays vibrant while the problematic corner is neutralized.
Pro tip: Aim for "commercial white"
Avoid the temptation to desaturate the yellow to absolute zero. If a room is perfectly neutral, it can feel sterile and uninviting, like a laboratory. Aim for a "warm-white" balance where a hint of the original character remains, ensuring the home still feels "lived-in" and welcoming to potential buyers.
3. Fixing blue window tint in real estate photos
While warm interior lights create yellow casts, the world outside your windows presents the opposite problem. Daylight is naturally "cool," often ranging from 5,500K to over 10,000K on a clear, blue-sky day. When you set your camera’s white balance to neutralize the warm indoor bulbs, the windows often take on a distracting, neon-blue glow. To fix blue window tint effectively, you must balance these two competing light sources without losing the clarity of the view outside.
Why do windows in real estate photos turn blue?
The "smurf window" effect occurs because of the massive temperature gap between your indoor ambient light and the sky. If your room is lit at 3,000K and the sky is 7,000K, that 4,000K difference manifests as a heavy blue or cyan "stain" on the window frames, glass, and even the nearby furniture.
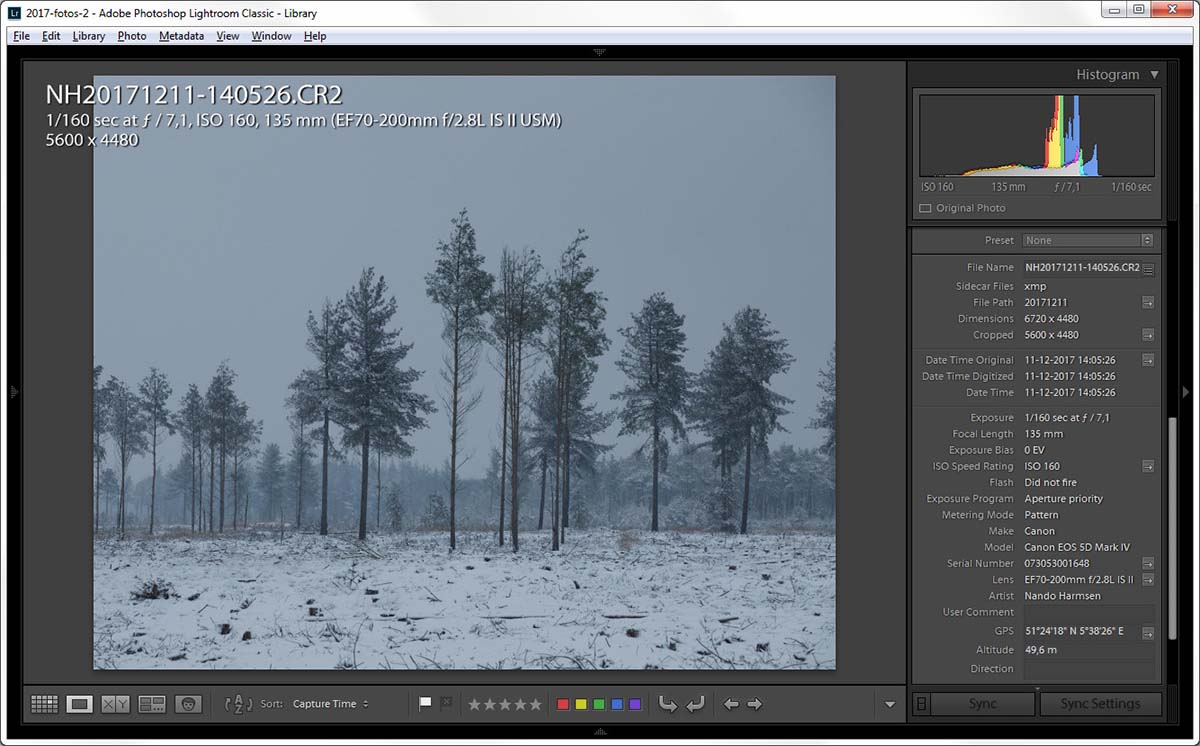
 The difference between the color temperature of indoor light and outdoor light results in a blue color cast
How to remove unwanted color cast in real estate photos with the precision of color range masking
The most efficient way to fix blue window tint in modern editing software like Adobe Lightroom or Camera Raw is through Color Range Masking.
1. Select the Masking tool: Choose "Color Range" from the masking menu.
2. Sample the blue tint: Use the eyedropper to click on the bluest part of the window.
3. Refine the selection: Use the "Refine" slider to ensure you are only selecting the blue light and not the blue sky itself (unless the sky is unnaturally saturated).
4. Counter-balance: Once the mask is active, move the Temp slider toward the Yellow (warm) side. This adds warmth specifically to the window area, neutralizing the blue. You may also need to slightly decrease the Saturation or Moisic to pull out stubborn cyan tones.
The Flambient advantage
If you want to reduce the need for heavy post-processing, many professionals use the "Flambient" (Flash + Ambient) technique. By "popping" a powerful flash inside the room, you raise the interior light temperature closer to that of the outdoor daylight (5,500K). This narrows the gap between the two light sources, making the windows look much more natural straight out of the camera.
Preserving the "money shot"
The goal isn't just to remove the blue, but to ensure the view remains crisp. High-end buyers want to see the backyard or the city skyline. By targeting only the color cast rather than lowering the exposure of the entire window, you maintain a professional, high-contrast look that sells the property.
4. Balancing and correcting mixed lighting interiors
In the world of professional editing, the ability to correct mixed lighting interior scenes is often considered the "final boss" level of color correction. Mixed lighting occurs when two or more light sources with vastly different color temperatures compete for dominance in a single room. The most common scenario involves a room flooded with cool, blue light from a large window (6,000K) on one side, while warm, orange tungsten lamps (2,700K) illuminate the other.
If you are learning how to remove unwanted color cast in real estate photos, you might have encountered this situation: When you white balance for the lamps, the window side turns neon blue. When you balance for the window, the lamps turn the interior into a fiery orange mess. To create a professional, "true-to-life" image, you must harmonize these extremes.
The proactive fix: The gray card
Even if you can do wonders in post-production, the best way to tackle mixed lighting is by using a gray card during the shoot. By placing a neutral gray card in the center of the room and taking a reference shot, you provide your software with a mathematically "neutral" anchor. In post-production, clicking on this card with the White Balance eyedropper gives you a balanced starting point, even if it doesn't solve the entire problem immediately.
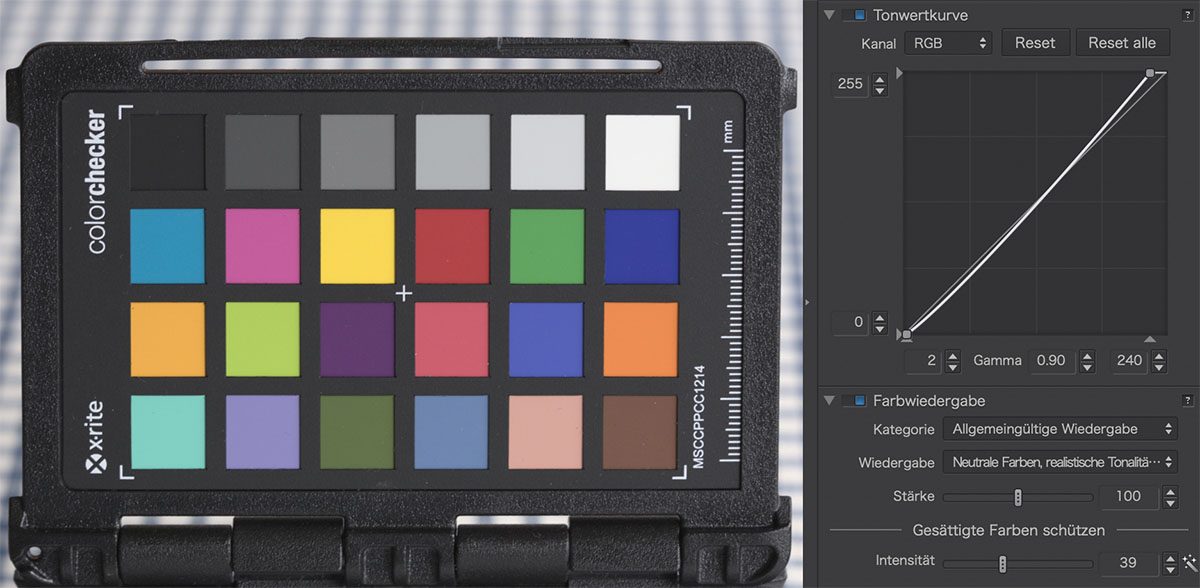 A gray card should be a commercial photographer’s friend
The gradient filter approach (Lightroom)
For rooms where the light transition is linear, meaning it gets progressively warmer as you move away from a window, the Linear Gradient tool is your best friend.
1. Identify the Temperature Gap: Determine which side of the room is "incorrect."
2. Apply the Gradient: Drag a gradient from the blue window toward the center of the room.
3. Counter-adjust: Slowly move the Temperature slider toward yellow to warm up the blue light fall-off. Conversely, apply a second gradient from the lamps toward the center, shifting the Temperature toward blue to cool down the orange glow.
Advanced layer masking (Photoshop)
When the lighting is too complex for simple gradients (e.g., multiple lamps scattered around a room), you must move to Photoshop for layer masking.
- The 2-exposure blend: Create two versions of the same RAW file. Balance one perfectly for the windows and the other perfectly for the interior walls. Stack them as layers in Photoshop.
- Selective painting: Use a soft, low-opacity brush to "paint in" the correct colors from each layer.
- The "Color" blend mode: A secret weapon for editors is creating a new layer, setting its blend mode to "Color," and sampling a clean, white area of the wall. You can then paint this neutral color over the areas "stained" by mixed lighting to unify the room's palette without losing the underlying texture and shadows.
5. When color editing in real estate photos requires advanced retouching
So you’ve basically known how to remove unwanted color cast in real estate photos. However, standard sliders in Lightroom have their limits. When basic adjustments fail to produce a clean image, you’ve entered the territory of advanced color correction in real estate photography. The most common reason for this is "color bleed", a phenomenon where highly saturated surfaces, such as a vibrant red rug or dark mahogany floors, reflect their hue onto neutral surfaces like white walls or ceilings.
In these scenarios, global HSL shifts are ineffective because they would desaturate the rug itself, not just the "stain" on the wall. Advanced editors turn to Frequency Separation in Photoshop. By splitting the image into a high-frequency (texture) and low-frequency (color) layer, an editor can brush over the color "stain" on the low-frequency layer without blurring the fine details of the wall's texture. This ensures the wall looks repainted rather than "photoshopped."
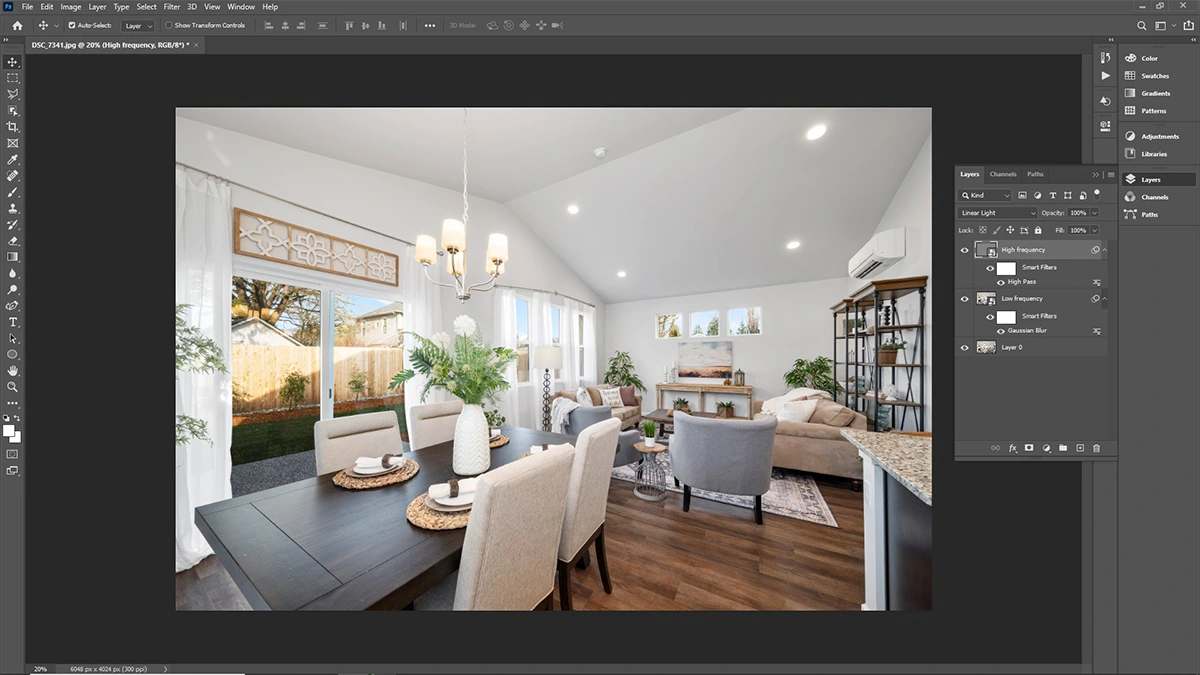 There are many techniques to zone in on the problematic spots and leave the rest of the photo untouched
Another advanced technique involves manual color matching. By using the Eyedropper tool to sample a "clean" white area and painting over the cast using a layer set to the "Color" blend mode, retouchers can surgically remove a specific color or muddy tones.
In extreme cases, where light has "burnt" a specific hue into the pixels, it may be necessary to replace elements entirely. This involves masking out a ceiling or a specific corner and replacing it with a clean texture plate or using the Clone Stamp tool to replicate a neutral surface from elsewhere in the room. These high-end retouching steps are what separate standard real estate photos from the "hero" shots found in luxury architectural magazines.
6. Why you should outsource real estate photo editing
Real estate photography is a high-volume business where time is quite literally money. While knowing how to remove unwanted color cast in real estate photos is an essential skill, performing these detailed edits for every single image can quickly become a bottleneck that limits your business's growth. This is why the decision to outsource real estate photo editing has become a strategic standard for the industry’s top-producing photographers. By shifting the tedious hours of "painting out" yellow casts and masking blue windows to a dedicated team, you free yourself to focus on what truly generates revenue: booking more shoots and building relationships with agents.
Why choose Fotober?
When it comes to selecting a reliable editing partner, Fotober stands out as a premier choice for professionals globally. Unlike general photo editors, Fotober specializes in the high-stakes nuances of real estate imagery. Their team deeply understands the specific challenges discussed in this guide, from balancing complex mixed lighting to surgically removing stubborn color bleed from high-end interiors.
 Dedicated photo editing services can consistently bring the cleanest look to your real estate photos
By partnering with Fotober, you benefit from:
- Rapid 24-hour turnaround: Meet the aggressive deadlines of the real estate market without the stress of "all-nighter" editing sessions.
- Consistent artistic quality: Every photo undergoes a rigorous quality control process, ensuring your white balance, exposure, and color accuracy remain uniform across your entire portfolio.
- Scalability for growth: Whether you have one listing or twenty in a single week, Fotober’s large team of expert retouchers can handle the volume effortlessly. Fotober employs the latest tools like Photoshop AI Remove Background to speed up the workflow while maintaining accuracy with every edit.
- Advanced retouching expertise: Beyond basic color correction, they offer specialized services like "Day-to-Dusk" conversion, 3D rendering, and virtual staging, giving your brand a luxury edge.
Ultimately, working with Fotober isn't just about hiring an editor; it’s about gaining a dedicated production department. This partnership ensures your images consistently pop on the MLS, helping you secure higher commissions and maintain a reputation for excellence.
Conclusion
Mastering the ability to remove unwanted color cast in real estate photos is the hallmark of a professional photographer. By understanding the science of color temperature and applying targeted fixes for yellow wall casts and blue window tints, you transform cluttered, muddy images into clean, high-end listings. Whether you choose to refine how to remove unwanted color cast in real estate photos yourself or leverage the expertise of a partner like Fotober, the goal remains the same: delivering consistent, true-to-life visuals. In today’s competitive market, color-accurate photography is the key to capturing buyer attention and securing premium commissions.
Don’t let complex color casts slow down your business. Let Fotober’s expert editors handle the heavy lifting while you focus on booking your next shoot. From flawless color correction to luxury "Day-to-Dusk" conversions, we deliver pixel-perfect results with a 24-hour turnaround.
Follow us on social media to explore more practical techniques in real estate photo editing and up-to-date details of our services!
- Facebook: fotobermedia.co
- YouTube: Fotober
- TikTok: @fotober
- Instagram: fotober_media.
Related posts

Las Vegas Virtual Staging: Best Platforms to Enchant Your Listings
July 23, 2026

Best Austin Real Estate Photography Options for Perfect Listing Photos
July 22, 2026
Best Aperture for Real Estate Photography: The Range for Sharp Photos
July 18, 2026

Short-Term Rental Photography: Shoot & Edit Photos That Gain Bookings
July 17, 2026
