
How to Become a Real Estate Photographer: Full Career Guide 2025
.png)

Share:
Table of Contents
- What Does a Real Estate Photographer Do?
- Step 1: Learn the Basics of Real Estate Photography
- Step 2: Gather the Right Equipment
- Step 3: Build Your Real Estate Photography Portfolio
- Step 4: Develop Your Brand and Set Competitive Rates
- Step 5: Enhance Your Skills with Advanced Techniques
- Step 6: Master Photo Editing and Workflow Efficiency
- Step 7: Market Your Real Estate Photography Business
- Why Choose Fotober's Real Estate Photo Editing Service?
- Conclusion
- FAQ for "How to Become a Real Estate Photographer"
Step 1: Learn the Basics of Real Estate Photography
Industry data shows that successful professionals spend at least 3–6 months mastering fundamental skills before going pro. Learning how to become a real estate photographer involves understanding manual camera settings to ensure consistent image quality across challenging environments. Technical knowledge is essential to overcome difficult situations like bright windows and dark interiors.
Essential Technical Skills
Mastering proper exposure control is the foundation. Professional real estate photographers emphasize practicing these basics consistently:
- Manual Mode Operation: Full control over your camera is non-negotiable.
- Aperture Control: Typically set between f/8 to f/11 for maximum sharpness (depth of field) throughout the room.
- ISO Management: Keep the ISO low (100–400 ideal) to minimize digital noise.
- White Balance Settings: Learn to use custom or fixed White Balance to ensure color consistency across all photos.
Mastering both natural and artificial lighting is essential for professional real estate photography editing. In fact, many photographers underestimate the workload involved. This leads to one of the common real estate photography misconceptions: that shooting is the hardest part—when editing often takes more time. Natural light works best during golden hours-typically two hours after sunrise or just before sunset.
Mastering Lighting and Exposure
Shooting is often less time-consuming than editing—a common misconception in the field. Balancing light is key to great images:
- Ambient Light: Use natural light during golden hours (just after sunrise or before sunset) for exteriors.
- Artificial Light: Fotober recommends turning on all interior lights to create warmth and depth. Use flash bouncing techniques to fill shadows without creating harsh reflections.
- Exposure Control: Master bracketing (taking multiple exposures) to handle high-contrast scenes effectively.
Composition and Angles
Proper camera angles and strong composition make spaces appear larger, more inviting, and professional.
- Camera Height: Shoot most photos from doorways or corners at chest height (around 5 feet) for a natural, balanced perspective.
- Keep Level: Always use a tripod and ensure your camera is perfectly level to avoid distorted vertical lines (walls must be straight).
- The Three-Wall Rule: Always try to include three walls in the frame to clearly show room depth and scale.
- Staging: Remove personal items and clutter before shooting. Position furniture to create clear pathways, guiding the viewer’s eye naturally and showcasing the room's potential.
By learning these basics and applying key real estate photography techniques, you’ll be well on your way to learning how to become a successful real estate photographer.
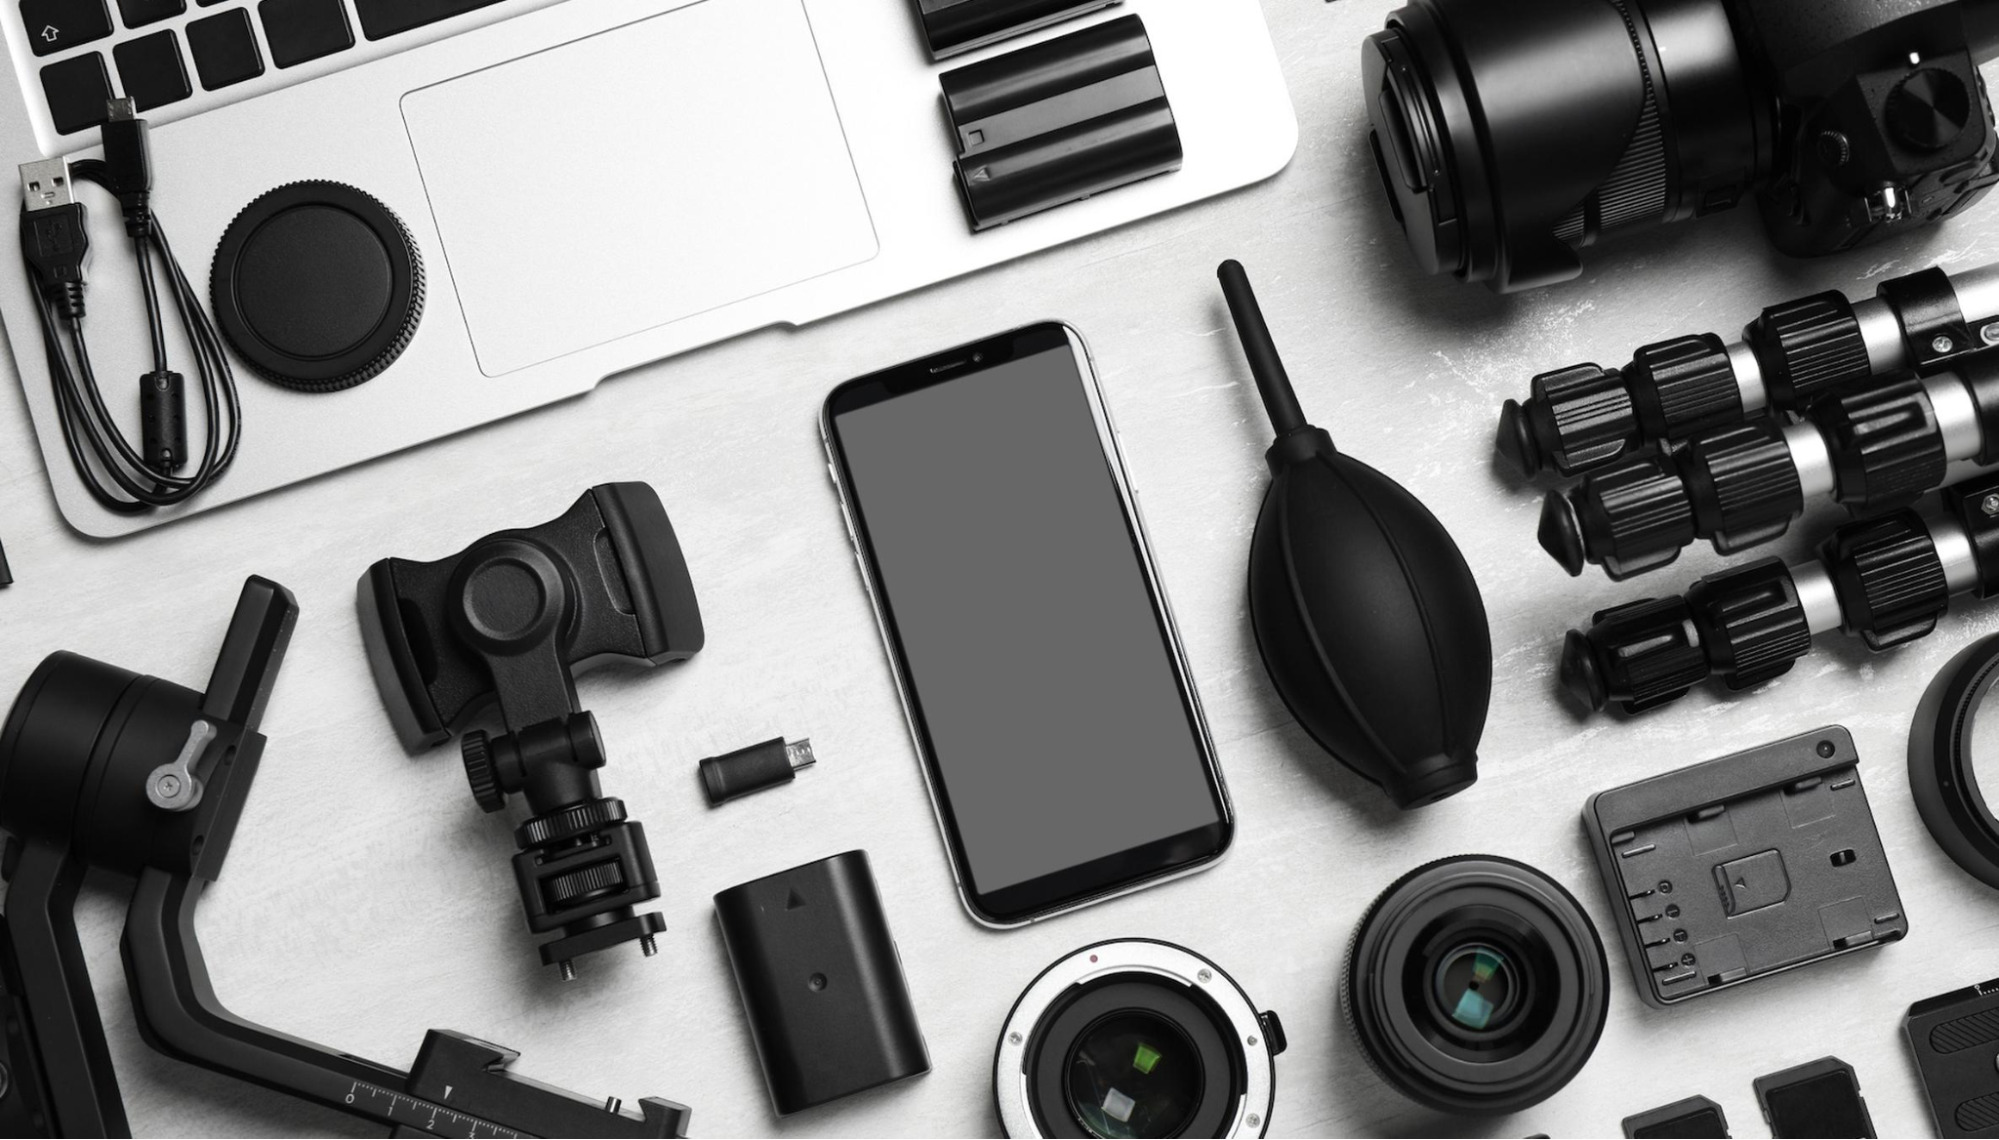
Step 2: Gather the Right Equipment
Understanding how to become a real estate photographer necessitates a smart investment in gear. According to industry data, equipment investments typically range from $2,000 to $5,000 for a complete starter kit. Investing in quality gear pays for itself quickly, as market research shows photographers with professional equipment can charge 40% higher rates.
Essential Camera Gear Requirements
A quality camera setup is the foundation for creating stunning images:
- Camera Body: A full-frame sensor is preferred as it offers better low-light performance and wider angle capabilities. Look for high ISO performance, good dynamic range, and a built-in level indicator.
- Must-Have Lenses:
- Wide-angle zoom (16-35mm is ideal) to capture spacious interiors.
- Standard zoom (24-70mm) for versatility and detail shots.
- A prime lens for close-up detail shots (if budget allows).
- Lenses should have minimal distortion to ensure straight lines.
Lighting and Stability Tools
These tools are crucial for managing mixed lighting and executing techniques like HDR:
- Sturdy Tripod: Essential for maintaining consistent angles and enabling low-shutter-speed HDR techniques.
- Lighting: External flash units, light stands, flash triggers, and diffusers/modifiers are needed to control indoor light.
- Remote Triggers: Highly recommended to prevent camera shake during longer exposures.
- Outdoor Gear: A circular polarizing filter helps manage reflections and enhance sky colors for vivid exterior shots.
For indoor photography, specific equipment is needed to manage mixed lighting conditions. A sturdy tripod is essential for maintaining consistent angles and enabling HDR techniques. Remote triggers are also recommended to prevent camera shake during longer exposures. Professionals suggest having backup equipment to avoid problems on critical shoots. For those entering this space, understanding real estate photography laws—such as drone licensing, property permissions, and copyright—is essential to operating a compliant business.
Outdoor real estate photography requires weather-resistant gear and different lighting strategies. A circular polarizing filter can help manage reflections and enhance sky colors, making your shots more vivid. As commercial real estate photography pricing continues to increase with demand for drone and aerial content, investing in advanced gear becomes even more rewarding.
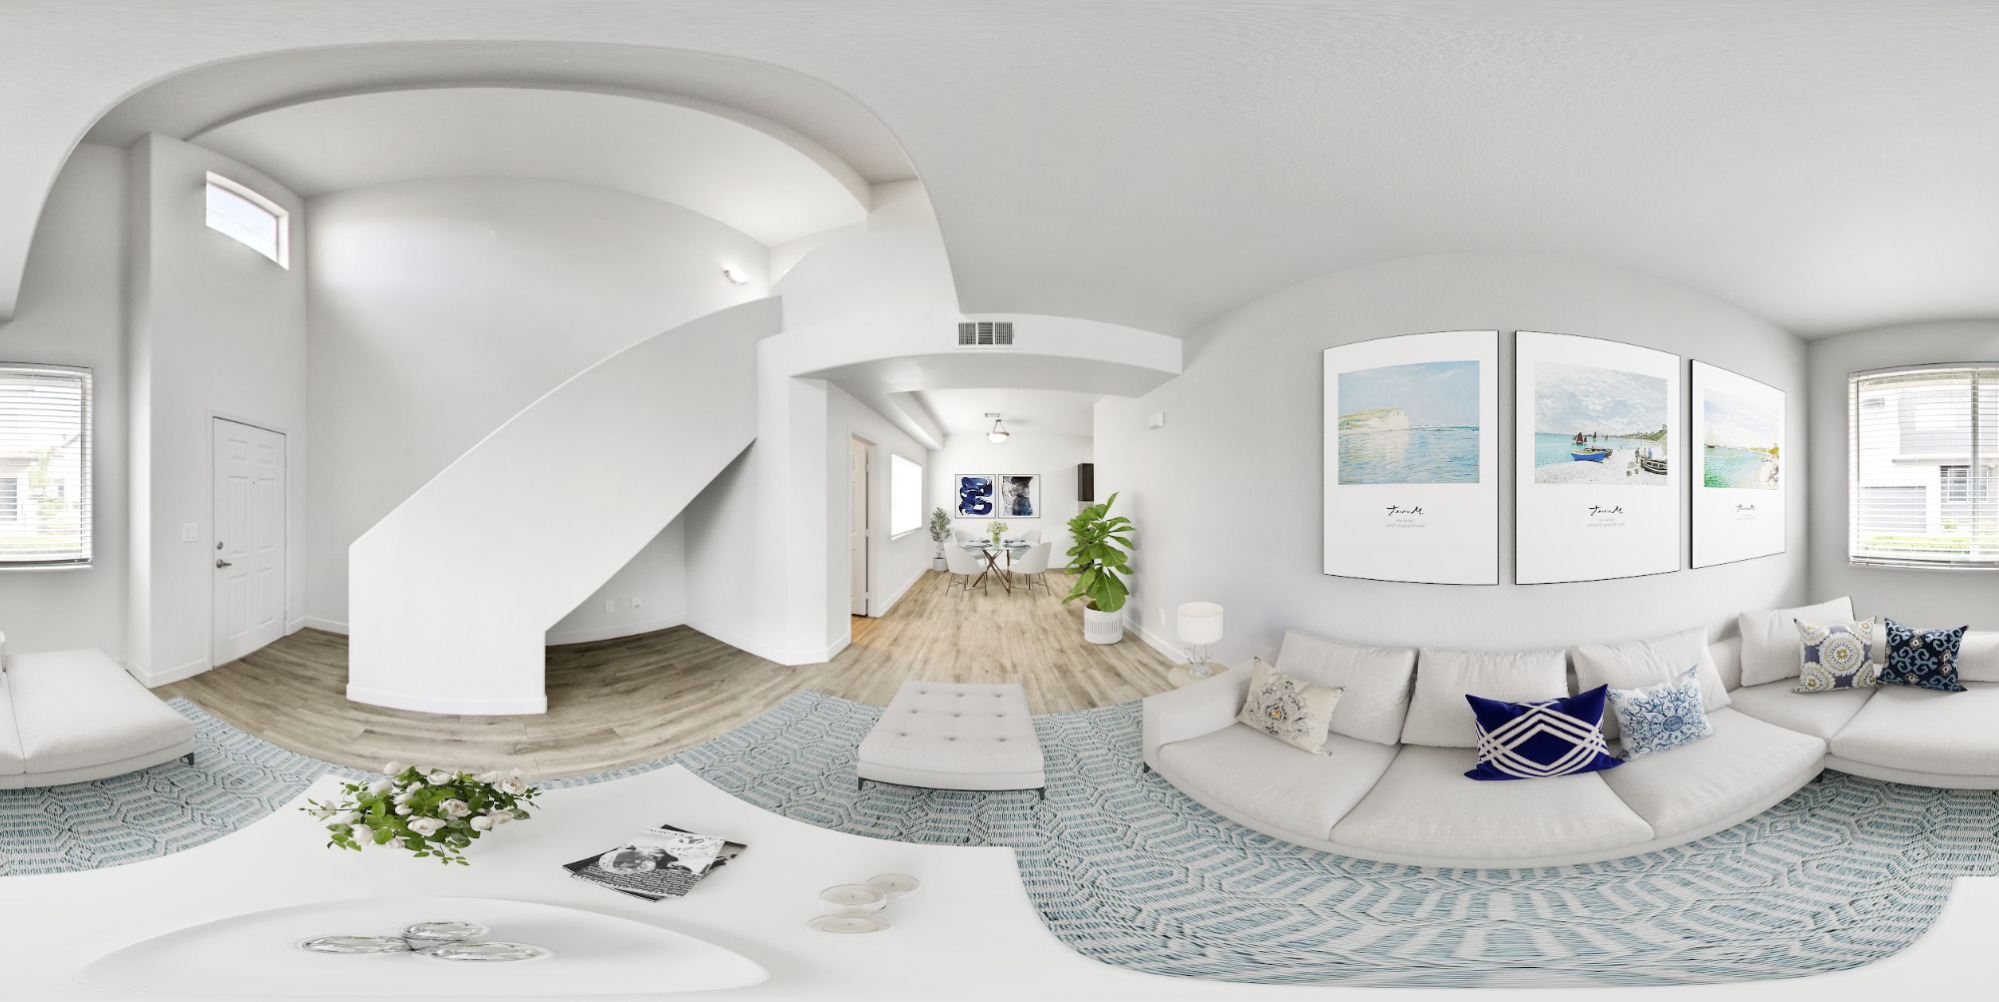
For photographers looking to expand their services, understanding Real Estate 360 Photography Pricing is also essential—this high-demand niche allows you to offer immersive experiences that help listings stand out in crowded markets.
By investing in the right real estate photography equipment, you'll be well on your way to creating stunning, high-quality images that attract potential buyers and elevate your business.
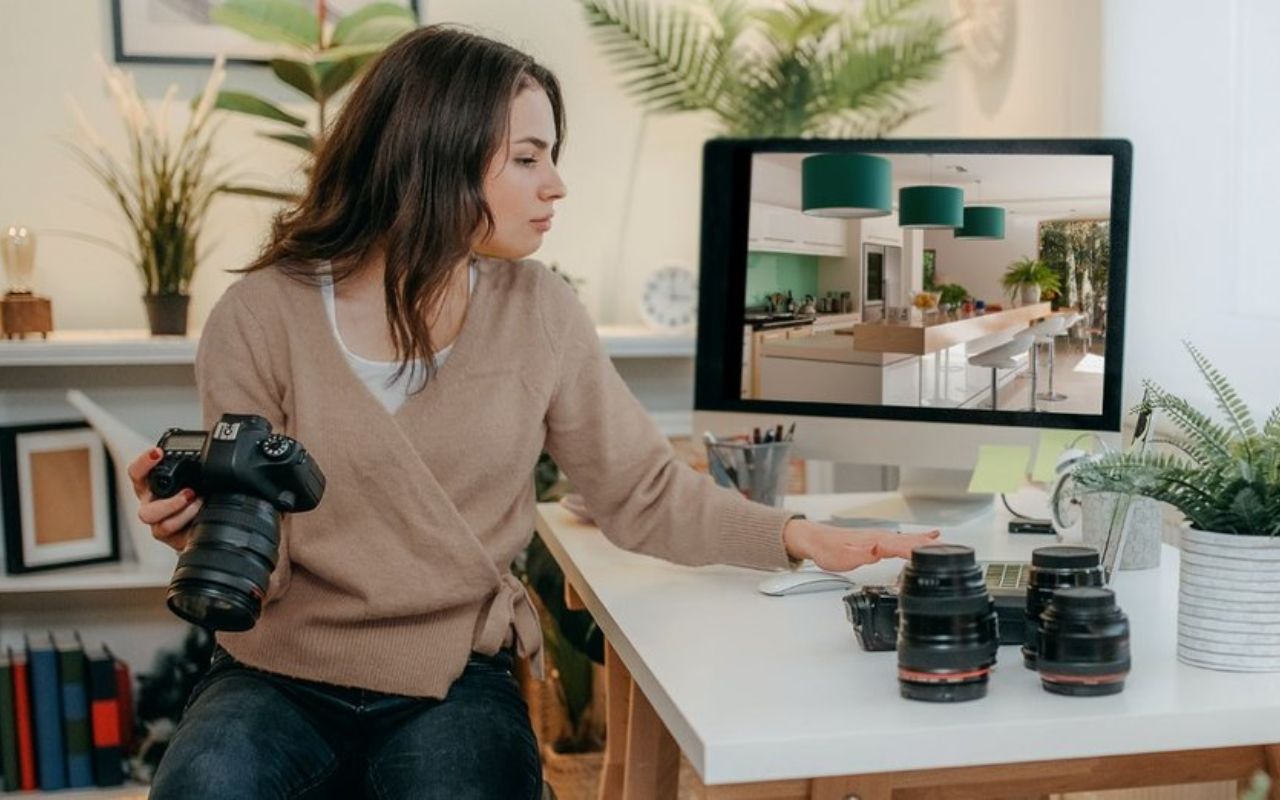
Step 3: Build Your Real Estate Photography Portfolio
Statistics show that photographers with strong portfolios secure 75% more clients in their first year. Building a diverse portfolio is crucial for attracting potential clients in the competitive real estate market. If you're wondering how to become a real estate photographer, showcasing a well-rounded portfolio is key. New photographers should aim to photograph at least 10-15 different properties to demonstrate versatility. Market research indicates that real estate agents are more likely to hire photographers who can showcase experience with various property types.
Create strategic opportunities to build your portfolio through different channels. Offer free or discounted shoots to local real estate agents who regularly list properties. Reach out to property management companies handling multiple rental units for consistent work opportunities. Focus on capturing a variety of homes, from small apartments to luxury properties, to show your range and appeal to a broader client base.
Local networking can lead to valuable portfolio opportunities:
- Real estate agencies
- Property managers
- Home builders
- Interior designers
Professional approaches for building content:
- Document various property styles
- Capture different room types
- Show exterior and interior skills
- Include twilight shots
Creating a strong online presence is essential in today’s digital-first market. Research shows that 92% of clients check photographers' websites before making contact. Your portfolio website should load quickly and be easy to navigate on all devices. This matters especially if you’re offering services that justify your average cost of real estate photography, where clear presentation and perceived value strongly impact bookings.
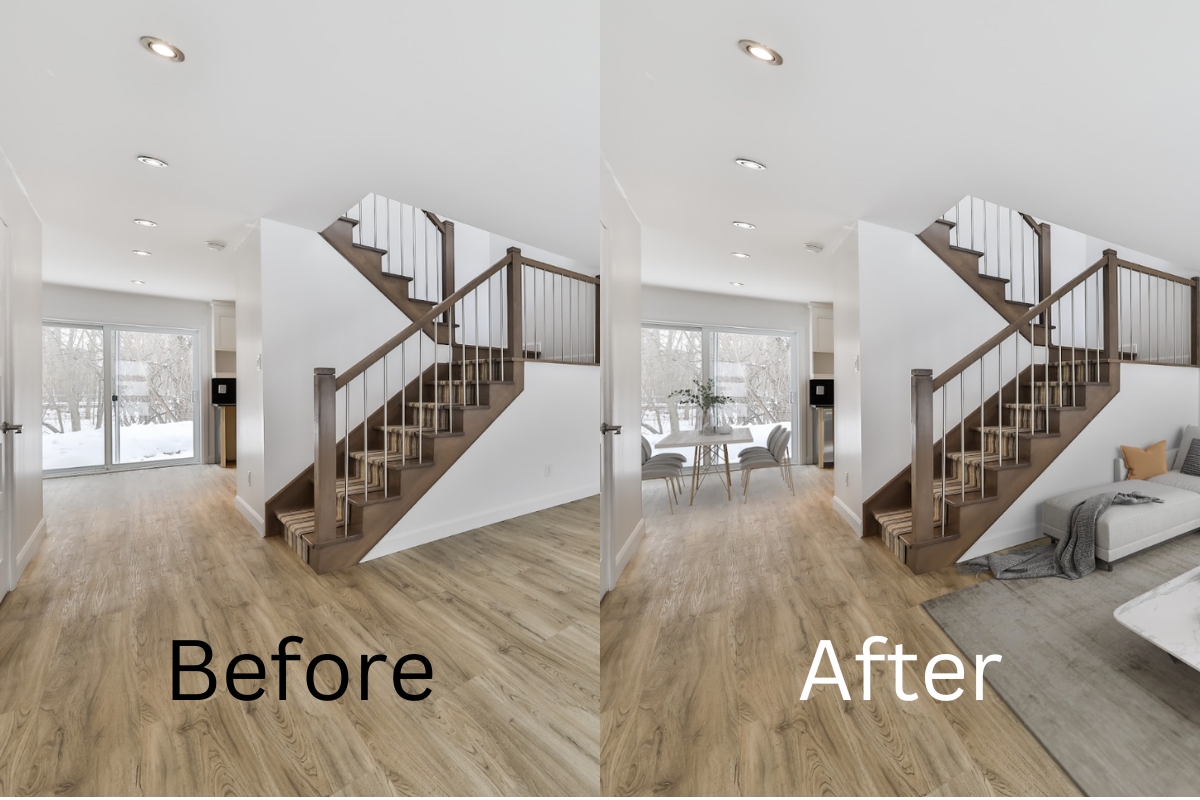
Organize your portfolio to highlight different photography skills and property types. Include detailed information about your shooting and editing process for transparency. Consider adding before-and-after examples to demonstrate your ability to handle challenging situations and to show the true impact of your work. Make sure your contact information is prominently displayed on every page.
Your online portfolio should include:
- Property type categories
- Technical specifications
- Pricing information
- Client testimonials
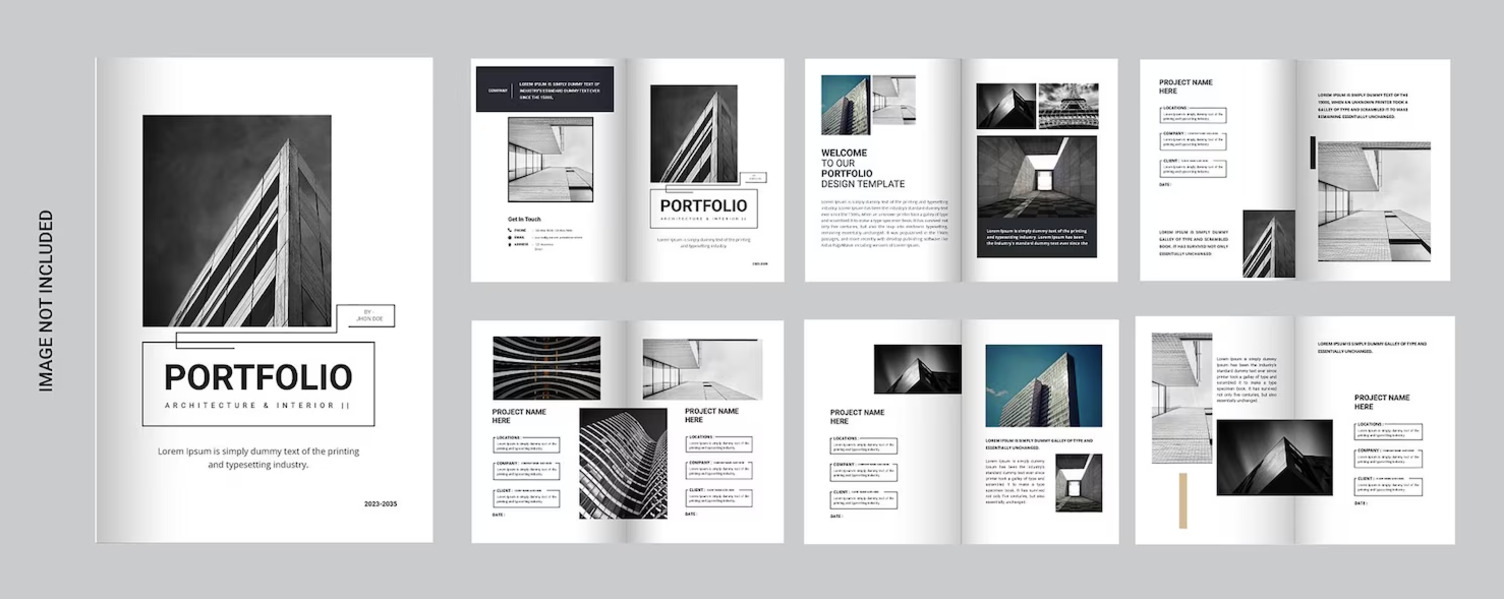
While online portfolios are essential, print portfolios remain valuable for in-person meetings and networking events. Create a professional presentation book using high-quality paper and printing. Include examples of different property types and lighting situations you've mastered. Having both digital and print versions of your work can accommodate different client preferences.
Successful portfolio presentation requires:
- Logical image sequence
- Consistent image quality
- Clear descriptions
- Contact information
Step 4: Develop Your Brand and Set Competitive Rates
Market research reveals that real estate photographers with professional websites attract 65% more inquiries than those without. Your website should act as a powerful marketing tool, showcasing your portfolio, services, and pricing in a clean, professional layout. Strong branding not only justifies higher rates but also helps attract more serious clients. A well-designed website functions as your 24/7 marketing resource.
Essential website elements include:
- Mobile-responsive design
- Fast-loading galleries
- Clear service packages
- Easy contact forms
Your brand identity should reflect your professional approach and resonate with your target market. Include a professional headshot and a compelling "About" section to build trust. Share your photography process and highlight what sets your services apart from others. Adding a blog to share tips can also help establish your expertise in real estate photography.
Industry surveys show that real estate photographers charge between $200-$800 per property, depending on location and experience. To set competitive rates, research local market rates by analyzing competitors and interviewing real estate agents. Consider offering package deals that include specialized services, such as twilight shots or drone photography. Keep track of your time and expenses to ensure profitability. If you're wondering how much to charge for real estate photos, start by researching local competitors and the types of services they offer in each pricing tier. Clear pricing gives you flexibility to scale and helps clients understand your value.
To build trust and boost conversion, consider sharing real estate photography quotes from past clients on your website or social channels. Testimonials are a powerful form of social proof.
You might also consider offering a realtor branding photoshoot to your clients. This is a great upsell that gives real estate agents professional headshots and lifestyle images for their marketing while keeping you top-of-mind for future listings.
Create clear pricing tiers based on property size and service level:
Basic Package ($200-300)
- 15-25 photos
- Standard processing
- 24-48 hour delivery
- Basic sizing/formats
Premium Package ($300-500)
- 25-40 photos
- Advanced editing
- Same-day delivery
- Multiple formats
Luxury Package ($500+)
- Unlimited photos
- Drone shots
- Twilight photos
- Virtual staging
Successful pricing strategies require regular market analysis and periodic adjustments. Monitor your conversion rates at various price points to find the optimal pricing for your services. You can also adjust pricing seasonally during peak real estate months. Be sure to factor in travel time, editing time, and equipment costs when setting rates to maintain profitability.
By mastering how to develop your brand and set competitive rates, you can position yourself as a sought-after real estate photographer in your market, delivering high-quality services that attract more clients and increase revenue.
Step 5: Enhance Your Skills with Advanced Techniques
Drone photography has become increasingly important in real estate, with 73% of high-end real estate listings now featuring aerial shots. To legally operate a drone for commercial purposes, obtaining your FAA Part 107 certification is essential. Professional drone equipment typically costs between $1,000 and $2,500. Marketing data shows that properties with aerial photos sell 68% faster than those without, making drone photography a valuable asset for real estate professionals.
Legal requirements for drone photography:
- FAA Part 107 certification
- Drone registration
- Insurance coverage
- Flight planning permits
Another growing trend in real estate marketing is 3D virtual tours. Investing in 3D camera equipment like Matterport, which ranges from $3,000 to $4,500, allows buyers to explore properties remotely, reducing unnecessary in-person showings. Listings with virtual tours receive 87% more views than those without, making it an essential tool for any real estate photographer.
Virtual staging has revolutionized empty property marketing, offering a cost-effective alternative to traditional staging-typically costing 90% less. To make the most of virtual staging, it's important to capture rooms with proper angles and lighting. Professional virtual staging software or services generally cost between $30-60 per room. Research shows that virtually staged properties sell 75% faster than empty spaces, further highlighting the impact of this technique.
Video walkthroughs require additional skills and equipment:
- Gimbal stabilizer
- Professional microphone
- LED lighting kit
- Slider for smooth moves
Real estate walkthrough video editing are also gaining traction in real estate marketing. To create smooth and professional-looking walkthroughs, you'll need additional equipment such as a gimbal stabilizer, professional microphone, LED lighting kit, and a slider for smooth movements. These tools are essential for producing high-quality video content that engages potential buyers and enhances your listings.
As your business grows, it's worth understanding how much do real estate photographers make based on experience, niche, and services offered. This knowledge will help you set realistic income goals and track profitability.
To keep your skills sharp and stay inspired, follow behind-the-scenes blogs and vlogs that offer insight inside real estate photography—covering everything from lighting setups to client communication strategies.
By mastering these advanced techniques, you'll elevate your skills as a real estate photographer and stay ahead in a competitive market. Whether through drone photography, 3D virtual tours, virtual staging, or video walkthroughs, incorporating these strategies will help you deliver exceptional results for your clients.
Step 6: Master Photo Editing and Workflow Efficiency
Professional studies show that post-processing typically takes 15-20 minutes per photo for quality real estate photography results. Understanding color correction, exposure blending, and perspective correction is crucial for producing high-quality real estate photos. Top real estate photographers spend 30-40% of their time on post-processing work. Efficient editing workflows help maintain quick turnaround times without sacrificing quality.
Essential editing skills include:
Basic Adjustments
- Exposure balancing
- Color correction
- Lens distortion fixes
- Vertical alignment
Advanced Techniques
- HDR blending
- Sky replacement
- Window masking
- Flash compositing
Industry standards show that 85% of professional real estate photographers use Adobe Lightroom and Photoshop for editing. Creating consistent editing presets can reduce processing time by up to 50%. Regular software updates and training help photographers stay current with industry trends, ensuring their photo editing skills remain sharp and efficient. If you want to photoshop real estate photos professionally, mastering layers and masking in this software suite is essential. Additionally, cloud backup solutions ensure client files remain safe and accessible.
If you're publishing your work online, it's also essential to learn how to protect your photos from being copied. Watermarking, metadata, and copyright registration are all tools to secure your digital assets.
Professional editing workflow requires:
- Photo management tools
- RAW processors
- HDR software
- Batch processing apps
Working with professional editing services like Fotober can significantly improve workflow efficiency. Outsourcing editing typically costs $2-5 per photo but saves hours of processing time. Many successful photographers combine in-house editing for basic adjustments with outsourced processing for complex edits. This hybrid approach ensures high-quality results while maximizing shooting time and improving overall workflow efficiency.
Step 7: Market Your Real Estate Photography Business
Success statistics show that 70% of a real estate photography business comes from repeat clients and referrals. To grow your business, it’s crucial to understand how to market real estate photography effectively—through social media, referral programs, workshops, and in-person networking. Attend local real estate events and join professional associations to build valuable connections. Schedule regular meetings with top-performing agents in your area and create referral programs that reward agents for bringing new business.

Effective networking strategies include:
- Attend broker opens
- Join real estate groups
- Offer agent workshops
- Create email newsletters
Professional presentation materials help maintain contact with potential clients. Develop case studies showing how your real estate photography improves property listings. Share statistics demonstrating faster sale times with high-quality real estate photos. Consistent follow-up with past clients helps secure repeat business and strengthen relationships.
Social media strategy (content calendar) should include:
- Before/after examples
- Property highlights
- Photography tips
- Client testimonials
Sharing "before-and-after" examples that demonstrate your mastery in post-production is highly effective. You can create social media content showing exactly how you photoshop real estate photos to transform a simple image into a stunning listing visual. Success in online marketing requires consistency and engagement. Respond promptly to comments and messages across all platforms. Share client success stories and feature standout properties regularly. Consider paid advertising on platforms where your target clients spend the most time to boost visibility and attract new business.
Many beginners also ask: do real estate agents pay for photography? The answer often depends on the region and business model—some agents pay out of pocket, while others pass the cost on to sellers or include it in a marketing package.
By using these strategies and applying the right marketing tactics, you can establish yourself as a go-to professional in real estate photography, driving growth and building long-lasting relationships with clients.
Why Choose Fotober's Real Estate Photo Editing Service?
After learning how to become a real estate photographer, you quickly realize that professional photo editing can consume up to 75% of your working time. This is where Fotober's specialized editing service becomes your most valuable partner. We help photographers focus on booking more shoots and mastering their craft while ensuring every image is delivered with consistent, high-quality results.
By outsourcing post-production to us, you can significantly increase your booking capacity—professional editing services can boost a photographer's business by $40\%$. Our team processes thousands of real estate photos daily with guaranteed fast turnaround times.
Our core editing services, designed to make your portfolio shine, include:
- Color Correction and White Balance adjustment.
- Sky Replacement (perfect skies every time).
- Virtual Twilight creation (high-value, high-demand shots).
- HDR Blending and Flambient post-processing.
- Perspective correction and decluttering.
By partnering with Fotober, you're not just outsourcing; you're scaling your business efficiently.
Conclusion
Building a successful career in real estate photography takes dedication, skill development, and solid business practices. Every expert started as a beginner, so focus on mastering the fundamentals and refining your craft. With consistent effort and support from Fotober - professional editing services, you can create a standout real estate photography portfolio and reach a stable income level within your first year in the business.
FAQ for "How to Become a Real Estate Photographer"
1. What does a real estate photographer do?
A real estate photographer captures interior and exterior images of properties for sale or rent, helping listings stand out and attract potential buyers.2. How much do real estate photographers make?
Income varies by experience and location, but on average, real estate photographers make between $40,000–$90,000 per year, with high earners exceeding $100K.3. What equipment do I need to start real estate photography?
At minimum, you need a DSLR or mirrorless camera, wide-angle lens, tripod, and editing software. Optional but helpful: flash, drone, and gimbal.4. Do I need a license to become a real estate photographer?
No license is needed to shoot photos, but you’ll need an FAA Part 107 certification if you plan to use a drone commercially.5. How do I build a real estate photography portfolio with no experience?
Start by shooting your own home or volunteering to shoot for friends, family, or local agents. Focus on variety and consistent image quality.6. Do real estate agents pay for photography services?
Yes, most agents pay photographers directly or include the cost in their marketing budget. Some teams may also cover the cost for multiple listings.7. Can I outsource photo editing to save time?
Absolutely. Many real estate photographers outsource editing to services like Fotober to ensure fast turnaround and consistent, high-quality results.
Related posts

Double Your Booking: Airbnb Photography Tips for World Cup Host Cities
July 15, 2026
The Legacy of Sam Neill Real Estate: Vineyard & His Private Sanctuary
July 14, 2026

World Cup 2026 Host City Real Estate: Overview & Marketing Strategies
July 13, 2026
Most Common Photography Mistakes California Realtors Should Avoid
July 10, 2026
