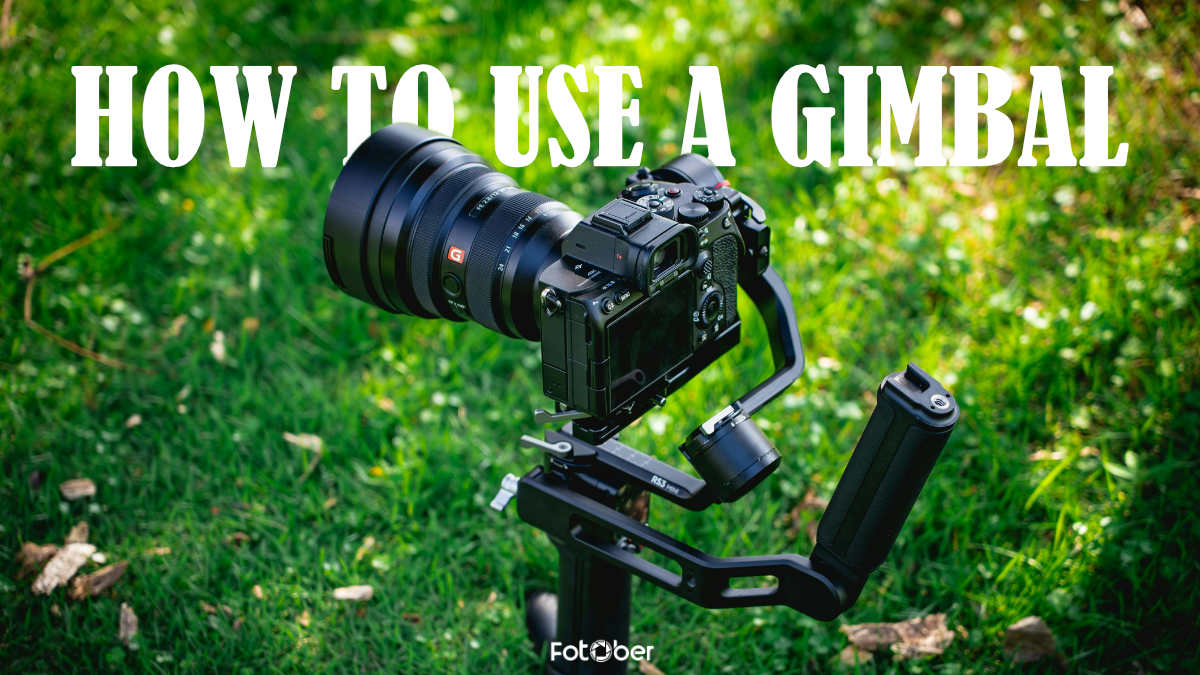
How to Use a Gimbal: Step-by-Step Guide for Smooth, Cinematic Footage

Share:
Table of Contents
- 1. Setup & preparation: How to balance a gimbal
- 2. The fundamentals: How to use a gimbal for real estate
- 3. Eradicating the "Z-axis bounce": The gimbal Ninja walk technique
- 4. Advanced techniques: Cinematic gimbal movements for real estate
- 5. Common mistakes when learning how to use a gimbal
- 6. Why does editing still matter when you know how to use a gimbal
- 7. Conclusion
Nothing ruins a million-dollar listing faster than shaky, amateurish handheld footage that instantly distracts potential buyers. To capture the true elegance and flow of a property, professional videographers rely on a crucial tool: the gimbal. When mastered, this stabilizer transforms erratic camera shakes into buttery-smooth, cinematic walkthroughs. This guide will teach you exactly how to use a gimbal and balance it, master the ninja walk, and execute flawless camera movements that sell homes faster.
Quick steps to keep in mind:
- Balance your camera
- Turn on & calibrate
- Choose the right mode
- Hold it properly
- Move slowly and smoothly.
1. Setup & preparation: How to balance a gimbal
Before you even think about hitting the power button on a property shoot, you must master how to balance a gimbal. Many beginners learning how to use a gimbal commit the blasphemy of turning on the device while it is unbalanced, relying entirely on the heavy-duty motors to force stability. This bad habit severely drains your battery halfway through a luxury tour, introduces micro-shakes, and risks permanent motor burnout. True mechanical balance ensures fluid micro-movements when transitioning through tight layout spaces like narrow hallways or compact walk-in closets.
To achieve perfect calibration, keep the gimbal powered off, unlock one axis at a time, and follow this precise sequence:
1. Step 1: The Tilt axis:
Mount your camera facing forward. First, point the lens straight up at the ceiling and adjust the vertical arm until the camera stays pointing upward. Next, level the lens forward and slide the quick-release baseplate backward or forward until the camera remains perfectly still without dipping.
2. Step 2: The Roll axis:
Unlock the roll axis while keeping the tilt locked. Loosen the roll arm knob and slide the entire arm left or right. Your camera is balanced when it stays perfectly horizontal like a spirit level, without tilting to either side when you let go.
3. Step 3: The Pan axis:
Finally, unlock the pan axis. Lift the gimbal by its handle and tilt the entire setup forward at a 45-degree angle. Adjust the pan arm slide forward or backward until the camera remains completely stationary and does not swing or rotate on its own.
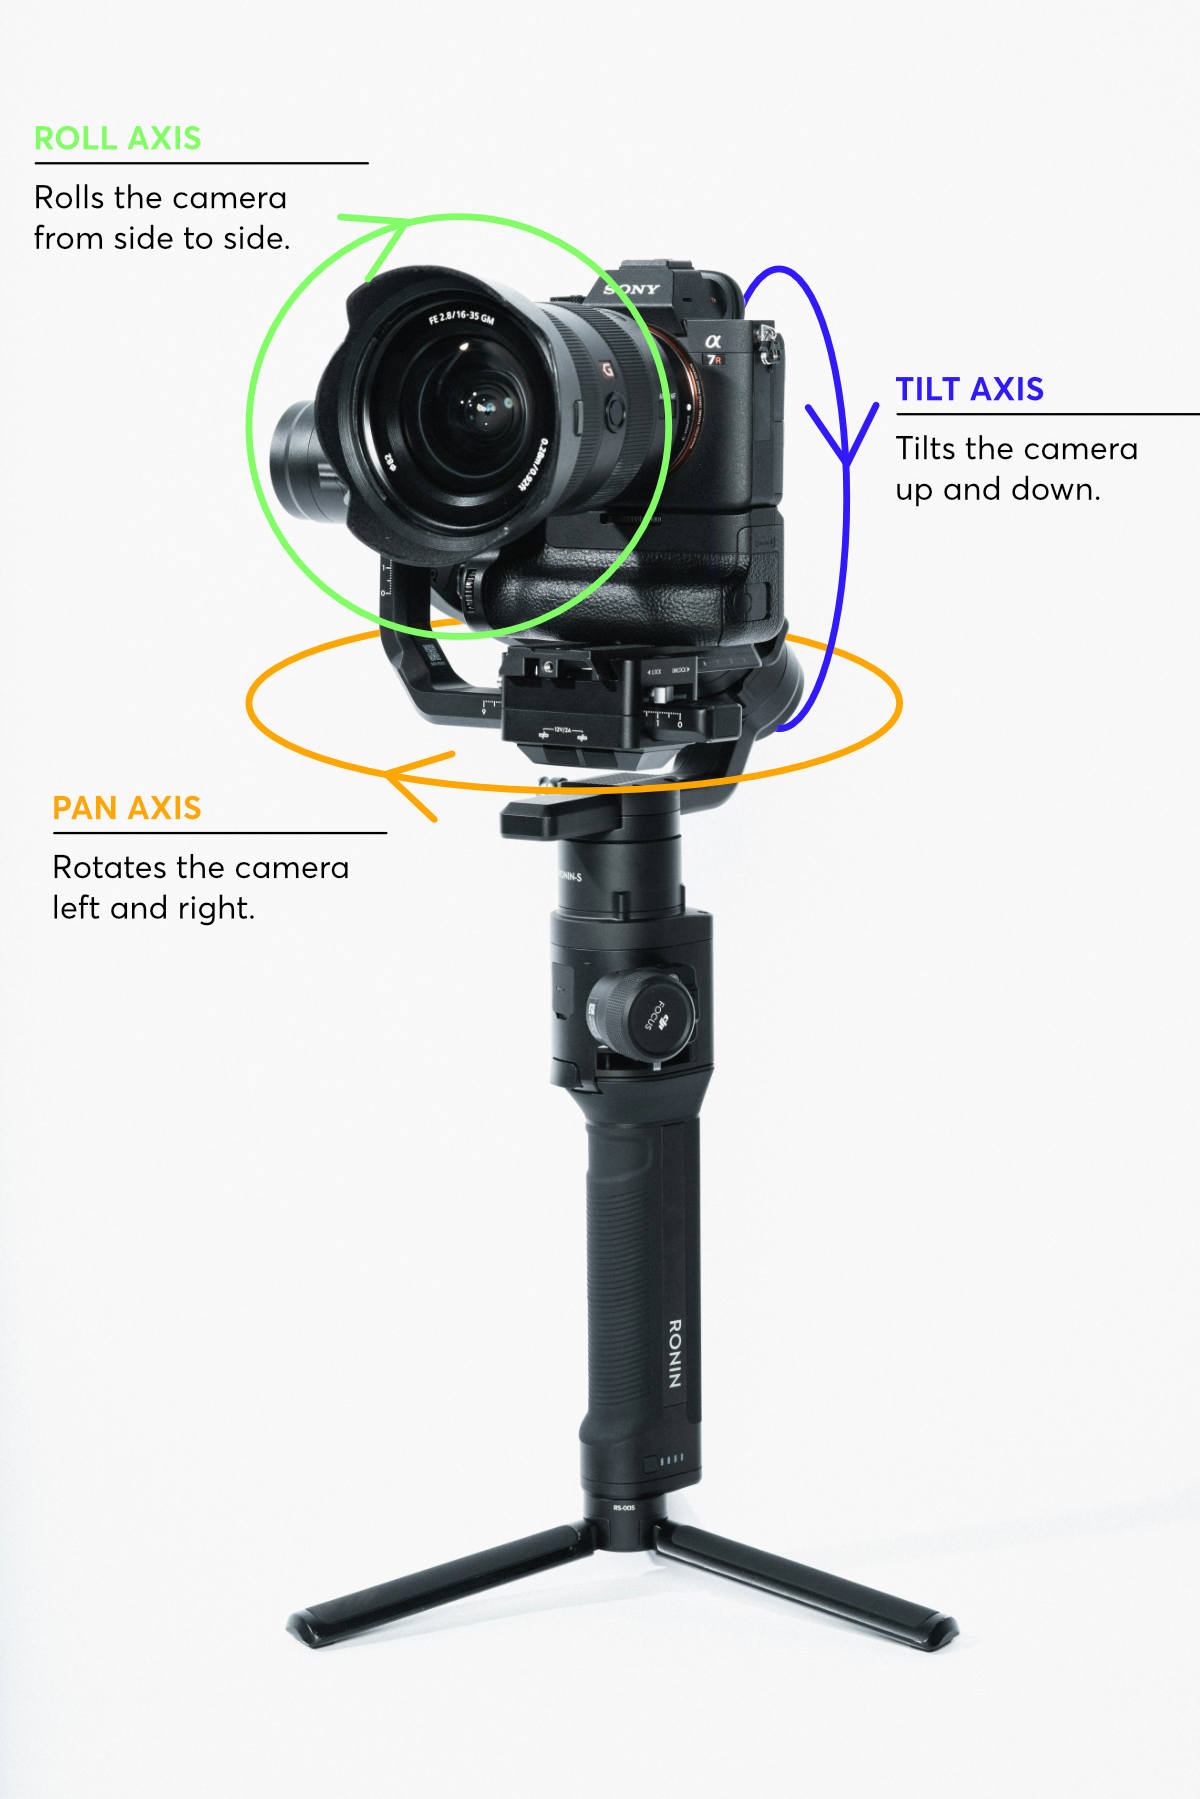 Calibrate the 3 axes of the gimbal to keep your camera balanced properly.
Pro Tip: Always balance your setup in its exact shooting configuration. Remove the lens cap, insert the battery and memory card, and flip out your LCD screen. Even a minor weight shift from an open screen can strain your motors and ruin your cinematic flow.
2. The fundamentals: How to use a gimbal for real estate
Knowing how to use a gimbal goes far beyond just turning it on and walking through a house. To create a seamless, high-end property tour, you must understand how your stabilizer interacts with the layout. This starts with selecting the right gimbal mode for each specific room.
2.1. Essential gimbal modes for property tours
- Pan Follow (PF): This is your bread and butter. The gimbal keeps the horizon perfectly level but smoothly follows your left-to-right panning movements. It is ideal for sweeping across open-concept living rooms or scanning a spacious backyard.
- Lock Mode (L): In this mode, the camera points in one fixed direction regardless of how you move the handle. It is the perfect choice for pushing straight down long hallways or capturing clean, geometric lines without accidental panning.
- POV / All-Follow Mode: While tempting, this mode should generally be avoided for traditional real estate tours. It tilts and rolls with your wrist movements, which easily disorients buyers and breaks the professional, architectural feel of the listing.
 Know your gimbal modes so you can apply them in suitable use cases.
2.2. The real estate camera settings checklist
A great gimbal setup is nothing without proper camera calibration. Before shooting, ensure your camera settings match these real estate standards to maximize clarity and depth:
|
Setting |
Recommended configuration |
Purpose |
|
Lens choice |
16-35mm wide-angle (full-frame equivalent) |
Captures small bedrooms and makes spaces look grand without extreme fisheye distortion. |
|
Frame rate |
60 FPS |
Allows you to slow down the footage in post-production to smooth out minor pacing issues. |
|
Aperture |
f/4 to f/5.6 |
Keeps the entire room, from the foreground kitchen island to the background view, tack-sharp. Avoid wide apertures like f/2.8 as they lack the necessary depth of field for architectural spaces. |
By mastering these fundamental modes and settings, you ensure your mirrorless camera behaves predictably, giving you complete creative control over the property's visual narrative.
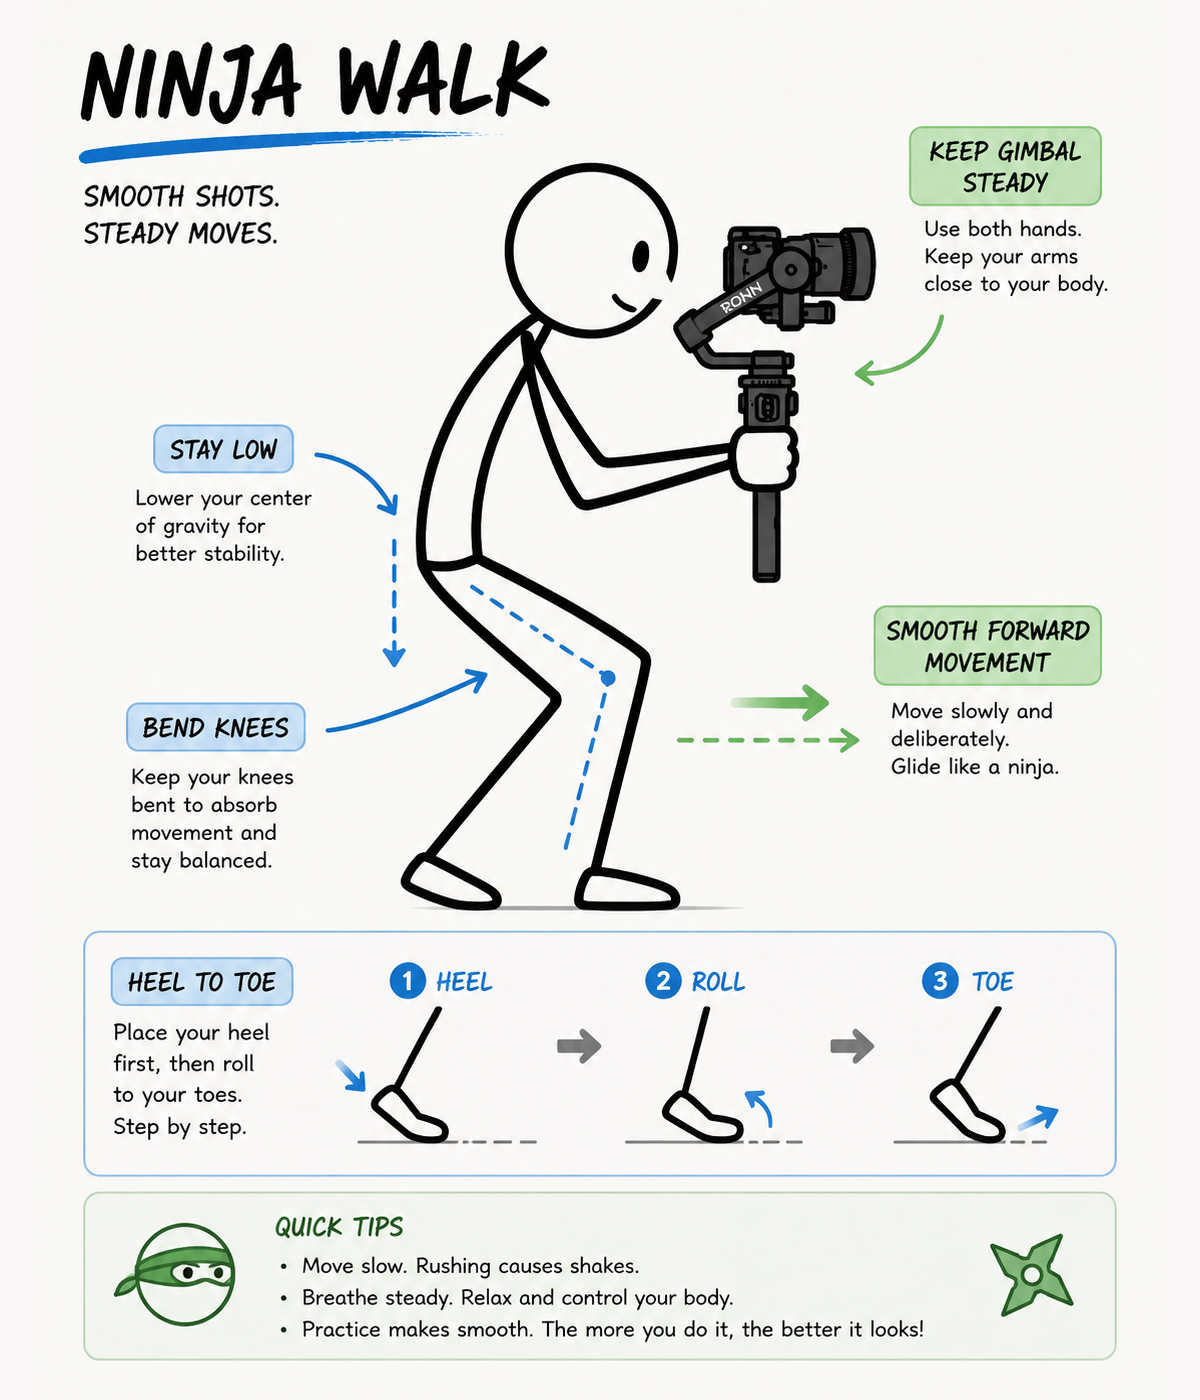
3. Eradicating the "Z-axis bounce": The gimbal Ninja walk technique
Even with a perfectly balanced setup and the correct shooting modes, many beginners notice a frustrating up-and-down bobbing motion in their final footage. This is known as the "Z-axis bounce." While a motorized stabilizer flawlessly corrects pitch, roll, and yaw, it cannot mechanically counteract the vertical translation caused by your natural footsteps. In real estate videography, a bouncy shot makes luxury floors look uneven and instantly pulls the buyer out of the viewing experience.
To eliminate this issue, you must master the gimbal ninja walk technique. This physical adaptation turns your lower body into a human shock-absorption system, isolating your camera from the impact of your stride.
[Normal Walk] --> Stiff legs --> Sharp vertical impact --> Z-Axis Bounce
[Ninja Walk] --> Bent knees --> Heel-to-toe rolling --> Smooth Cinematic Flow
3.1. How to execute the perfect Ninja walk
- Lower your center of gravity: Slightly bend your knees and sink your hips. Walking with a lower stance allows your legs to naturally flex and absorb shock, much like the suspension on an off-road vehicle.
- The heel-to-toe roll: Instead of landing flat-footed, consciously step forward by touching your heel to the ground first. Smoothly roll your weight forward across the arch of your foot onto your toes.
- Maintain flexible arms: Never lock your elbows or pin your arms tightly to your chest. Keep your elbows relaxed and bent at roughly a 90-degree angle, allowing your arms to act as secondary mechanical dampeners.
3.2. Practice drill for mastering the Ninja walk
Before heading to a high-stakes luxury listing, practice this technique down your own hallway. Hold a full cup of water or monitor your camera's LCD screen. If the water splashes or the screen jolts, your steps are still too heavy. Perfecting the gimbal ninja walk technique takes time, but it is the ultimate secret to achieving that coveted, floaty "floating on air" look.
4. Advanced techniques: Cinematic gimbal movements for real estate
Once you have mastered the mechanical setup and the ninja walk, it is time to move beyond simple forward walkthroughs. To truly capture the architectural elegance and potential of a high-end property, you must employ intentional, cinematic gimbal movements for real estate that tell a compelling story. Each movement should serve a specific purpose, whether it is revealing a space, emphasizing its scale, or highlighting premium features.
Here are four essential camera choreographies used by professional real estate videographers.
4.1. Movement 1: The push-in reveal (The welcoming shot)
This movement simulates the perspective of a potential buyer first walking into a space. It is designed to create a feeling of anticipation and welcome.
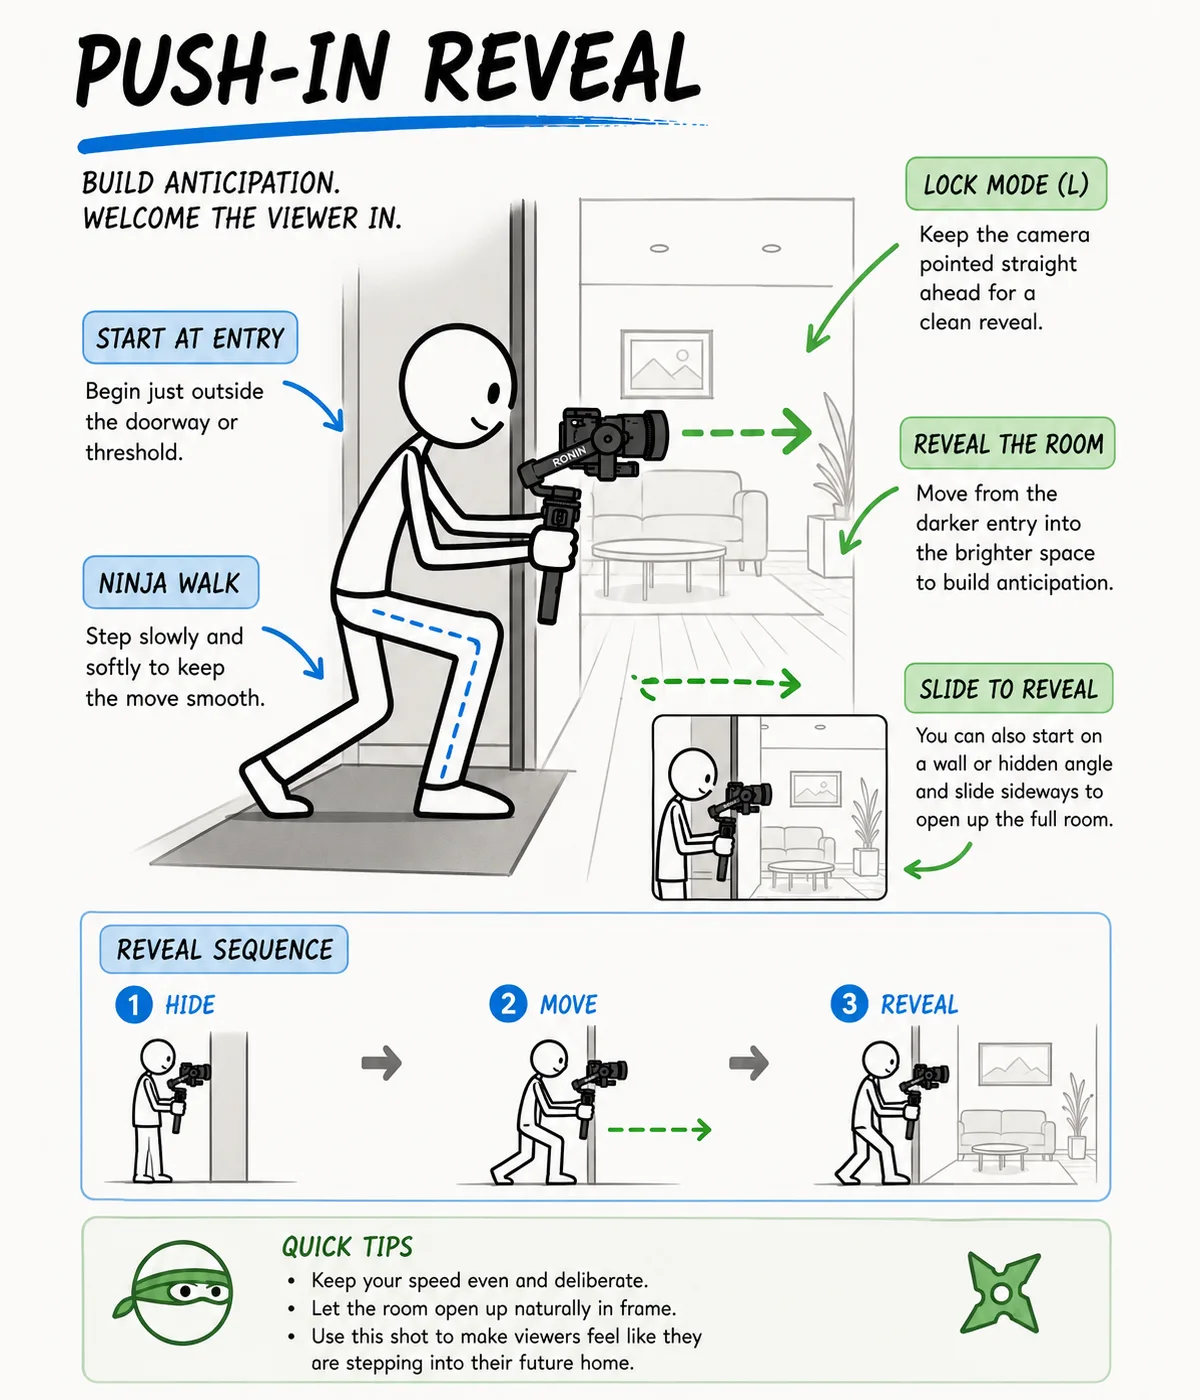
- How to execute it: Position yourself just outside a doorway or entry point. For the smoothest result, set your gimbal to Lock Mode (L) to keep the camera pointing dead ahead. Step forward slowly using your ninja walk, moving from the darker entry area directly into the brighter room. You can also start by focusing on a wall or an obscure angle and slowly slide laterally to reveal the entire room.
- The impact: This shot establishes an immediate connection, making the viewer feel like they are personally stepping into their future home.
4.2. Movement 2: The lateral slide / Tracking shot (Showcasing scale)
The lateral slide is the best way to visualize the width and flow of large, open-concept floor plans, which are a massive selling point in modern real estate. In my opinion, this is a must-have shot for everyone learning how to use a gimbal, whether you will shoot real estate or not.
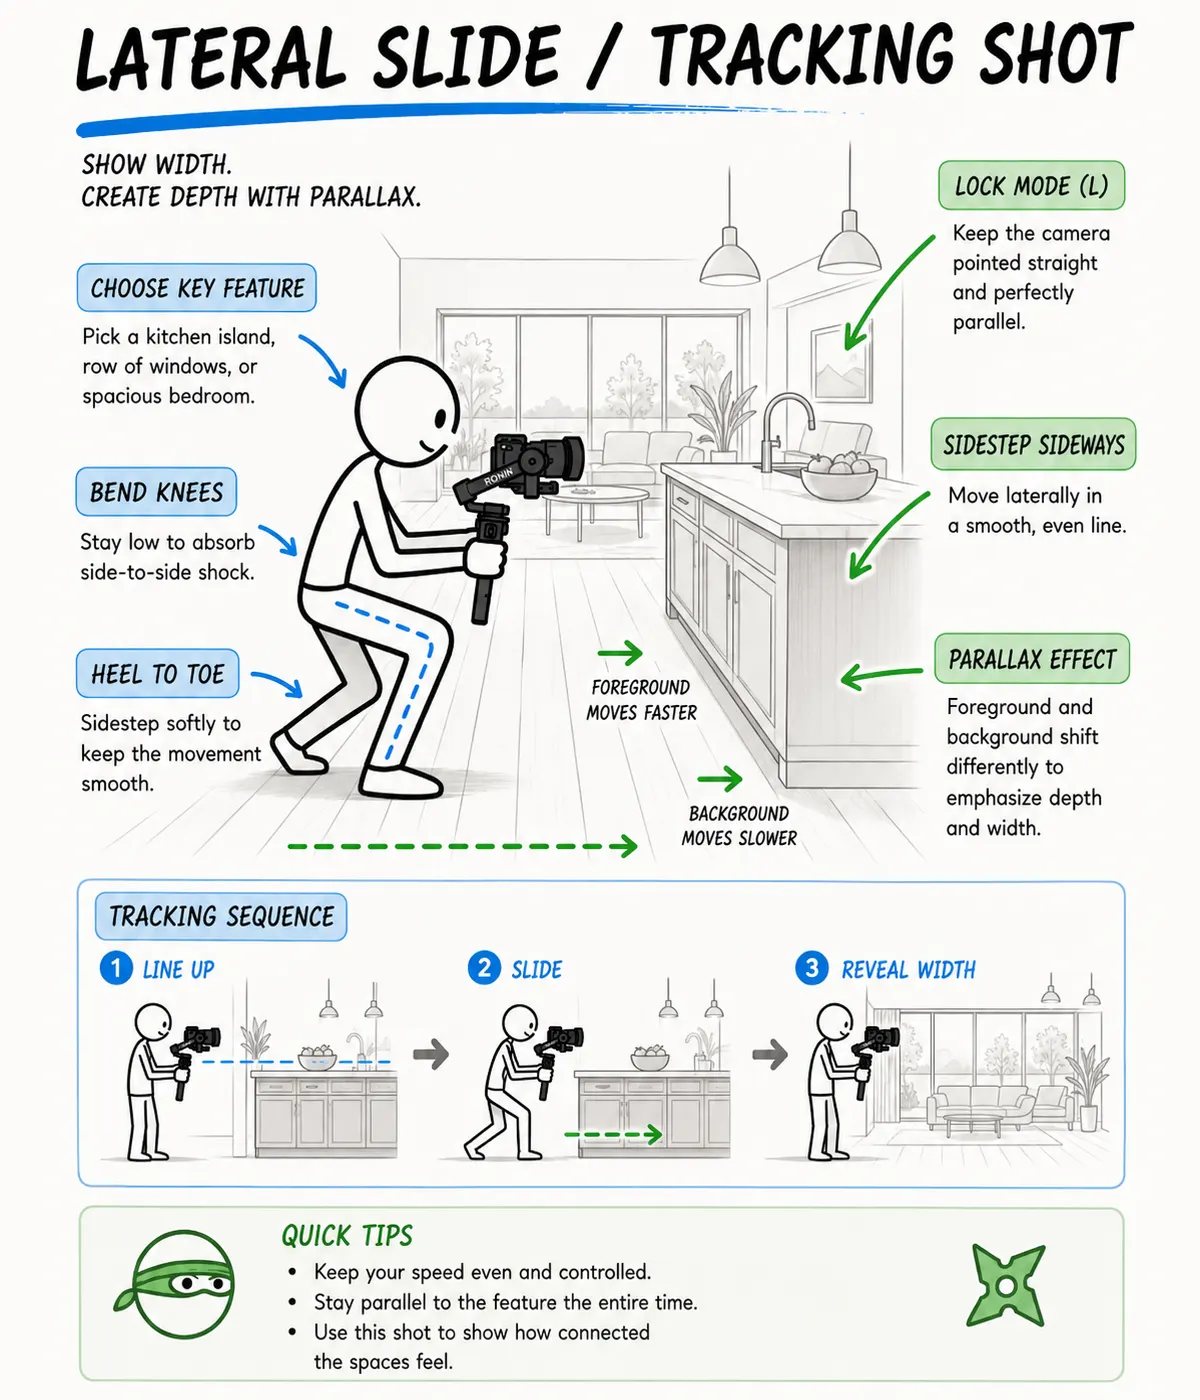
- How to execute it: Choose your key feature, such as a large kitchen island, a row of large windows, or a spacious master bedroom. Keep your camera perfectly parallel to the feature (using Lock Mode again is excellent here). Walk sideways, "sidestepping," while using your bent knees and heel-to-toe technique to absorb lateral shock.
- The impact: As the background moves differently from the foreground (the "parallax effect"), this shot emphasizes depth and width, showing how the spaces interact without distortion.
4.3. Movement 3: The orbit / Point of interest (Highlighting premium upgrades)
Orbits are highly impactful shots used to draw a buyer's eye to high-value selling points that might be missed in a standard straight walkthrough.
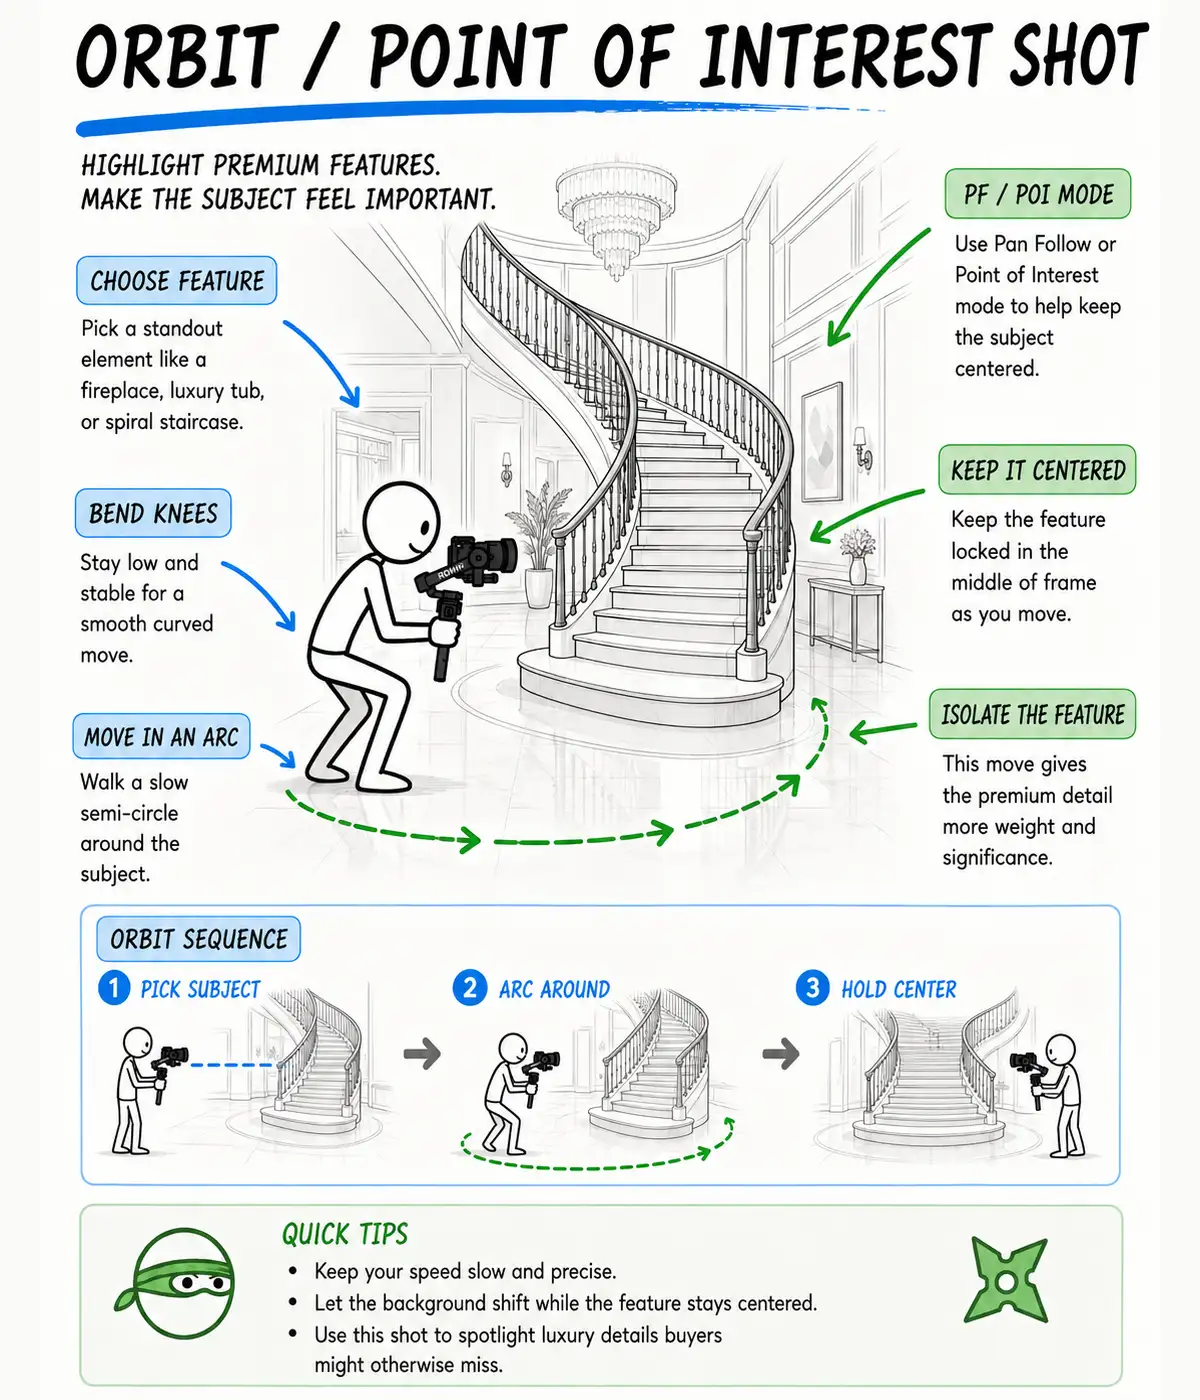
- How to execute it: Identify a standalone feature, such as a custom fireplace, a luxury standalone bathtub, or a grand spiral staircase. Stand adjacent to the object and set your gimbal to Pan Follow (PF) or Point of Interest (POI) mode (if your gimbal supports active tracking). Walk in a slow, precise semi-circle around the object, keeping it centered in the frame.
- The impact: This movement isolates the premium feature, giving it weight and significance within the visual narrative of the home.
4.4. Movement 4: The tilt-up reveal (Grand spaces)
When a property boasts double-height ceilings, grand chandeliers, or vaulted architecture, you need a vertical movement to capture that sense of grandeur.
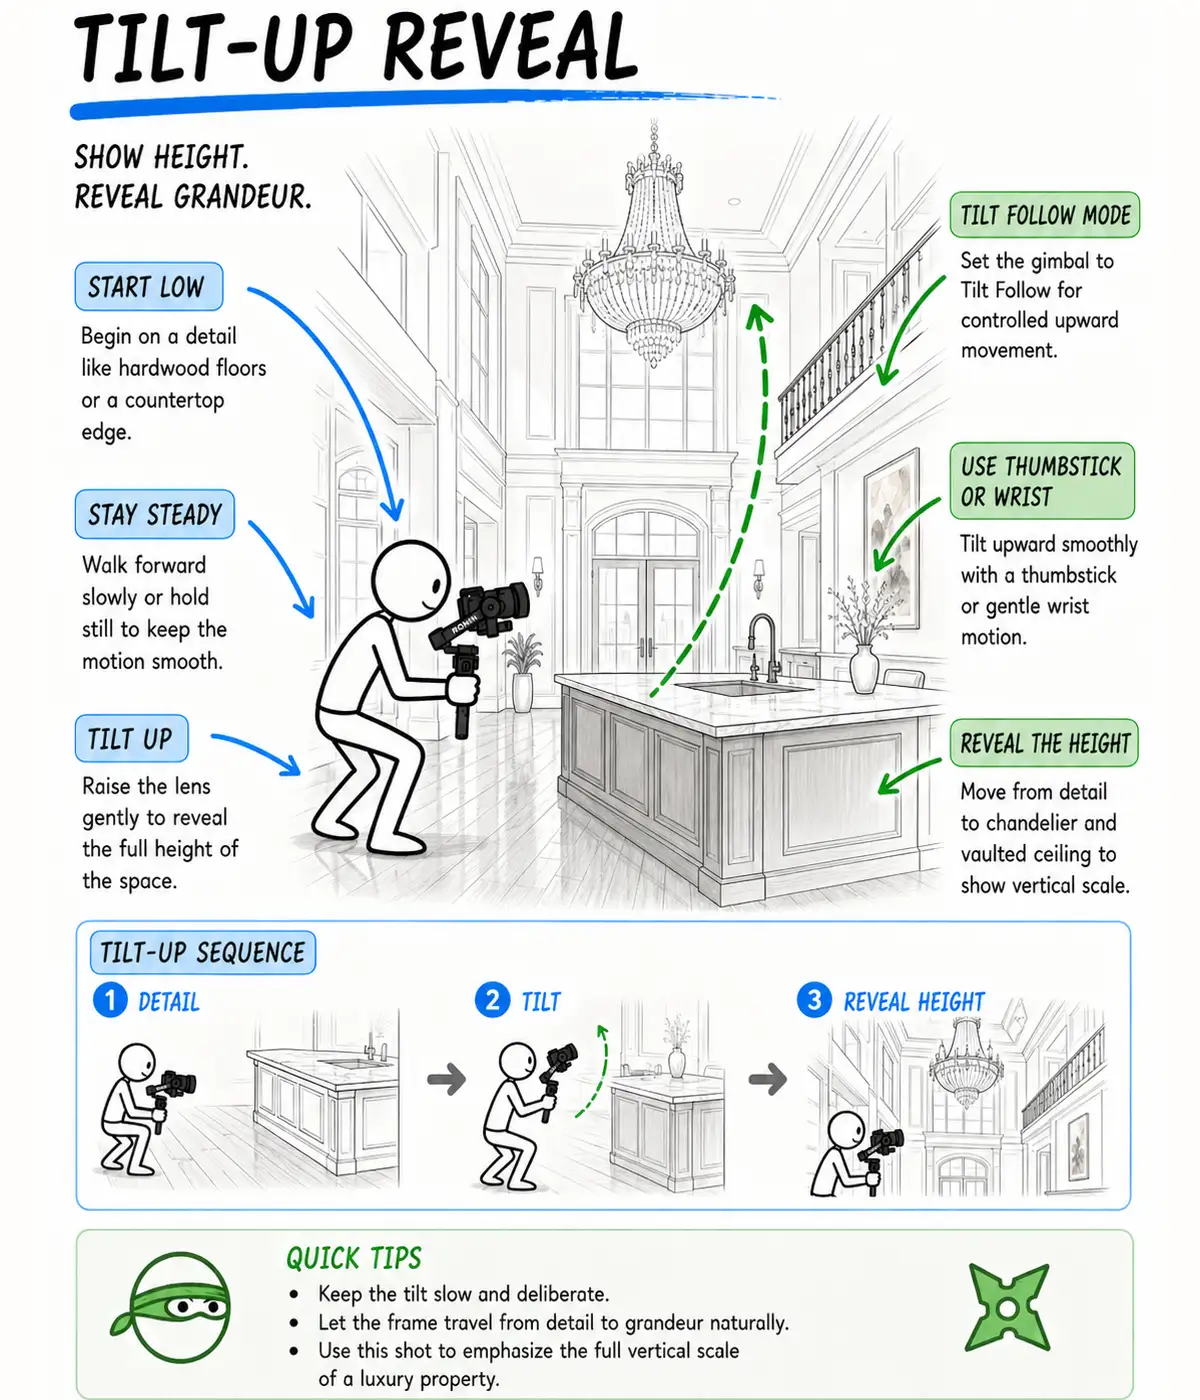
- How to execute it: Set your gimbal to Tilt Follow mode. Start your shot low, focusing on a detail like the polished hardwood floors or the granite of a kitchen island. As you smoothly walk forward or hold still, use your thumbstick (or very gentle wrist motion) to tilt the camera lens upward, revealing the towering height of the space.
- The impact: The tilt-up creates a dramatic transition from detail to grandeur, ensuring the viewer feels the full vertical scale of a luxury property.
By intentionally integrating these cinematic gimbal movements for real estate into your property tours, you move from simply "filming a house" to creating a professional, emotional visual experience that resonates with buyers.
5. Common mistakes when learning how to use a gimbal
A lot of people pick up a gimbal and expect their footage to instantly look cinematic. Then they review the clips, and something still feels off, maybe a slight shake, maybe the movement just doesn’t look natural. In most cases, the issue comes down to a few small mistakes people make when operating this device.
5.1. Not balancing properly
This is the step people tend to rush, and it almost always shows up in the footage. If your camera slowly tilts on its own or the motors make a faint buzzing sound, your balance isn’t quite right. It might still “work,” but the stabilization won’t be as clean as it should be.
The fix is simple-just take the time to balance each axis properly before you start shooting. Also, anytime you change your lens or add accessories, it’s worth checking again. A small shift in weight can throw things off more than you’d expect, especially when you’re still figuring out how to use a gimbal in different setups.
5.2. Moving too fast
This is probably the most common mistake beginners make, and it’s not obvious until you watch your footage back. When you’re filming, your movement feels controlled and smooth, but on camera, it often looks rushed. That’s just how motion translates in video.
A good rule is to move slower than feels natural. Start your movement gently, keep a steady pace, and ease into your stop instead of cutting it abruptly. If something feels off, slowing down by even 20–30% can make a huge difference when practicing how to use a gimbal.
5.3. Ignoring horizon level
A slightly tilted horizon is one of those details that instantly makes footage look less professional. You might not notice it while filming, but it becomes obvious as soon as you watch it back. Even a small angle can make the whole shot feel unbalanced.
Instead of trying to correct it manually while shooting, it’s better to recalibrate your gimbal. Most modern models also have a quick horizon adjustment feature, which is worth using. It only takes a few seconds, but it can completely clean up your shot.
5.4. Using the wrong mode
Gimbal modes can be confusing at first, especially if you’re not sure what each one is designed for. You might be moving correctly, but the footage still feels strange or disconnected. In many cases, it’s simply because the mode doesn’t match the shot you’re trying to create.
Follow mode is usually the safest choice for everyday shooting. Lock mode works better when you want to keep a consistent frame, while FPV mode adds more dynamic movement but requires more control. Knowing when to switch between them is a key part of understanding how to use a gimbal beyond just the basics.
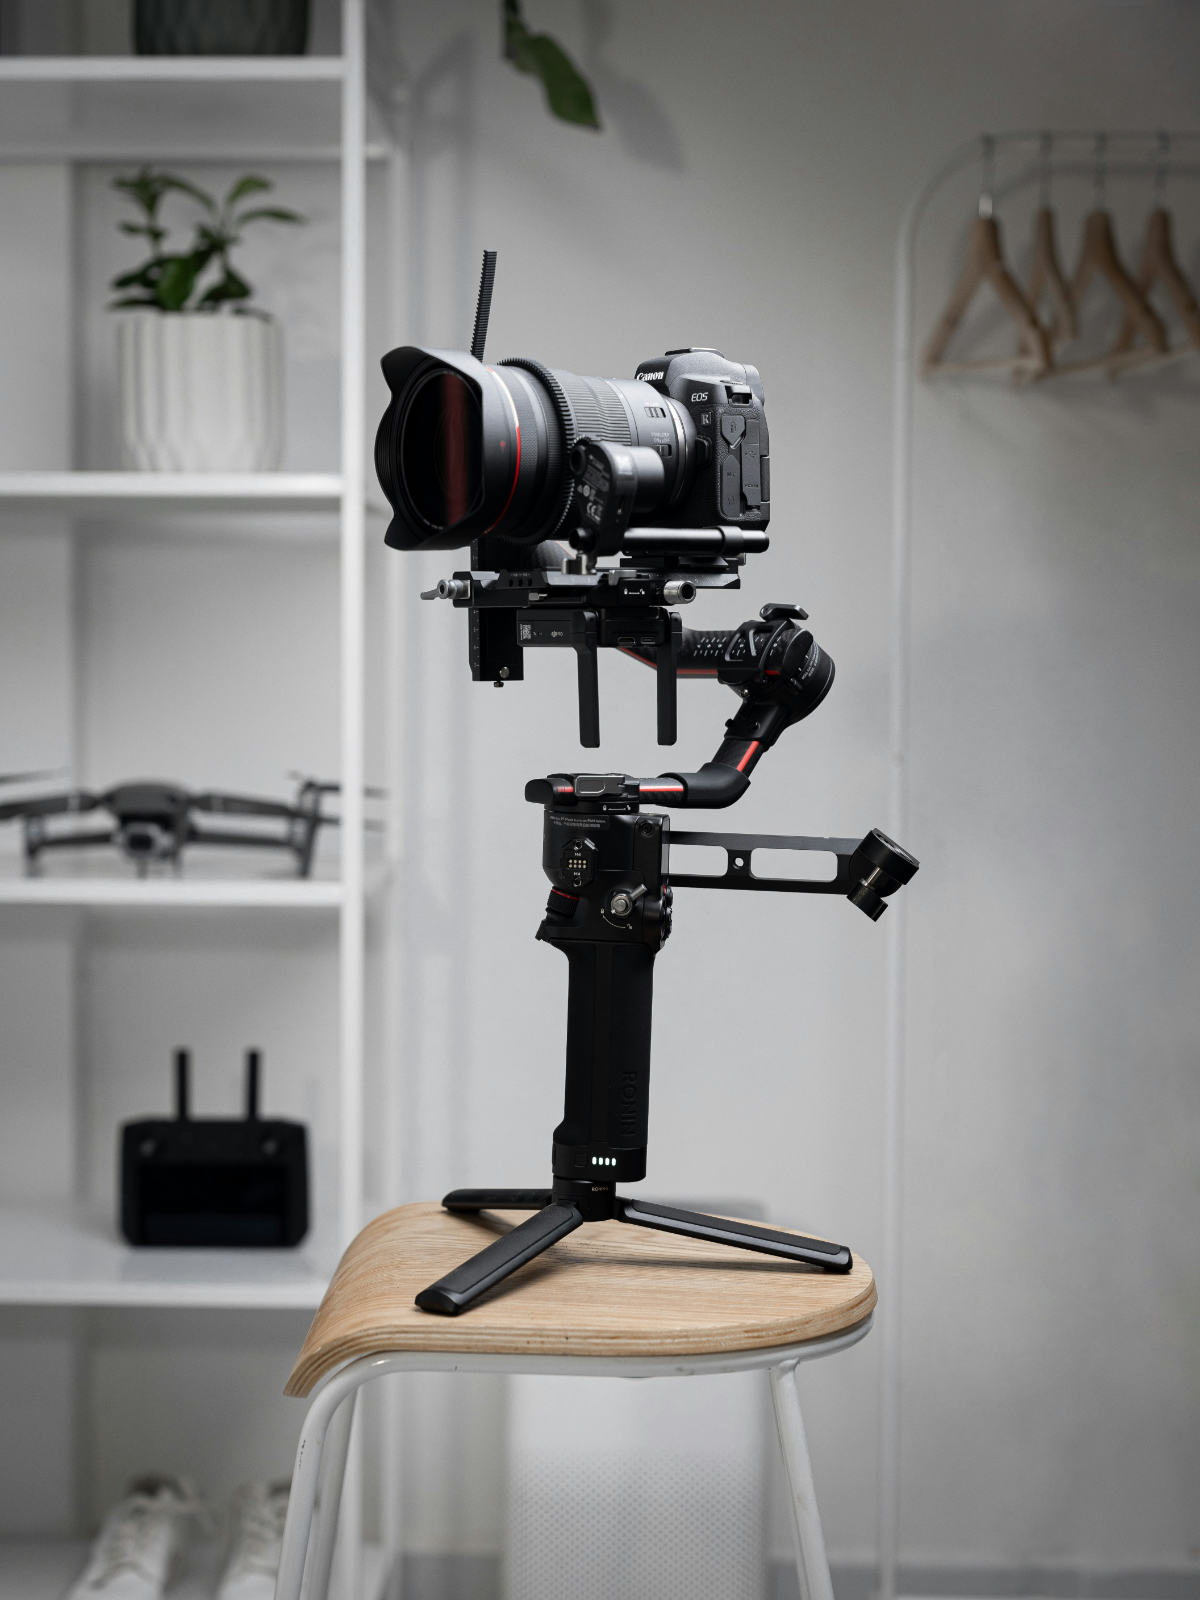
5.5. Holding the gimbal incorrectly
Even with perfect settings, your body movement still affects the final result. A lot of people hold the gimbal with one hand because it feels easier, but that usually leads to less stable footage, especially when walking.
 How you hold the gimbal will greatly affect the stability of the output.
Using both hands gives you much better control, and keeping your elbows close to your body helps reduce unnecessary movement. It might feel slightly awkward at first, but once you get used to it, your shots will look noticeably smoother.
5.6. Not planning thoroughly before the shoot
Before you start filming, it helps to run through a quick mental checklist. Make sure your gimbal is properly balanced, your movement is slower than you think it should be, and your shooting mode matches your intention. Also, double-check that your horizon is level and that you’re holding the gimbal in a stable position.
Small things that make a big difference. Once you’ve fixed the major mistakes, the next improvements usually come from small details. Planning your movement ahead of time helps avoid awkward corrections mid-shot, even if it’s just a rough idea of where you’re going. It also helps to use foreground elements, like walls, poles, or furniture, to create a stronger sense of depth.
Keeping a consistent distance from your subject makes your footage feel more intentional, especially in tracking shots. You can also start combining movements, like a slow pan with a push-in, to add more visual interest. These are the kinds of habits that gradually improve your results as you get more comfortable with a gimbal.
6. Why does editing still matter when you know how to use a gimbal
If you’ve spent time learning how to use a gimbal, you’ve probably noticed something a bit frustrating: even when your movement feels smooth, the footage doesn’t always look as polished as you expected. It’s stable, sure, but maybe it still feels slightly “raw.” That’s completely normal.
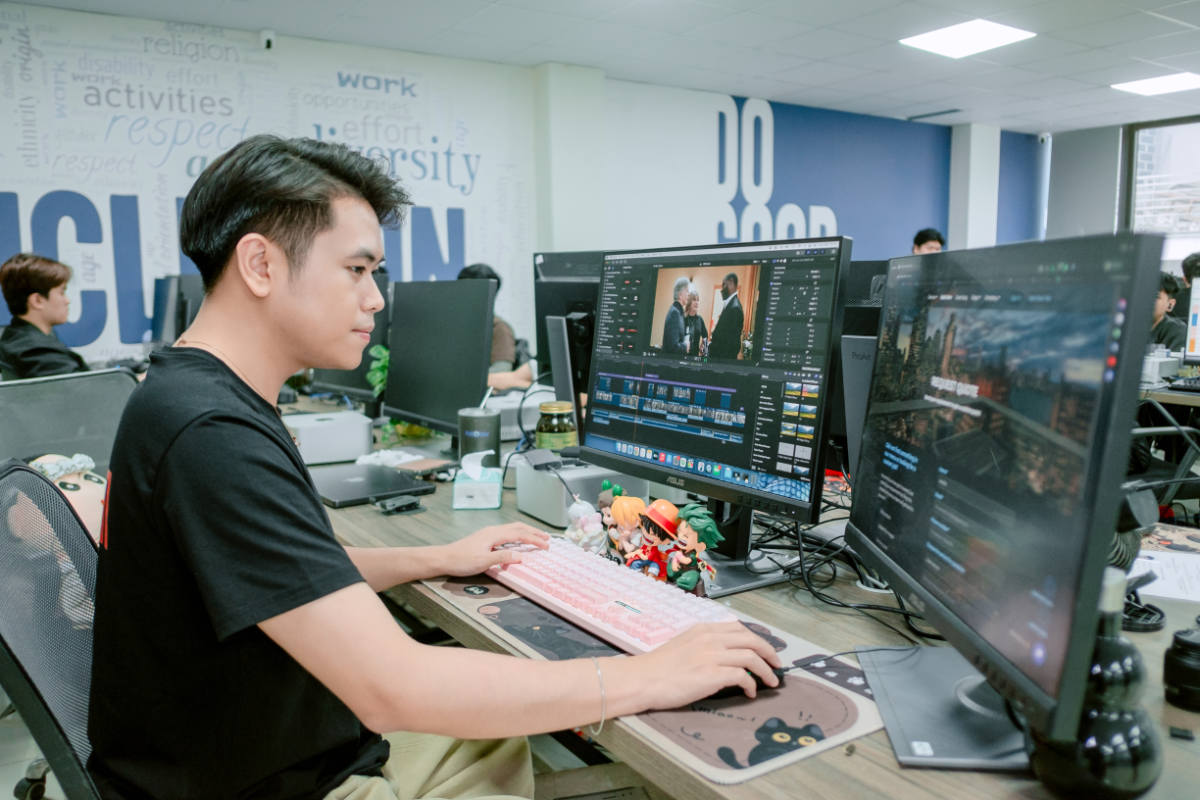 Having great equipment and techniques gets you 70% there. The rest 30% is done in the post-production.
A gimbal is great at removing big shakes, but it doesn’t eliminate everything. Small micro-movements can still sneak in, especially during longer takes or when you’re walking on uneven ground. You might not notice them while filming, but they show up once you watch the footage on a larger screen.
There’s also the color side of things. Lighting changes constantly: moving from indoors to outdoors, or even just shifting angles slightly, can affect exposure and white balance. So even if you’ve nailed how to use a gimbal in terms of movement, the clip itself can still feel inconsistent. That’s where post-production quietly does a lot of heavy lifting.
You don’t need anything extreme. Subtle motion smoothing can clean up the last 10% of instability that’s hard to fix in-camera. A bit of color correction can bring shots back to a consistent tone, especially if you filmed across different lighting conditions. These are small adjustments, but together they make your footage feel intentional instead of just “captured.”
For real estate videos or walkthrough content, this step becomes even more important. Smooth movement helps viewers stay engaged, but consistent color and pacing are what make the space feel natural and professional. It’s often the difference between a clip that feels casual and one that actually sells the space.
That’s also why many creators don’t try to do everything themselves. Services like Fotober focus specifically on refining footage, things like motion smoothing, color correction, and overall video enhancement. Elite agents need more than just fixing bad footage. They care about elevating decent footage into something that feels finished and cinematic.
If you’re already investing time into learning, it makes sense to take that last step seriously. The shooting gets you 80% there. The final 20% usually happens after.
7. Conclusion
Mastering premium real estate videography requires a perfect blend of mechanical precision, physical technique, and post-production polish. By properly balancing your gimbal, mastering the ninja walk, executing intentional cinematic movements, and embracing the transformative power of editing, you convert basic walkthroughs into high-converting visual stories that command premium listings. Consistency is key, and practicing these skills will quickly elevate your media brand from amateur to luxury-tier.
What is your go-to cinematic gimbal movement when shooting tight property spaces? Let us know on our social media, and follow us today for more expert real estate video marketing strategies! Follow us on social media to stay updated with the latest real estate videography techniques for filming every home better.
- Facebook: fotobermedia.co
- YouTube: Fotober
- TikTok: @fotober
- Instagram: fotober_media.
.png)
.png)
.png)