
How to Remove Lens Flare in Photoshop for Flawless Real Estate Photos


Share:
Table of Contents
- 1. Understanding the light: Flare vs. glare vs. reflections
- 2. How to remove lens flare in Photoshop: The manual methods
- 3. Specialized: Removing window glare in real estate photos
- 4. Advanced architectural photo retouching techniques
- 5. Specialized tools & plugins for faster glare removal
- 6. Prevention: How to avoid flare and glare on-site
- 7. Why should photographers outsource architectural image retouching?
- Conclusion
While natural light is often a real estate photographer’s best asset, it can cause distracting lens flares and hazy glares. Whether you need to learn how to remove lens flare in Photoshop or remove reflections in real estate photos, this comprehensive guide has you covered to transform your raw captures into polished architectural masterpieces.
1. Understanding the light: Flare vs. glare vs. reflections
Understanding the distinction between lens flare, window glare, and unwanted reflections is the first step in high-end architectural photo editing. While these terms are often used interchangeably by beginners, they represent distinct optical challenges that require unique technical solutions in post-production.
 Direct light shines through glass elements inside a lens, creating a dramatic multi-layer flare effect
Lens flare occurs when a direct, intense light source, such as the sun or a bright interior spotlight, hits the internal elements of your camera lens. This causes light to scatter, resulting in visible artifacts like colored polygons, circles, or a general "veiling haze" that desaturates the image. Learning to reduce flaring in property photography is vital because it restores the natural contrast and color depth that the sensor loses when overwhelmed by stray light.
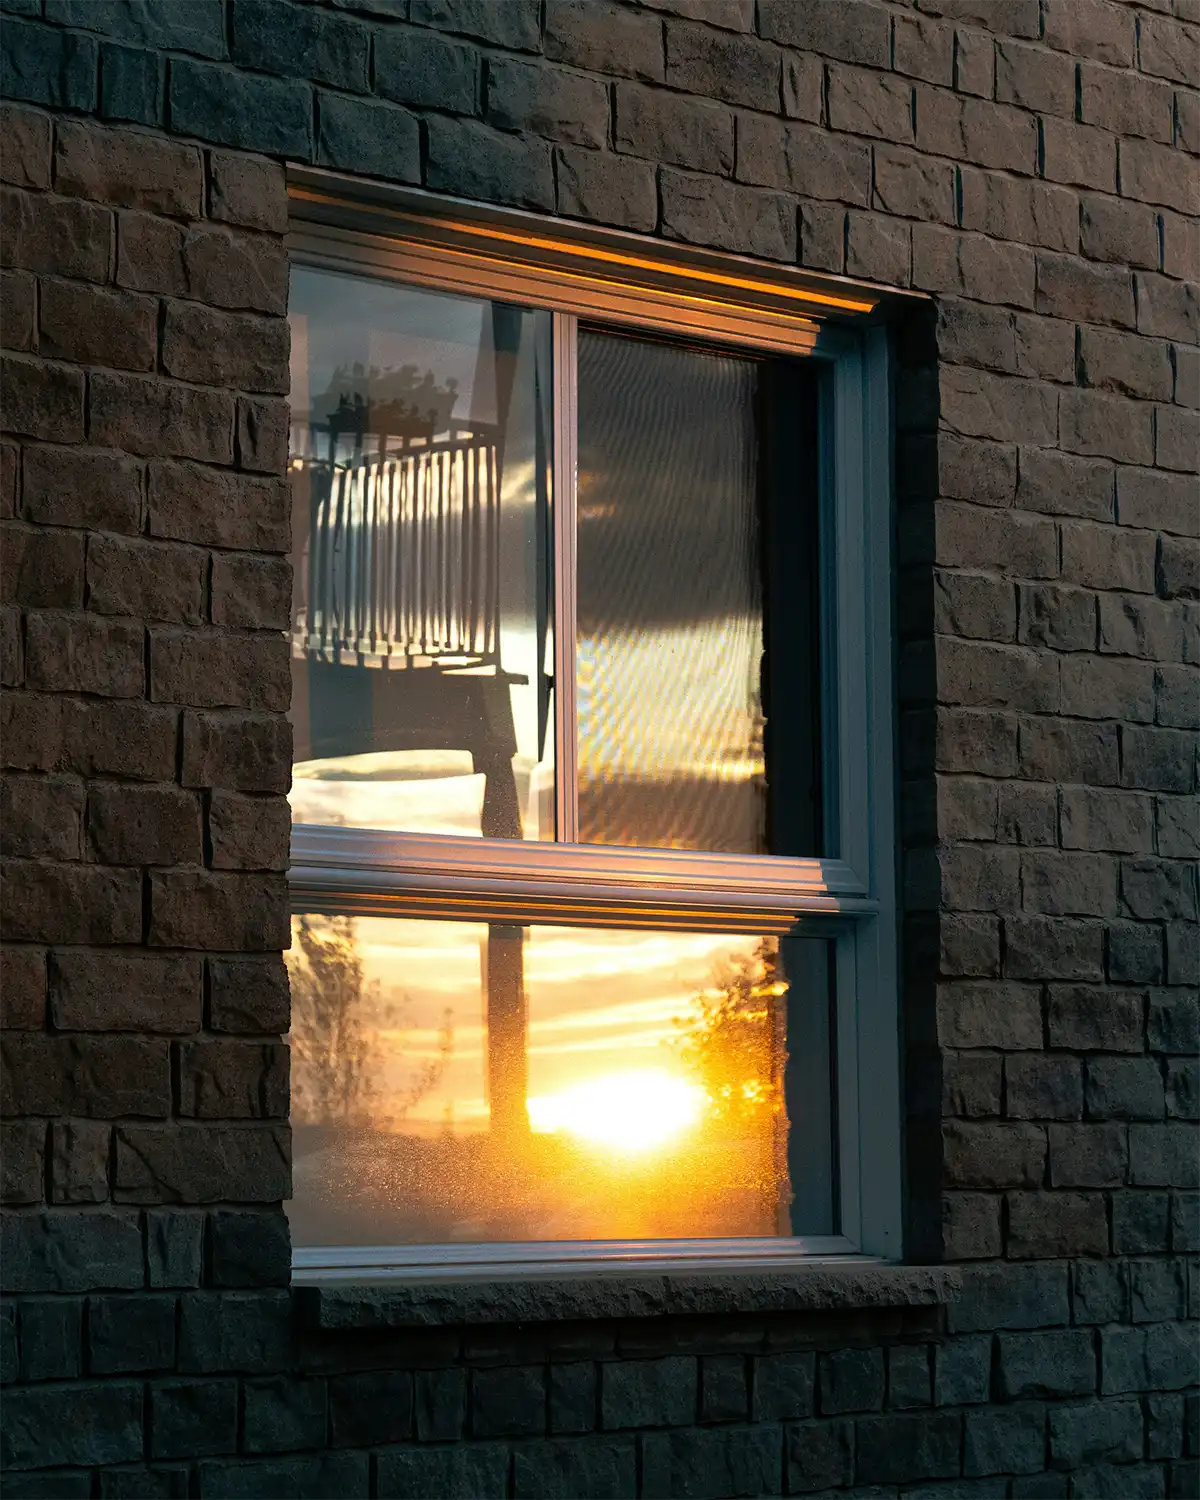 Overexposed reflection on the window is a common problematic spot in real estate photos
Window glare, by contrast, is a surface-level phenomenon. It happens when light bounces off glass at specific angles, creating a white "wash" that obscures the view through the window. To effectively remove window glare in real estate photos, a retoucher must often employ advanced masking to blend ambient frames with flash "pops," ensuring the exterior landscape is as clear as the interior.
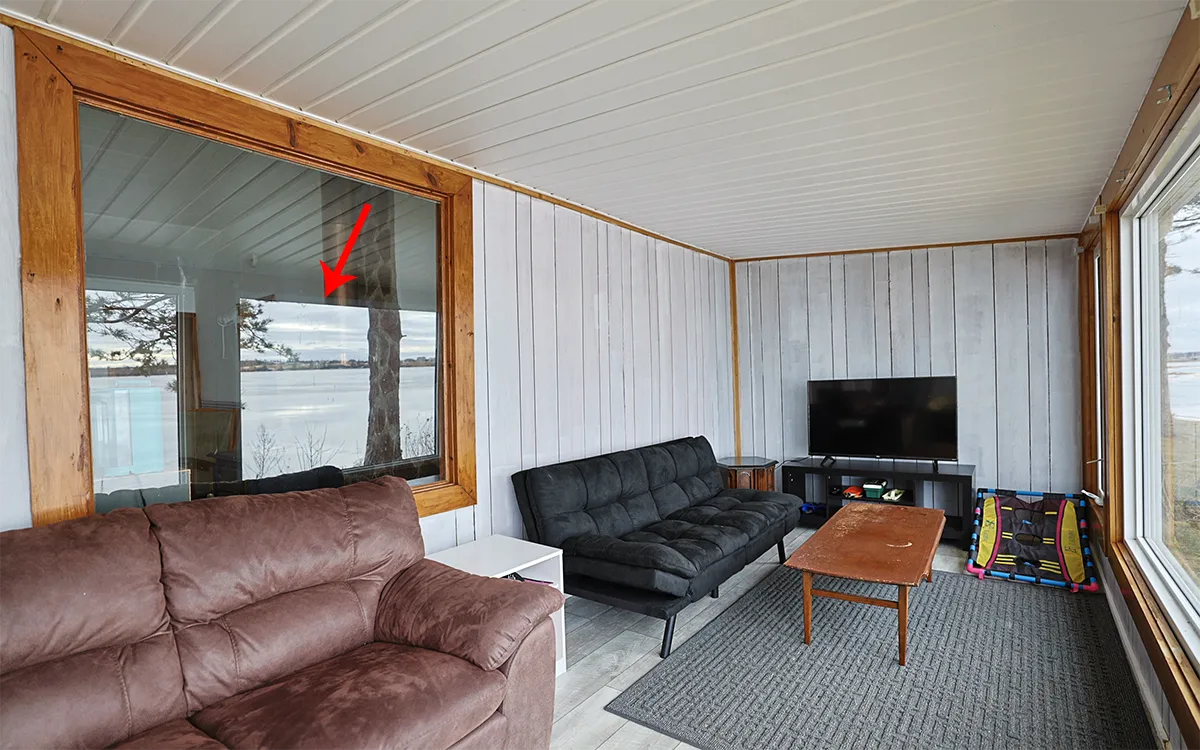 Reflections across multiple reflective surfaces in a home are hard to control when shooting on-site
Lastly, reflection removal in real estate photos focuses on unwanted mirror images on polished surfaces. Whether it is a tripod visible in a bathroom mirror or a flash unit reflecting off a stainless-steel refrigerator, these distractions break the immersion of a property tour. While knowing how to remove lens flare in Photoshop addresses optical errors, mastering the removal of physical reflections is what truly creates that "magazine-ready" look.
2. How to remove lens flare in Photoshop: The manual methods
Learning how to remove lens flare in Photoshop is a rite of passage for every real estate photographer. While AI-driven tools are rapidly improving, manual retouching remains the gold standard for high-end real estate photo editing. Manual methods allow you to preserve the integrity of a scene’s textures and light gradients, ensuring the final image looks natural rather than "over-processed." Here are the most effective manual workflows to fix sun flare in property photography and other glaring light problems.
The Healing Brush and Patch tool
For small, localized flare spots, often appearing as translucent colored circles or "orbs", the Spot Healing Brush and the Patch Tool are your first line of defense. The Patch Tool is particularly effective for larger artifacts; simply select the flared area and drag the selection to a clean section of the wall or floor that shares the same perspective and lighting. When using the Patch Tool, ensure the "Content-Aware" structure and color settings are adjusted to maintain a seamless blend with the surrounding environment.
Content-Aware Fill (The precision workspace)
When a flare covers a larger, more complex area, Photoshop’s dedicated Content-Aware Fill workspace (Edit > Content-Aware Fill) offers unparalleled control. Unlike the basic fill command, this workspace allows you to manually paint the "sampling area." By excluding distracting elements like window frames or furniture from the sampling zone, you ensure that Photoshop only uses clean wall or floor data to reconstruct the flared section. This is a highly efficient way to handle flares occurring on flat, repetitive surfaces.
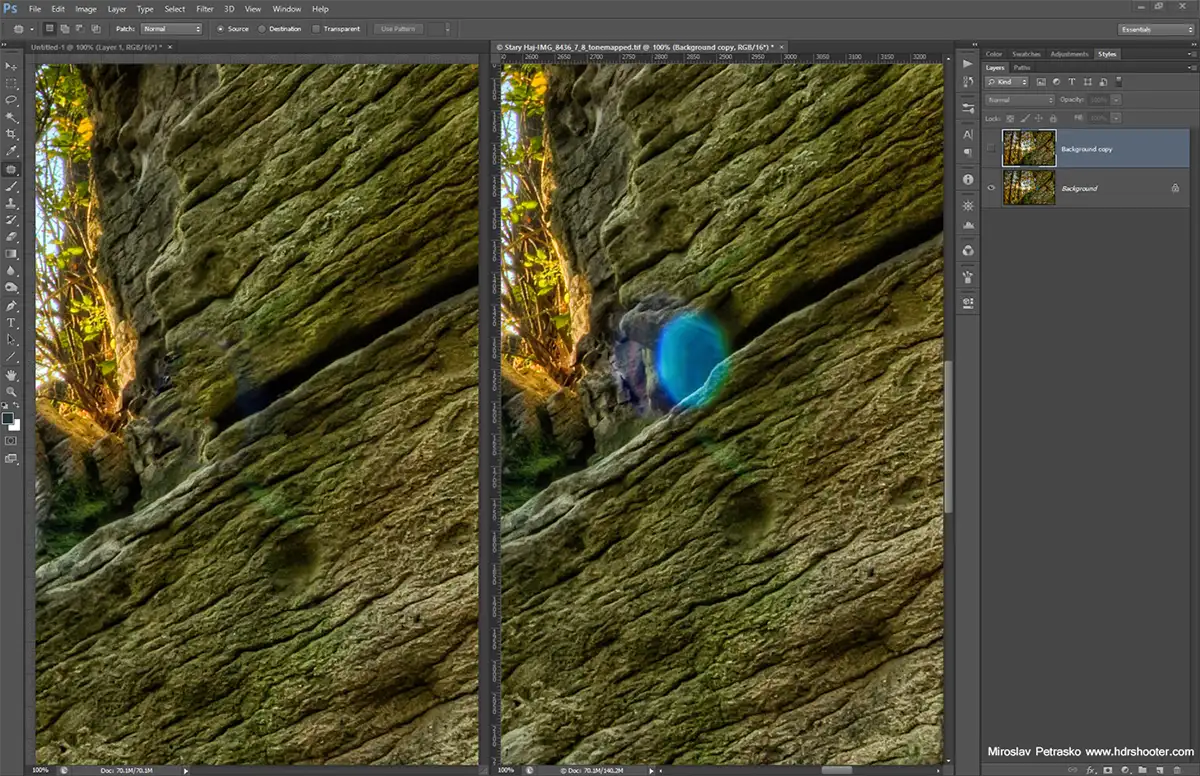 Content-Aware Fill can help with small patches of flare
Frequency separation: The professional choice
To truly fix sun flare in property photography without losing the fine detail of expensive wallpaper, stone countertops, or wood grain, Frequency Separation is the elite choice. This technique splits the image into two distinct layers: a "Low Frequency" layer for colors and tones, and a "High Frequency" layer for texture.
- Color correction: On the Low Frequency layer, use a soft Clone Stamp or the Lasso Tool with a high feather to isolate and then neutralize the color shifts caused by the flare.
- Texture preservation: On the High Frequency layer, use the Clone Stamp to sample sharp texture from a non-flared area and paint it over the flare.
This ensures the "glow" of the flare is diminished while the underlying architectural details remain razor-sharp.
Pro Tip: Using the "Darken" blending mode
If a flare is simply a bright "hot spot," create a new empty layer and set the Blend Mode to Darken. Sample a nearby color that represents how the area should look and paint over the flare. Because the Darken mode only affects pixels lighter than your brush color, it will precisely target the bright flare while leaving darker, correctly exposed details untouched.
3. Specialized: Removing window glare in real estate photos
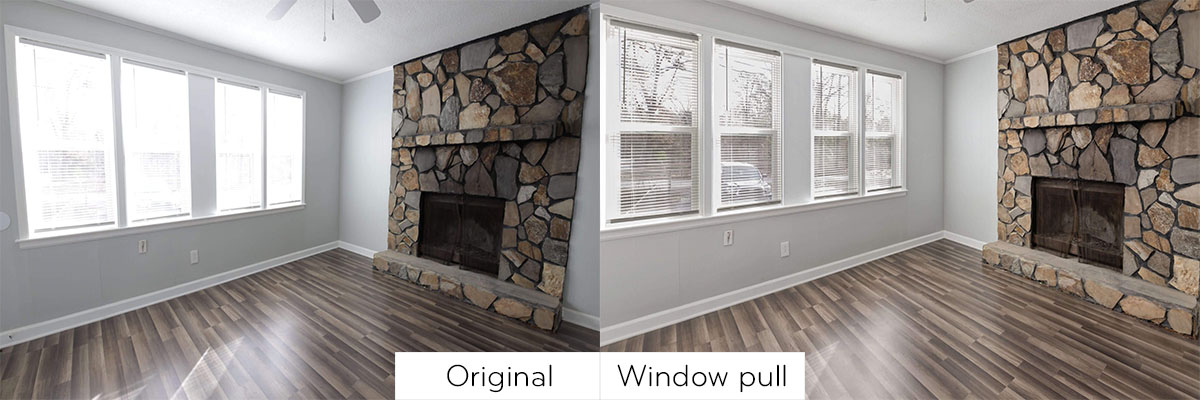
In high-end real estate marketing, the "view out the window" is often a primary selling point. However, bright exterior light hitting glass surfaces frequently creates a thick white haze or distracting reflections. To remove window glare in real estate photos effectively, a retoucher must balance the interior exposure with the exterior landscape, a process often referred to as a "window pull."
The "Flambient" blending method
The most professional way to handle glare starts on-site with the "Flambient" (Flash + Ambient) technique. This involves taking one "ambient" shot of the room and a second shot where a powerful flash is aimed directly at the window frame. The flash overpowers the natural glare, revealing the true colors and details of the glass and the view behind it.
- The workflow: In Photoshop, place the flash frame over the ambient frame. Set the flash layer to "Darken" blend mode or use a layer mask to paint in only the clear, glare-free window panes. This is a cornerstone of professional architectural photo retouching, as it produces a natural look that single-exposure edits simply cannot match.
Manual window pulls with levels and curves
If you are working with a single exposure where the glare isn't completely "blown out," you can use adjustment layers.
1. Selection: Use the Pen Tool or Polygonal Lasso to create a precise selection of the window glass.
2. Masking: Apply a Levels or Curves adjustment layer.
3. Adjustment: Pull the mid-tones down and increase the contrast specifically within the window area. This cuts through the "haze" of the glare, making the outdoor greenery or city skyline pop without affecting the interior walls.
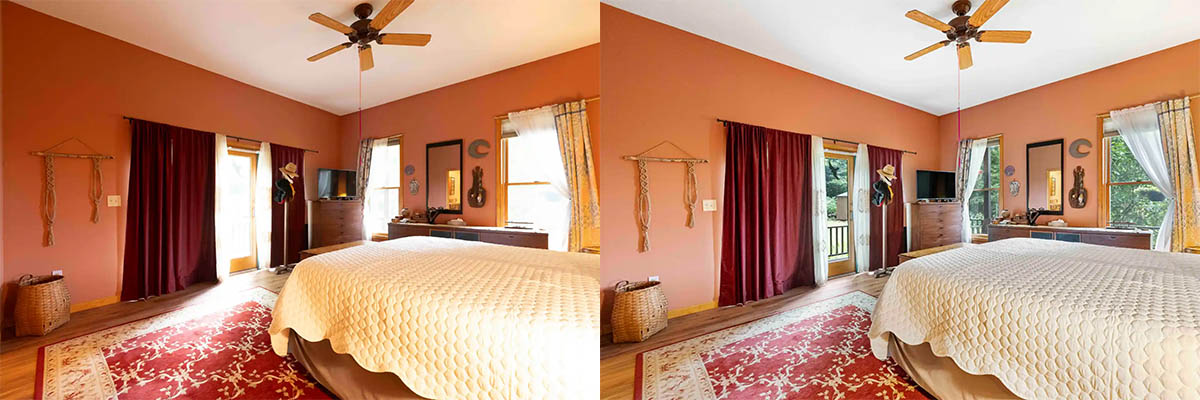
 Always check if window details are recoverable with traditional techniques before moving to generative approaches
Reflection removal in real estate photos
Windows aren't the only surfaces that suffer from light artifacts. Reflection removal in real estate contexts also extends to item removal like mirrors, TV screens, and stainless steel appliances.
- The mirror challenge: To remove a visible tripod or photographer in a bathroom mirror, use the Clone Stamp tool sampled from a different angle or a "clean plate" shot.
- Polarization simulation: If a floor or countertop has a "sheen" that hides its texture, creating a Hue/Saturation layer and desaturating the specific "cyan" or "blue" tones often found in window light can drastically reduce the perceived glare.
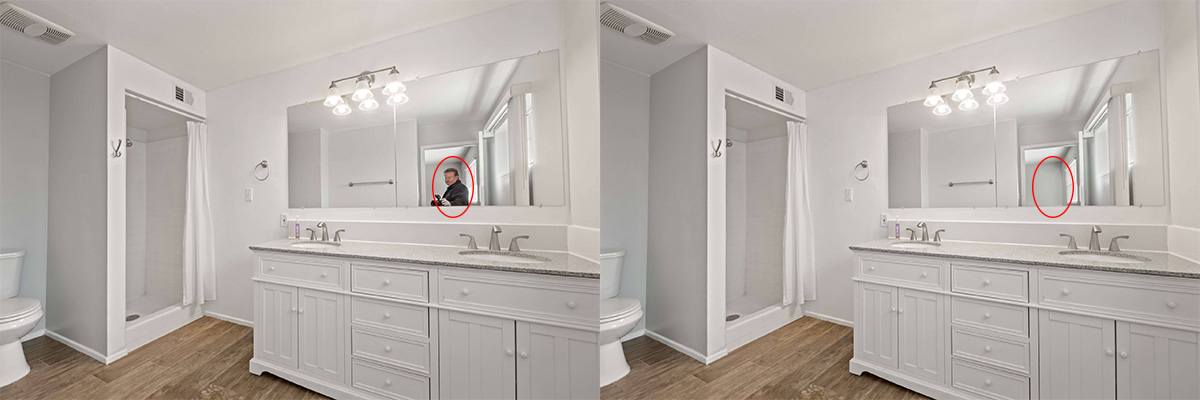 Some reflections are just too obtrusive to be included in commercial real estate photos
Mastering these specialized techniques ensures that every pane of glass in your portfolio acts as a transparent portal rather than a distracting mirror, a hallmark of elite property photo editing.
4. Advanced architectural photo retouching techniques
Advanced photo retouching for real estate is less about "erasing" and more about "rebalancing" the physics of light within a digital space. While basic tools can hide a spot, professional editors use advanced workflows to maintain the atmosphere and realism of a property. When you aim to fix sun flare in property photography at a high level, you must address the color shifts and contrast loss that occur across the entire frame.
Harnessing luminosity masks
One of the most powerful tools in a retoucher's arsenal is the Luminosity Mask. Unlike standard selections, Luminosity Masks allow you to target specific brightness ranges, such as just the "brightest highlights", without affecting the mid-tones or shadows.
When you need to remove window glare in real estate photos, a "Highlight" mask lets you darken the hazy glass while keeping the indoor shadows deep and natural. This prevents the "flat" look that often plagues amateur edits. By isolating the glare, you can apply a Curves adjustment to restore the lost detail of the exterior view with surgical precision.
Neutralizing color haze and "veiling"
Lens flare often leaves a "veiling haze", a milky, low-contrast wash that shifts the color of the walls or furniture. To combat this, advanced editors use the Dehaze slider in the Camera Raw Filter as a localized adjustment. Instead of applying it to the whole image, use a radial filter over the flared area.
 The Dehaze slider can tame veiling flares
- Color correction: Flares often introduce unwanted orange or yellow casts. Use a Hue/Saturation layer clipped to your "fix" area to specifically desaturate the flare’s color while preserving the natural wood or paint tones beneath. This is a crucial step for achieving balanced and natural-looking results.
The "view replacement" strategy
Sometimes, a sun flare or reflection is so destructive that it obliterates the pixel data entirely. In these cases, even if you’re confident enough that you know how to remove lens flare in Photoshop, the method that yield best results in my experience is to perform a full view replacement.
 Generative AI is now the magic cure for totally blown-out highlight regions like these
By using the Pen Tool to create a "window pull," you can drop in a clean, high-dynamic-range (HDR) exterior sky or landscape. The key to making this look "architectural" rather than "photoshopped" is the edge refining. Using a tiny amount of "inner glow" on the window frame mask simulates the natural light wrap, making the replacement indistinguishable from a perfectly captured single exposure.
Frequency separation for subtle textures
As mentioned in previous sections, frequency separation isn't just for portraits. In architectural work, it allows you to remove the "glow" of a reflection on a polished marble countertop while keeping the intricate stone textures perfectly sharp. This level of detail is what separates a standard real estate edit from premium architectural photo retouching.
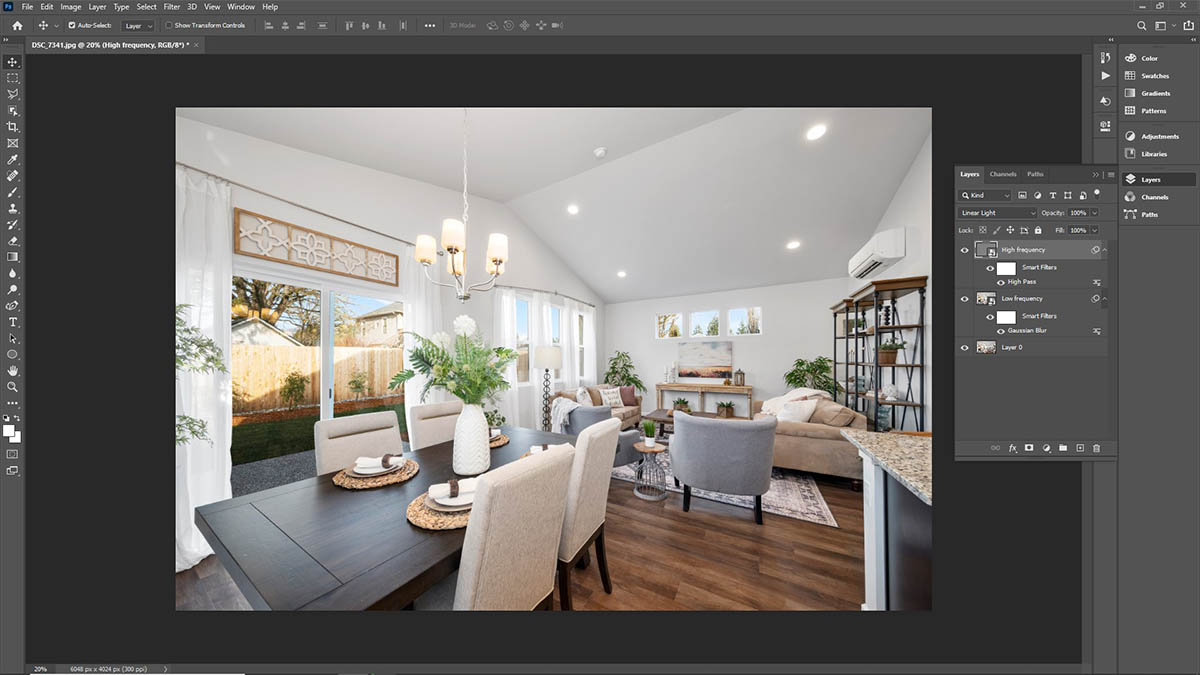 Frequency separation technique allows for finer editing on each discrete detail channels
The method basically separates image details into high-frequency and low-frequency layers, allowing for specific focus on textures and color details, or even to remove a specific color:
- Create frequency layers: Duplicate your image layer twice and rename them to ‘Low Frequency’ and ‘High Frequency’.
- Apply Gaussian Blur: On the Low Frequency layer, go to Filter > Blur > Gaussian Blur. Adjust the radius until the details are smoothed out.
- Apply High Pass filter: Select the High Frequency layer, and navigate to Filter > Other > High Pass. Set the radius to a value that defines the sharpest detail without introducing artifacts.
- Combine layers: Change the High Frequency layer’s the blending mode of the High Frequency layer to "Linear Light". This merges the two layers, bringing back sharp details.
- Clone and heal: Now, utilize the Clone Stamp and Healing Brush as needed to refine areas previously affected by flare.
5. Specialized tools & plugins for faster glare removal
While manual techniques offer the highest level of control, the rapid evolution of AI has introduced tools that significantly accelerate real estate photo editing workflows. Modern plugins can now handle repetitive tasks like initial sky replacements or basic reflection removal in a fraction of the time it takes to mask by hand.
Adobe’s own Generative Fill (powered by Firefly) and the Remove Tool are game-changers for identifying and erasing distractions with a single click. For more specialized needs, dedicated platforms like Autoenhance.ai and Luminar Neo provide "Window Pull" and "Relight AI" features that specifically target window glare in real estate photos. Furthermore, plugins like DxO PureRAW are indispensable for cleaning up optical imperfections and noise before you even begin the retouching process.
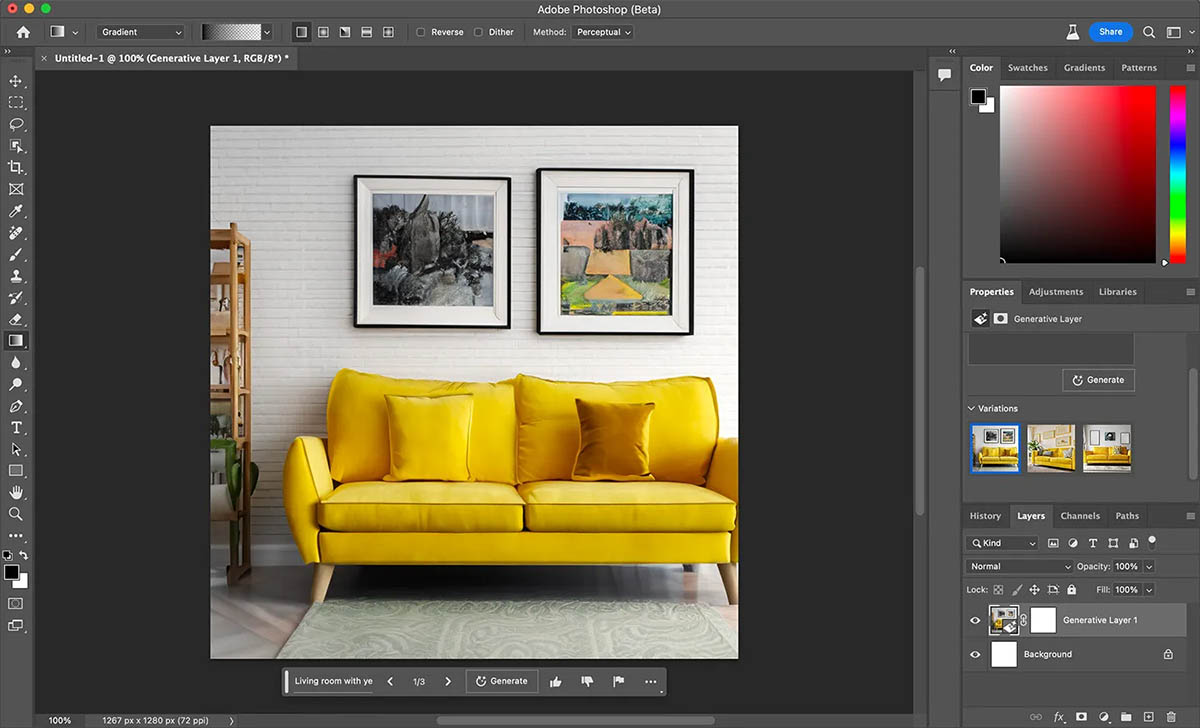 Generative Fill is a godsend for quickly fixing problems that used to require intensive photo manipulations
|
Feature |
Manual photoshop |
AI Generative Fill / Tools |
|
Precision |
Very high (Pixel-perfect control) |
Medium (May require touch-ups) |
|
Speed |
Slow (Requires manual masking) |
Very fast (Instant results) |
|
Realism |
Photorealistic (Preserves original data) |
Varies (Can occasionally look "artificial") |
|
Best for |
Luxury & high-end portfolios |
High-volume listing production |
Integrating these tools into your workflow allows you to reduce flare in property photography more efficiently, freeing up time to focus on the creative aspects of your shoot.
6. Prevention: How to avoid flare and glare on-site
While knowing how to remove lens flare in Photoshop is a vital skill, the most efficient way to handle optical artifacts is to prevent them during the shoot. Most satisfying real estate images actually begin with a clean RAW file, as preventing light issues on-site preserves more authentic and nuanced data than any software can reconstruct.
First, always use a high-quality lens hood to block oblique light from hitting the front element. For glass and polished surfaces, a Circular Polarizer (CPL) filter is an essential tool; it allows you to physically rotate the filter to cut through window glare in real estate photos and aids significantly in reflection removal in real estate photos on hardwood floors or marble countertops.
 A lens hood is a simple yet effective piece of equipment to reduce lens flare
Another professional secret is the "finger trick" to fix sun flare in property photography. With your camera on a tripod, take one exposure normally. Then, take a second frame while holding your finger or a dark card just outside the lens to block the direct sun. During the photo retouching phase, you can simply mask out the finger, leaving a flare-free image. Finally, be mindful of your tripod's position; often, shifting your angle by just a few inches can get rid of a distracting reflection in a mirror or window.
7. Why should photographers outsource architectural image retouching?
As a real estate photographer, your time is your most valuable asset. While mastering how to remove lens flare in Photoshop is a critical skill, spending hours behind a monitor can limit your ability to be out in the field capturing new listings. This is where outsourcing becomes a strategic advantage.
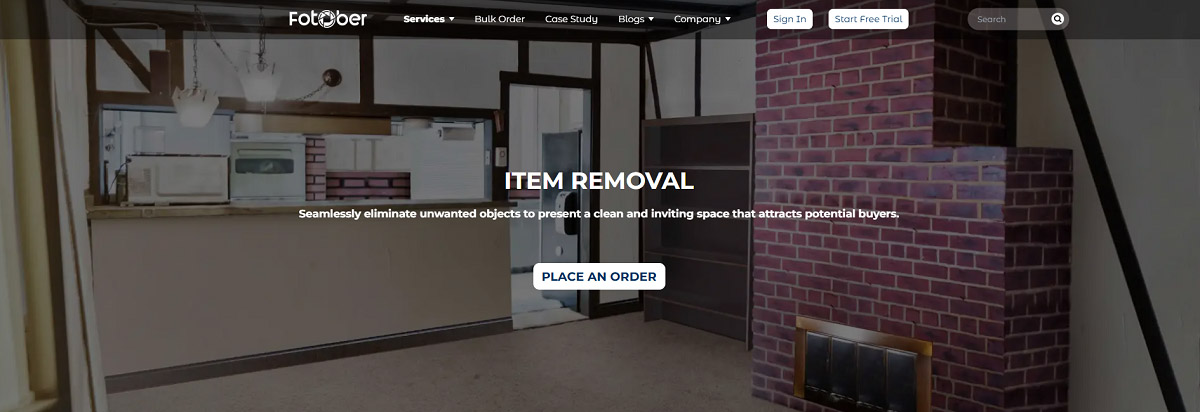 Item removal services by dedicated editing teams like Fotober can handle high-volume projects for you with consistent quality and affordable pricing
- Efficiency and scalability: Professional editing houses allow you to scale your business during peak real estate seasons. Instead of being bottlenecked by your own editing capacity, you can shoot multiple properties a day and receive polished results overnight.
- Consistency across portfolios: Large-scale retouching requires a consistent "look and feel." Outsourcing to a dedicated team ensures that your color grading, window pulls, and reflection removal quality remain uniform across every project, reinforcing your brand identity.
- Access to specially-trained editors: High-end retouching often requires advanced techniques like frequency separation or complex luminosity masking. By outsourcing, you tap into a pool of editors who specialize exclusively in architectural aesthetics, ensuring a level of precision that is difficult to achieve alone.
- Cost-effectiveness: When you factor in the cost of software subscriptions, hardware maintenance, and the hourly value of your time, outsourcing is often more affordable than handling every surgical flare-removing task in-house.
Conclusion
Mastering the art of architectural photo retouching is what separates a hobbyist from a professional real estate photographer. While on-site prevention is always the ideal first step, knowing how to remove lens flare in Photoshop and precisely remove window glare in real estate photos ensures your portfolio remains flawless regardless of challenging lighting conditions.
By applying these advanced techniques to tame sun flare and focusing on meticulous reflection removal in real estate photos, you provide clients with the high-end, distraction-free visuals necessary to close premium deals. Ready to elevate your property portfolio? Start practicing these workflows today to transform every raw capture into a polished architectural masterpiece.
Follow us on social media to explore more practical techniques in real estate photo editing and up-to-date details of our services!
- Facebook: fotobermedia.co
- YouTube: Fotober
- TikTok: @fotober
- Instagram: fotober_media.
Related posts

Las Vegas Virtual Staging: Best Platforms to Enchant Your Listings
July 23, 2026

Best Austin Real Estate Photography Options for Perfect Listing Photos
July 22, 2026
Best Aperture for Real Estate Photography: The Range for Sharp Photos
July 18, 2026

Short-Term Rental Photography: Shoot & Edit Photos That Gain Bookings
July 17, 2026
