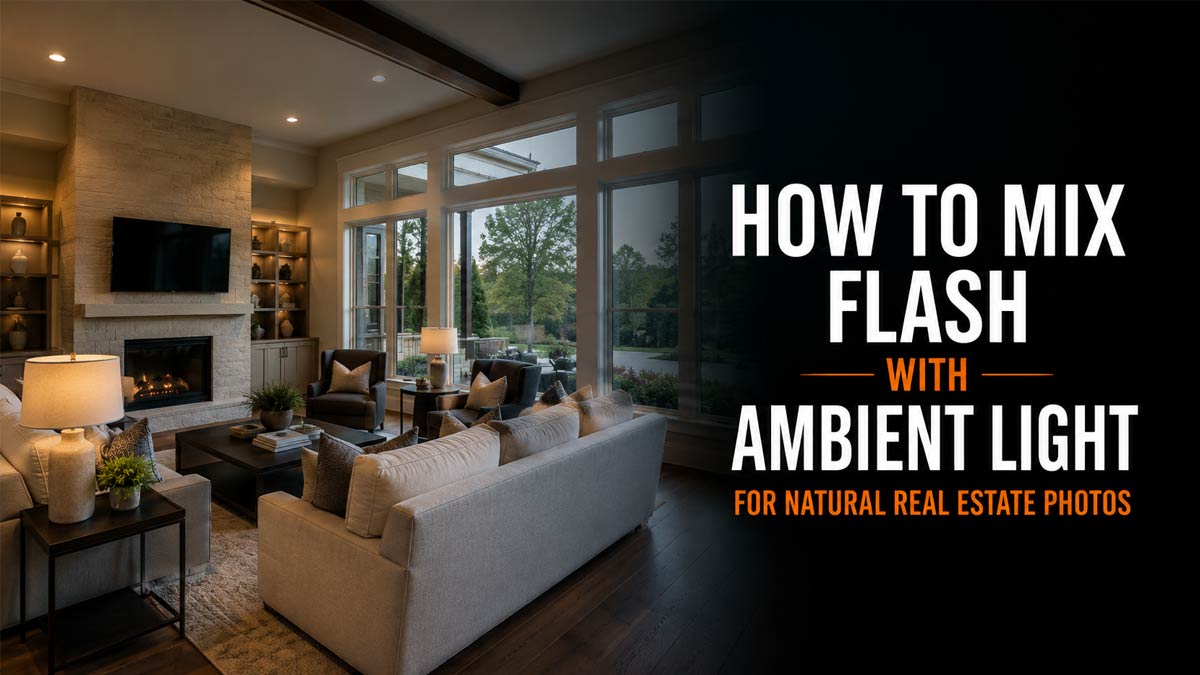
How to Mix Flash with Ambient Light for Natural Real Estate Photos
1. What does mixing flash with ambient light mean?
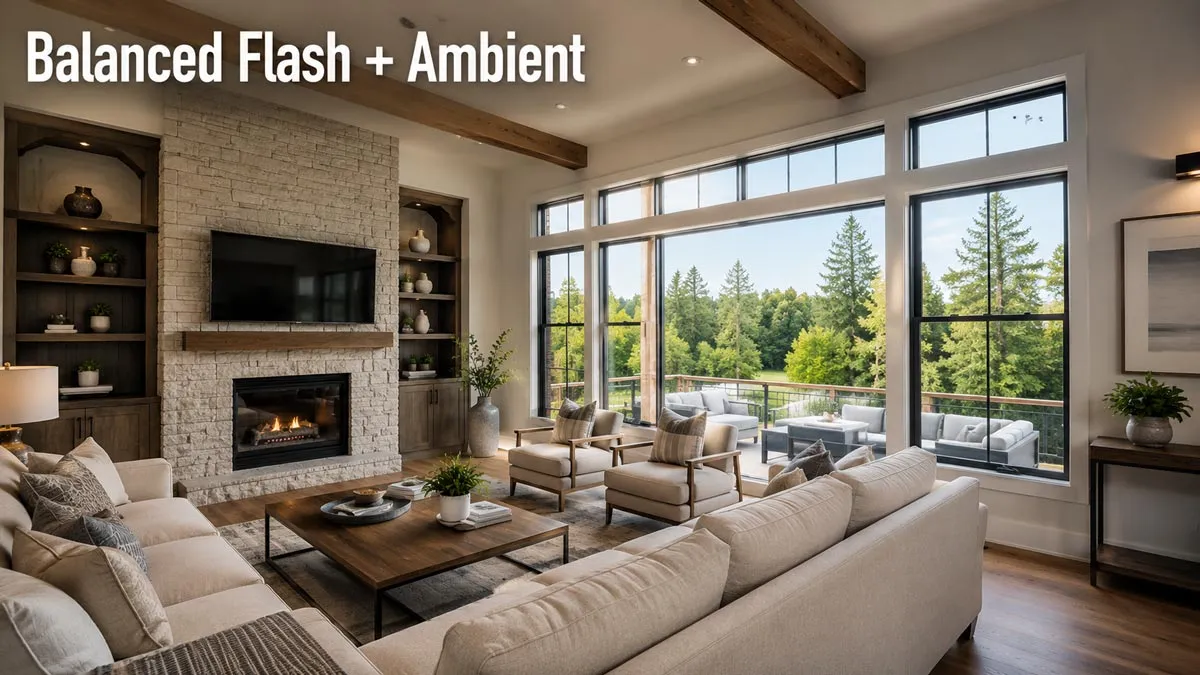
Mixing flash with ambient light means balancing artificial flash with the existing light already present in a room to create a natural-looking image. Instead of letting one light source completely overpower the other, photographers combine both to maintain realistic brightness, accurate colors, and softer shadows.
In real estate photography, this technique is commonly used because interior spaces often contain several different light sources at once. Window light, recessed ceiling lights, lamps, and under-cabinet lighting can all produce different color temperatures within the same frame. Cameras usually struggle to balance these lighting conditions on their own, especially in high-contrast interiors.
By blending flash with ambient exposure, photographers can control contrast while still preserving the natural feel of the room. The goal is not to make the image look “flashy.” The goal is to make the lighting appear clean, even, and believable.
1.1. What is ambient light in photography?
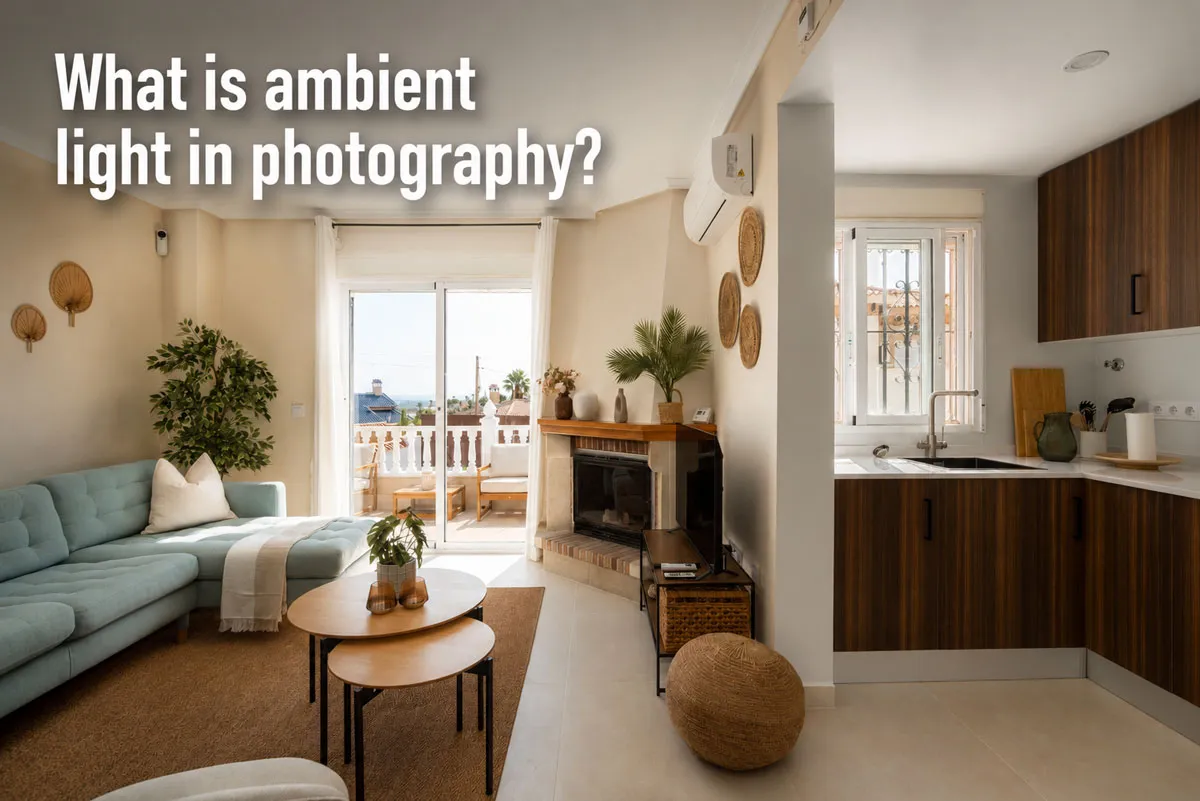
Ambient light refers to the natural or existing light already available in a scene before any artificial lighting is added. In real estate photography, ambient light may come from large windows, ceiling fixtures, lamps, LED strips, or even reflected daylight bouncing off walls and floors.
This existing light plays a major role in defining the mood and atmosphere of a space. Warm lamps can make a living room feel cozy, while soft daylight from windows can help a room feel open and airy. Ambient light also preserves realistic shadow transitions that make interiors feel more dimensional and less flat.
However, relying only on ambient light often creates technical problems. Bright windows can easily become overexposed while darker corners lose detail. Mixed lighting temperatures can also create orange, green, or blue color casts throughout the image. These issues become even more noticeable in rooms with limited natural light or darker finishes. That’s why ambient exposure alone rarely produces the polished look expected in professional property listings.
1.2. What does flash add to interior photos?
Flash gives photographers more control when balancing interior exposure, which is one of the most important parts of learning how to mix flash with ambient light effectively. A properly placed flash can brighten dark corners, recover lost detail, and create cleaner overall exposure without pushing ISO too high.
One of the biggest advantages of flash in real estate photography is color accuracy. Interior lighting often contains warm tungsten or mixed LED tones that can make walls and ceilings look yellow or uneven. Flash, especially daylight-balanced flash around 5500K, helps neutralize those unwanted color shifts and produces more consistent white balance across the room.
Flash also helps separate textures and architectural details that may disappear under flat ambient lighting. Features like cabinetry, countertops, ceiling beams, and wall textures tend to look sharper and more defined when controlled flash is added carefully.
Still, direct flash can easily create harsh shadows, blown highlights, or bright reflections if it’s used incorrectly. That’s why most professional real estate photographers bounce flash off ceilings or walls rather than aiming it directly into the room. This creates softer, more natural-looking light that blends better with the existing environment.
1.3. Why photographers blend flash with ambient light

Professional photographers learn how to mix flash with ambient light because combining both light sources usually creates a far more realistic result than relying on ambient exposure or flash alone. Ambient light keeps the room feeling natural and lived-in. It preserves the warmth of practical lighting fixtures and maintains the overall atmosphere of the property. Flash, on the other hand, improves clarity, balances exposure, and reduces the muddy shadows that cameras often struggle to capture indoors.
When these two light sources are balanced correctly, the result feels closer to how the human eye sees the space in person. Windows retain detail, shadows stay soft, and colors look cleaner without making the room appear artificially lit.
This approach is especially popular in flambient real estate photography, where photographers combine flash exposures with ambient exposures during editing to produce bright yet realistic interiors. Many high-end real estate listings use this workflow because it delivers cleaner results than HDR alone, particularly in rooms with difficult lighting conditions or strong window light. Once you understand how both light sources work together, the next step is learning how to balance them correctly during a real estate shoot.
2. How to mix flash with ambient light step by step
Learning how to mix flash with ambient light is less about using complicated gear and more about controlling balance. The best real estate photos don’t look heavily lit or artificially bright. They simply make a space feel clean, open, and natural.
A good workflow starts with the ambient exposure first, then uses flash to support the room rather than overpower it. This approach helps preserve realistic shadows, maintain window detail, and create more accurate color throughout the image. Below is a practical step-by-step workflow many real estate photographers use when shooting interiors with mixed lighting conditions.
2.1. How to mix flash with ambient light by exposing for ambient light first
The first step in learning how to mix flash with ambient light is understanding that ambient exposure should usually come first. Before adding any flash, take a test shot using only the available light in the room.
This initial exposure helps you evaluate three important things:
- Window brightness
- Shadow depth
- Overall room atmosphere
In most interior scenes, windows are significantly brighter than the room itself, which is why many photographers combine flash techniques with exposure bracketing to preserve both interior detail and exterior window views. On a sunny day, window light can measure 4–7 stops brighter than interior exposure, depending on the time of day and room orientation. If the room is exposed too brightly in-camera, windows will often blow out completely, losing exterior detail.
A better approach is to slightly underexpose the room while protecting the highlights near windows. Many real estate photographers intentionally keep ambient exposure around -0.3 to -1 EV below what the camera meter suggests. This preserves detail and gives more flexibility once flash is introduced.
At this stage, ignore dark corners temporarily. The purpose of the ambient frame is to establish the room’s natural mood and directional light. Flash will later fill the shadows and even out the exposure. A tripod becomes especially helpful here because slower shutter speeds are often necessary. Interior ambient exposures commonly fall between 1/15 and 1/2 second, depending on available daylight.
2.2. How to mix flash with ambient light using the right camera settings
Camera settings play a major role in how successfully you mix flash with ambient light. Even a well-placed flash can look unnatural if exposure settings are inconsistent. Unlike portrait photography, real estate photography usually prioritizes detail and depth throughout the entire room. That means settings should favor sharpness, dynamic range, and controlled highlights over shallow depth of field.
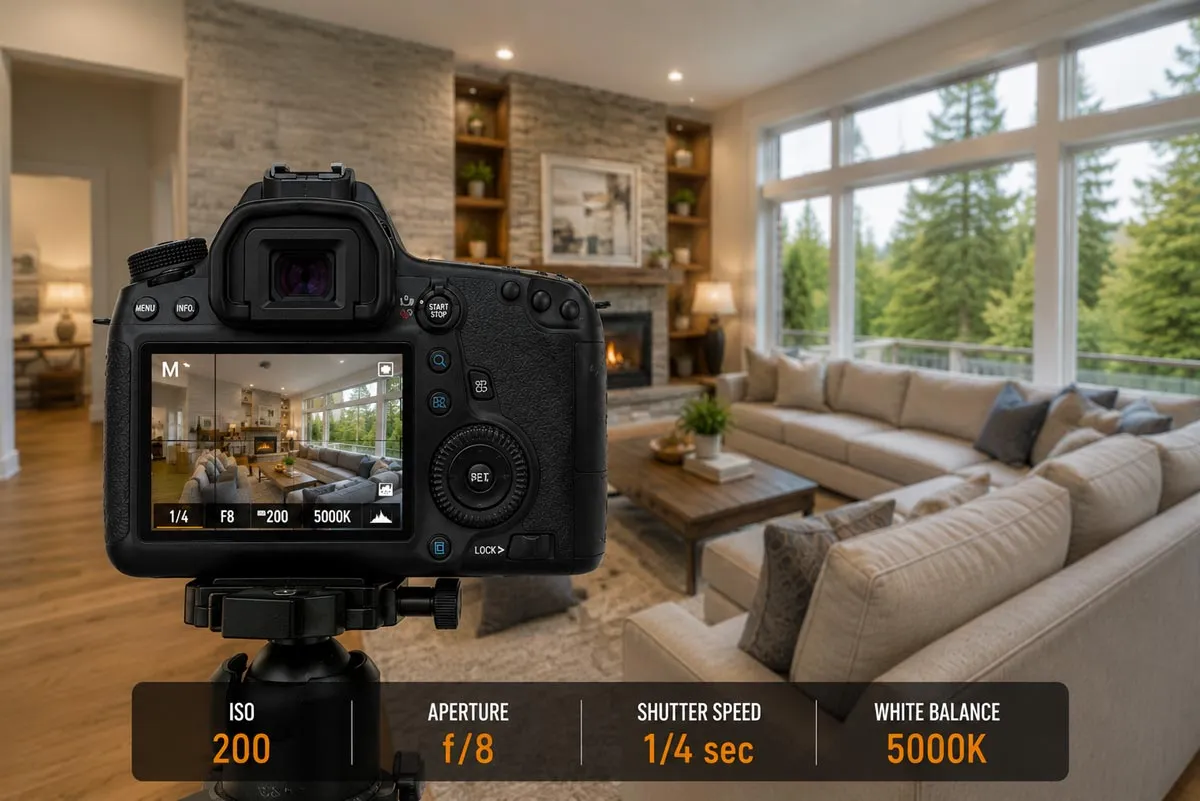
Here are my most commonly used starting settings for interior real estate photography:
ISO should stay as low as possible whenever shooting interiors. Raising ISO too aggressively can introduce shadow noise and reduce detail recovery during editing. Most professional real estate photographers stay between ISO 100 and ISO 320 unless the space is extremely dark.
Aperture is equally important. Wide apertures like f/2.8 may look attractive in portrait work, but they rarely work well for interiors because parts of the room fall out of focus. Apertures around f/8 generally provide the best balance between sharpness and lens performance.
Shutter speed controls ambient exposure, not flash brightness. This is one of the most important concepts when learning how to mix flash with ambient light. Slowing the shutter allows more natural room light into the image, while flash duration remains nearly unchanged.
White balance can be more difficult because many interiors contain mixed lighting sources. Daylight-balanced flash typically sits around 5500K, while tungsten bulbs often range between 2700K and 3200K. Choosing a consistent white balance in-camera makes blending easier later during editing.
2.3. How to mix flash with ambient light by bouncing flash instead of using direct flash
Direct flash is one of the fastest ways to make a real estate photo look cranked-up. It creates harsh shadows, bright hotspots, and unnatural reflections that immediately reveal the use of flash. That’s why experienced photographers rarely point flash directly into a room. Instead, they bounce flash off ceilings, walls, or nearby neutral surfaces. Bouncing increases the apparent size of the light source, which creates softer transitions and more natural shadow edges.
Ceiling bounce is one of the most common techniques for interior photography. By aiming the flash upward at roughly a 45–75 degree angle, the ceiling acts like a giant softbox that spreads light evenly throughout the room. Wall bounce works similarly and is especially useful in rooms with lower ceilings or directional window light. Bouncing from the side can help mimic natural daylight entering through windows, which often produces more realistic depth.
However, surface color matters. Flash bounced off yellow walls or wood ceilings can introduce strong color casts into the image. Neutral white or light gray surfaces usually produce the cleanest results. Distance also affects light softness. A flash bounced from a nearby wall creates softer light than one bounced across a large open space because the reflected source becomes relatively larger compared to the subject.
Many photographers using flambient techniques prefer off-camera flash because it provides more control over direction and shadow placement. Even a single speedlight positioned correctly can dramatically improve interior lighting quality.
2.4. How to mix flash with ambient light by adjusting flash power gradually
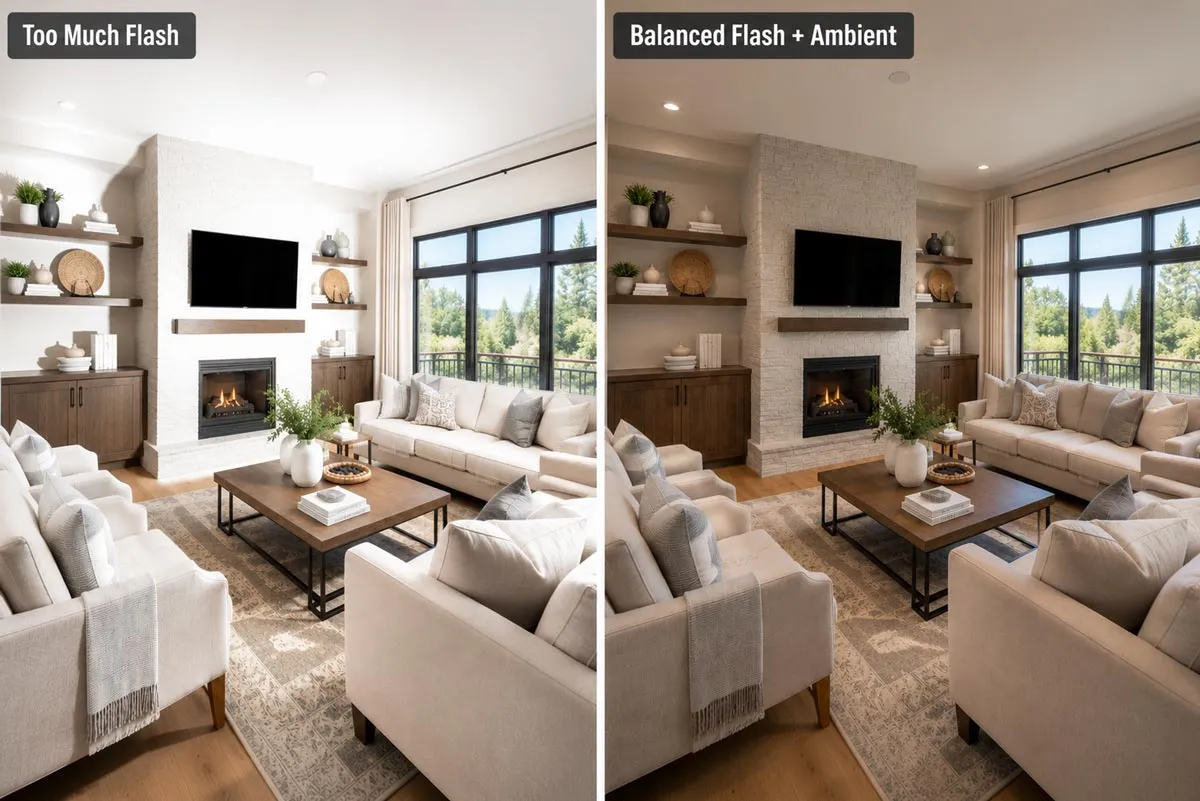
One of the most common mistakes beginners make is using too much flash power too quickly. Strong flash may brighten the room, but it often removes the natural atmosphere that makes interiors feel realistic.
A better strategy is to start low and build gradually. Most real estate photographers begin testing flash around 1/32 or 1/16 power, then adjust based on room size, ceiling height, and reflective surfaces. Smaller rooms with white walls usually require far less flash output than open-concept spaces with dark finishes. The goal is not to eliminate shadows completely. Some shadow depth is important because it preserves texture and dimension. Completely flat lighting often makes interiors look lifeless.
Watch carefully for these warning signs of excessive flash:
- Bright hotspots on walls
- Harsh furniture shadows
- Reflective glare on countertops
- Uneven ceiling brightness
- Artificial-looking white balance
Histogram review can help identify clipped highlights before moving to the next room. If the brightest areas are pushed too far right, reduce flash power slightly and retest. Another helpful technique is feathering the flash. Instead of aiming directly at the main subject area, angle the flash slightly away so only the softer edge of the light reaches the room. This creates smoother transitions and avoids obvious flash direction. When learning how to mix flash with ambient light, subtlety usually produces the most professional results.
2.5. How to mix flash with ambient light by matching flash color to room lighting
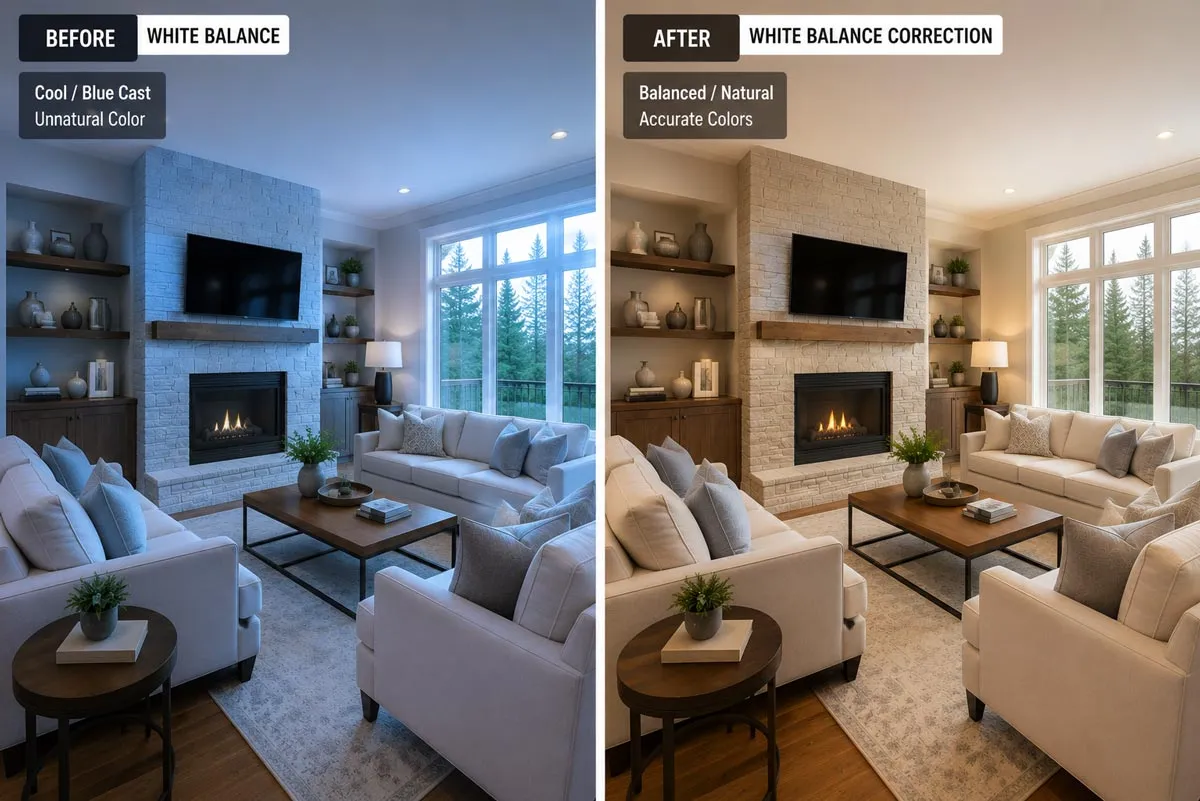
Color consistency is one of the hardest parts of interior photography. Even when exposure looks correct, mixed lighting temperatures can quickly make a room feel unnatural. This happens because most flashes are daylight-balanced at roughly 5500K, while indoor bulbs are often much warmer. Standard tungsten lighting typically falls between 2700K and 3200K, creating orange or yellow tones compared to flash. Without correction, the image may contain both cool blue areas and warm orange areas in the same frame.
That’s where color correction gels become useful. CTO gels, short for Color Temperature Orange, warm the flash output so it blends more naturally with indoor lighting. A full CTO gel typically converts daylight-balanced flash closer to tungsten color temperature, while half CTO gels provide more subtle warming. Many photographers shooting residential interiors keep half CTO gels permanently attached to their flashes because modern homes frequently use warm LED fixtures.
Matching color temperatures before shooting saves significant editing time later. It also creates smoother transitions between window light, ceiling fixtures, and flash-filled areas. Custom white balance can help further improve consistency. Some photographers use a gray card or color checker at the beginning of a shoot to create more accurate color reference points during post-processing.
2.6. How to mix flash with ambient light by blending exposures in editing
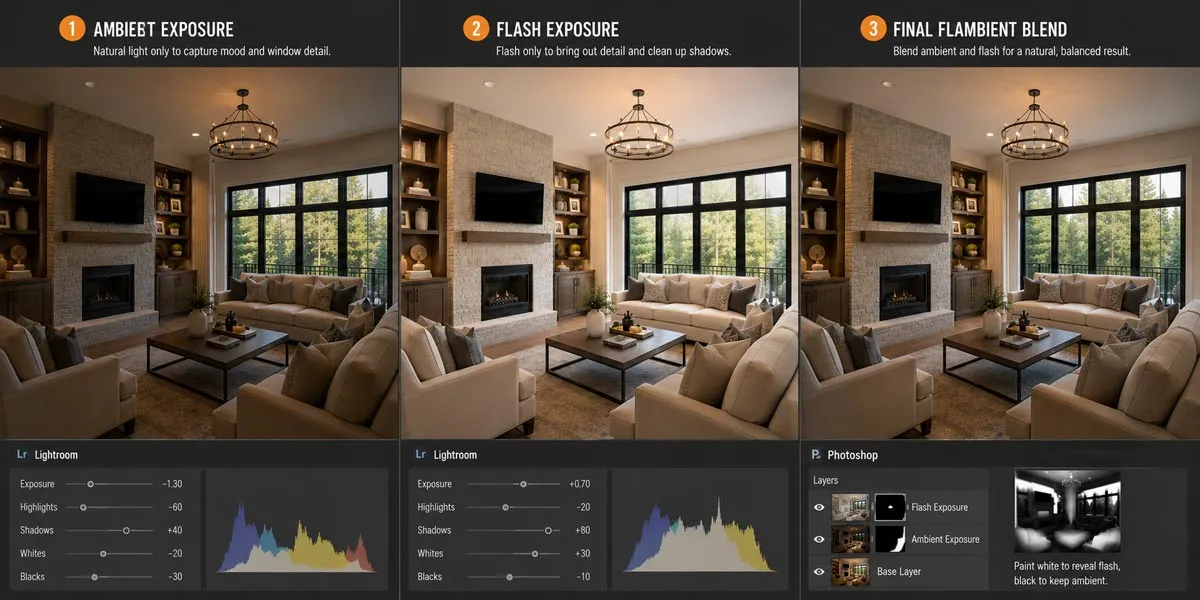
Even with good in-camera technique, most professional flambient images still require editing to achieve a polished final result. The editing process usually combines two separate exposures:
- Ambient exposure for mood and natural lighting
- Flash exposure for clarity and clean color
Adobe Lightroom is commonly used for initial corrections like lens distortion, exposure balancing, and color adjustments. Photoshop is then used for manual blending and masking. A typical flambient workflow involves stacking ambient and flash frames as layers, then masking portions of each image to preserve the best qualities from both exposures. For example:
- Ambient layers often preserve natural shadows and window glow, while localized adjustments in Lightroom can further help remove distracting shadows from interior photos without flattening the image.
- Flash layers improve wall color and detail clarity
- Masking allows photographers to blend selectively instead of applying global corrections across the entire room.
Window pulls are another common editing technique. This involves separately exposing the exterior view through windows and blending it naturally into the final image without making it look fake or overly HDR-processed. The most convincing edits are usually the least noticeable. Good flambient editing should make viewers focus on the space itself, not the editing technique behind it.
2.7. How to mix flash with ambient light while checking reflections and window exposure
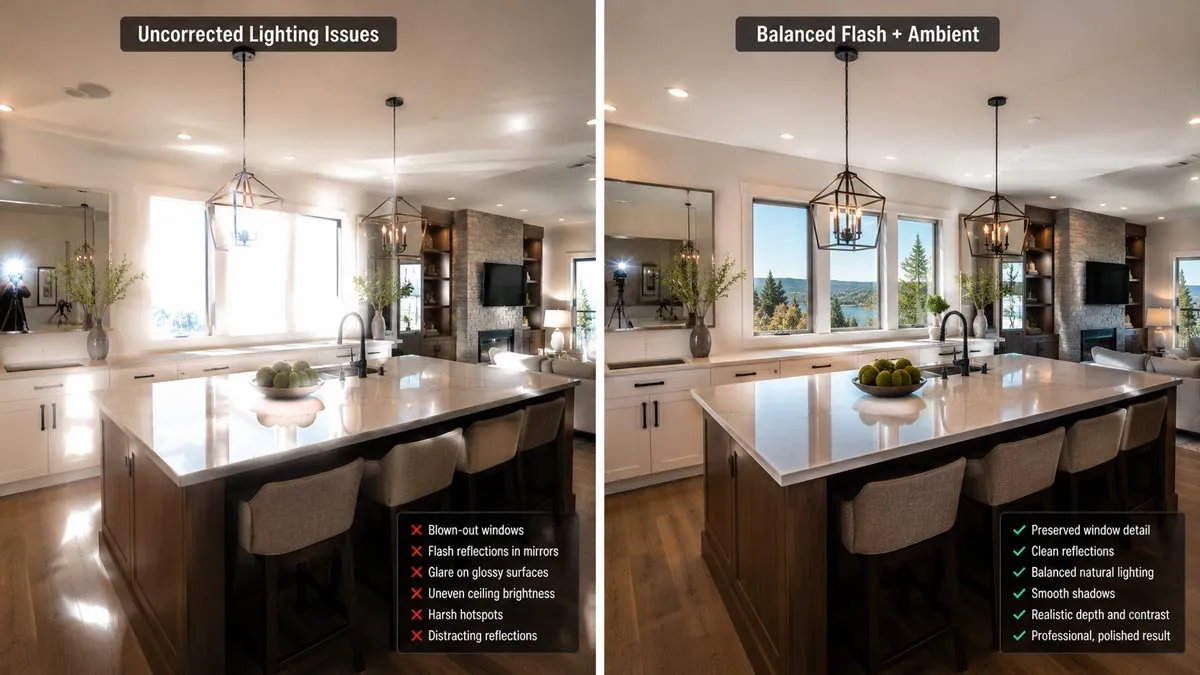
Before finishing a shot, take a few seconds to inspect the room carefully for reflections, uneven shadows, and blown highlights. Small lighting issues become much more noticeable once images are viewed on large listing platforms.
Mirrors and glossy surfaces are some of the biggest challenges in real estate photography because even small flash angles can create unwanted glare or reflections. Similar reflection control techniques are abundantly available for shooters learning how to photograph glass without reflections. Simply put, a poorly placed flash can easily reflect into the frame, along with the tripod or even the photographer. Slight angle adjustments often solve this problem without changing the entire lighting setup.
Reflective furniture surfaces also require attention. Stainless steel appliances, glossy countertops, polished floors, and glass decor can create bright hotspots if flash placement is too aggressive. Window exposure should receive special attention as well. Buyers naturally look toward windows when viewing listing photos because windows help define brightness and openness within a property. Completely blown-out windows can make interiors feel overprocessed and unrealistic.
A good final image should maintain detail both inside the room and outside the windows whenever possible. In high-end real estate photography, preserving exterior scenery often adds significant visual value to the listing. Before moving on to the next room, zoom into the image and check:
- Window highlights
- Ceiling brightness
- Flash reflections
- Color consistency
- Shadow transitions
These small corrections are often what separate average interior photos from professional-quality real estate images.
3. Common mistakes when mixing flash and ambient light
Even after learning how to mix flash with ambient light, small lighting mistakes can still make interior photos look unnatural. Most issues come from trying to brighten the room too aggressively or ignoring color consistency between different light sources.
3.1. Using too much flash
One of the most common problems in real estate photography is overpowering the room with flash. This usually creates bright hotspots on walls, flat textures, and unnatural-looking shadows behind furniture. It happens because the flash becomes the dominant light source instead of supporting the ambient exposure.
A simple fix is to reduce flash output and let more natural room light remain visible. Many photographers start around 1/32 or 1/16 flash power and increase gradually only if needed.
3.2. Ignoring mixed color temperatures
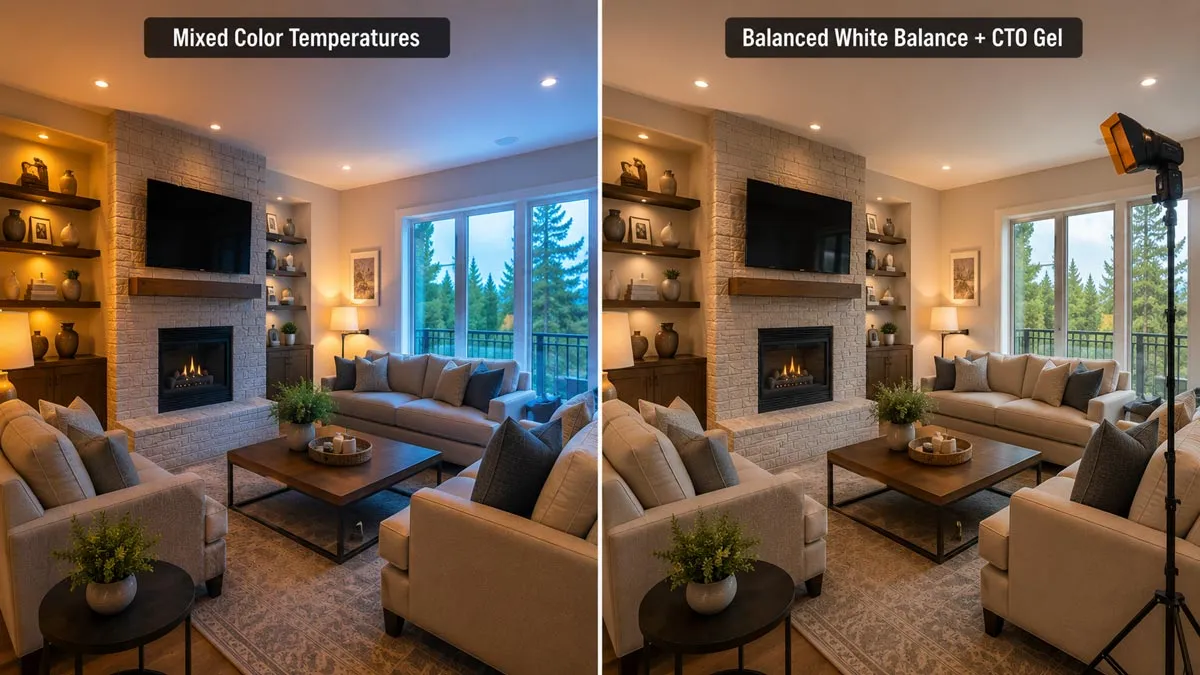
Interior spaces often contain multiple lighting types at once, including daylight, tungsten bulbs, and LEDs. Since these light sources can range anywhere from 2700K to over 6000K, inconsistent color casts are extremely common. Without correction, walls may appear orange in one area and blue in another. Using CTO gels and setting a consistent white balance in-camera usually creates much smoother color transitions.
3.3. Creating harsh shadows
Direct flash aimed into a room tends to produce sharp shadows and overly contrasty lighting. This makes interiors feel smaller and less inviting. The issue typically comes from using flash too close to the camera axis or not diffusing the light properly. Bouncing flash off ceilings or nearby walls softens shadow edges and creates more natural light spread throughout the space.
3.4. Overediting flash exposures
Heavy HDR effects, excessive clarity, or aggressive shadow recovery can quickly make interiors look unrealistic. Overedited images often lose depth and start to resemble CGI rather than real spaces. A better approach is subtle blending. Natural contrast, clean white balance, and controlled highlights usually produce more professional real estate photos than extreme edits.
4. Why professional real estate photo editing matters
Even experienced photographers can run into challenges when balancing flash and ambient exposures. Window pulls may look unnatural, reflective surfaces can create distracting glare, and mixed lighting often leaves behind uneven color casts that are difficult to fully correct in-camera.
This is especially true in luxury interiors where large windows, glossy finishes, and layered lighting make exposure balancing far more complex.
Professional editing helps refine those details while keeping the image realistic. Careful flambient blending can recover highlight detail, soften harsh transitions, and create more consistent color throughout the room without making the photo feel overprocessed.
Fotober helps real estate photographers turn complex flash and ambient exposures into clean, natural-looking listing photos. From realistic window pulls to balanced interior lighting and accurate color correction, our editing team focuses on preserving the natural feel of each property while delivering fast turnaround times for busy shooting schedules.
Proper lighting is only a part of creating professional listing images. Export settings, aspect ratios, and compression also matter when preparing photos for MLS platforms. Understanding current MLS photo size requirements helps maintain image quality across listing websites.
5. Conclusion
Mixing flash with ambient light is less about making a room brighter and more about making it feel natural. When ambient exposure, flash placement, and color balance work together correctly, interiors look cleaner, more realistic, and more inviting to buyers. With consistent practice and a thoughtful editing workflow, you can create real estate photos that preserve both the atmosphere of the space and the detail needed for professional-quality listings.
If you regularly shoot interiors with mixed lighting conditions, following Fotober for real estate photography tips and professional editing workflows can help simplify post-production and improve listing quality consistently.