
MLS Photo Size Requirements (2026): Exact Dimensions, Format & File Size Guide

Share:
Table of Contents
- 1. Understanding MLS photo size requirements in 2026
- 2. The best aspect ratio for real estate photos on the MLS
- 3. What is the maximum file size for MLS photos?
- 4. How to resize real estate photos for MLS without losing quality
- 5. Where to improve to get the best image quality on the MLS
- 6. Common MLS photo rejections and how to avoid them
- 7. Conclusion
- 8. FAQs about MLS photo size requirements
Potential buyers scroll through dozens of properties a minute, giving each listing a mere two seconds to grab their attention. However, capturing beautiful photos is just half the battle. If your files don't comply with platform standards, local Multiple Listing Services (MLS) will aggressively compress your images, distort your views, or even reject your upload. To save you from listing-day disasters, this guide outlines the updated MLS photo size requirements for 2026. We will break down the best aspect ratios, maximum file capacities, and provide a step-by-step walkthrough on resizing real estate photos while preserving quality.
1. Understanding MLS photo size requirements in 2026
Understanding the technical aspect of real estate listings requires keeping pace with rapid hardware and platform updates. In 2026, understanding precise MLS photo size requirements is a baseline requirement for any real estate professional or photographer aiming to maintain a premium brand online.
|
Specification |
Minimum |
2026 Recommended |
|
Dimensions |
1024 x 768 px |
2048 x 1536 px (or 2048 x 1365 px) |
|
Aspect ratio |
4:3 is recommended |
4:3 (most common) hoặc 3:2 (original DSLR ratio) |
|
File size |
100 KB - 500 KB |
10 MB – 15 MB |
|
Format |
JPEG / JPG |
JPEG (sRGB Color Space) |
1.1. Minimum vs. recommended dimensions
Most local MLS platforms maintain a legacy minimum resolution requirement, typically around 1024 x 768 pixels. While the platform backend will technically accept these files without triggering an error message, uploading at the bare minimum is a costly marketing mistake.
Today’s consumer devices, ranging from high-end smartphone displays to 4K desktop monitors, possess incredibly high pixel densities. When a low-resolution 1024px image is stretched across a modern tablet screen, it immediately loses clarity, resulting in blurry details and a cheapened presentation.
 The minimum dimensions for photos on the MLS are 1024x768px.
To guarantee your listings look sharp on every screen, the gold standard for 2026 is a recommended size of 2048 x 1536 pixels. This resolution hits the absolute "sweet spot" for modern listing presentation. It offers enough crisp data for potential buyers to comfortably utilize pinch-to-zoom features, allowing them to inspect the grain of custom quartz countertops or the condition of hardwood flooring, while keeping the digital footprint light enough for lightning-fast loading speeds.
1.2. How syndication partners handle image sizes
Your local MLS is only the first stop for your property media. Through automated data syndication, your photos are pushed to major consumer-facing portals like Zillow, Realtor.com, and Redfin. Each of these secondary platforms operates on its own distinct user interface and image viewer logic.
If your files do not perfectly align with standard MLS photo size requirements, syndication engines use aggressive, automated algorithms to force your images into their specific layout containers.
If your resolution is too low, the system stretches the image, creating ugly digital artifacting (distortions or pixel blocks). If the dimensions are non-standard, the platform may automatically crop out vital parts of your composition, potentially cutting off elegant tray ceilings, designer light fixtures, or expansive flooring. By uploading your media at the universal 2048-pixel width standard, you ensure that your visual presentation remains consistent, predictable, and flawless across the entire real estate ecosystem.
2. The best aspect ratio for real estate photos on the MLS
Composing a visually stunning real estate image requires a keen eye for interior design, but presenting it correctly on the web requires a deep understanding of layout geometry. Choosing the best aspect ratio for real estate photos directly dictates how a property's spatial dimensions are perceived by online buyers, making it a critical technical decision in your media production workflow.
2.1. Choosing 4:3 vs. 3:2 vs. 16:9 - Which one wins?
The real estate media industry primarily utilizes three framing ratios, each offering unique visual advantages and platform compatibility challenges:
- 4:3 aspect ratio (The MLS champion): This is widely considered the best aspect ratio for real estate photos in 2026. Because modern MLS frameworks and mobile listing apps are heavily optimized for compact layout containers, a 4:3 frame maximizes the viewable area on a user's screen. It provides extra vertical headroom, allowing you to capture both elegant floor details and high vaulted ceilings simultaneously without making the room feel cramped.
- 3:2 aspect ratio (The native standard): This is the default aspect ratio generated by professional full-frame mirrorless camera sensors. While 3:2 provides a beautiful, natural field of view, uploading it directly to a 4:3-centric MLS can occasionally result in "pillarboxing" (grey or black bars on the sides) or unpredictable automated cropping by the platform's backend.
- 16:9 aspect ratio (The widescreen specialist): This ultra-wide format is best reserved for dramatic drone photography or sweeping exterior landscapes. While 16:9 looks spectacular on a widescreen monitor, it performs poorly in standard property search results. When forced into the MLS photo size requirements of thumbnail format, the sides of a 16:9 image are frequently clipped, destroying your initial composition.
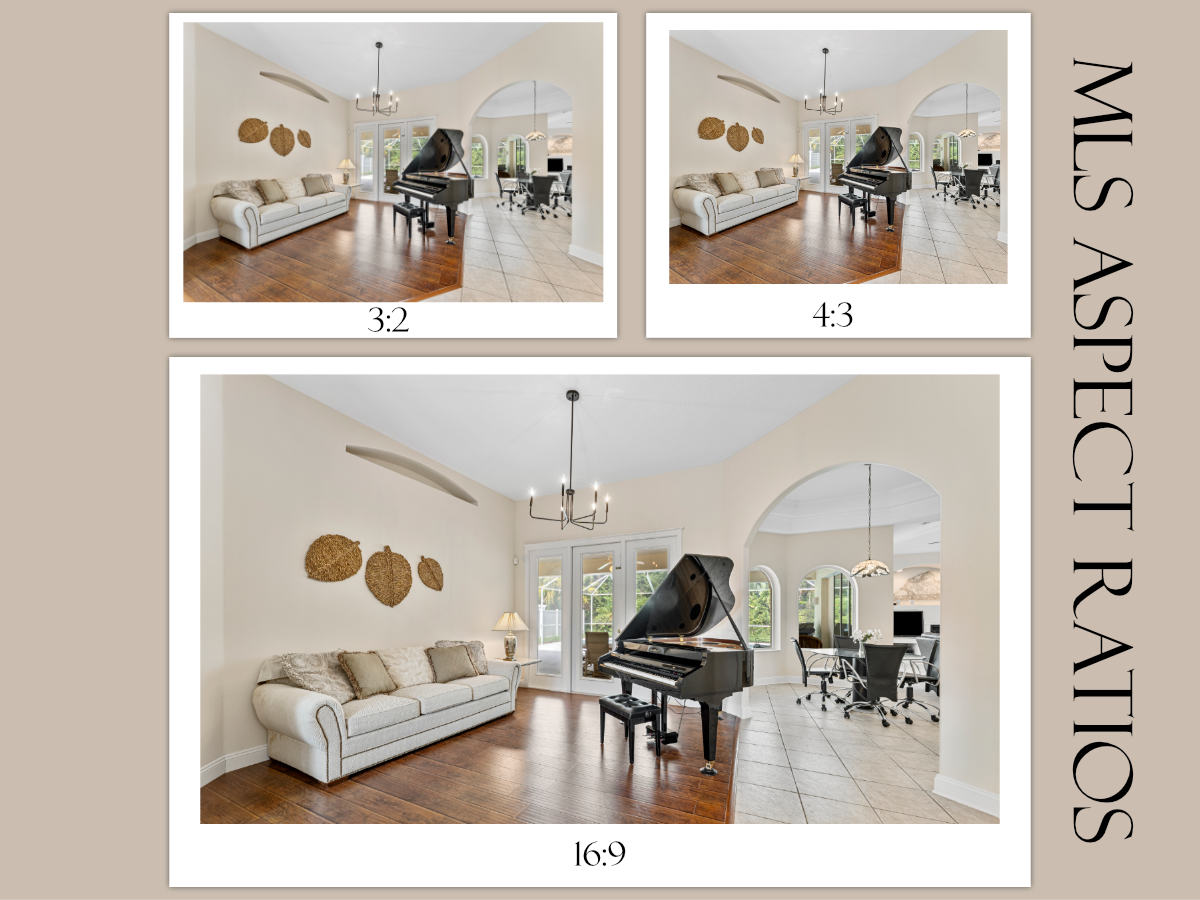 MLS allows multiple aspect ratios, with 4:3 being the most favorable.
2.2. The danger of vertical (portrait) orientation in listings
In an era dominated by vertical mobile video platforms like TikTok and Instagram Reels, it can be tempting to capture vertical property photos, especially for narrow spaces like powder rooms or walk-in closets. However, doing so remains a highly detrimental mistake on an MLS platform.
MLS search interfaces are strictly built around horizontal structures. When a vertical (portrait) image is uploaded, the system typically forces it into a horizontal box. This leaves massive, unprofessional blank spaces on both sides of the frame, distracting the viewer and making the property listing look amateurish. To maintain a polished, professional aesthetic, always shoot in landscape orientation.
3. What is the maximum file size for MLS photos?
With today’s high-resolution mirrorless cameras capturing incredible detail, uncompressed images can easily exceed 30 MB or 40 MB. However, uploading these massive files directly to an active listing is impossible due to strict network bandwidth boundaries. Real estate professionals must carefully manage the maximum file size for MLS photos to avoid instant platform rejection.
3.1. Regional MLS limits breakdown
While exact MLS photo size requirements vary by regional jurisdictions, most major MLS platforms in 2026 have raised their file caps to accommodate modern imagery:
- CRMLS (California): Allows up to 15MB per image, with a generous maximum of 100 photos per listing.
- Bright MLS (Mid-Atlantic): Permits file sizes up to 20MB for up to 50 photos.
- Stellar MLS & HAR (Texas): Typically caps individual uploads between 10MB and 15MB.
 Keep your file sizes in check for MLS.
If your file exceeds these specific regional caps, the portal's uploader will trigger an error and block the upload entirely, stalling your listing launch.
3.2. The balance between high resolution and page loading speed
Just because an MLS platform permits a 15MB file does not mean you should upload it at that size. Bloated image files cause massive bottlenecks when syndicated to consumer sites.
From an SEO perspective, slow-loading images negatively impact your website's Core Web Vitals, specifically Largest Contentful Paint (LCP), which can lower your organic search rankings. More importantly, mobile homebuyers on cellular networks will quickly abandon a listing if the media gallery takes more than a few seconds to render.
To maximize user engagement while remaining safely under the maximum file size for MLS photos, aim for an optimized sweet spot of 1MB to 3MB per photo after proper compression.
4. How to resize real estate photos for MLS without losing quality
Transforming raw, high-resolution property images into web-ready assets requires a systematic approach. If you manually adjust files one by one, your post-production workflow will grind to a halt. Instead, mastering automated batch processing ensures your images consistently meet MLS photo size requirements while retaining beautiful, crisp detail.
4.1. Setting up your export presets in Adobe Lightroom & Photoshop
Automating your workflow is easiest in Adobe Lightroom. Once you have finished color correction and masking, ensure your images are cropped to the best aspect ratio for real estate photos (ideally 4:3 or 3:2).
 You should create a preset for quicker export of a batch of photos.
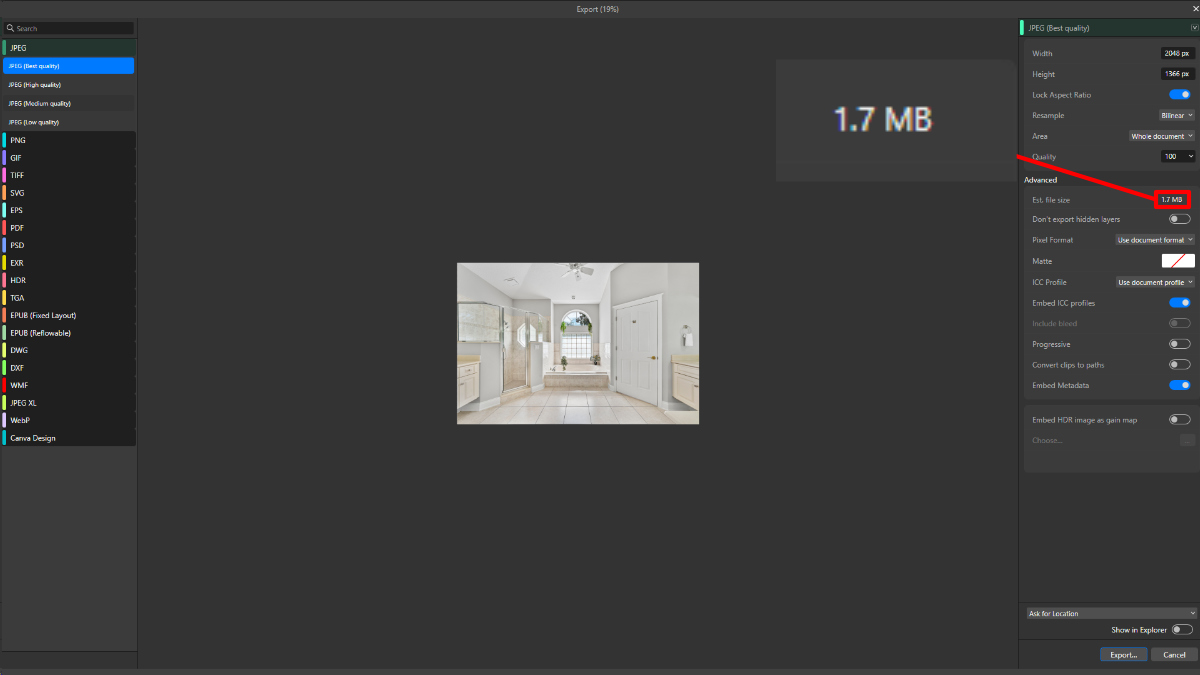
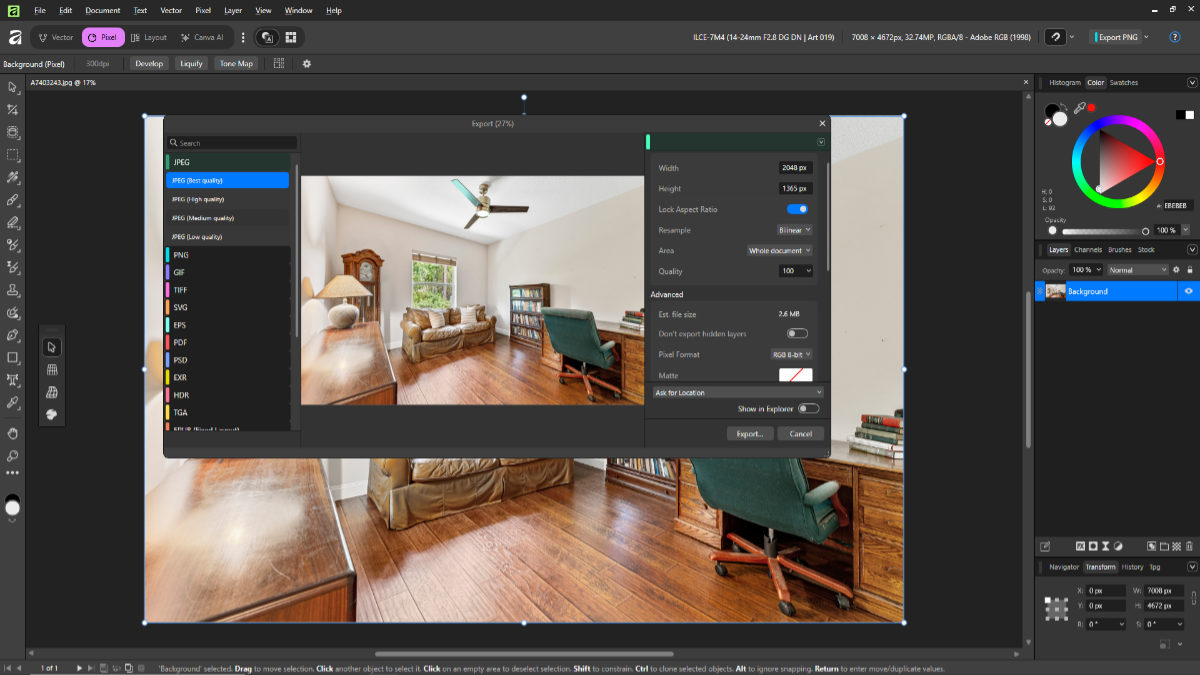
To batch export, select your final images and open the Export dialog box. Navigate to the Image Sizing panel and apply the following settings:
1. Check the Resize to Fit box and select Long Edge from the drop-down menu.
2. Set the length to 2048 pixels.
3. Set the resolution to 72 pixels per inch (ppi).
This setting ensures that whether the photo is a standard interior shot or a wide drone photograph, its maximum boundary perfectly scales to modern MLS display grids without any manual calculations.
4.2. Selecting the right format and compression levels
Next, look at the File Settings panel. The universal format for almost every real estate platform is JPEG (or .jpg). PNG files are unnecessarily heavy, and RAW files are completely unreadable by MLS databases.
To keep your images far below the maximum file size for MLS photos without visibly damaging the image quality, adjust the Quality slider to between 80% and 90%. This minor reduction discards unnoticeable microscopic data, shrinking a massive multi-megabyte file down to a lightweight 1MB–2MB package that uploads instantly and loads seamlessly on mobile devices.
If you're working with more advanced editing workflows, like how to remove shadow in Lightroom or blending exposures using exposure bracketing, you’ll notice that export settings matter just as much as editing itself.
4.3. The critical role of color space (sRGB vs. Adobe RGB)
The final, yet most frequently overlooked step in learning how to resize real estate photos for MLS is selecting the correct color space. In your export settings, always change the default color space from Adobe RGB or ProPhoto RGB to sRGB.
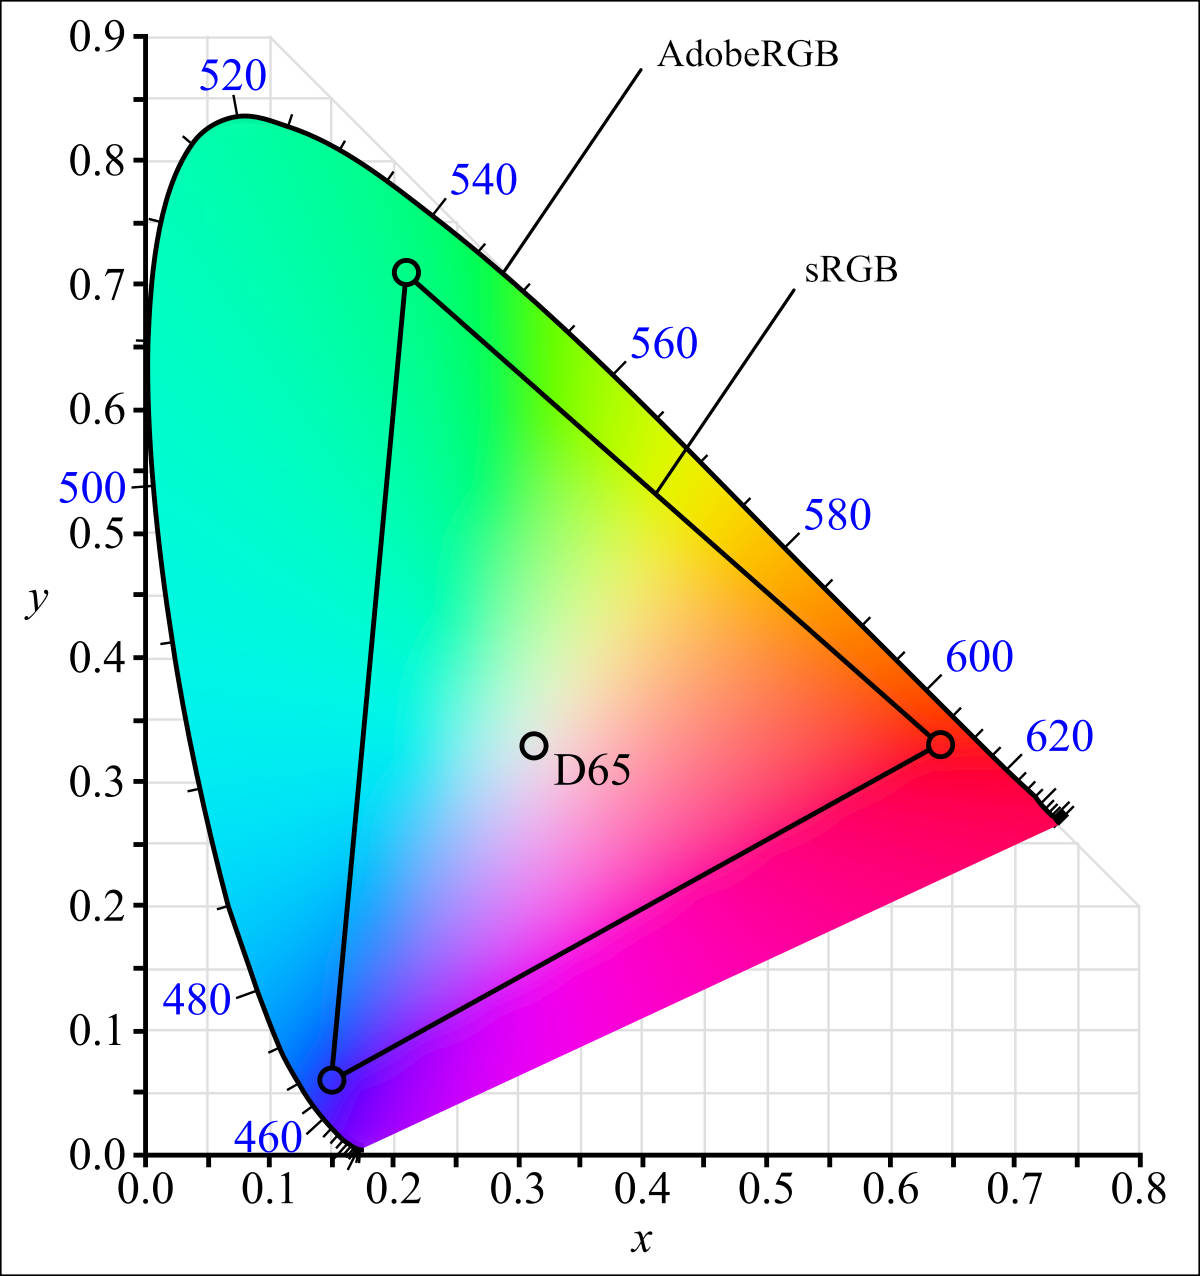 AdobeRGB is the wider gamut that allows for richer colors, but is less supported on listing sites.
Web browsers, mobile listing apps, and syndication platforms are built exclusively around the sRGB color spectrum. If you upload an image exported in Adobe RGB, the web browser will struggle to interpret the profile data, causing your vibrant, warm interior shots to look muddy, desaturated, and completely unappealing to prospective buyers online.
5. Where to improve to get the best image quality on the MLS
Even when you follow the basic MLS photo size requirements, things don’t always go as expected. You upload a set of images that look clean and well-edited, but once they’re live, something feels different. It’s a common experience, and it usually has less to do with photography and more to do with how MLS systems handle images behind the scenes.
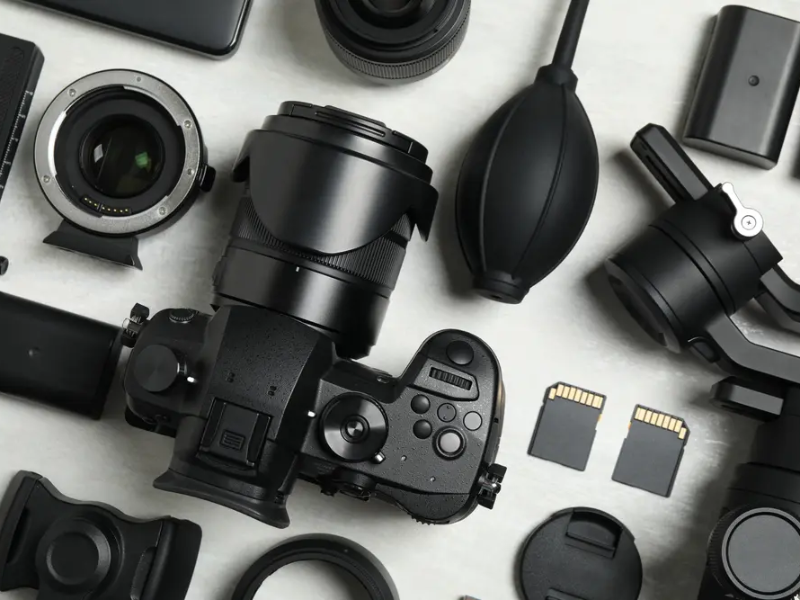
5.1. Camera quality and resolution
The camera used for MLS photos greatly affects the final image quality. While professional interchangeable lens cameras are still the best cameras for photography and video in 2026, modern smartphones can deliver comparable results when used effectively.
A study by Real Estate Photographer Pro found that listings with DSLR images receive 61% more views than those with basic point-and-shoot cameras. However, the study also noted that high-end smartphone cameras produced similar results to entry-level DSLRs in 68% of cases when used correctly.
 Even using a phone can capture sufficient photos for the MLS.
When using a smartphone for real estate photos, choose the highest resolution settings available. Many current models offer 12MP or higher resolutions, easily meeting or exceeding MLS standards. Regardless of the camera, always shoot in the highest quality setting to capture details and allow for adjustments during editing. If you know how to use a gimbal to capture longer exposures, the results will be even more impressive.
5.2. Lighting and staging
Good lighting and effective staging form the foundation of successful MLS photos, no matter the camera quality. Well-lit, professionally staged photos consistently attract more buyer interest and improve marketability.
Proper staging emphasizes a property’s best features, helping buyers envision themselves in the space. To stage effectively, focus on decluttering, depersonalizing, and arranging furniture to maximize space and flow.
Lighting is equally important. Maximize natural light by opening curtains and blinds, and use artificial lighting to fill darker areas. Shoot during daylight hours to minimize shadows and avoid overexposure.
5.3. Multiple angles and wide-angle shots
Capturing a variety of angles and using wide-angle lenses enhances the visual appeal of MLS listings. This approach helps potential buyers understand the layout and flow of spaces, offering a more comprehensive view.
Research by Redfin found that listings with more than six photos receive twice as many views as those with fewer images. Aim to capture each room from multiple angles, highlighting key features. Exterior shots that showcase curb appeal and outdoor spaces should also be included.
Wide-angle lenses work well for spacious interiors, but they should be used carefully to avoid distortion. A survey by the Real Estate Photography Association found that buyers preferred moderate wide-angle shots (24-35mm equivalent) in 72% of cases, while ultra-wide angles were sometimes perceived as misleading.
5.4. A faster way to handle MLS photo size requirements
If you’re managing multiple listings, getting images ready for MLS quickly becomes a time issue. Resizing, compressing, checking formats, adjusting lighting, all sound straightforward until you’re doing it repeatedly. And the more listings you handle, the harder it is to keep everything consistent.
This is where many agents and photographers start looking for a more reliable workflow. Fotober helps streamline that process by delivering images that are already aligned with MLS photo size requirements, so you don’t have to second-guess formatting or spend extra time fixing issues after upload.
- MLS-ready images delivered in the correct size and format
- Consistent quality across every listing
- Fast turnaround that fits tight schedules
Instead of spending hours adjusting images, you can focus on getting listings live and in front of buyers.
6. Common MLS photo rejections and how to avoid them
Meeting structural dimension and aspect ratio benchmarks is only the first step. In 2026, regional MLS compliance committees are leveraging advanced automated image recognition software to scan incoming uploads for policy violations. Failing to adhere to these strict visual rules will result in sudden photo rejections or immediate listing penalties.
6.1. Misaligned primary listing photos
One of the most frequent administrative pitfalls is violating the "Primary Photo Policy." The vast majority of MLS boards mandate that the very first image in a listing sequence must be an authentic, eye-level exterior shot of the property's front facade. Attempting to use a stylized interior shot of a luxury kitchen, a floor plan rendering, or a dramatic top-down drone photograph as your hero image will often trigger an automatic system flag, delaying your listing from going live to the public.
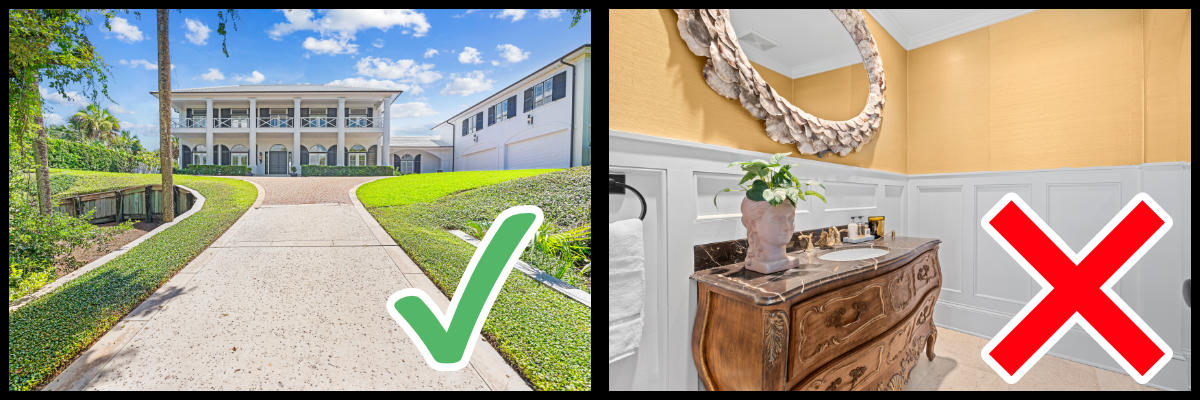 Don’t be tempted by choosing an interior photo as the primary image on the MLS.
6.2. The 2026 AI and virtual staging disclosure crackdown
The most significant compliance shift in 2026 revolves around transparency and truth-in-advertising regarding generative AI. Virtual staging, adding digital furniture to an empty room to help buyers visualize the space, remains highly effective, but it is now heavily regulated to prevent buyer deception.
Most modern MLS networks strictly require a visible, permanent "virtually staged" watermark on any digitally altered image. Furthermore, editing boundaries are rigidly defined. While you are permitted to optimize lighting, fix white balance, or digitally place a sofa, using clone tools to erase permanent structural flaws, public utility poles, or nearby fire hydrants is strictly forbidden. Deceptive editing that misrepresents the true physical condition of the property will lead to immediate media rejection, hefty compliance fines, and potential legal exposure for real estate fraud.
7. Conclusion
Mastering the technical side of property marketing is just as vital as capturing the perfect shot. By aligning your post-production workflow with modern MLS photo size requirements and choosing the best aspect ratio for real estate photos, you shield your media from destructive compression across syndication networks.
Before hitting upload on your next listing, run through this quick 2026 pre-flight checklist to guarantee flawless presentation:
- Dimensions: Exactly 2048 x 1536 pixels (Long edge set to 2048px).
- Aspect ratio: 4:3 (highly recommended) or 3:2 landscape orientation.
- File weight: Optimized to 1MB–3MB, remaining safely below the maximum file size for MLS photos.
- Format & color: Exported as JPEG using the sRGB color space.
- Compliance: First photo is a front exterior shot; all virtually staged images feature a clear watermark disclosure.
Follow us on social media to stay updated with the latest real estate photo editing knowledge for selling residential homes better.
- Facebook: fotobermedia.co
- YouTube: Fotober
- TikTok: @fotober
- Instagram: fotober_media.
8. FAQs about MLS photo size requirements
Q: What is the best MLS photo size?
A: Most listings perform well with images around 2048 × 1536 pixels. It provides enough detail while staying within typical MLS limits.
Q: Why are my MLS photos blurry?
A: This usually happens when images are either too small or heavily compressed. Uploading higher-resolution files and controlling compression helps maintain clarity.
Q: Can I upload vertical images to MLS?
A: Yes, but horizontal images with a 4:3 aspect ratio are more common and tend to display better across most MLS platforms.
.png)
.png)
.png)
