
Flambient Real Estate Photography: Creating Perfect Property Visuals
Share:
Table of Contents
- 1. What is flambient real estate photography?
- 2. Flambient vs. flash & HDR real estate photography: Which is better?
- 3. Essential gear for flambient real estate photography
- 4. Step-by-step guide: How to shoot flambient real estate photography
- 5. Tips for mastering flambient photography
- 6. The real challenge: Blending flambient photos in post-processing
- 7. Streamline your workflow with Fotober’s real estate photo editing services
- 8. Conclusion
- 9. FAQs for flambient real estate photography
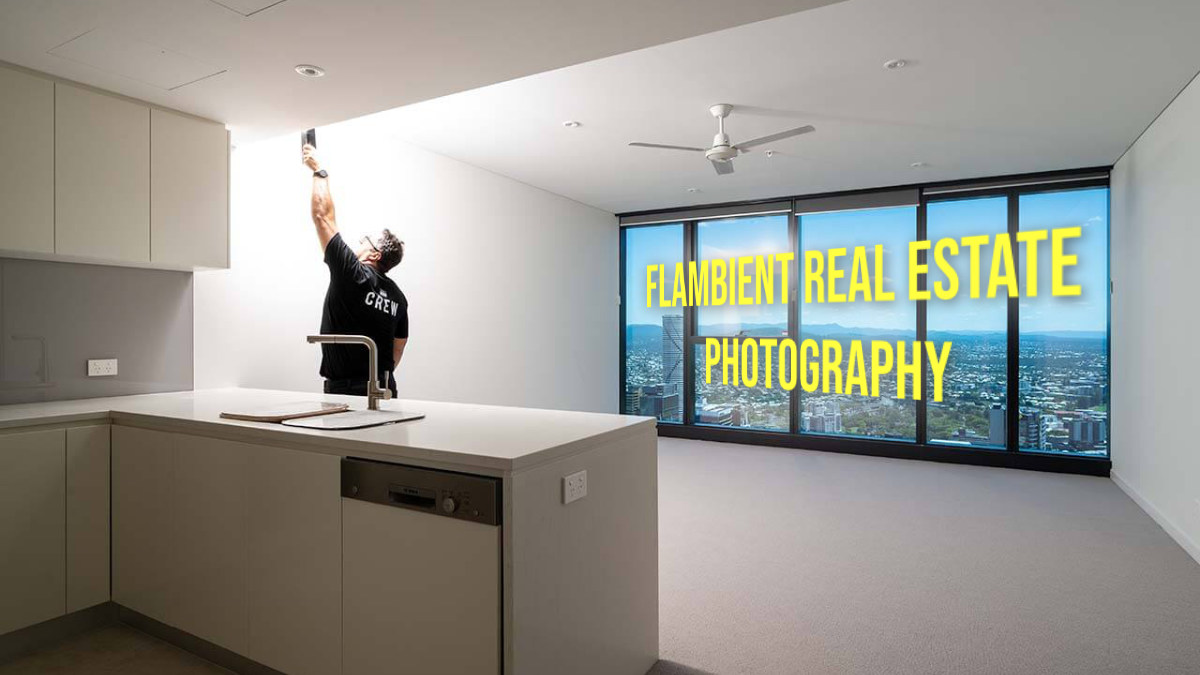
The flambient technique combines flash and ambient light techniques to create balanced, professional property images. This method has become popular among real estate photographers for its ability to capture interior spaces naturally while preserving detail in both bright and dark areas. In this article, Fotober will guide you through the essential equipment, camera settings, and step-by-step process to master flambient real estate photography and capture stunning property photos.
1. What is flambient real estate photography?
At its core, flambient is a hybrid shooting technique that seamlessly fuses two distinct lighting styles: flash and ambient (natural) light. The term itself is a portmanteau of "flash" and "ambient." In property marketing, relying solely on one method often compromises quality. Pure ambient shots look warm and inviting but frequently suffer from blurry details and blown-out windows. Conversely, pure flash photography produces sharp details but can result in harsh reflections and a cold, artificial atmosphere. Flambient strikes the perfect balance, capturing the strengths of both worlds.
The anatomy of a standard flambient image typically involves two or three separate exposures taken from a locked tripod. First is the ambient frame, captured using only the room’s existing light to retain a soft, natural mood. Next is the flash frame, where a strobe or speedlight is bounced off ceilings or walls to illuminate dark areas and neutralize ugly color casts. For premium properties, photographers often add a "window pull" frame, a high-speed flash shot directed straight at windows to perfectly capture the exterior view.
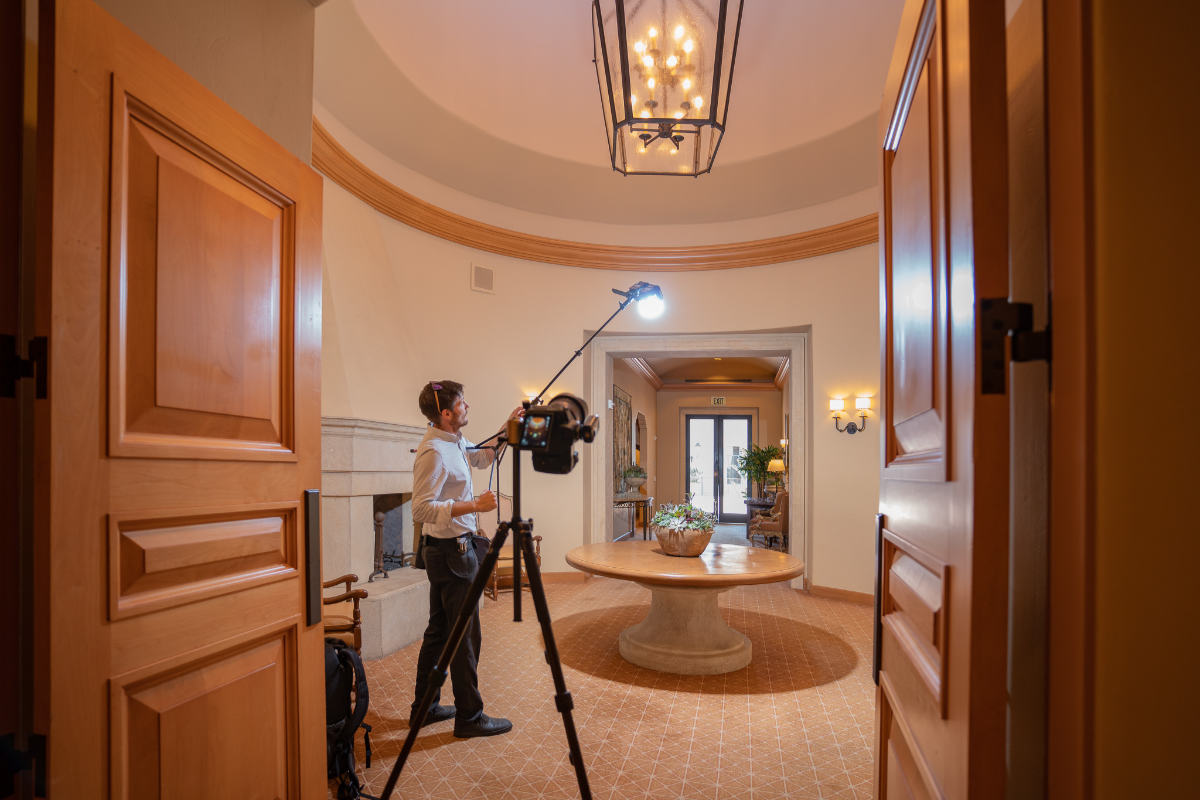
 Flambient shooting & blending is the evolution of traditional flash and HDR photography.
This meticulous, layer-based approach explains why flambient real estate photography has become the industry standard. By blending these exposures during post-processing, editors can eliminate color contamination caused by interior bulbs or outdoor foliage. The final image boasts unparalleled color accuracy, rich textures, and perfectly exposed interiors alongside vibrant window views. It creates a striking, true-to-life representation of the space that immediately engages potential buyers, making it an indispensable asset in any modern real estate media portfolio.
2. Flambient vs. flash & HDR real estate photography: Which is better?
When shooting property interiors, photographers generally choose between three main techniques: HDR (High Dynamic Range), pure (traditional) flash, and flambient. Each approach offers distinct trade-offs regarding on-site efficiency, editing complexity, and final visual appeal.
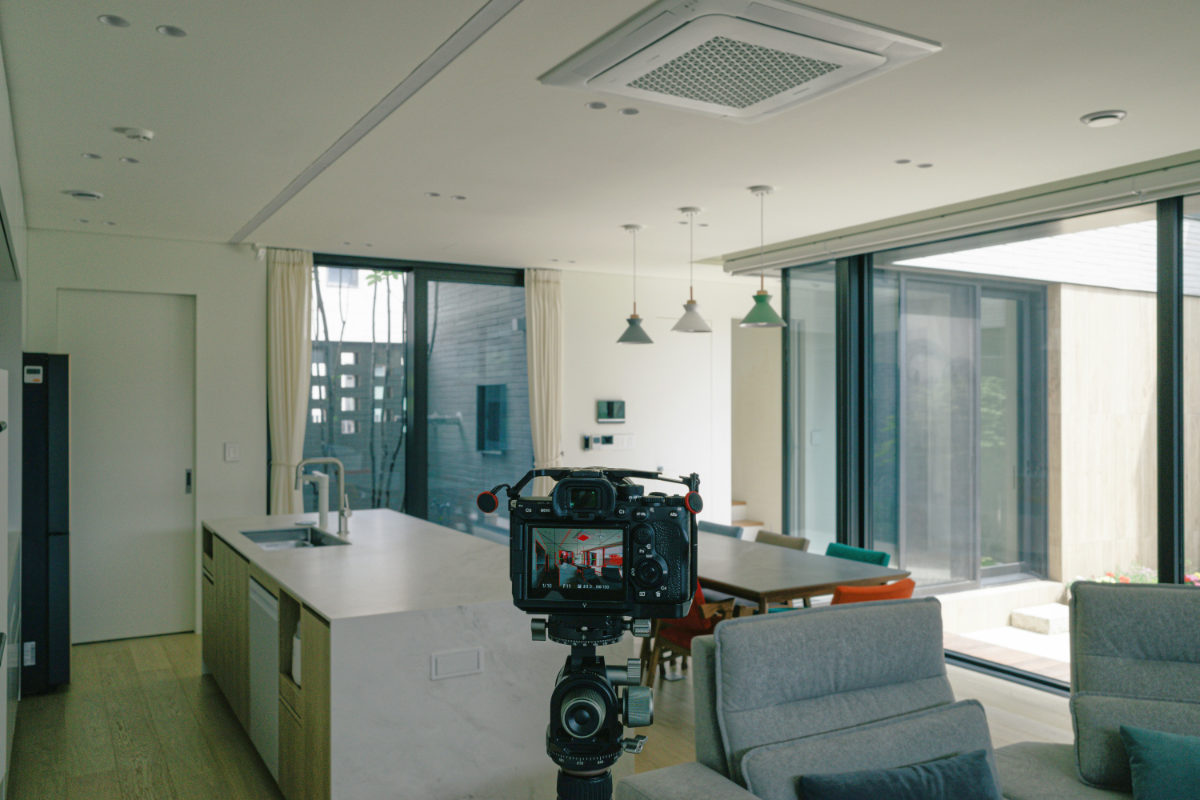
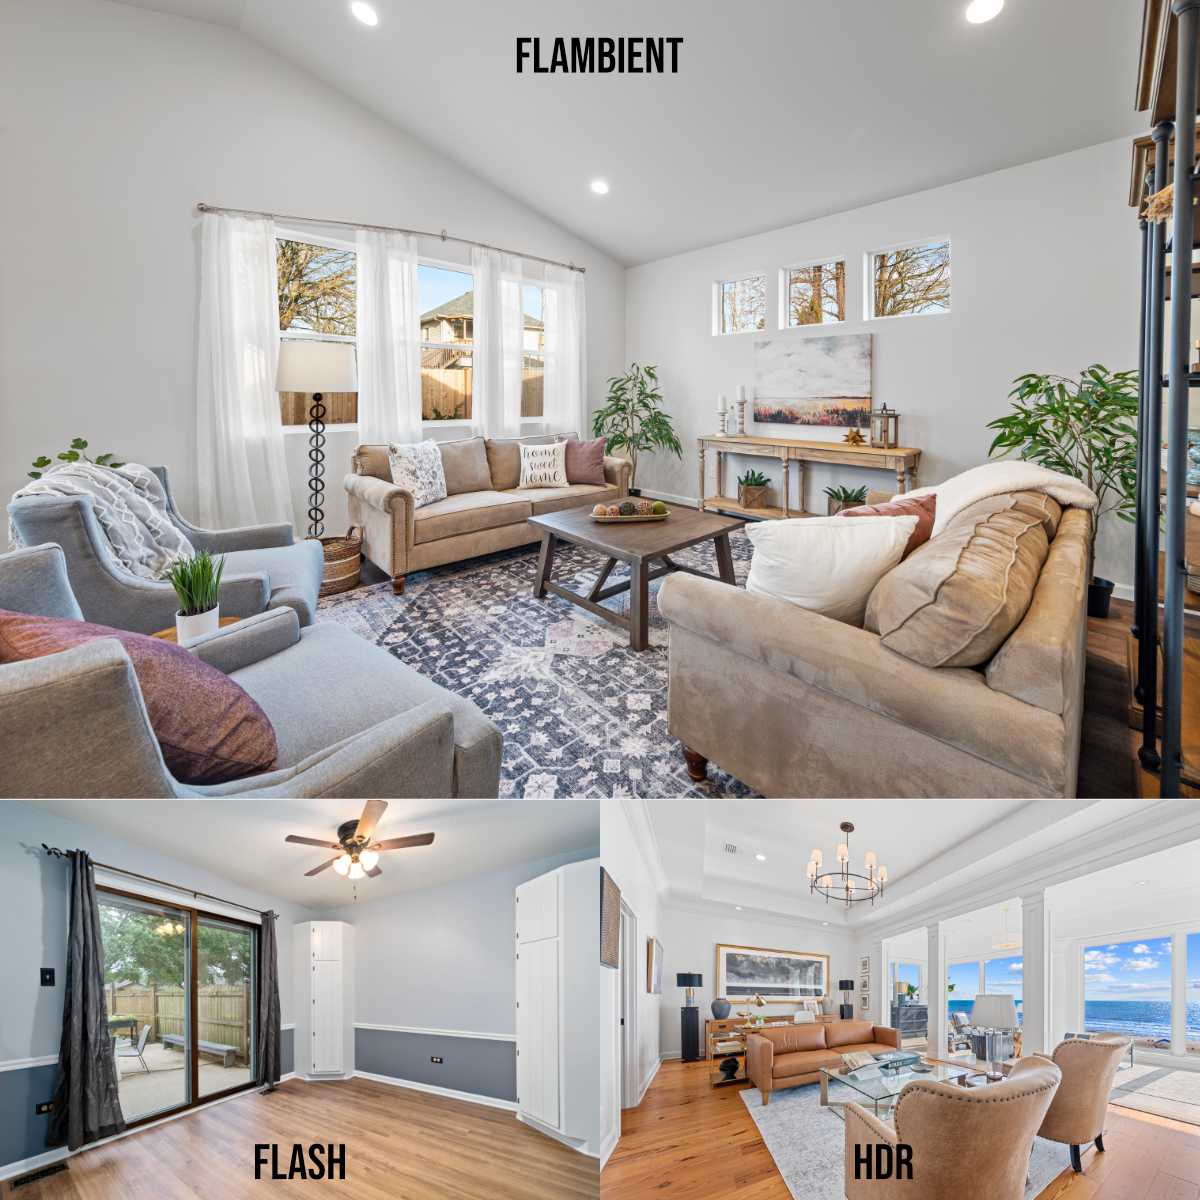 The Flambient technique is capable of creating more naturally pleasing results compared to other methods.
HDR (High Dynamic Range) involves taking multiple bracketed exposures and merging them using automated software. While exceptionally fast on-site, HDR real estate photography often struggles with severe "color casting", a phenomenon where yellow interior light bulbs mix with blue daylight from windows, creating muddy, unrealistic tones. The final image can also look overly flat, cartoonish, or "fake" to discerning home buyers.
Pure flash relies strictly on external strobes or speedlights to illuminate the space. This method guarantees tack-sharp details and excellent color accuracy because the high-powered flash overpowers mixed ambient light. However, the results can feel sterile and clinical. Pure flash photography often introduces harsh shadows, creates bright glare on polished hardwood floors, and completely obliterates the warm, inviting atmosphere of a home.
Flambient represents the ultimate compromise. By overlaying a clean flash layer onto a soft ambient base, it preserves the natural, welcoming mood of the property while utilizing the flash to neutralize ugly color distortions and crisp up the details.
To help you decide which method fits your workflow, here is a direct comparison:
|
Feature |
HDR (Bracketed) |
Pure flash |
Flambient method |
|
Time on-site |
Very fast (1-2 mins/room) |
Moderate (Moving lights) |
Moderate (Multiple setups) |
|
Editing difficulty |
Low (Automated batching) |
Moderate (Color/Shadow fix) |
High (Manual layer masking) |
|
Color accuracy |
Poor to fair (Mixed casts) |
Excellent (Daylight balanced) |
Outstanding (Neutralized) |
|
Visual realism |
Low (Can look digital) |
Medium (Can look sterile) |
High (Natural yet crisp) |
From our assessment as a production house for real estate photographers, if speed and low budgets are your primary constraints, HDR effect photos serve well for entry-level listings. However, if your goal is to shoot luxury properties, capture magazine-ready images, and command premium rates, flambient real estate photography is the undisputed winner. The only real drawback is the heavy post-processing bottleneck, a challenge easily solved by outsourcing the complex manual blending to specialized editors.
3. Essential gear for flambient real estate photography
Achieving professional results with the flambient approach hinges on having the right equipment to control and manipulate light. While the foundation is a quality camera, flambient photography prioritizes lighting control over camera body specifications. Professional photographers recommend investing in quality light modifiers and stands before upgrading the camera body, as lighting quality has the greatest impact on the final image.
3.1. Camera body requirements
- Full-frame or APS-C sensor (full-frame or larger formats are advisable).
- Manual mode capability.
- Minimum 24MP resolution.
- Ability to set Custom white balance for color consistency.
First and foremost is a reliable full-frame camera paired with a sharp wide-angle lens, typically in the 16-35mm range. This focal length allows you to capture entire rooms in a single frame without fish-eye distortion, ensuring edge-to-edge clarity that makes spaces look open and airy.
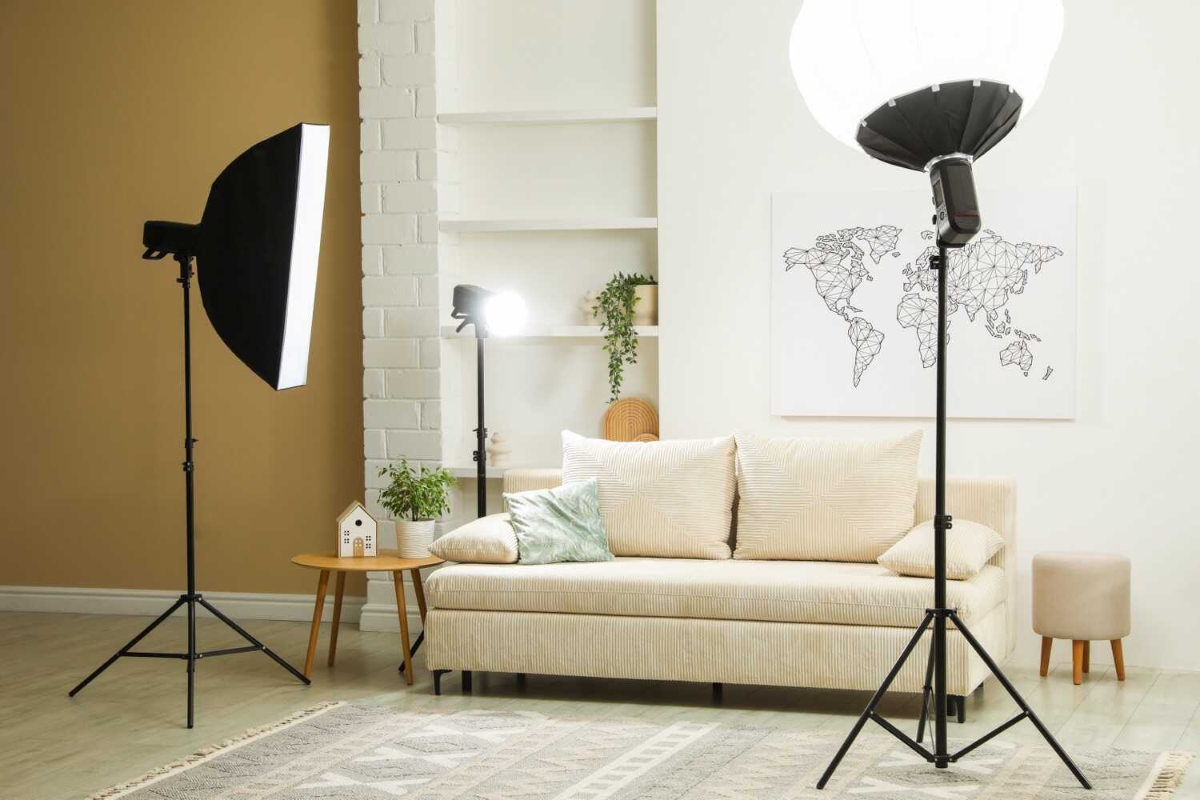
3.2. Essential lighting equipment
- Speedlights: A minimum of two units (off-camera flash) is needed.
- Triggers: Reliable radio triggers to fire the flash units wirelessly.
- Stands and modifiers: Light stands and flash modifiers (softboxes/umbrellas) are indispensable for placing light strategically and ensuring the flash appears soft and natural.
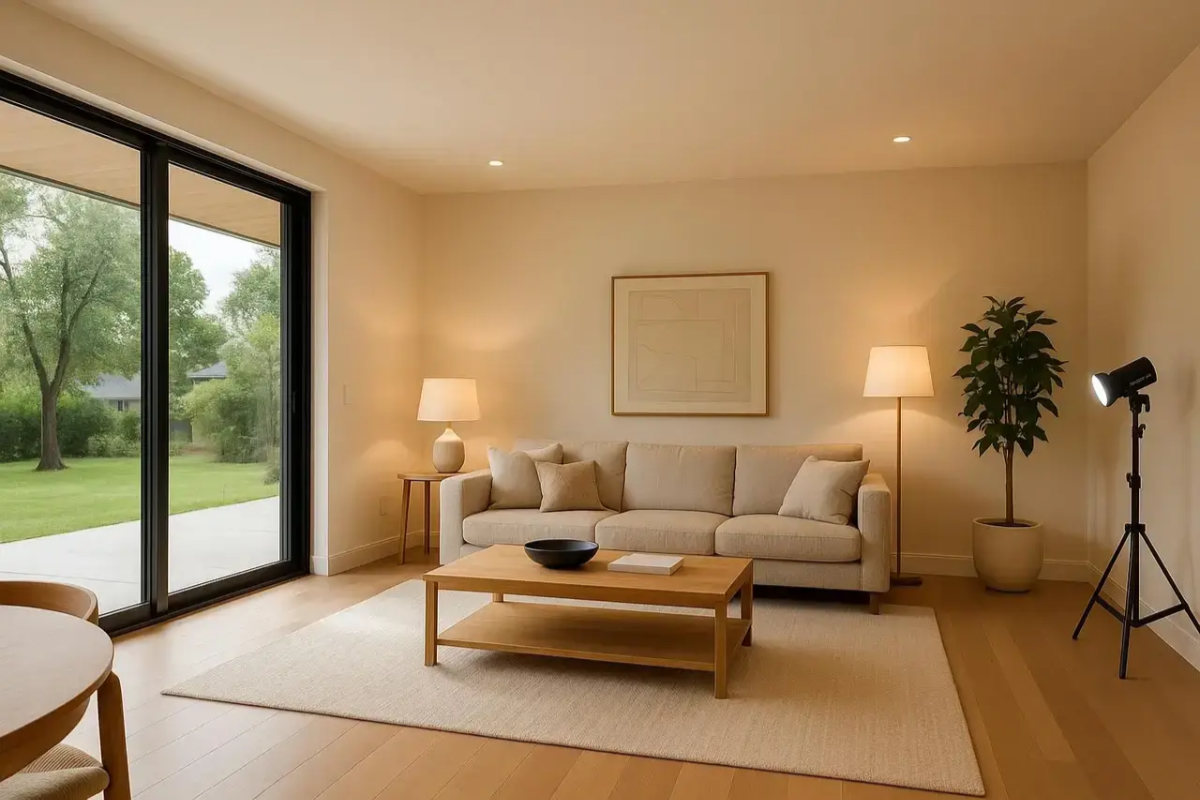
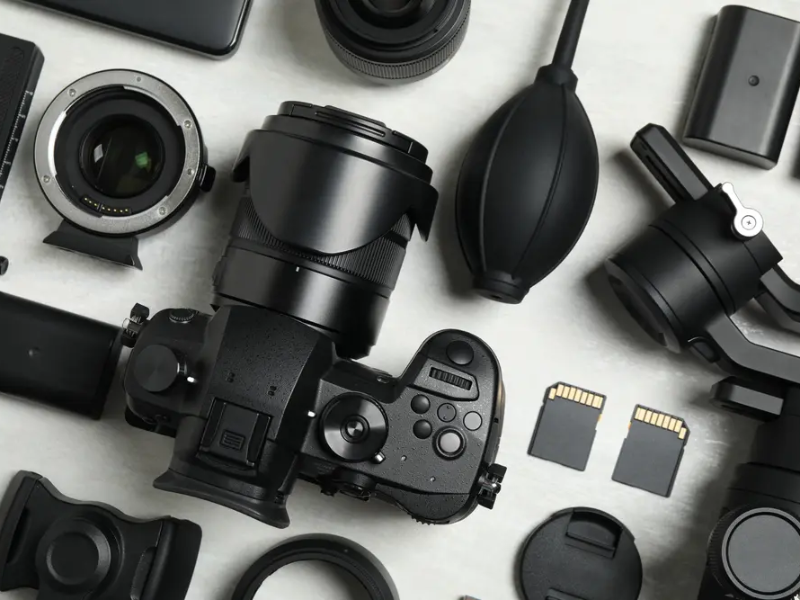
 An ideal setup for flambient shooting consists of capturing devices, lighting, and stabilization.
For illumination, you need powerful off-camera lighting. Portable yet robust strobe systems, such as the Godox AD200 Pro or AD400 Pro, are favorites among professionals. These strobes offer the fast recycle times and high power needed to overpower ambient shadows or execute a crisp window pull. You will also need a reliable wireless flash trigger to control these units remotely from your camera's hot shoe.
Also, consider light modifiers. While a white shoot-through umbrella can soften the output, many flambient photographers prefer a bare bulb, choosing to bounce the flash directly off white ceilings or neutral-colored walls. This turns the entire surface into a massive, soft light source that naturally fills the space.
3.3. Workflow and stability tools
- A sturdy tripod is indispensable for maintaining consistent composition and perfect alignment across the necessary multiple exposures.
- Remote triggers help reduce camera shake during the longer ambient exposures.
- Color checkers are vital for post-production, assisting in maintaining accurate color and white balance, which simplifies the complex editing process inherent in flambient real estate photography.
Last but definitely not least, the foundation of this capturing system must be a rock-solid, sturdy tripod. Because the flambient technique requires blending multiple images seamlessly in Photoshop, even a millimeter of camera movement between the ambient and flash shots will misalign your layers and ruin the composite. Equipping yourself with these core tools lays the groundwork for a flawless shooting workflow.
4. Step-by-step guide: How to shoot flambient real estate photography
Mastering the flambient technique requires a methodical approach on-site. Because you will be combining multiple exposures later, consistency during the shoot is paramount. Here is a practical, step-by-step breakdown of how to capture a flawless flambient sequence.
4.1. Step 1: Composition and camera settings
First, secure your camera onto the tripod and lock in your composition. Switch your camera to Manual (M) mode to ensure total control over your exposures. Set your ISO to a low, clean value between 100 and 400 to prevent digital noise. Next, dial in your aperture to a mid-range setting, typically between f/5.6 and f/11. Avoid wide apertures like f/2.8, as they create a shallow depth of field that leaves parts of the room blurry. These are the standard camera settings for real estate photography, allowing for absolute edge-to-edge sharpness. Finally, set a fixed White Balance preset (such as Daylight or 5000K) instead of Auto to prevent the camera from shifting colors between frames.
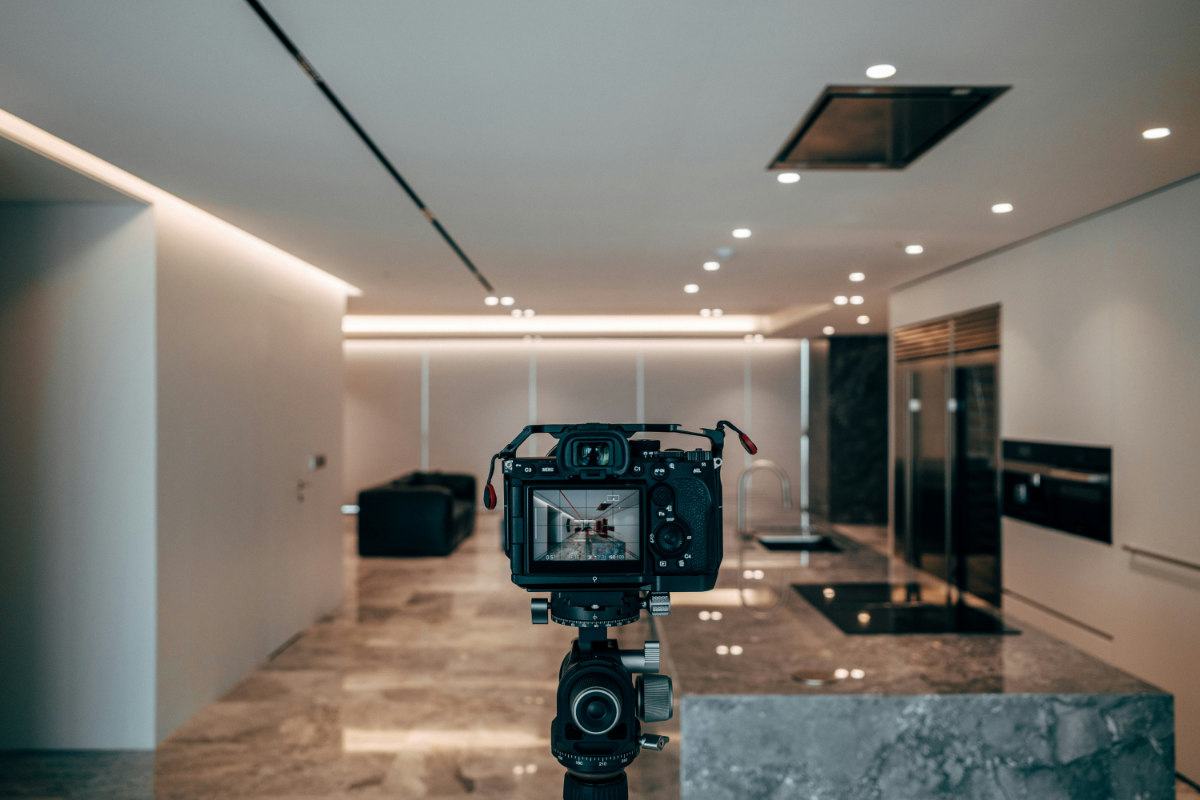
 Proper settings will save you many headaches in the editing room.
4.2. Step 2: Taking the ambient shot
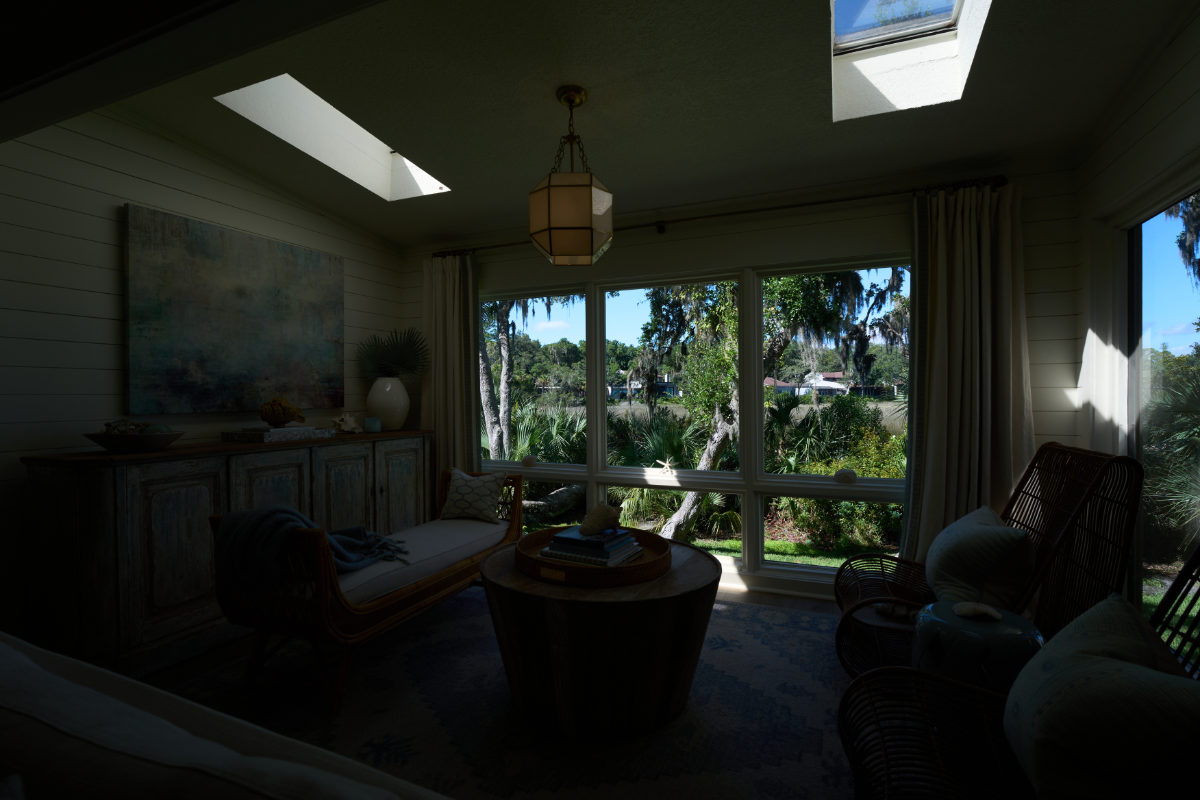
With your wireless flash trigger turned off, adjust your shutter speed to properly expose the interior space using only available light. Take the shot. This ambient frame captures the natural warmth, soft shadows, and overall mood of the room. Do not worry if the windows appear completely blown out or if there are heavy yellow color casts from overhead lightbulbs; this layer is strictly used to bring back a natural atmosphere during editing.
 An image layer shot under the home’s own lights is crucial for natural flambient blending.
4.3. Step 3: Taking the flash shot(s)
Turn on your flash trigger. Position your external strobe and aim it upward to bounce the light off a white ceiling or a neutral wall behind the camera. This diffuses the flash, creating a massive, soft light source that fills the room. Adjust your flash power so that the exposure illuminates dark corners and neutralizes the ambient color casts. If you are shooting a large, open-concept living space, you may need to take multiple flash frames while walking around the room, popping the flash in different sections while staying out of the lens's field of view.
 Flash can help fill in the darker spots in the property.
4.4. Step 4: The window pull shot
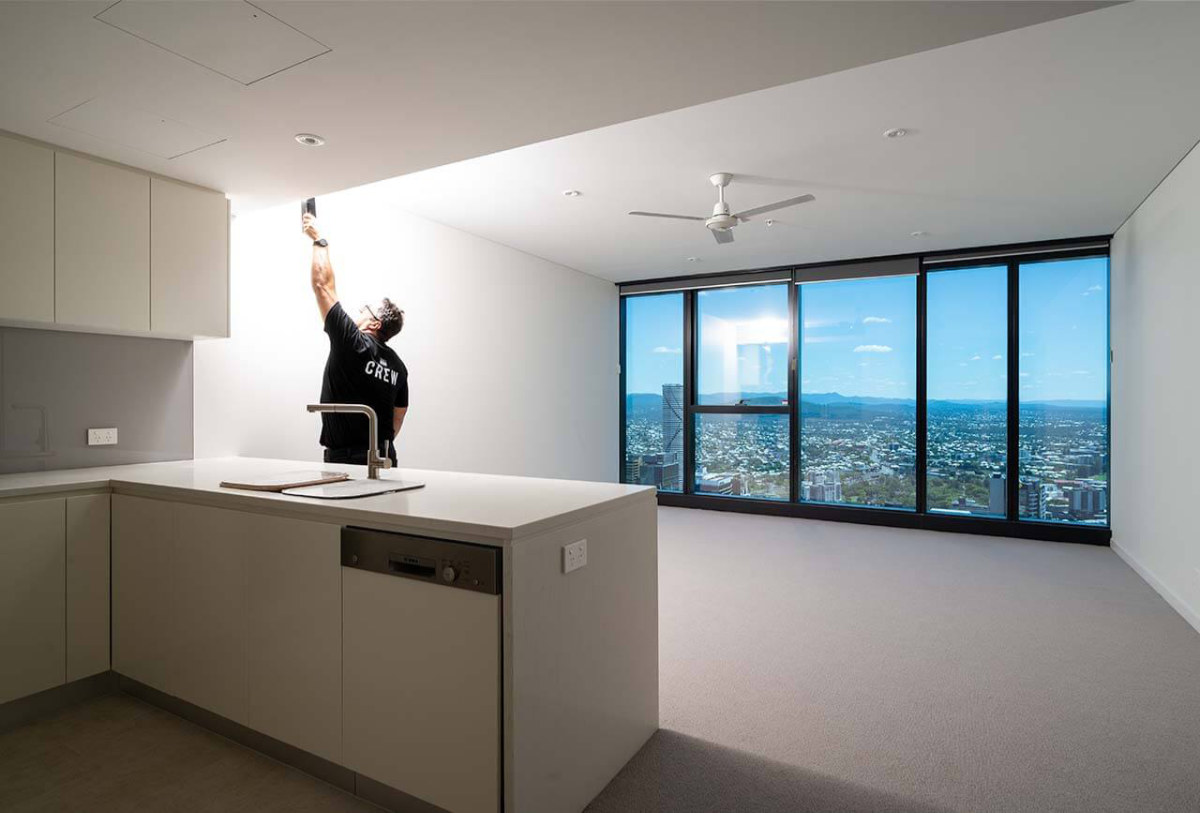
To capture a crisp, clear view of the outdoors, you need a dedicated window pull frame. Speed up your shutter speed until the scenery outside the window is perfectly exposed. Walk over to the window, hold your flash a few feet away, and point it directly at the window frame before firing. This intense burst of light cuts through reflections on the glass and leaves a clean, well-exposed exterior view that is incredibly easy to blend in post-processing.
 Most of the time, exposing for the interior will make the window’s highlights blow out. Shooting a separate window layer allows for better blending in post.
5. Tips for mastering flambient photography
Mastering a flambient photoshoot requires consistent practice and meticulous attention to detail. Start with simpler rooms and gradually progress to more challenging spaces as your comfort with the technique grows.
5.1. Developing a consistent flambient workflow
Efficiency and consistency are vital. Develop a reliable workflow that you can replicate across different properties:
- Room assessment: Begin each shoot with a detailed assessment. Identify potential challenges like mirrors, glossy surfaces, or unusual light sources before setting up any equipment.
- Plan flash placement: Always plan your flash placement before setting up gear to minimize wasted time on repositioning.
- Room preparation: Never skip pre-shoot staging. Straightening furniture, removing clutter, and adjusting window treatments significantly impact the final image quality and simplify the editing process.
 Flambient shootings require precise calculations of lighting placements and shot angles.
5.2. Solving common flambient challenges
Flambient shooting often presents three major challenges that require specific solutions:
Color balance management: Maintaining accurate and consistent colors is difficult with mixed lighting.
- Use color checkers in test shots.
- Match flash and ambient light temperatures (often using gels).
- Document your settings for consistency across the entire property.
Reflection management: Glossy surfaces and mirrors can quickly ruin a shot.
- Map out reflective surfaces before shooting.
- Use black cards (flags) to block unwanted reflections.
- Position flash units outside reflection zones.
- Remove camera/tripod reflections during post-processing.
Space constraints: Shooting in tight bathrooms or hallways.
- Use wider lenses for small spaces.
- Employ remote flash triggers for awkward angles.
- Use bounce cards in small rooms to soften the flash.
- Modify flash power appropriately for close quarters.
5.3. How to shoot flambient and avoid common mistakes
Even with top-tier equipment, mastering flambient real estate photography requires a high level of operational precision. Experienced photographers and editors who know how to shoot flambient have concluded that avoiding these frequent pitfalls on-site will save you hours of tedious frustration during the post-processing phase.
- Mistake 1: Neglecting tripod stability. Because flambient editing relies on pixel-perfect alignment between your ambient, flash, and window exposures, even a microscopic camera shift will ruin the final composite. Always use a heavy-duty tripod, hang your camera bag on the center column for extra weight, and use a 2-second timer to eliminate hand shake.
- Mistake 2: Creating harsh flash shadows. Bouncing your flash at an incorrect angle can cast dramatic, unnatural shadows behind furniture or plumbing fixtures. To keep the light soft and seamless, aim your strobe directly upward at a flat, white ceiling or a neutral rear wall to maximize diffusion.
- Mistake 3: Over-blending the ambient layer. A frequent post-processing error is relying too heavily on the ambient layer during manual brushing. Over-blending reintroduces stubborn yellow color casts and leaves the final image looking muddy or flat. The ambient layer should be used sparingly, strictly to inject a natural warmth back into a crisp, color-accurate flash base.
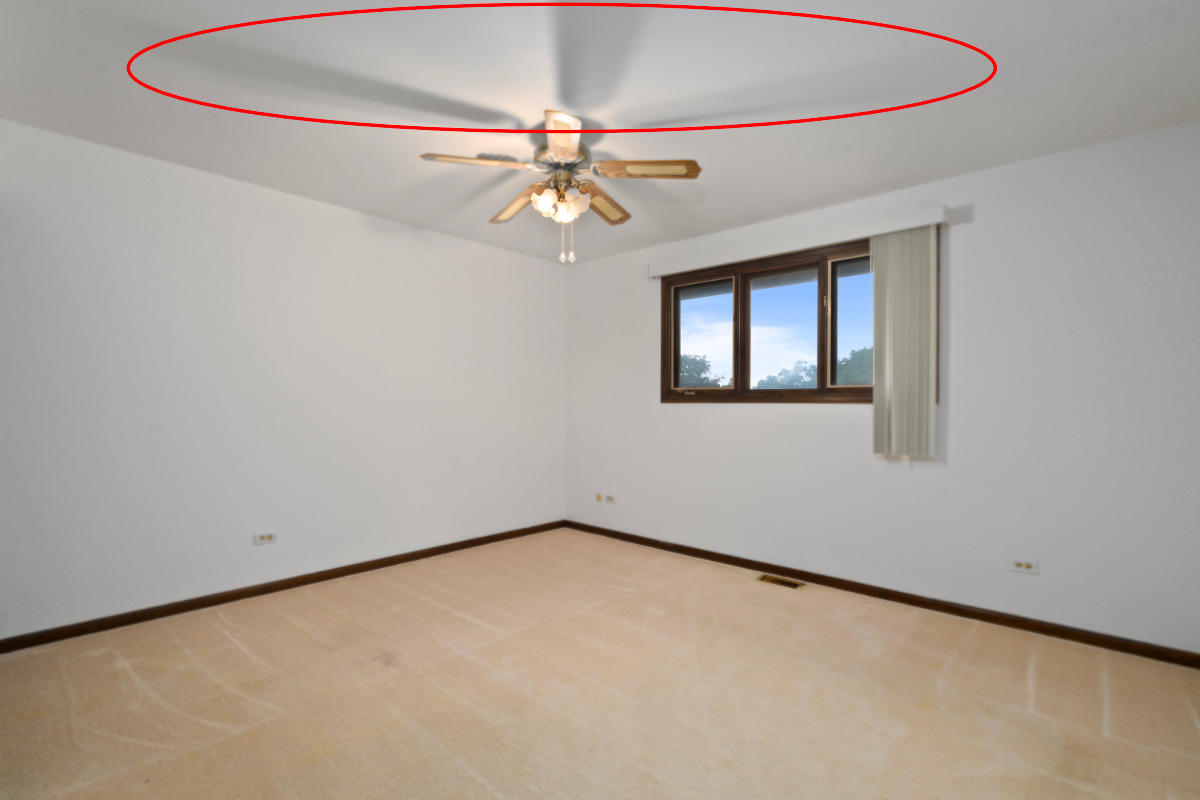 Shooting with flash is going to leave you with harsh shadows behind objects.
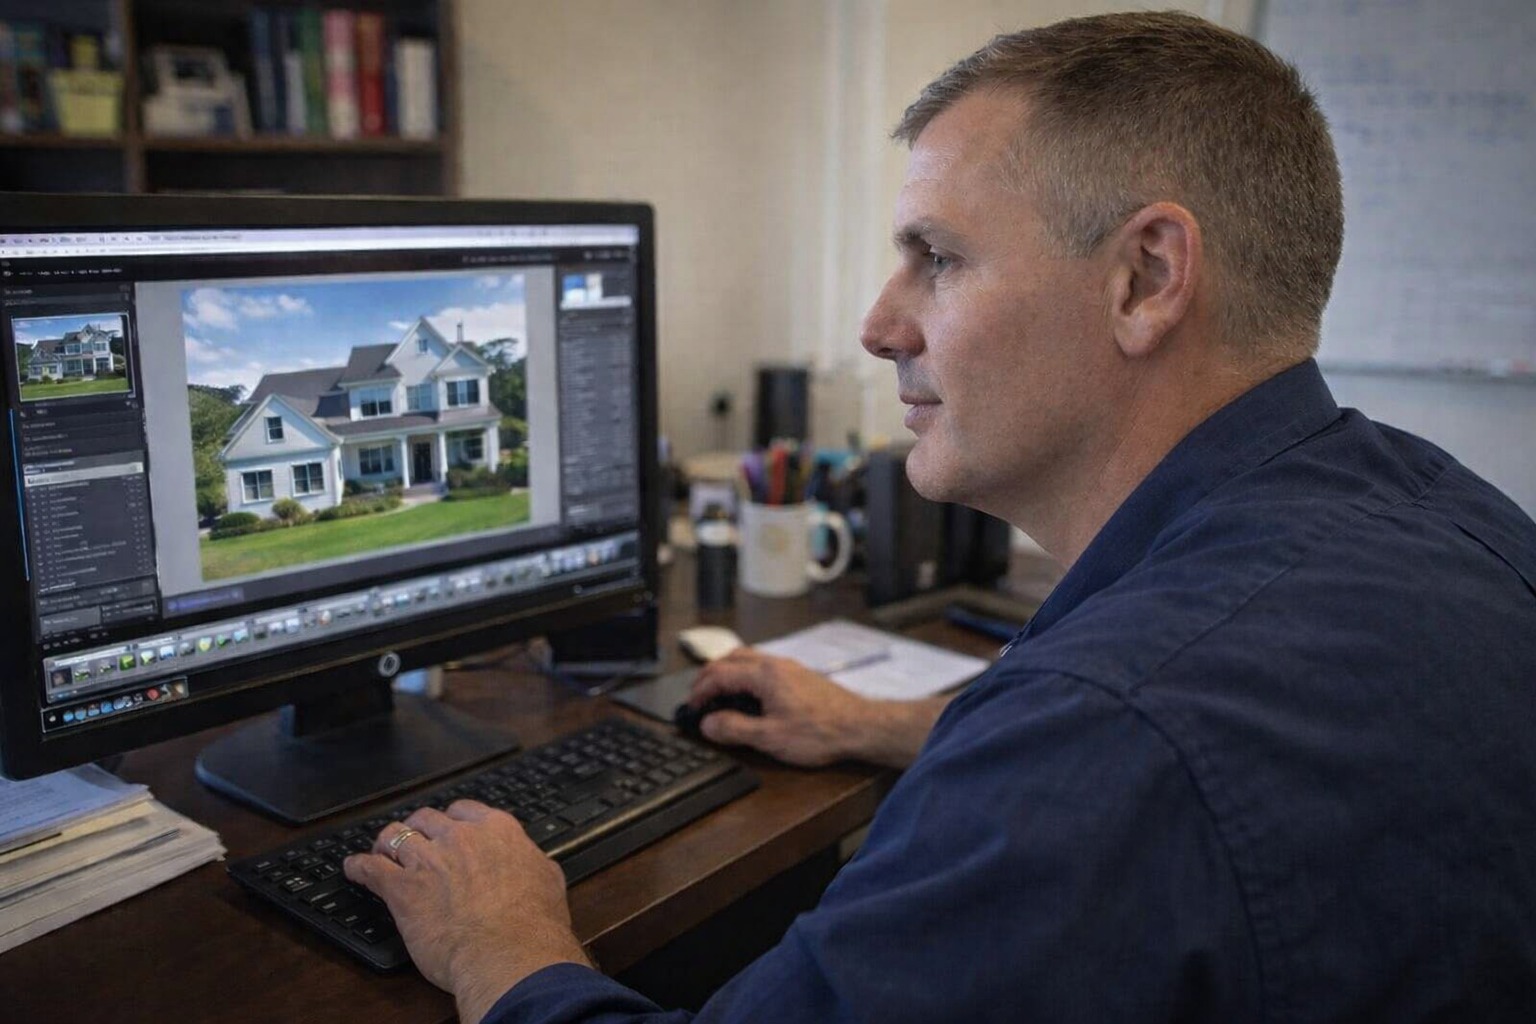
6. The real challenge: Blending flambient photos in post-processing
While pressing the shutter button on-site takes only a few minutes, the true magic, and the primary obstacle, of flambient real estate photography occurs behind the computer screen. Bringing these separate exposures together into a single, flawless masterpiece requires advanced proficiency in Adobe Photoshop; it is far from an automated process.
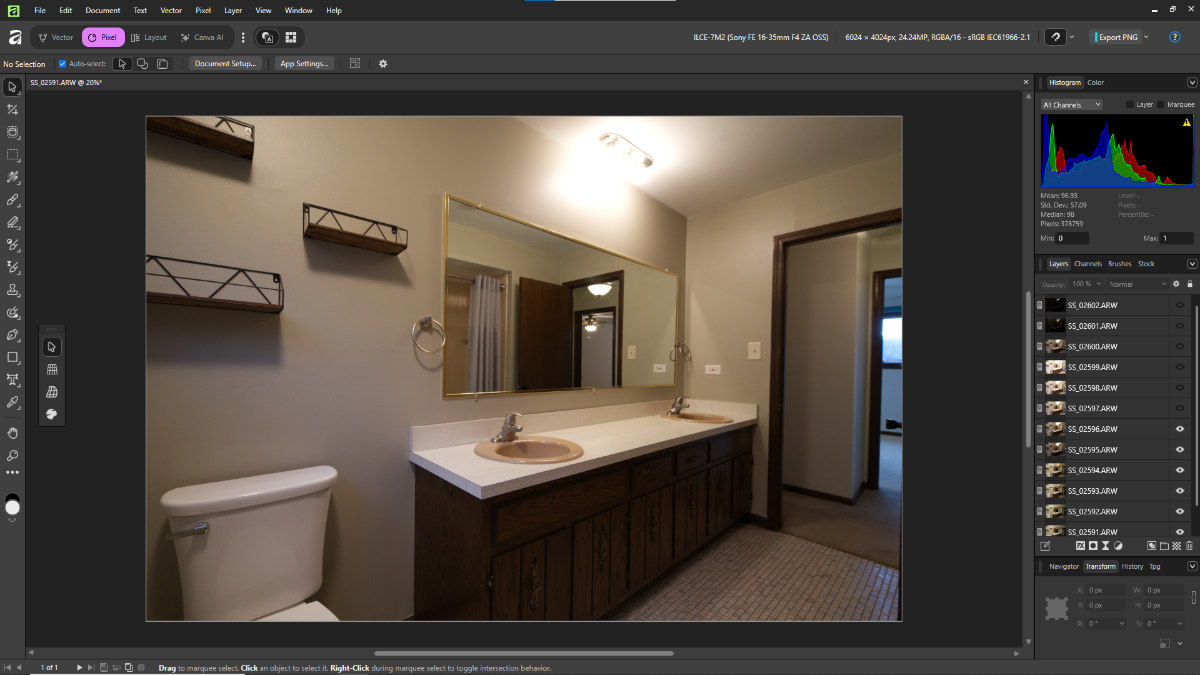 Blending 10 or more flambient layers is a painstaking process.
The technical complexity begins with layering. Editors must manually stack the ambient, flash, and window pull frames. To harvest the best elements of each layer, specific blending strategies are used. For example, the Luminosity blend mode is frequently applied to the flash layer to inherit its crisp, shadow-free brightness without destroying the ambient color. Conversely, the Color blend mode helps paint over stubborn color casts caused by interior light bulbs. Editors must then use a highly precise Layer Mask and a soft brush tool to manually brush the natural warmth of the ambient shot back into areas like fireplaces or lamps, maintaining an inviting atmosphere.
The process of flambient photo editing becomes even more tedious when integrating the window pull technique. An editor must meticulously trace the window frames, mask out the glare from the flash on the glass, and seamlessly blend the vibrant outdoor scenery so it looks natural, not pasted on.
Consequently, this meticulous layering means a single flambient image can easily demand 15 to 30 minutes of manual editing. When you multiply that by 30 or 40 images for a standard property listing, a photographer faces hours of exhausting screen time. This creates a severe operational bottleneck. Instead of being out in the field shooting new properties and growing their business, photographers find themselves chained to their desks late into the night, making post-processing the ultimate challenge in scaling a real estate media business.
7. Streamline your workflow with Fotober’s real estate photo editing services
If spending hours meticulously masking layers and balancing luminosity curves in Adobe Photoshop to mix flash with ambient light is keeping you from scaling your real estate media business, outsourcing is your ultimate path to freedom. Instead of being trapped at an editing desk long after the sun goes down, savvy professional photographers are reclaiming their time by partnering with dedicated post-processing experts.
This is where Fotober steps in as your premier backend production partner. As a leading global provider of high-end real estate photo editing services, Fotober specializes in transforming raw, bracketed flambient exposures into stunning, magazine-ready marketing assets. Their team of highly skilled digital editors intimately understands the exact technical nuances of the flambient photo editing, executing complex manual layer masking with exceptional precision.
 With Fotober, you have a dedicated team handling all the intensive labor while you focus on the creative part of the job.
When you delegate your files to Fotober, you receive a comprehensive post-processing suite tailored to your brand's unique signature style. Their advanced flambient editing workflow guarantees:
- Flawless exposure blending: Seamlessly merging ambient warmth with crisp flash structure to achieve an elegant, natural, yet vibrant final look.
- Advanced color correction: Eradicating stubborn yellow tungsten or blue daylight color casts, ensuring total color accuracy for walls, ceilings, and hardwood floors.
- Crisp window pulls: Effortlessly masking out flash reflections on glass to reveal pristine, perfectly exposed exterior landscape views that capture buyer attention.
By leveraging Fotober's high-capacity infrastructure, you benefit from reliable quality control, highly competitive pricing structures, and an ultra-fast 12-to-24-hour turnaround time. This elite level of operational support allows you to confidently shoot multiple properties a day, aggressively scale up your listing volume during peak real estate seasons, and dramatically boost your profit margins, all while leaving the exhausting screen time to the pros.
8. Conclusion
Mastering flambient real estate photography is the ultimate way to elevate your portfolio and capture premium listings. By masterfully blending natural warmth with crisp flash details, you deliver the magazine-ready imagery that top-tier agents demand. However, do not let tedious hours of manual layer masking stall your business growth. Elevate your workflow by partnering with Fotober. Our specialized real estate photo editing services handle the entire post-processing bottleneck, delivering flawless, high-end composites within 24 hours. Contact Fotober today to claim your free trial and scale your photography business effortlessly!
9. FAQs for flambient real estate photography
Q: What is the difference between flambient and HDR photography in real estate?
A: Flambient real estate photography combines both flash and ambient light to create a balanced, natural-looking image. In contrast, HDR real estate photography uses multiple exposures of the same scene and blends them to highlight both bright and dark areas. The Flambient approach is considered more natural, while HDR can sometimes create a more dramatic or surreal look.
Q: How do I achieve aesthetically pleasing window pulls in my real estate photos?
A: Achieving aesthetically pleasing window pulls involves carefully balancing the interior and exterior exposures. Use the window pull method to prevent overexposing the outside view while properly lighting the interior. Proper flash placement and post-processing techniques, such as blending exposures, are key to achieving this effect.
Q: Can I use HDR settings to capture window pulls effectively?
A: While HDR is effective for blending exposures, flambient photography is typically a better approach for window pulls in real estate. Flambient allows you to mix flash with ambient light, giving you more control over the exposure and ensuring that both the inside and outside are well-lit without losing detail in either.
Q: What camera settings should I use for a flambient photoshoot?
A: For flambient real estate photography, use the following settings: ISO: 100-400; Aperture: f/8-f/11; Shutter speed: Adjust to balance interior exposure and allow for flash lighting; White Balance: Custom or auto, based on the lighting conditions; Drive Mode: Use a 2-second timer to avoid camera shake.
Q: How can I mix flash with ambient light effectively in real estate photography?
A: To mix flash with ambient light effectively, start by adjusting the camera settings for the ambient light exposure. Then, use the flash to illuminate darker areas without overpowering the natural light. The key is to adjust the flash power and direction to create a soft, natural lighting effect that complements the existing light in the scene.
Q: What is the HDR effect, and how is it achieved in real estate photography?
A: An HDR effect is achieved by combining multiple exposures of the same scene to capture a broader range of light and detail. This technique ensures that both bright windows and dark interiors are well exposed. In flambient real estate photography, this effect is achieved by blending ambient light with flash in a way that captures the best of both worlds.
.png)
.png)
.png)
