




Real Estate Photography Shot List: Key Shots for Success


Share:
Table of Contents
- 1. Quick checklist: Essential real estate photography shot list at a glance
- 2. Why you need a dedicated shot list for real estate photography
- 3. Exterior real estate photography shot list
- 4. Interior real estate photography shot list (Room-by-room)
- 5. Best drone shots for your real estate photography shot list
- 6. Pro tips to execute your real estate photography shot list seamlessly
- 7. How Fotober’s photo editing services empower real estate photographers
- 8. Conclusion
In the fast-paced real estate market, visual presentation is everything. Over 90% of home buyers start their property search online, where first impressions are formed in a fraction of a second. Whether you are a professional real estate photographer, an aspiring freelancer, or a real estate agent taking your own media, neglecting a key detail can result in unsatisfied clients or costly reshoots. Thus, having a comprehensive real estate photography shot list ensures that you capture every necessary angle efficiently and consistently. This guide breaks down everything you need to photograph a home flawlessly, from exterior curb appeal and detailed interior spaces to the best drone shot list.
1. Quick checklist: Essential real estate photography shot list at a glance
For quick reference on set or during pre-shoot planning, use this master checklist as your baseline. It outlines the core images required for a standard residential property shoot.
|
Category |
Must-have shots |
Recommended count |
|
Front exterior |
Wide front elevation, 45-degree angle front, entryway close-up, driveway/candid street view |
4-6 shots |
|
Rear exterior |
Wide backyard perspective, patio/deck seating area, pool/landscaping highlights, exterior architectural details |
4-6 shots |
|
Living & dining areas |
Wide-angle main living space, open-concept flow to dining, fireplace or focal wall, dining table overview |
4-6 shots |
|
Kitchen |
Wide overall kitchen view, kitchen island focal point, pantry interior/cabinets, high-end appliance/countertop close-ups |
4-6 shots |
|
Primary bedroom & suite |
Wide room angle from entrance, opposite corner facing bed, walk-in closet |
3-5 shots |
|
Primary bathroom |
Double vanity & mirror view, walk-in shower detail, soaking tub angle, luxury fixtures |
3-5 shots |
|
Secondary bedrooms & baths |
Standard wide bedroom angles, guest bathroom vanity/shower |
1-2 shots per room |
|
Specialty amenities |
Home office, laundry room, garage, basement, gym, outdoor kitchen |
1-2 shots per area |
|
Aerial / Drone views |
High top-down overhead, 45-degree hero elevation, neighborhood context shot, low-altitude lifestyle angle |
4-6 shots |
2. Why you need a dedicated shot list for real estate photography
Operating with a pre-planned shot list for real estate photography is more than just a memory aid; it is an essential operational workflow that elevates your business professionalism and image quality.
Eliminates on-site guesswork & saves time: When you step onto a property, time is money. A structured shot list keeps you moving purposefully from room to room without lingering or wondering what to shoot next. It prevents wasted time spent taking repetitive angles while ensuring no critical area is overlooked.
Standardizes quality across listings: Whether you are photographing a $250,000 starter home or a $5,000,000 luxury estate, maintaining a consistent shooting structure guarantees that every listing gets high-grade visual coverage. Consistency builds trust with real estate agents, agencies, and home sellers who expect a predictable standard of quality.
Improves communication with realtors & homeowners: Providing your clients with a standard real estate photography shot list before shoot day sets clear expectations. Realtors can review the list, request specific custom angles, or highlight special upgrades (such as heated floors, smart home controls, or custom cabinetry) before you arrive.
Maximizes MLS and marketing platform optimization: MLS (Multiple Listing Service), Zillow, Realtor.com, and social media platforms favor well-organized visual storytelling. A systematic shot list ensures you capture both ultra-wide navigational shots and engaging detail shots tailored for digital marketing campaigns.
3. Exterior real estate photography shot list
The exterior of a home creates the crucial first impression. Curb appeal sets the tone for the entire listing gallery, making exterior shots vital for attracting potential buyers.
|
Street view / Neighborhood context | |
|
Front elevation (Straight-on) |
45-degree angle front (Shows depth) |
|
Main entryway & porch | |
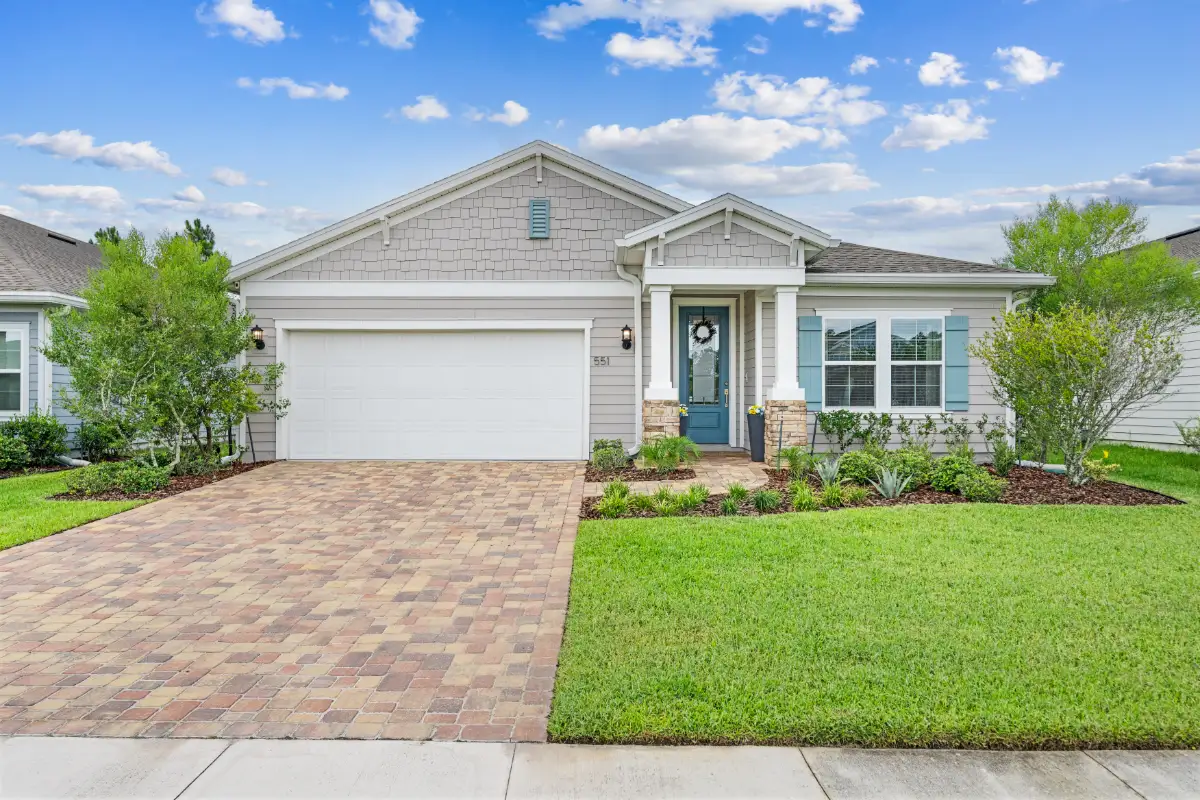
3.1. Front elevation & curb appeal
- Straight-on wide front elevation: Position yourself centrally to capture the home symmetrically. Ensure the shot is level and vertical lines remain straight.
- 45-degree angle front view: Step to the left or right side of the front yard. An angled perspective showcases both the front façade and the side profile, giving buyers a clear sense of depth and architectural dimension.
- Main entryway & porch: Move closer to emphasize the front door, covered porch, archways, or entryway lighting. This shot welcomes viewers into the home experience.
- Driveway & garage overview: Show the garage doors, driveway width, and parking availability clearly without cluttering the main home hero shot.
3.2. Rear exterior & outdoor living spaces
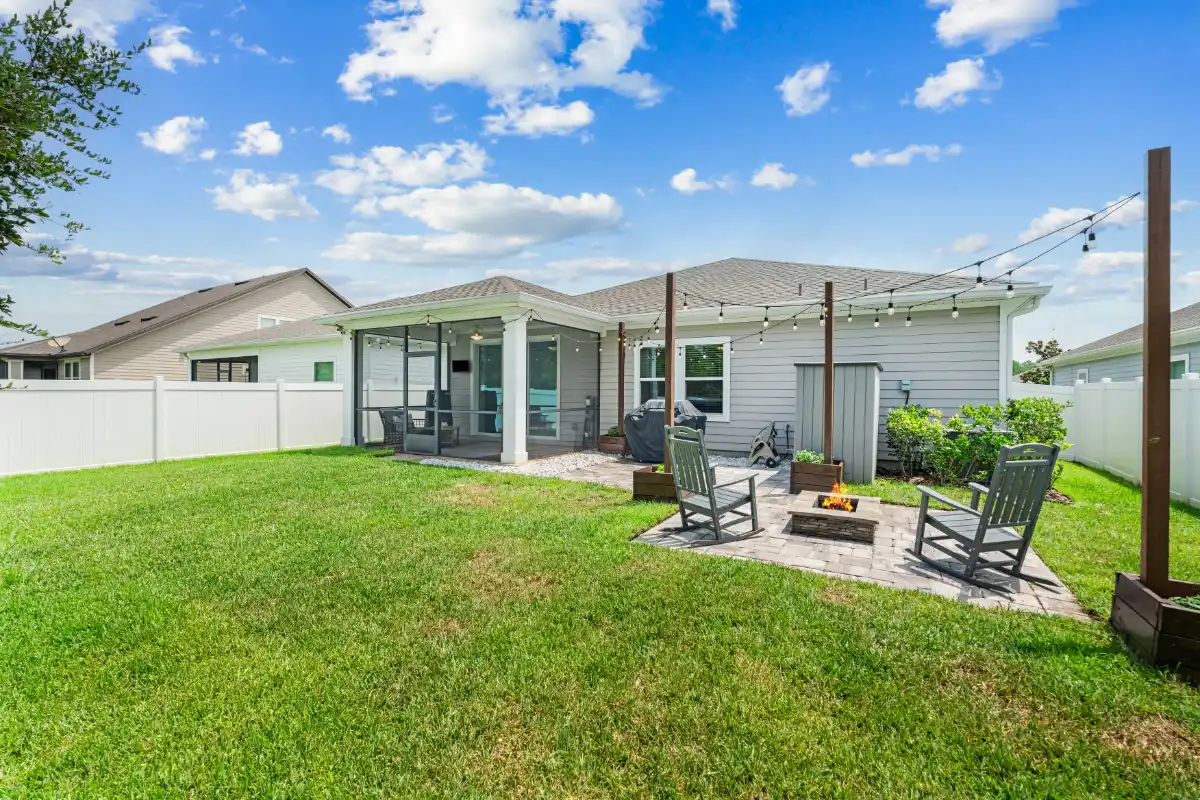
- Wide backyard overview: Stand near the property boundary corner to capture the entire expanse of the lawn, fencing, and landscaping.
- Patio, deck & entertainment hub: Frame outdoor dining areas, covered lanais, pergolas, or fire pits to highlight lifestyle potential.
- Pool & spa angles: Capture the full length of the pool, water features, lighting, and surrounding deck space. Clean reflections on calm water elevate the luxury feel.
- Rear façade facing house: Shoot looking back toward the rear of the home from the edge of the yard to demonstrate indoor-outdoor living flow.
3.3. Exterior details & twilight photography
- Architectural details: Highlight unique craftsmanship such as custom stone facades, timber beams, decorative shutters, or custom stonework.
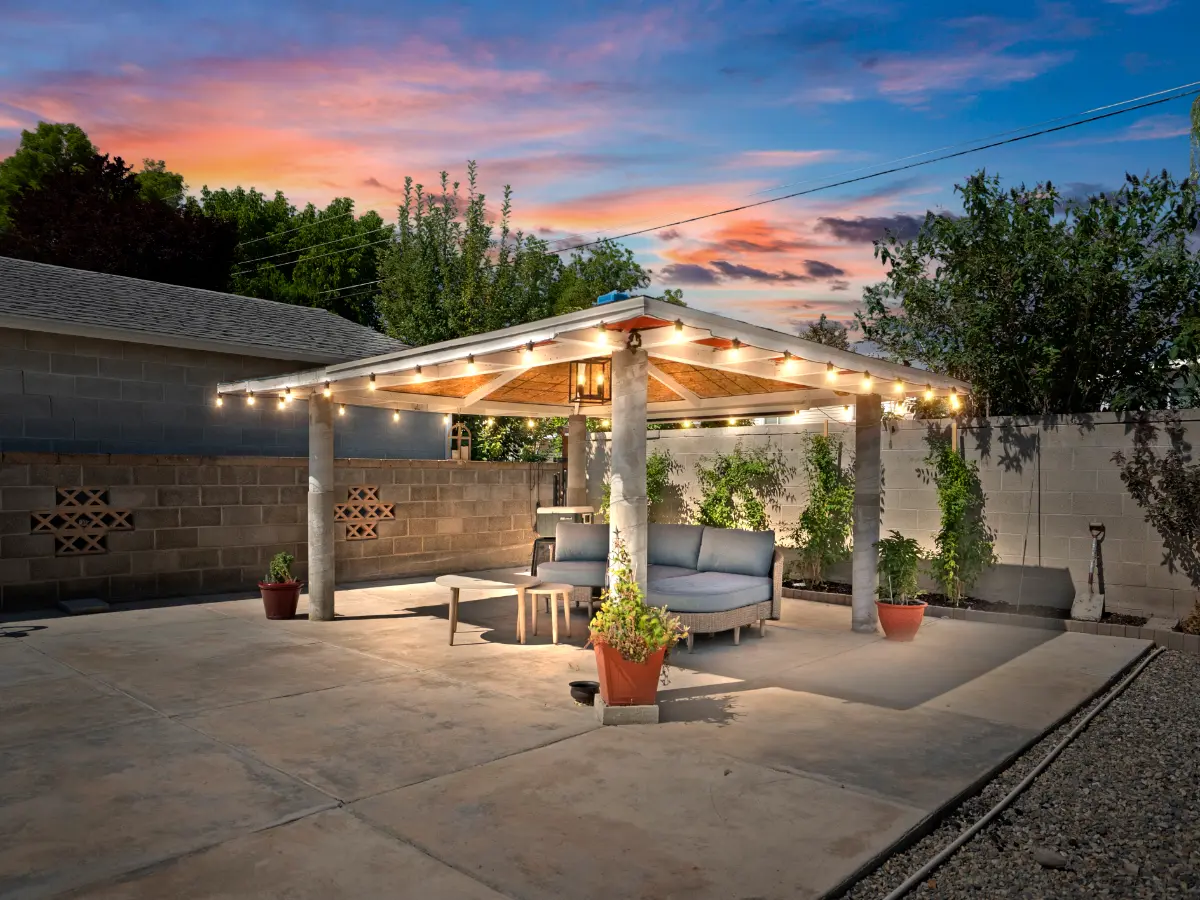
- Day-to-dusk / Twilight shot: Taken during the golden/blue hour or created via virtual twilight editing. Lit windows against a soft twilight sky create a warm, high-end look that dramatically increases online click-through rates.
4. Interior real estate photography shot list (Room-by-room)
Interior real estate photography requires balancing natural light, ambient indoor lighting, space composition, and correct vertical alignment. Approaching the interior room-by-room keeps your gallery organized and comprehensive.
|
Interior flow | ||
|
Living & dining |
Kitchen hub |
Primary suite |
|
Wide-angle entrance |
Full kitchen view |
Bed focal point |
4.1. Foyer & main living areas
- Foyer/entryway: Capture the immediate view upon entering the front door to convey the welcoming sensation of arriving home.
- Living room main wide angle: Shoot from the doorway or corner using a wide-angle lens (typically 16mm–24mm full-frame equivalent) to encompass as much of the living space as possible.
- Living room secondary angle: Capture the room from the opposite diagonal corner to reveal the full room layout and window placements.
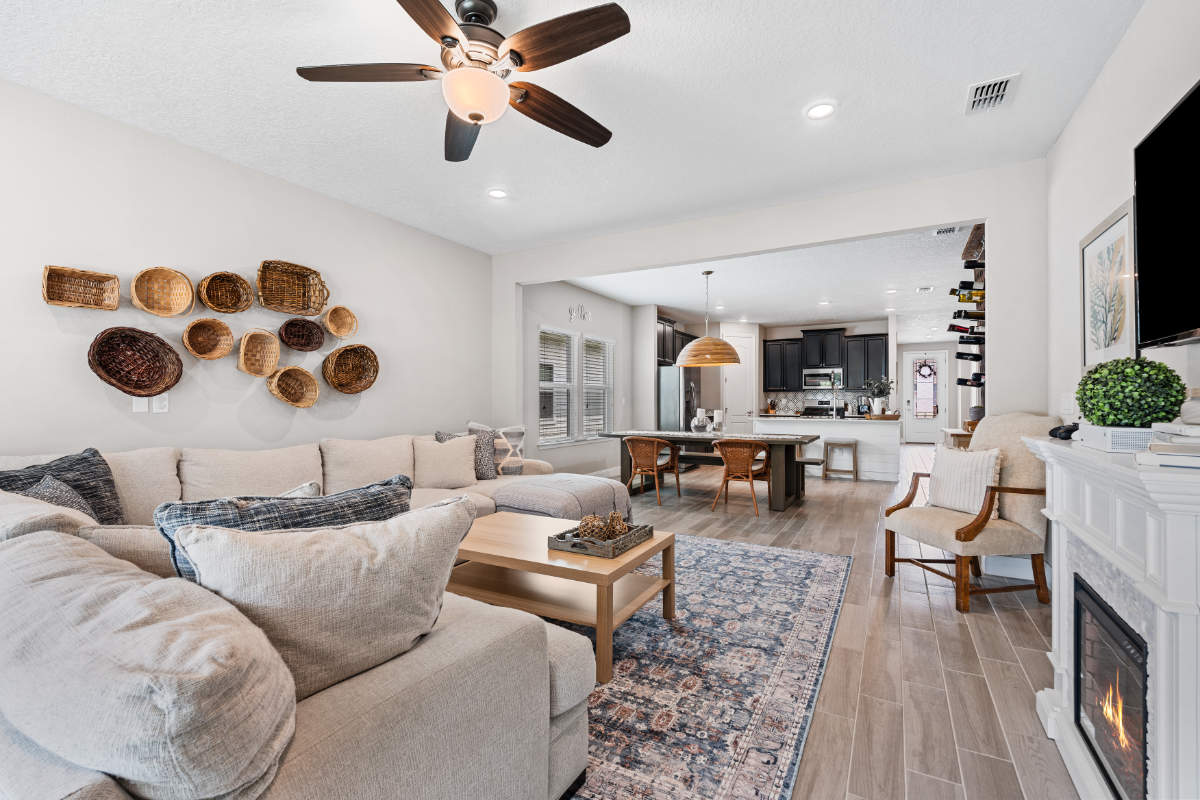
- Open-concept flow shot: Frame the seamless connection between the living area, dining space, and kitchen. This is a top priority for modern buyers.
- Architectural focal point: Focus on key selling features such as a stone fireplace, built-in bookshelves, vaulted ceilings, or large floor-to-ceiling windows.
4.2. Kitchen & dining area
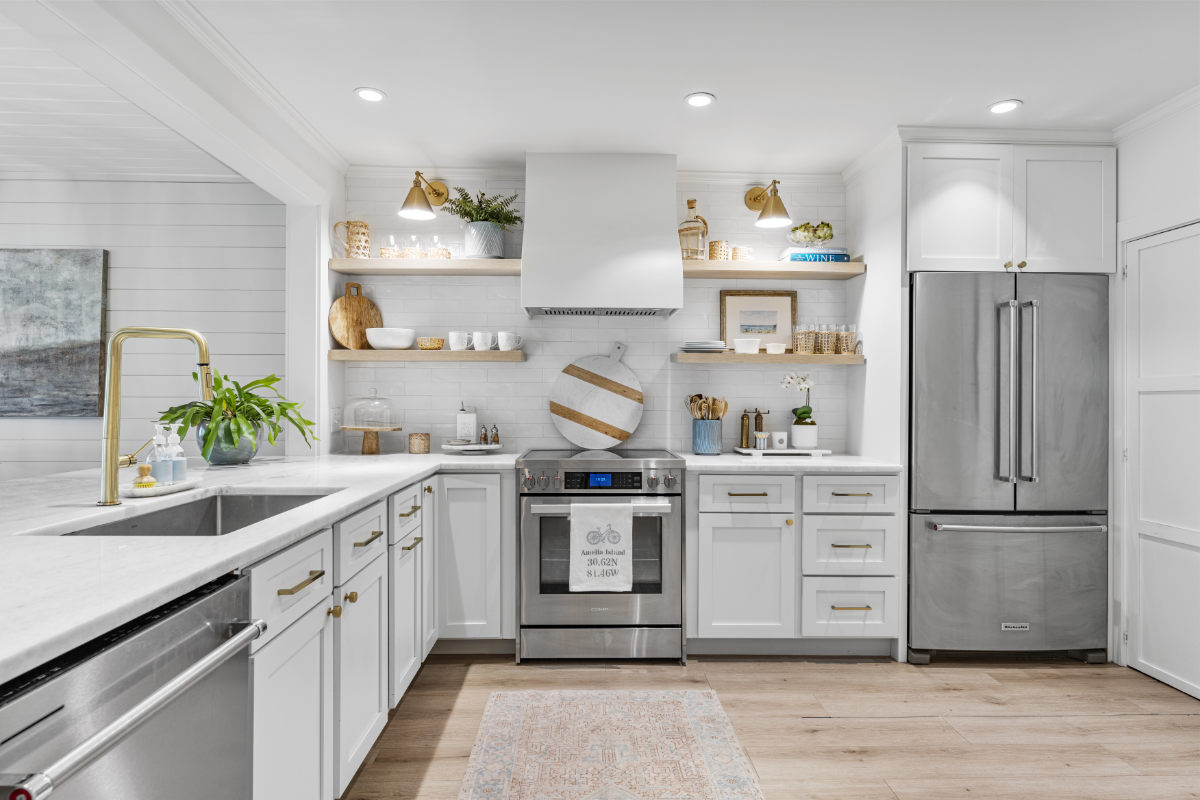
- Kitchen wide hero shot: Position yourself at the kitchen entrance or standing at the dining threshold to capture the overall layout (U-shaped, L-shaped, or galley).
- Kitchen island focal view: Highlight the island counter, bar seating, pendant lighting, and sink arrangement.
- Cooktop & cabinetry perspective: Shoot across the countertops toward high-end appliances, custom backsplashes, and cabinet finishes.
- Pantry shot: Capture open or neatly organized walk-in pantries, showcasing storage capacity.
- Formal dining room: Provide a clear angle showing the dining table setup, overhead chandelier lighting, and surrounding space.
4.3. Primary bedroom suite
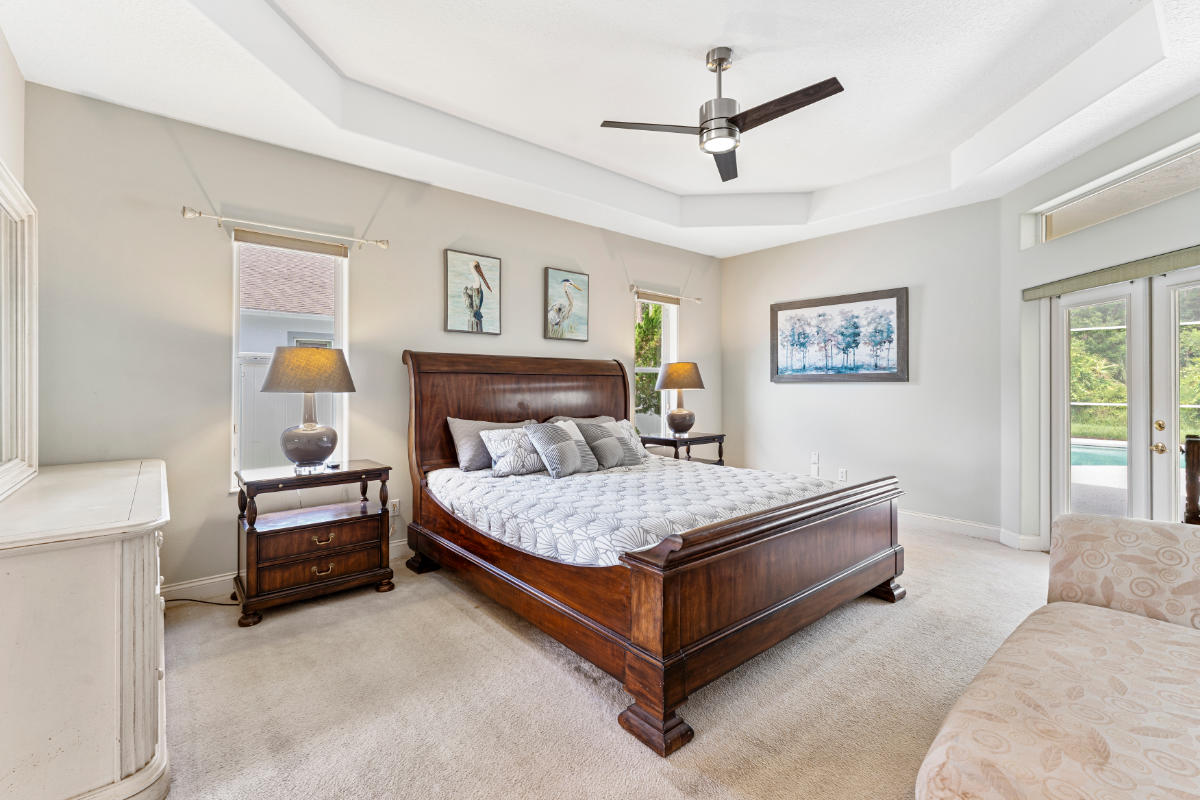
- Primary bedroom main view: Shoot from the doorway looking toward the main bed wall. Ensure the bed is neatly dressed, and pillows are styled.
- Primary bedroom opposite angle: Frame the view from a far corner back toward the entrance or seating area to illustrate total room size.
- Walk-In closet overview: Capture custom shelving, storage units, and hanging space. Keep the camera level to prevent distortion in tight quarters.
4.4. Bathrooms (Primary & guest)
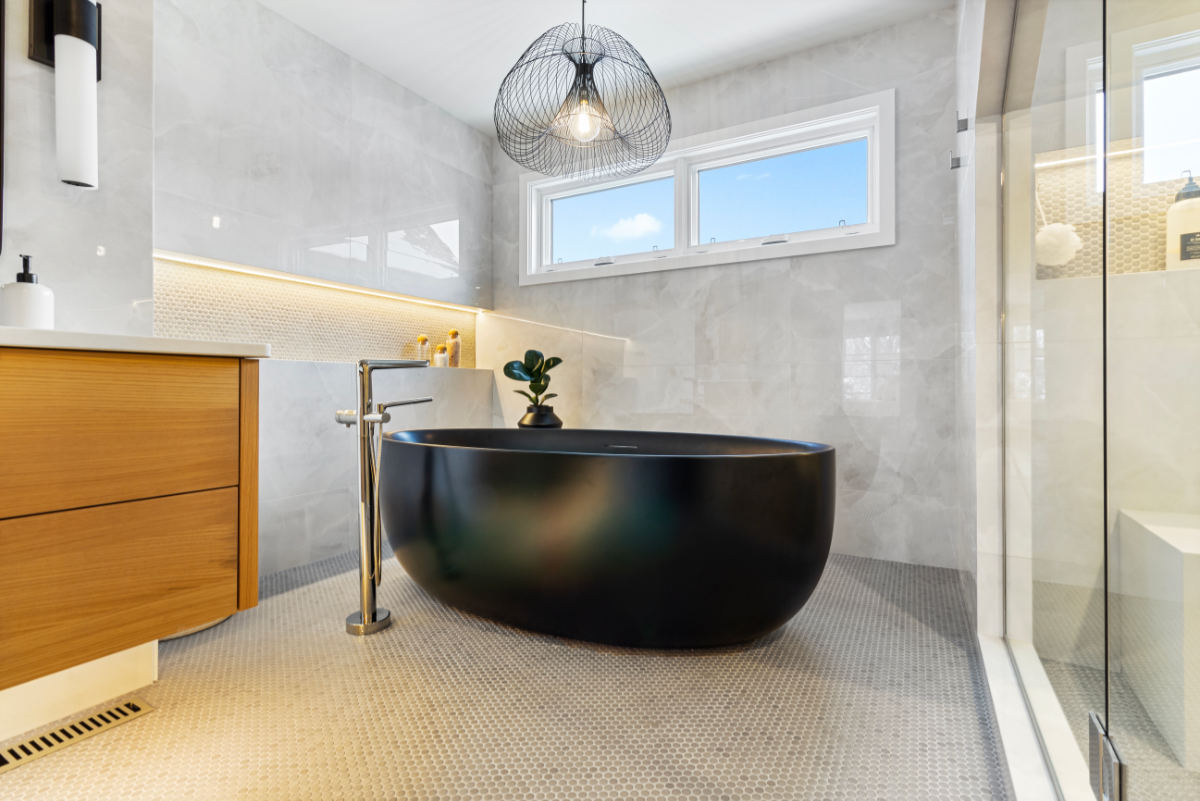
- Primary bath vanity & mirror: Capture double vanities, lighting fixtures, and mirrors while angling yourself to avoid camera reflections in glass surfaces.
- Walk-in shower & soaking tub: Highlight frameless glass enclosures, rain shower heads, custom tile work, and standalone bathtubs.
- Guest bathroom overview: Clean, concise wide shot showing the sink vanity and bathtub/shower combination.
4.5. Secondary bedrooms, home office & utilities
- Guest bedrooms: Minimum of one clean wide-angle shot showing window light and floor space for each secondary room.
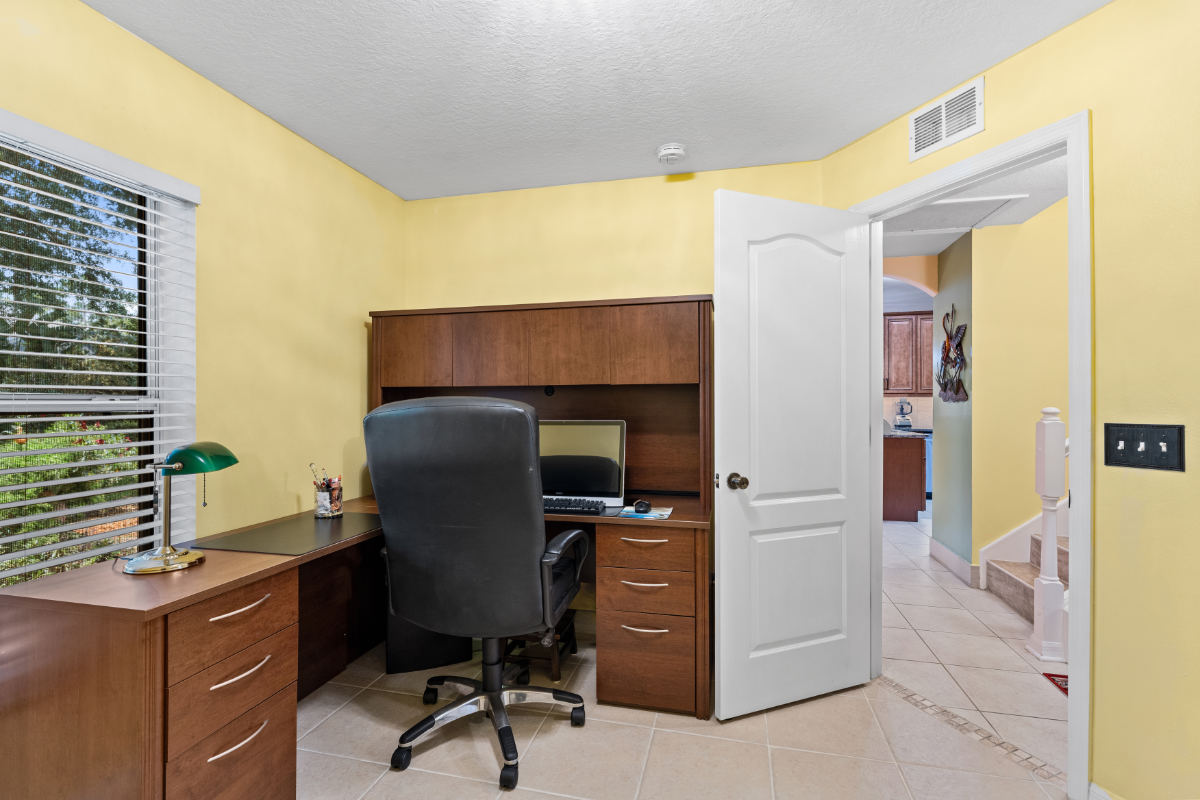
- Home office/flex room: Emphasize built-in desks, natural light, and quiet working zones, a highly sought-after feature for modern remote professionals.
- Laundry room & mudroom: Show washer/dryer hookups, storage cabinets, folding counters, and coat hooks.
- Garage & basement: Clean shots demonstrating vehicle parking, epoxy floors, finished basement living space, or workshop setups.
5. Best drone shots for your real estate photography shot list
Drone technology has revolutionized real estate marketing by providing perspectives that were previously impossible without expensive helicopter rentals. Aerial visuals showcase property dimensions, acreage, surrounding terrain, and proximity to neighborhood amenities.
When curating your aerial shot library, following this curated best aerial drone shots for real estate photography list ensures you capture high-impact, professional drone imagery every single time.
|
Aerial drone angles | ||
|
[High top-down] |
[45-degree hero] |
[Low-altitude] |
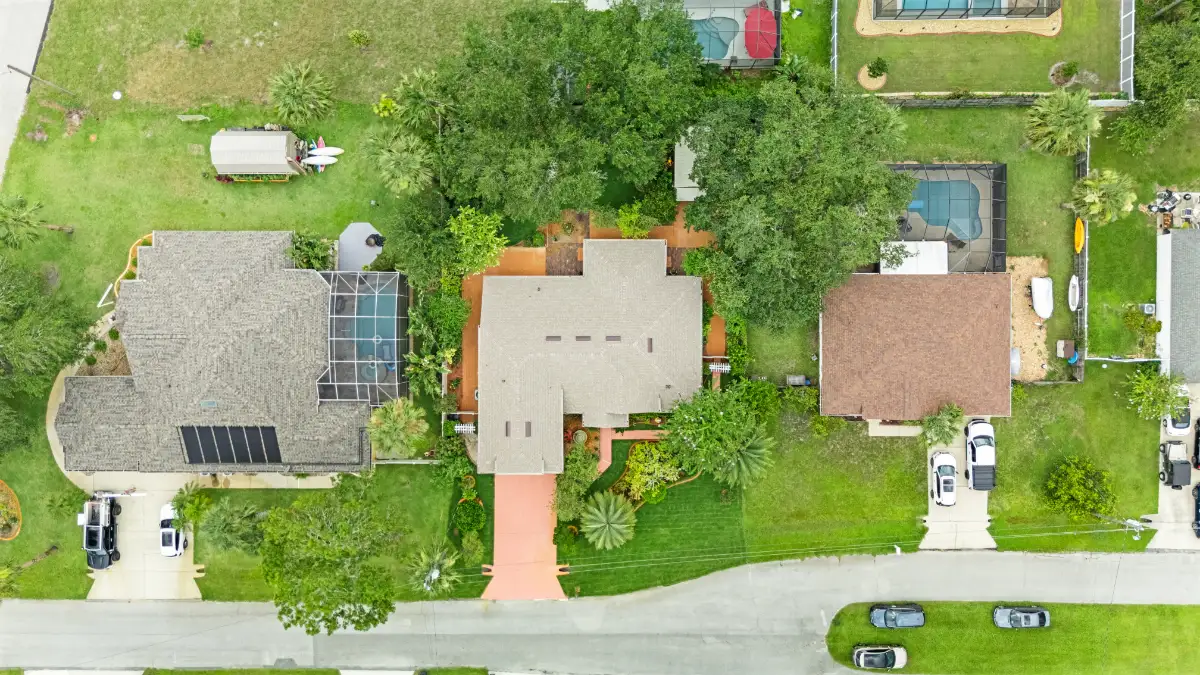
5.1. High top-down / Bird’s-eye view (Overhead boundaries)
- Description: Fly the drone directly above the center of the property, angling the camera 90 degrees straight down, facing the earth.
- Why it works: This is one of the most critical angles on any best aerial drone shots for real estate photography list. It provides a clear blueprint-style view of the entire lot, clearly outlining property boundaries, swimming pools, outdoor structures, roof layout, and landscaping design.
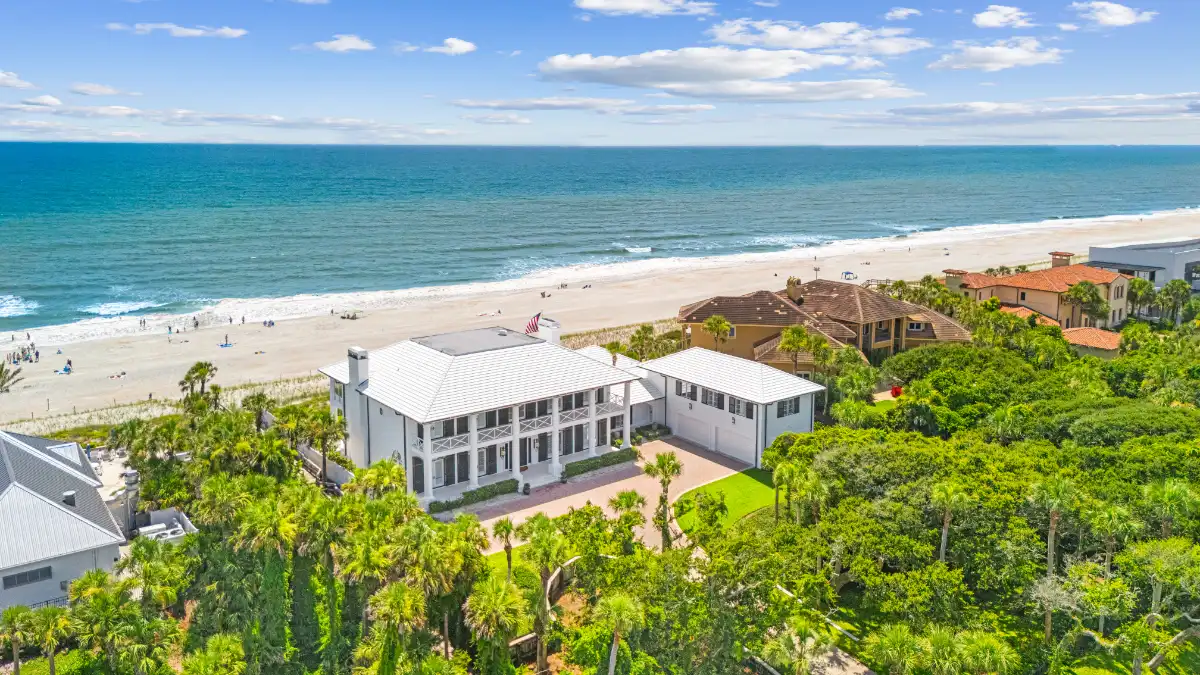
5.2. The 45-degree front hero elevation
- Description: Position the drone 30 to 50 feet in the air, angled down at approximately 45 degrees facing the front façade of the house.
- Why it works: This shot combines the familiar street-level curb appeal with elevated scale. It highlights the front elevation, roofline, roof condition, long driveways, and front yard landscaping all in a single frame.
5.3. The neighborhood context & proximity shot
- Description: Elevate the drone higher (100–200 feet, within local aviation limits) and tilt the camera horizon slightly up to include surrounding geographical markers.
- Why it works: Essential for properties whose main selling point is location. It visually highlights proximity to water bodies, golf courses, parks, downtown centers, lakes, or mountain views that ground-level photography cannot capture.
5.4. Low-altitude lifestyle framing
- Description: Fly at a low elevation (10 to 15 feet off the ground), hovering just above tree branches, fences, or gate posts facing the outdoor living area.
- Why It Works: It creates a dynamic, cinematic perspective that bridges ground photography with high aerial views. This entry on our real estate photography shot list gives buyers an immersive, luxury experience of outdoor decks and pools.
5.5. 180- or 360-degree panoramic view
- Description: Capture a series of stitched images or a wide panoramic shot at medium altitude surrounding the property perimeter.
- Why it works: Found prominently on every professional drone shot list, panoramic imagery captures the broader environment, showing orientation relative to sunrise, sunset, and nearby natural preserves.
6. Pro tips to execute your real estate photography shot list seamlessly
Having a complete shot list for real estate photography is half the battle; executing it cleanly on-site requires discipline and technical control.
|
Shoot execution | ||
|
Home staging |
Lighting control |
Legal safety |
|
Clear clutter |
Natural + flash HDR |
FAA Part 107 |
|
Open blinds |
Consistent color temp |
Respect privacy |
6.1. Send a pre-shoot checklist to homeowners
Before shoot day, advise the client or listing agent to prepare the home:
- Turn on all interior lights and replace burnt-out bulbs.
- Turn off ceiling fans so blades remain crisp in photos.
- Clear kitchen counters, bathroom vanities, and refrigerator doors of personal items.
- Hide pet beds, food bowls, trash cans, and garden hoses.
- Move vehicles out of the driveway and close all garage doors.
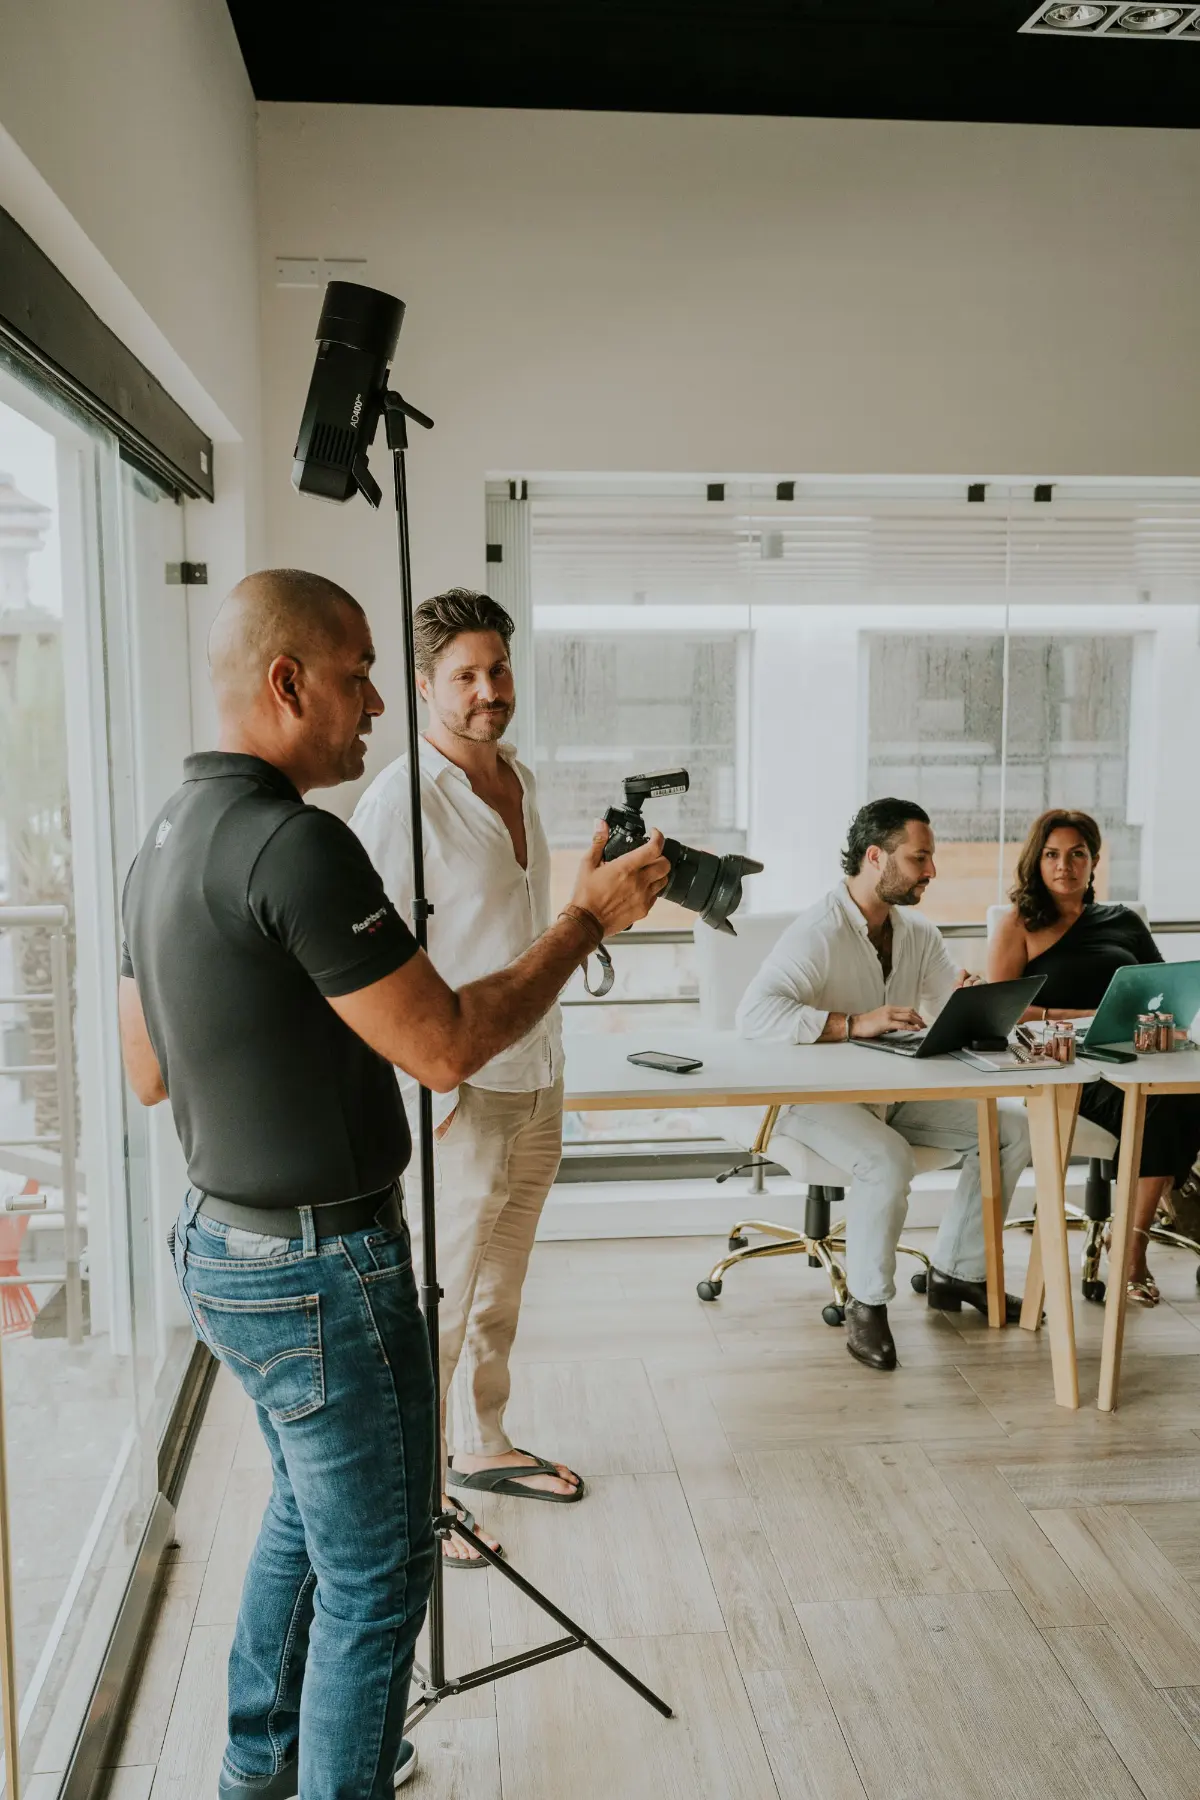
6.2. Master lighting & HDR / Flambient techniques
- Real estate interiors present extreme dynamic range between bright exterior windows and darker indoor corners.
- Utilize HDR (high dynamic range) bracketed exposures (typically 3 to 5 exposures spaced 2 EV apart) or the "Flambient" technique (combining ambient light frames with flash frames) to maintain clean colors and crisp, visible window views without blowing out highlights.
6.3. Maintain vertical lines and eye-level camera heights
- Keep your camera level using a tripod equipped with a bubble level or digital horizon gauge. Leaning the camera up or down causes vertical walls to converge or tilt unnaturally.
- Keep camera height around chest level (4.5 to 5 feet) in general rooms, and lower it slightly (around 3.5 to 4 feet) in kitchens and bathrooms to avoid looking down onto countertops and furniture.
6.4. Observe drone safety & local regulations
- When utilizing drone photography, ensure compliance with local aviation authorities (such as FAA Part 107 in the United States or equivalent local regulations).
- Avoid flying directly over non-consenting neighbors or moving traffic, maintain line-of-sight visual contact with your aircraft, and respect local airspace height restrictions.
7. How Fotober’s photo editing services empower real estate photographers
Capturing every angle on your real estate photography shot list is only half the battle. Transforming raw exposures into polished, magazine-ready listing photos requires extensive post-processing time. For busy real estate photographers balancing multiple shoots a day, post-production can quickly become a bottleneck. Partnering with a professional post-processing service like Fotober enables photographers to scale their business while delivering flawless results.
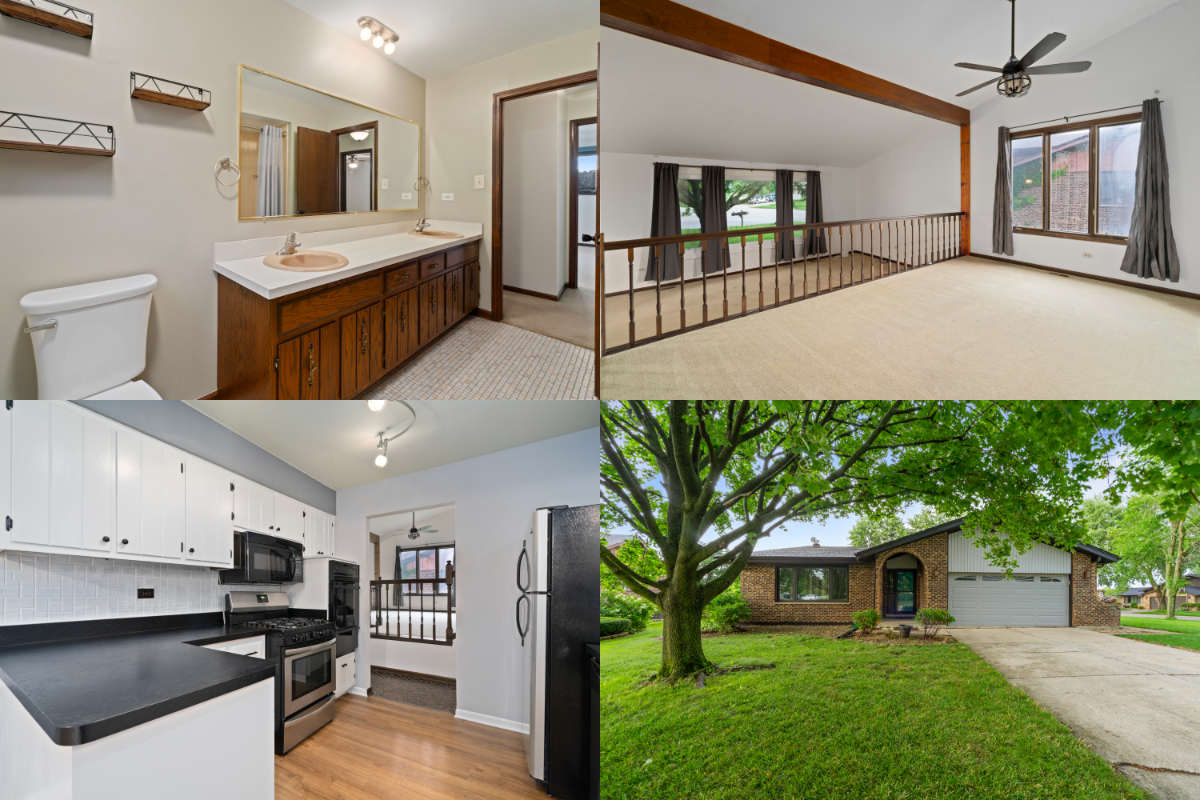
7.1. Advanced enhancement techniques for every shot list
Real estate interiors and exteriors present complex lighting challenges, from overexposed windows to dull grass and grey skies. Fotober’s specialized editing team handles complex retouching tasks effortlessly:
- HDR & flambient blending: Hand-blending ambient and flash exposures to maintain natural light, rich shadow detail, and crisp, perfectly exposed window views.
- Sky & lawn enhancement: Replacing overcast skies with vibrant blue or golden hour sunsets, and restoring yellowed lawns to plush green grass.
- Decluttering & virtual staging: Removing unwanted cords, hoses, trash cans, or personal items, and adding modern virtual furniture to vacant spaces to help buyers visualize the property's potential.
- Perspective & vertical correction: Ensuring straight vertical lines, true-to-life color accuracy, and clean white balance across every room in the property.
7.2. Fast 12 to 24-hour turnaround times
Real estate agents operate under strict listing schedules and often require marketing materials immediately after a shoot. Fotober delivers fully edited, high-resolution images within 12 to 24 hours, giving you a competitive edge with agents who demand quick service without sacrificing quality.
7.3. Consistency and brand standard retention
Maintaining visual consistency across dozens of photos per property, and across multiple clients, is essential for building your brand. Fotober creates customized editing profiles tailored to your preferred style (whether bright and airy, natural, or high-contrast modern), ensuring every shot from your exterior hero angles to detail shots matches your exact aesthetic.
7.4. Scaling your business without the editing burnout
Outsourcing post-processing to Fotober allows real estate photographers to trade hours behind a computer screen for extra time on set or pitching new clients. By delegating tedious editing tasks and editing software as well as hardware costs, you can double your daily shoot capacity, increase revenue, and prevent burnout while delivering exceptional quality to your listing agents.
8. Conclusion
A well-crafted real estate photography shot list is an indispensable tool for photographers and real estate professionals aiming for efficiency, consistency, and visual excellence. By systematically working through essential front exteriors, room-by-room interior setups, and the best drone shot list, you guarantee complete media coverage that captivates buyers and satisfies listing clients.
Keep this guide handy on your mobile device or print out the master checklist for your camera bag. With careful preparation, master lighting techniques, and a structured approach, you will produce striking property listings that sell homes faster and elevate your brand in the real estate market.
What is usually on your shot list when shooting properties? Let us know on our social media, and follow us today for more expert real estate marketing strategies and the latest real estate techniques for capturing every home better.
- Facebook: fotobermedia.co
- YouTube: Fotober
- TikTok: @fotober
- Instagram: fotober_media.
Related posts

San Antonio Housing Market Forecast 2026: Prices & Trends
October 30, 2026

What Drives Mortgage Rates? Explain The Forces Behind 2026's Numbers
October 29, 2026

Dallas vs. Los Angeles Housing Market: Comparing Prices & Supply
October 29, 2026

Orlando Population Growth in 2026: Trends & Housing Demand
October 26, 2026
