
Inside Real Estate Photography: Interior Photo Tips 2025
.png)

Share:
Table of Contents
- 1. Why Interior Photography Is Critical in Real Estate
- 2. Essential Gear for Interior Real Estate Photography
- 3. Composition & Framing Techniques
- 4. Lighting for Interior Spaces
- 5. Common Challenges & How to Fix Them
- 6. Post-Processing Tips for Interiors
- 7. Bonus: Styling Tips Before the Shoot
- 8. Let Fotober Perfect Your Inside Real Estate Photography
- Conclusion
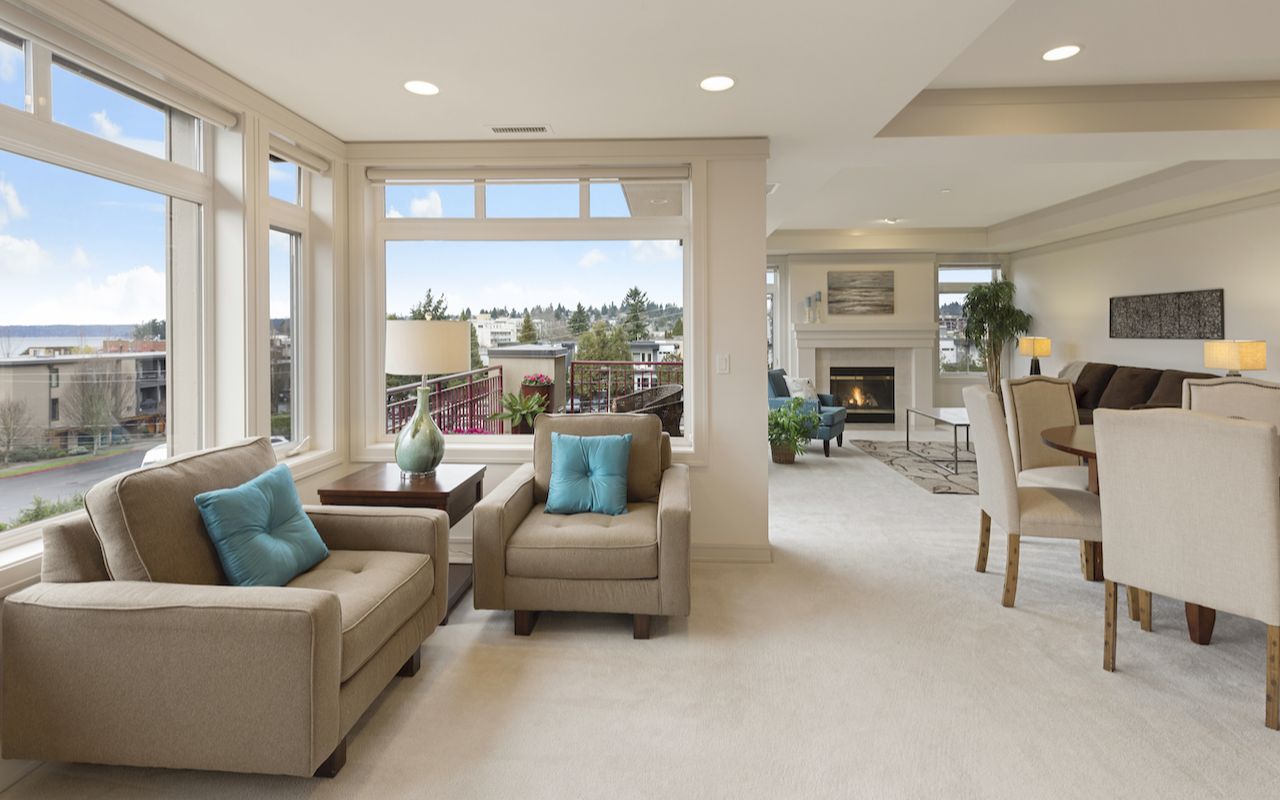
In today’s competitive housing market, inside real estate photography plays a crucial role in captivating buyers from the very first click. Stunning interior photos help potential buyers imagine themselves living in the space, increasing engagement and driving faster sales. This comprehensive guide covers everything you need to know-from gear and composition to lighting, post-processing, and styling-so you can capture interiors that sell.
1. Why Interior Photography Is Critical in Real Estate
When it comes to real estate, first impressions are everything. Most buyers form their first opinions about a property through its interior photos. Inside real estate photography helps buyers mentally place themselves inside the home, imagining their own furniture, family gatherings, and daily routines.
Properties with strong interior photography typically enjoy higher click-through rates on listing platforms and generate more showing requests. In contrast, poorly shot interiors can cause buyers to move on instantly, no matter how good the home's location or features are. Investing time and effort into interior photography directly translates into faster sales and better offers.
2. Essential Gear for Interior Real Estate Photography
To excel in inside real estate photography, having the right gear is essential for professional results.
Camera with Wide-Angle Lens (e.g., 16–35mm)
A full-frame DSLR or mirrorless camera paired with a 16–35mm wide-angle lens is ideal for capturing expansive shots of interiors without unnatural distortion. Wide lenses make rooms feel larger and more inviting without misleading viewers.
Tripod for Long Exposures and Symmetry
A sturdy tripod is non-negotiable. It keeps your shots sharp during long exposures in low light and helps you maintain perfectly straight lines for walls, windows, and cabinetry.
External Flash or Continuous Lights
Bringing in an external flash or continuous lighting helps fill in shadows and balance exposure between bright windows and darker corners. Proper lighting avoids the need for excessive post-processing fixes later.
Optional: Tethered Shooting for Client Previews
Tethering your camera to a laptop or tablet during the shoot lets you preview images immediately. This setup is especially useful when collaborating with realtors or stagers who want to provide real-time feedback.
3. Composition & Framing Techniques
Composition can make or break inside real estate photography. Proper techniques ensure rooms feel welcoming and natural.
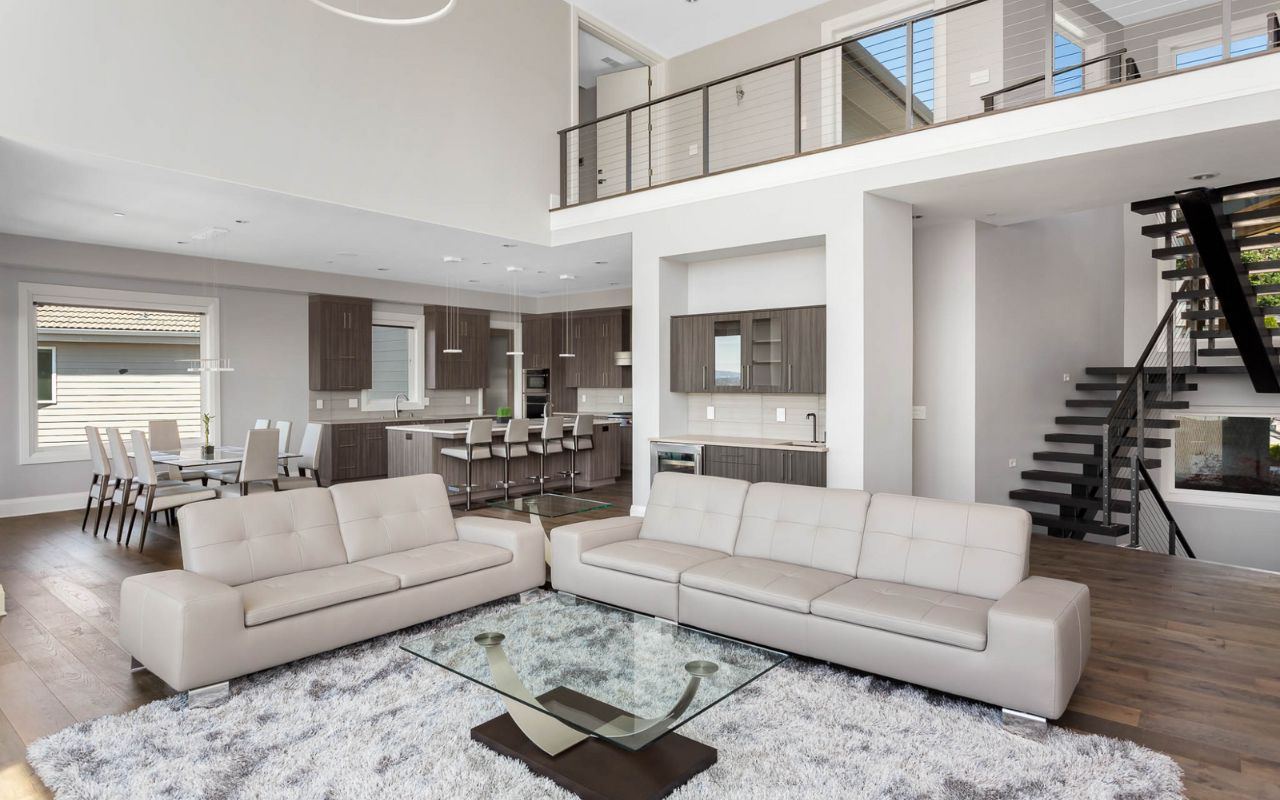
Shoot from Chest Height
Set your camera height to roughly chest level (about 4–5 feet), or just above the doorknob height. Shooting from this level creates a balanced, human-eye view of the room.
Keep Lines Straight: Walls, Cabinets, Windows
Ensure all vertical lines-walls, door frames, windows-are perfectly straight. Tilting your camera up or down introduces distortion that looks unprofessional and unsettling.
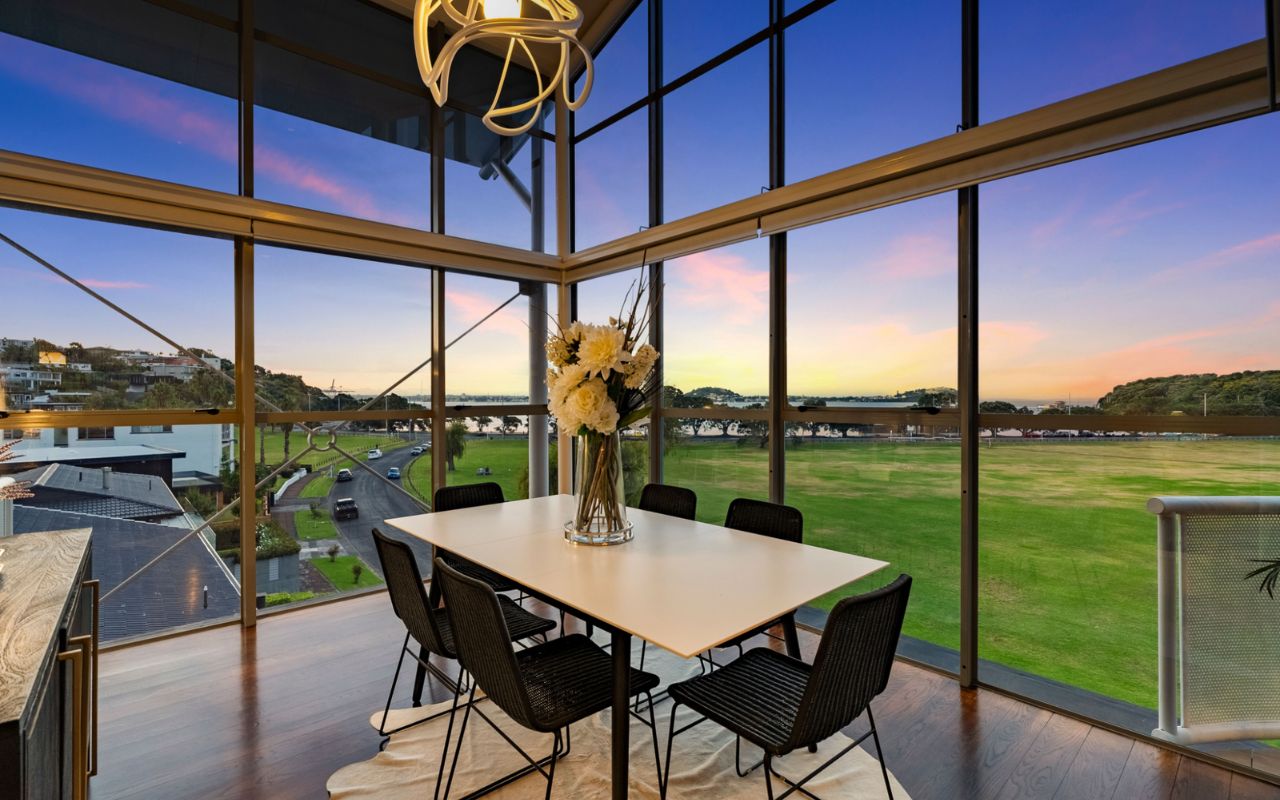
Use Foreground Elements for Depth
Including parts of furniture or decor in the foreground subtly leads the viewer’s eye into the scene, creating a stronger sense of space and immersion.
Best Practices: Shoot Corners vs. Flat Walls
Shooting toward a corner instead of straight at a flat wall helps showcase a room's dimensions and prevents it from looking cramped.

4. Lighting for Interior Spaces
Lighting can dramatically influence the success of inside real estate photography.
Use Natural Light + Artificial Fill
Use as much natural light as possible by opening blinds and curtains. Supplement with flash or continuous lights to fill darker areas, creating an evenly lit, vibrant image.
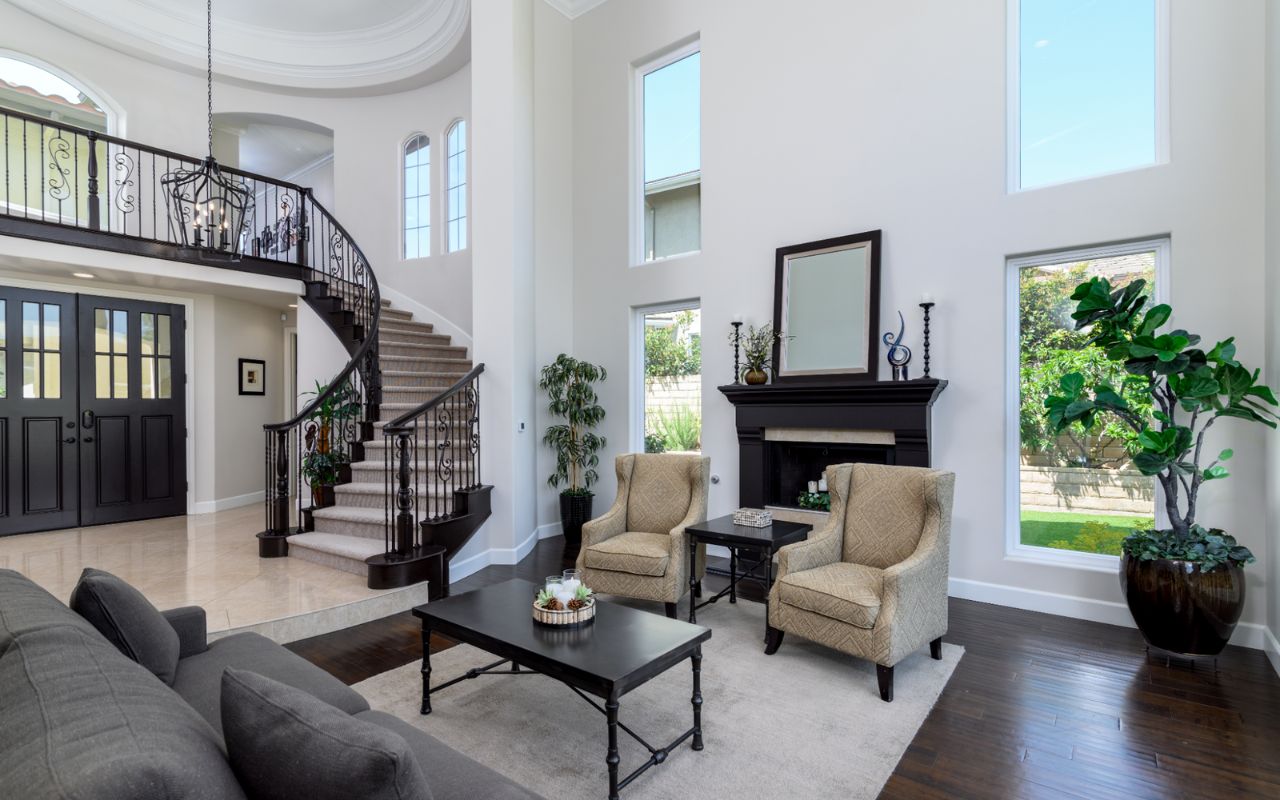
Avoid Blown-Out Windows or Underexposed Corners
Balance exposure so that windows aren’t blown out white and corners aren’t lost in shadows. Proper bracketing helps capture detail throughout the dynamic range.
Use Bracketing/HDR to Merge Exposures
Shooting multiple bracketed exposures (underexposed, correctly exposed, overexposed) allows you to merge them in post-processing, preserving details in both highlights and shadows.
5. Common Challenges & How to Fix Them
Even with solid preparation, inside real estate photography often presents real-world challenges that require quick thinking and creative solutions.
Tight Spaces: Use Wider Lens or Shoot Through Doors
Shooting in small spaces like bathrooms or laundry rooms can be tricky. Using a wide-angle lens, ideally in the 14–20mm range, can help capture more of the room without heavy distortion. Another trick is to shoot from doorways or slightly outside the room, ensuring you capture a sense of openness even in tight quarters.
Mixed Lighting: Adjust White Balance and Color Casts
Interiors often combine daylight, tungsten, and fluorescent lighting, which can cause unsightly color casts. Set a custom white balance on-site or fix it during post-processing to ensure colors look accurate and natural across the entire series of images.
Reflections in Mirrors/Glass: Shoot from Angles
Mirrors, glossy countertops, and windows can reflect unwanted objects-or even the photographer. Avoid this by adjusting your shooting angle or temporarily moving reflective items. Minor reflections that can’t be avoided are typically easy to remove during editing.
6. Post-Processing Tips for Interiors
Post-processing is where inside real estate photography truly comes to life, transforming good shots into stunning, polished images ready for marketing.
Correct Perspective and Vertical Lines
Use tools like Lightroom’s Transform panel or Photoshop’s Perspective Warp to fix tilted lines and ensure walls, windows, and door frames appear straight and realistic, not leaning or distorted.
Balance Exposure, Shadows, and Highlights
Blend multiple bracketed exposures carefully to maintain detail in both bright windows and darker corners. Aim for natural lighting that reflects what the human eye would see inside the space, avoiding over-edited, artificial looks.
Remove Clutter and Fix Lighting Inconsistencies
Even a clean house may have small distractions like cords, smudges, or minor lighting flaws. Use cloning and healing tools to tidy up distracting elements and ensure a cohesive, professional finish across all images.
If you're still learning how to become a real estate photographer, mastering post-processing techniques—or knowing when to outsource—is essential for delivering polished, market-ready photos that meet client expectations and stand out in competitive listings.
Outsource for Consistent Results – Like with Fotober
Handling post-processing yourself is possible, but outsourcing to experienced services like Fotober helps you deliver consistent, high-quality results faster-especially important when managing high-volume real estate projects.
7. Bonus: Styling Tips Before the Shoot
Styling is a critical yet often overlooked step in inside real estate photography. Well-prepared spaces photograph better and create stronger emotional connections with buyers.
Declutter and Depersonalize
Before shooting, encourage sellers or agents to remove excessive furniture, personal items, and clutter. Clean, neutral spaces make it easier for buyers to envision their own belongings in the home.
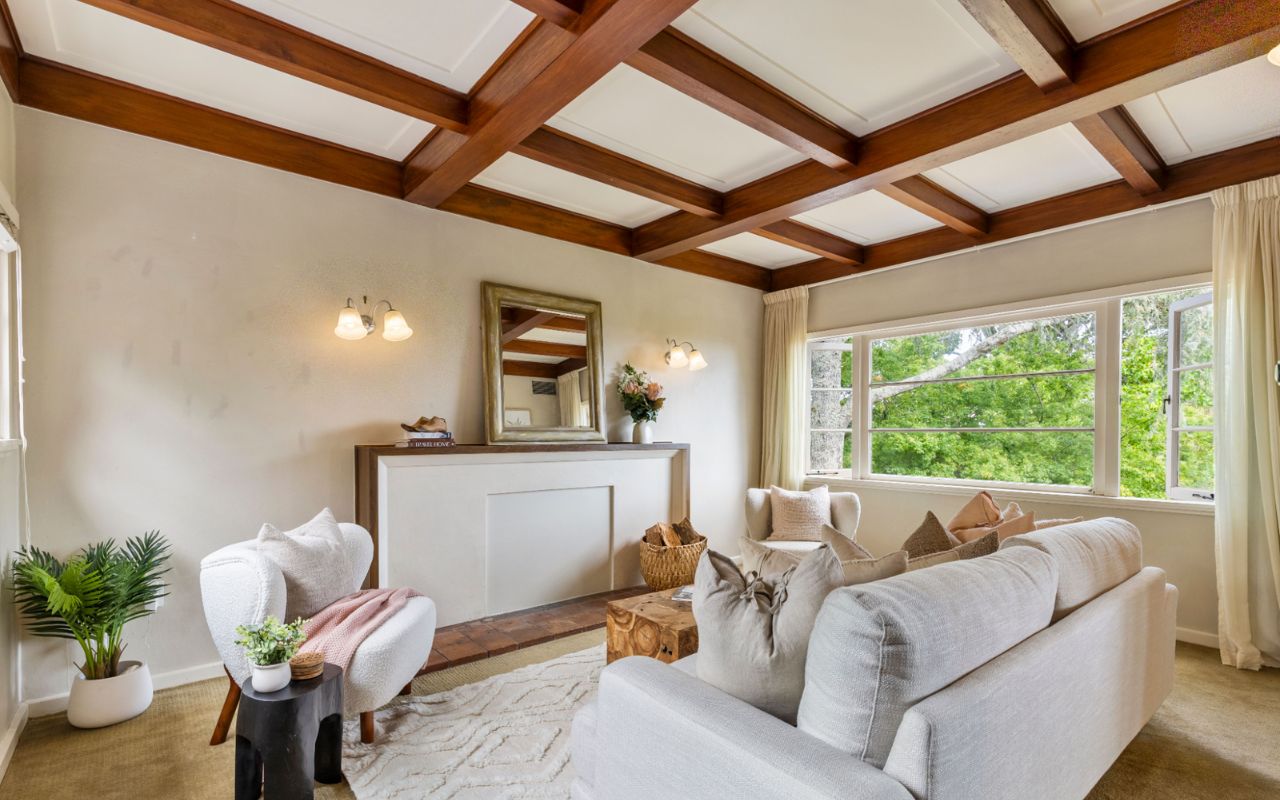
Add Props for Warmth
Tasteful props such as a cozy throw blanket, a vase of fresh flowers, or neatly stacked books can add warmth and make a space feel cared for-subtly influencing buyer emotions without distracting from the home's features.
Open Blinds to Bring in Natural Light
Natural light gives rooms a fresh, airy feeling. Always open blinds and curtains fully to let in as much daylight as possible, helping rooms look bright, clean, and cheerful in your photos.
8. Let Fotober Perfect Your Inside Real Estate Photography
After capturing the perfect shots, professional editing is what truly elevates inside real estate photography to a market-ready standard.
Fotober, a provider of real estate photo editing and real estate video editing services, specializes in transforming raw images into vibrant, polished visuals that stand out on listings. Our services include exposure blending, perspective correction, object removal, virtual staging, and more-helping your photos look consistent, natural, and highly appealing.
By outsourcing your editing to Fotober, you free up your time to focus on growing your business, capturing new projects, and delivering faster turnarounds to clients-all while maintaining the highest visual quality.
Conclusion
Perfecting your inside real estate photography skills is essential for success in today’s competitive housing market. From capturing clean compositions and balancing tricky lighting to delivering flawless final images, every detail matters in creating visuals that resonate with buyers.
By combining careful planning, professional shooting techniques, smart styling, and expert editing support from trusted partners like Fotober, you can produce captivating interior photos that help properties sell faster and grow your real estate photography business sustainably. Invest in your craft-and watch your impact (and income) soar.
Related posts

Win Bookings with a World Cup 2026 Rental Property Video Walkthrough
July 16, 2026

Double Your Booking: Airbnb Photography Tips for World Cup Host Cities
July 15, 2026
The Legacy of Sam Neill Real Estate: Vineyard & His Private Sanctuary
July 14, 2026

World Cup 2026 Host City Real Estate: Overview & Marketing Strategies
July 13, 2026
