
How to Enhance Image Quality in Photoshop: Expert Tips 2025
.png)

Share:
Table of Contents
- 1. Understanding Image Resolution and Quality
- 2. Step-by-Step Guide to Enhancing Image Quality in Photoshop
- • 2.1 Open the Image in Photoshop and Convert It to a Smart Object
- • 2.2 Apply the Camera Raw Filter and Use the Enhance Option to Enable Super Resolution
- • 2.3 Adjust Exposure, Contrast, and Clarity Using the Basic Panel in Camera Raw
- • 2.4 Reduce Noise and Sharpen the Image Using the Detail Panel
- • 2.5 Use the Spot Removal and Adjustment Brush Tools for Localized Corrections
- 3. Advanced Techniques for Professional Image Enhancement
- 4. Optimizing Images for Real Estate Photography
- 5. Fotober's Professional Image Enhancement Services
- Conclusion
Wondering how to enhance image quality in Photoshop? Whether for professional or personal projects, photographers and designers often need to refine images to achieve stunning results. This guide covers effective techniques to improve your images, helping them stand out. Fotober’s expert editing services can further elevate your photos, delivering polished, high-quality visuals.
1. Understanding Image Resolution and Quality
To enhance image quality in Photoshop, it's crucial to understand the fundamentals of image resolution and what contributes to overall image quality.
Image resolution refers to the level of detail in a photo, typically measured in pixels per inch (PPI) or dots per inch (DPI). A higher resolution delivers sharper, crisper images. For print purposes, 300 DPI is considered ideal, while 72 DPI is standard for web images. Setting the correct resolution from the start helps prevent distortion or pixelation during resizing.
It's important to note that larger file sizes don’t always equal higher quality. Key factors such as file format, compression, and color depth significantly impact quality. For instance, JPEG files are compressed and may lose detail, while TIFF retains maximum quality. Similarly, greater color depth ensures richer, more vibrant visuals.
Image quality also depends heavily on the camera settings used during capture—ISO, aperture, and shutter speed - as well as lighting conditions and lens quality. Using proper equipment and lighting before editing can greatly improve results in Photoshop.
By mastering these basics, you’ll be better equipped to optimize any photo and achieve professional-quality results using Photoshop. Learning how to edit real estate photos in Photoshop effectively is key for photographers looking to enhance property images, making them stand out in competitive real estate markets by improving lighting, color balance, and sharpness.
2. Step-by-Step Guide to Enhancing Image Quality in Photoshop
After building understanding around resolution and quality, let’s dive into the practical steps you can take to enhance image quality in Photoshop.
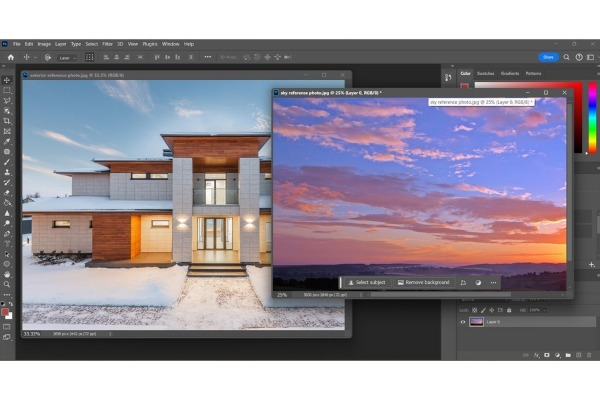
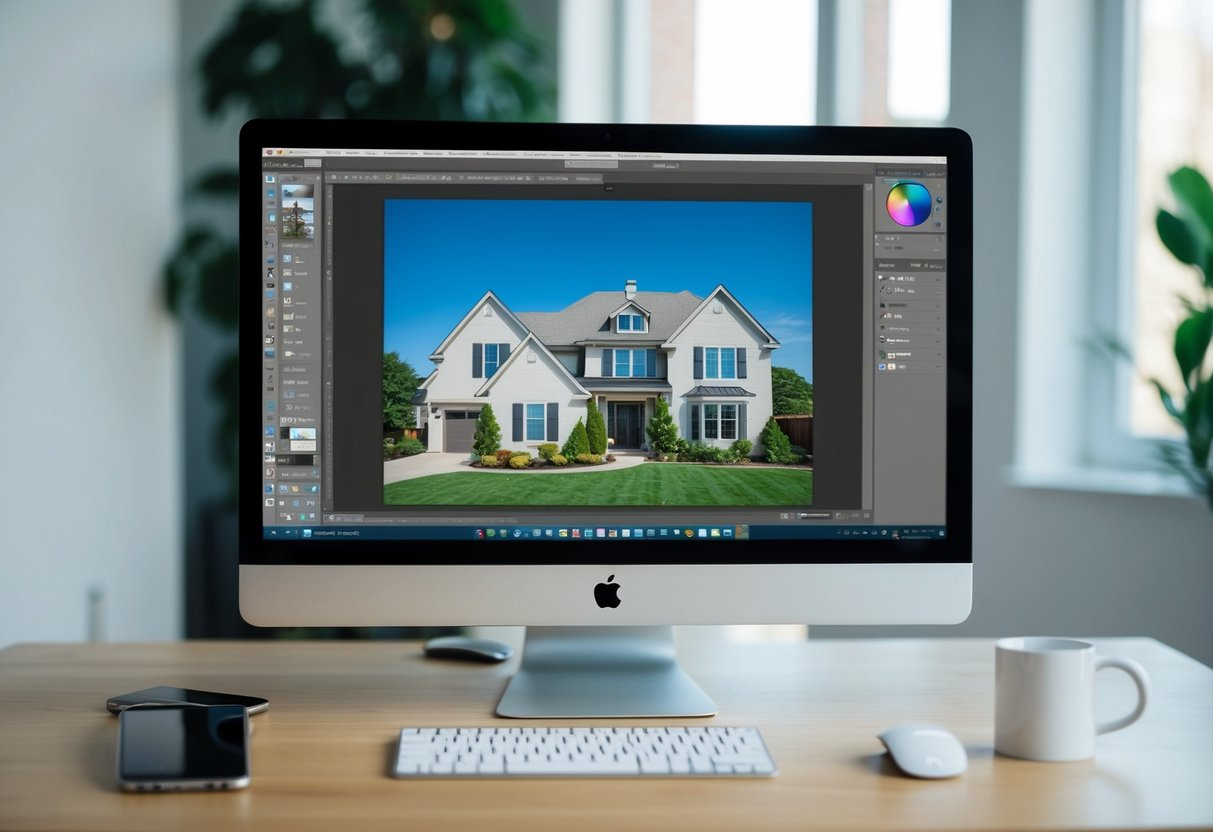
2.1 Open the Image in Photoshop and Convert It to a Smart Object
Before making any changes, it is advisable to open your image in Photoshop and convert it into a Smart Object.
- Why Smart Objects? Smart Objects enable you to make non-destructive edits. This means changes can be reverted in the future, providing flexibility in your real estate photography editing process.
- How to Convert: To convert your image, right-click on the layer in the Layers panel and select "Convert to Smart Object." This will allow you to apply filters and adjustments that you can modify later.
- Navigating File Formats: Ensure your image is in a compatible format for Smart Objects. Common formats include JPEG, TIFF, and PSD.
2.2 Apply the Camera Raw Filter and Use the Enhance Option to Enable Super Resolution
The Camera Raw Filter is a powerful tool for making adjustments that can elevate your image quality.
- What Is Super Resolution? The Super Resolution feature in Camera Raw uses machine learning to enhance the details in your image effectively. It works by analyzing the pixels and intelligently upscaling them for clarity.
- How to Apply:
- Go to Filter > Camera Raw Filter.
- Select the Enhance option and check “Super Resolution.”
- This will enhance the image quality at a pixel level and help you achieve a cleaner look.
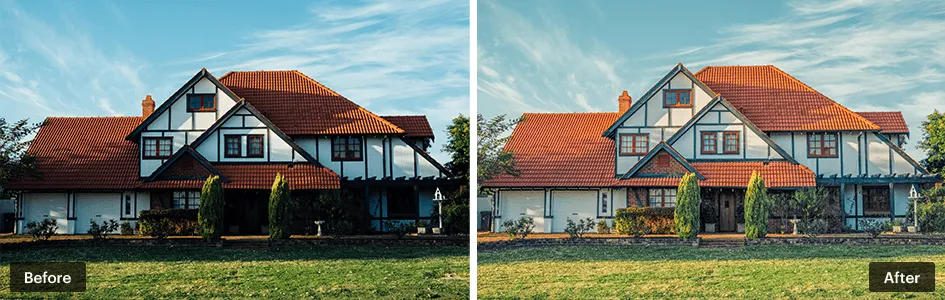
- Comparative Results: Always check before and after results to understand how much improvement has been made. This method often reveals hidden details that can make a significant difference in your final image quality.
2.3 Adjust Exposure, Contrast, and Clarity Using the Basic Panel in Camera Raw
Once you’ve enabled super resolution, it’s time to refine the overall exposure, contrast, and clarity of the image.
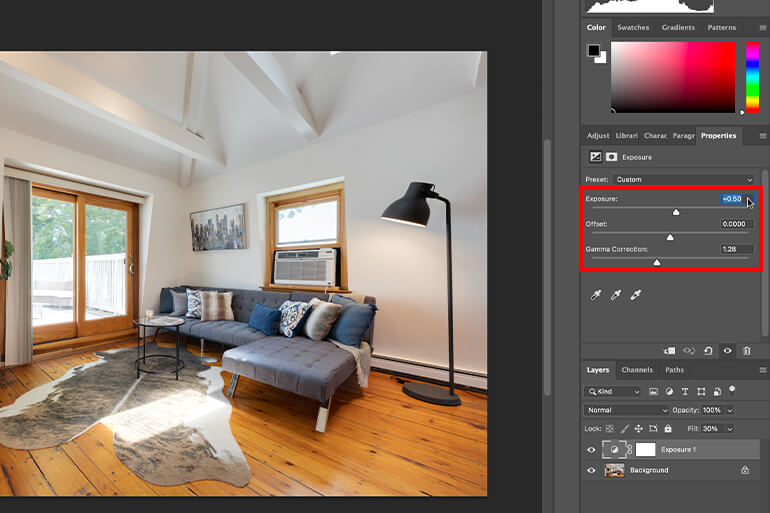
- Exposure Adjustments: Adjusting exposure can brighten or darken your image while enhancing detail in highlights or shadows.
- Contrast Enhancements: Adding contrast can make your image pop without overwhelming other elements. A basic rule of thumb is to start at a low increment and assess after each change.
- Clarity and Texture: Clarity can emphasize mid-tone contrasts, while texture can enhance fine details. Together, they create an impressive result without introducing noise.
Effective use of these adjustments is key when looking for a more professional and polished final image.
2.4 Reduce Noise and Sharpen the Image Using the Detail Panel
Noise can be a significant issue in images, particularly when shot in low-light conditions. Reducing noise and sharpening details further enhances image quality.
- Noise Reduction Techniques: Use the noise reduction slider in the Detail panel to minimize graininess. Be cautious, as over-reduction can lead to softening an image.
- Sharpening Filters: After noise reduction, apply sharpening. The ‘Amount’ and ‘Radius’ sliders can be finely tuned to bring back the crispness lost in noise reduction.
- Preview Options: Always keep an eye on the preview window while adjusting noise and sharpening settings. Compare initial and final results to avoid oversaturation of these effects.
The balance of noise reduction and sharpening is delicate; achieving it can significantly improve perceived image quality.
2.5 Use the Spot Removal and Adjustment Brush Tools for Localized Corrections
Here you can make targeted corrections to enhance the image further.
- Spot Removal Tool: Utilize this tool to fix blemishes, dust spots, or other imperfections in the image. This is particularly useful for portraits or nature shots.
- Adjustment Brush Tool: This tool allows you to make localized adjustments—perfect for brightening specific areas or adding contrast where needed. Paint over the selected area and adjust sliders accordingly.
- Using Layers: Consider creating separate adjustment layers for localized changes. This way, if you want to make accumulation adjustments in the future, they'll be easier to manage.
Localized corrections can improve the overall image significantly by fine-tuning problem areas without affecting the whole composition.
3. Advanced Techniques for Professional Image Enhancement
Moving beyond the basics, let’s delve into advanced techniques that can give your work a professional edge.
3.1 Utilizing Frequency Separation for Skin Retouching
Frequency separation is a technique mainly used in portrait retouching to separate the texture from color.
- Understanding Frequency Layers: The base layer contains all color information, while a separate layer preserved texture details.
- Step-by-Step Process:
- Duplicate the base layer.
- Apply a Gaussian Blur to the lower layer, focusing on color.
- Use high-pass filtering on the top layer to bring back texture.
- Non-Destructive Edits: Since you've separated control over color and texture, adjustments can be tailored specifically without excessive loss of quality.
This technique is professional-grade and facilitates superior retouching, giving a natural but polished look.
3.2 Advanced Sharpening Techniques
There's more to sharpening than just the basic sliders.
- Smart Sharpen Method: This provides more control compared to standard sharpening. Adjust the amount and radius while keeping an eye on any noise introduced.
- Unsharp Mask: This classic method increases contrast along edges, enhancing apparent sharpness. Again, moderation is vital to prevent artifacts.
- Selective Sharpening: Use a layer mask to sharpen only specific areas, such as eyes in portraits, avoiding over-sharpening other parts of the image.
Advanced sharpening can redefine clarity and ensure the most important elements in your image stand out.
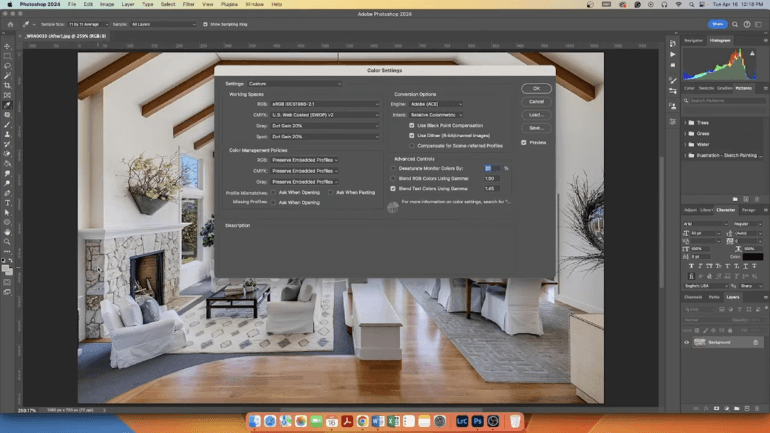
3.3 Color Grading and Enhancement Techniques
Let’s not forget about color—its nuances can dramatically shift an image’s quality and appeal.
- Hue, Saturation, and Lightness (HSL) Adjustments: Altering these parameters can create mood and improve overall aesthetics. It’s essential to maintain a harmonious color palette.
- Gradient Maps: Applying gradient maps creatively can infuse images with new color tones and achieve that artistic flair without extensive rewrites of existing colors.
- Creating LUTs: Look-Up Tables (LUTs) can offer robust color grading options for various scenarios. They can be saved and applied to multiple images for consistency across a series.
Color plays a pivotal role in how viewers perceive an image's quality, and mastering these enhancements can elevate your results significantly.
4. Optimizing Images for Real Estate Photography
Real estate photography often requires specific enhancements to highlight properties effectively.
4.1 Understanding the Target Audience
Before editing, it’s vital to understand who the images are aimed at and what details matter most to prospects.
- Attracting Buyers: Highlighting spaciousness, lighting, and clean lines can make a substantial difference in attracting potential buyers.
- Showcasing Best Features: Each property has unique characteristics that deserve attention. Tailored edits to emphasize a home’s best aspects will engage viewers.
4.2 Effective Use of Lighting and Composition
Light can change everything in real estate photography.
- Natural Light Usage: Try to capture images during golden hour for optimal natural lighting. This can highlight subtle colors and textures.
- HDR Techniques: For areas with contrasting lighting, High Dynamic Range (HDR) imaging can effectively balance shadows and highlights, bringing out intricate details.
- Straightening Lines: Use Photoshop’s tools to ensure that lines are straight and appealing, reflecting professionalism and attention to detail.
A thorough understanding of these elements can lead to eye-catching listings that stand out in crowded markets. In real estate photo editing, these techniques are crucial for bringing out the best features of a property, whether you're working on exterior shots or highlighting interior details that attract potential buyers.
4.3 Final Touches for Listings
Finally, ensure your images are polished and ready for presentation.
- Simple Edits: Small touches like increasing brightness, reducing noise, and ensuring color accuracy can make a large impact on the final image quality.
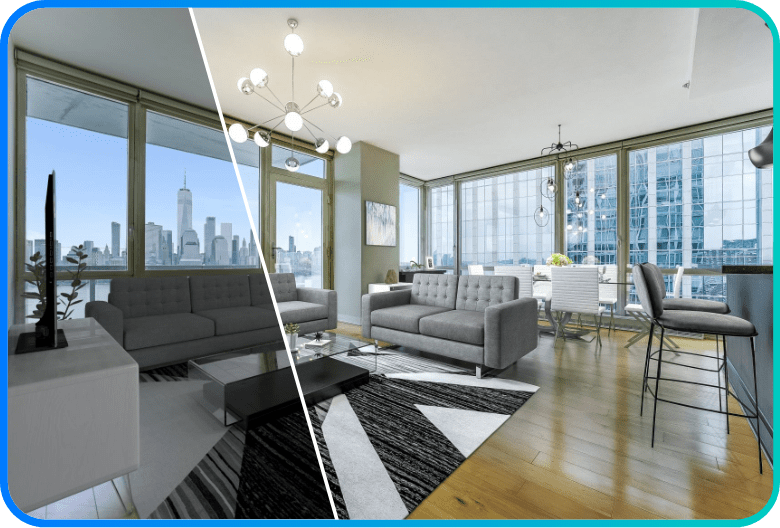
- Virtual Staging: If properties are empty or outdated, virtual home staging can breathe modern life into spaces, allowing potential buyers to visualize how they might use the space.
- Final Format Adjustments: Save images in high-resolution formats for prints and web-optimized versions to ensure seamless versatility in various applications.
The nuances of real estate photography editing require understanding the market demands while applying general enhancement techniques judiciously.
5. Fotober's Professional Image Enhancement Services
If diving deep into editing doesn’t match your skillset or time, leveraging professional services like Fotober can offer incredible benefits. Fotober provides tailored photo enhancement services for individuals and businesses, targeting a range of needs from weddings and events to real estate and eCommerce.

- Wide Spectrum of Services: From retouching and color balancing to advanced editing techniques like frequency separation and virtual staging, Fotober offers professional solutions for diverse editing requirements.
- Expert Practice: Their team consists of seasoned professionals familiar with the latest techniques and programs, ensuring high-quality output.
- Quality Assurance: Professionals can ensure technical aspects are spot-on, drastically improving the final results.
- Consistency Across Projects: Maintaining a uniform style throughout images, particularly for branding purposes, is simpler when using dedicated services.
- Time Efficiency: Outsourcing allows clients to focus on their core activities while leaving image enhancements to the experts.
In a world where visual content is paramount, utilizing expert services can help you maintain superior quality effortlessly.
Conclusion
Understanding how to enhance image quality in Photoshop involves a multifaceted approach that combines technical skills with creative techniques. Enhancing image quality in Photoshop requires a blend of technical skills and creative techniques. From understanding resolution to mastering advanced editing tools, Photoshop helps achieve clarity, color vibrancy, and detail. Whether you're editing personal photos or real estate listings, these techniques can elevate your images. Fotober’s expert editing services can further refine your visuals, ensuring professional-quality results that stand out.
Related posts

Double Your Booking: Airbnb Photography Tips for World Cup Host Cities
July 15, 2026

The Legacy of Sam Neill Real Estate: Vineyard & His Private Sanctuary
July 14, 2026

World Cup 2026 Host City Real Estate: Overview & Marketing Strategies
July 13, 2026
Most Common Photography Mistakes California Realtors Should Avoid
July 10, 2026
