
How to Stabilize Real Estate Video: Fix Shaky Footage Like a Pro

Share:
Table of Contents
- 1. Why is smooth video critical in real estate marketing?
- 2. Common reasons real estate videos are shaky
- 3. How to stabilize real estate video while filming (hardware solutions)
- 4. Step-by-step: How to stabilize a shaky property tour video
- 5. Best apps to stabilize shaky real estate video
- 6. When video stabilization hurts quality (and how to avoid it)
- 7. DIY vs Professional editing: When should you outsource stabilization?
- 8. Professional real estate video stabilization by Fotober
- Conclusion
In the modern real estate market, your first showing can actually happen right on a smartphone screen. As video becomes desirable for property listings, whether you can hold buyers’ attention often comes down to production quality. Specifically, real estate video stabilization has moved from an embellishment to a minimum requirement. The following article will go over some best practices to stabilize real estate video and common mistakes to avoid to get naturally pleasing results.
1. Why is smooth video critical in real estate marketing?
If you want to capture a home in the most faithful way, you need to eliminate the distractions that come with handheld filming. Here are some reasons why smooth, cinematic motion is critical for your brand.
First impressions matter: Expressing professionalism
When a potential buyer clicks on a video tour, they are looking for a dream, not a headache. Shaky footage just gives off an unsettling, unprofessional impression of the agent and the property that resembles a low-budget DIY project rather than an admirable presentation effort.
 Shaky footage is a dealbreaker for real estate listings
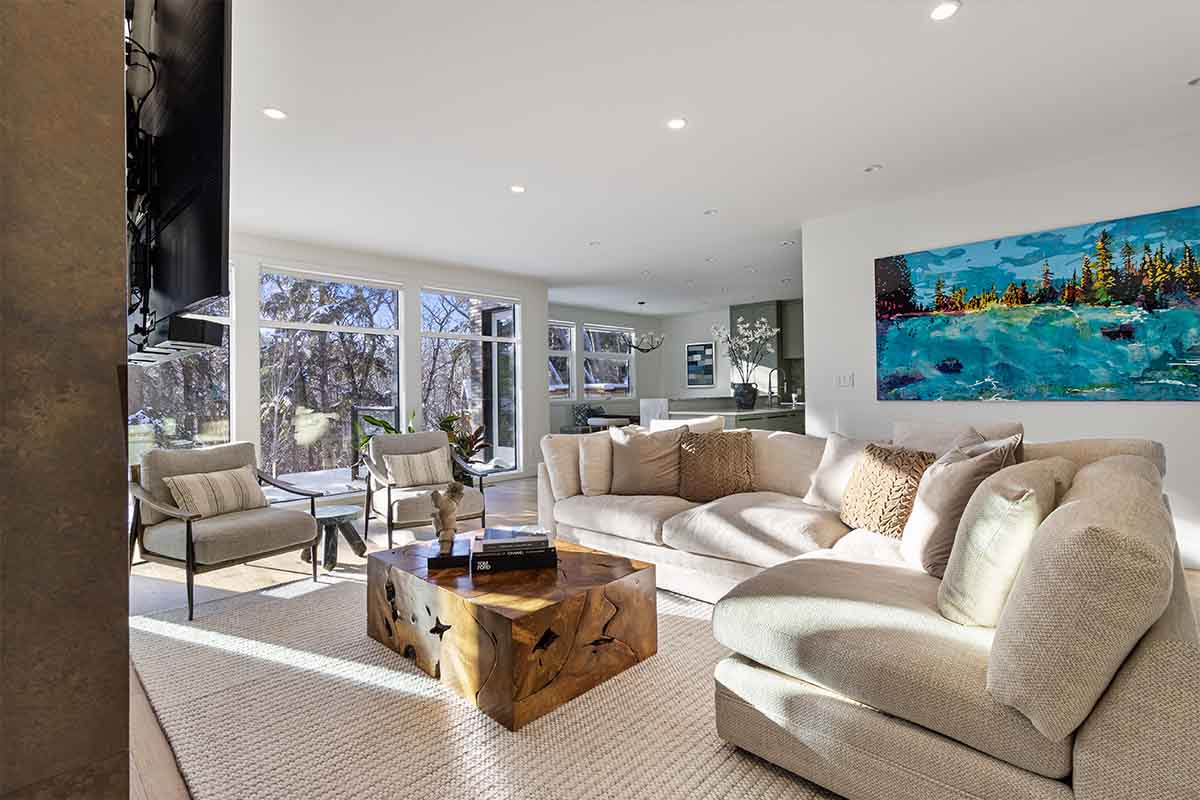
When you stabilize real estate video, you provide a viewing experience that mimics those satisfying architectural documentaries. Smooth pans and gliding "walk-throughs" create a sense of calm and luxury, allowing the viewer to focus on the crown molding or the granite countertops rather than “feeling the rhythm” with the camera operator's footsteps.
A nauseating showcase keeps viewers away
There is a physiological reason to fix shaky real estate video: viewer discomfort. Wide-angle lenses, which are standard in real estate to make rooms look larger, actually accentuate camera shake. If your presentation causes "motion sickness", viewers will close the tab within seconds.
By using software or hardware to stabilize shaky video footage, you ensure the viewer can be fully immersed in the space. The goal is a seamless experience, as the viewer shouldn't think about the camera at all; they should only think about the layout of the space.
Highlighting flow and layout
Real estate is about the "flow" of a home. How does the master bedroom connect to the en suite? How easily can you move from the kitchen to the patio? Shaky footage can get in the way of this continuity. Every bump and jitter is a disruption, subtly making it harder to piece together the floor plan.
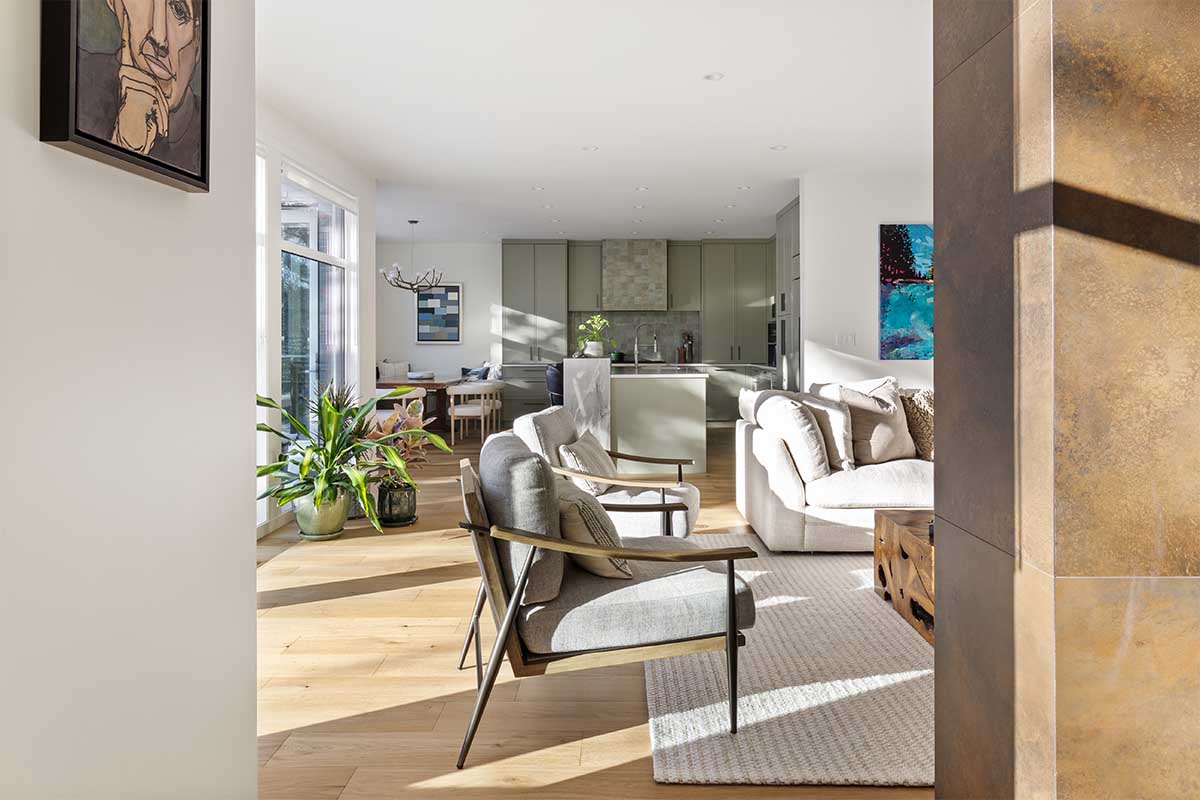 The video should be as smooth as possible to establish a sense of flow
In contrast, stabilized footage provides a fluid, sequential progression through the property. This spatial coherence is important for out-of-state buyers who are relying on your video to make a multi-hundred-thousand-dollar decision.
Boosting your social media algorithm
Platforms like Instagram, TikTok, and YouTube heavily favor the engaging, straight-to-the-point type of content. If your video is stabilized and aesthetically pleasing, users will be pleased to watch longer, or even watch it many times. Longer watch times signal to the algorithm that your content is valuable, pushing your listing to a wider audience.
Quick tips for better stability
|
Method |
Impact |
Best For |
|
Physical gimbals |
High |
On-site filming and "walking" shots. |
|
Post-processing software |
Medium-High |
Fixing minor jitters in existing footage. |
|
Slow motion (60fps) |
Medium |
Adding a "dreamy" feel to detail shots. |
2. Common reasons real estate videos are shaky
To stabilize real estate video effectively, you first have to understand why the shake is there in the first place. Whether you are an agent figuring out real estate video marketing or a promising videographer, avoiding these common issues is the key to creating a property tour that performs well.
2.1. Handheld walkthrough mistakes
The most frequently seen problem is the apparent handheld walkthrough where the camera bobs up and down corresponding to each of the videographer’s steps. This bouncing effect is the most stubborn issue to fix in real estate video because we typically use ultra-wide lenses (12mm to 16mm) to make rooms look spacious, accidentally putting more emphasis on those “pulses”.
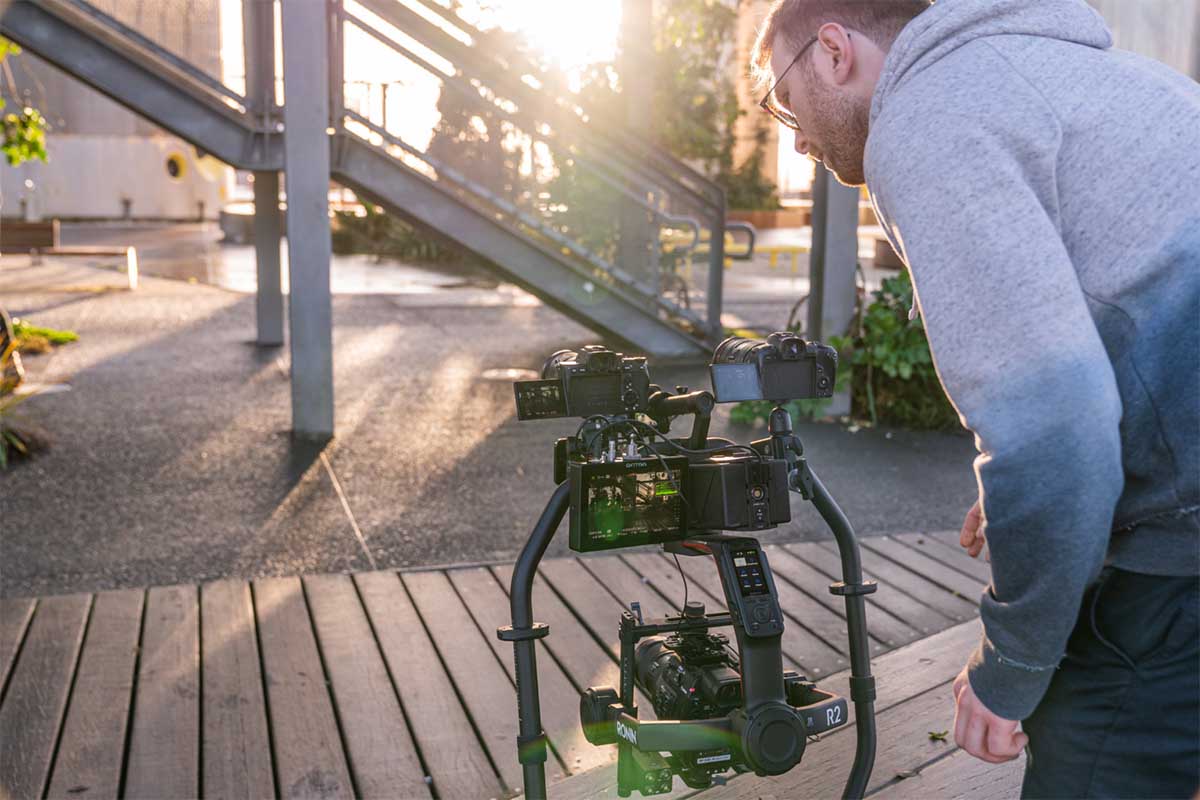
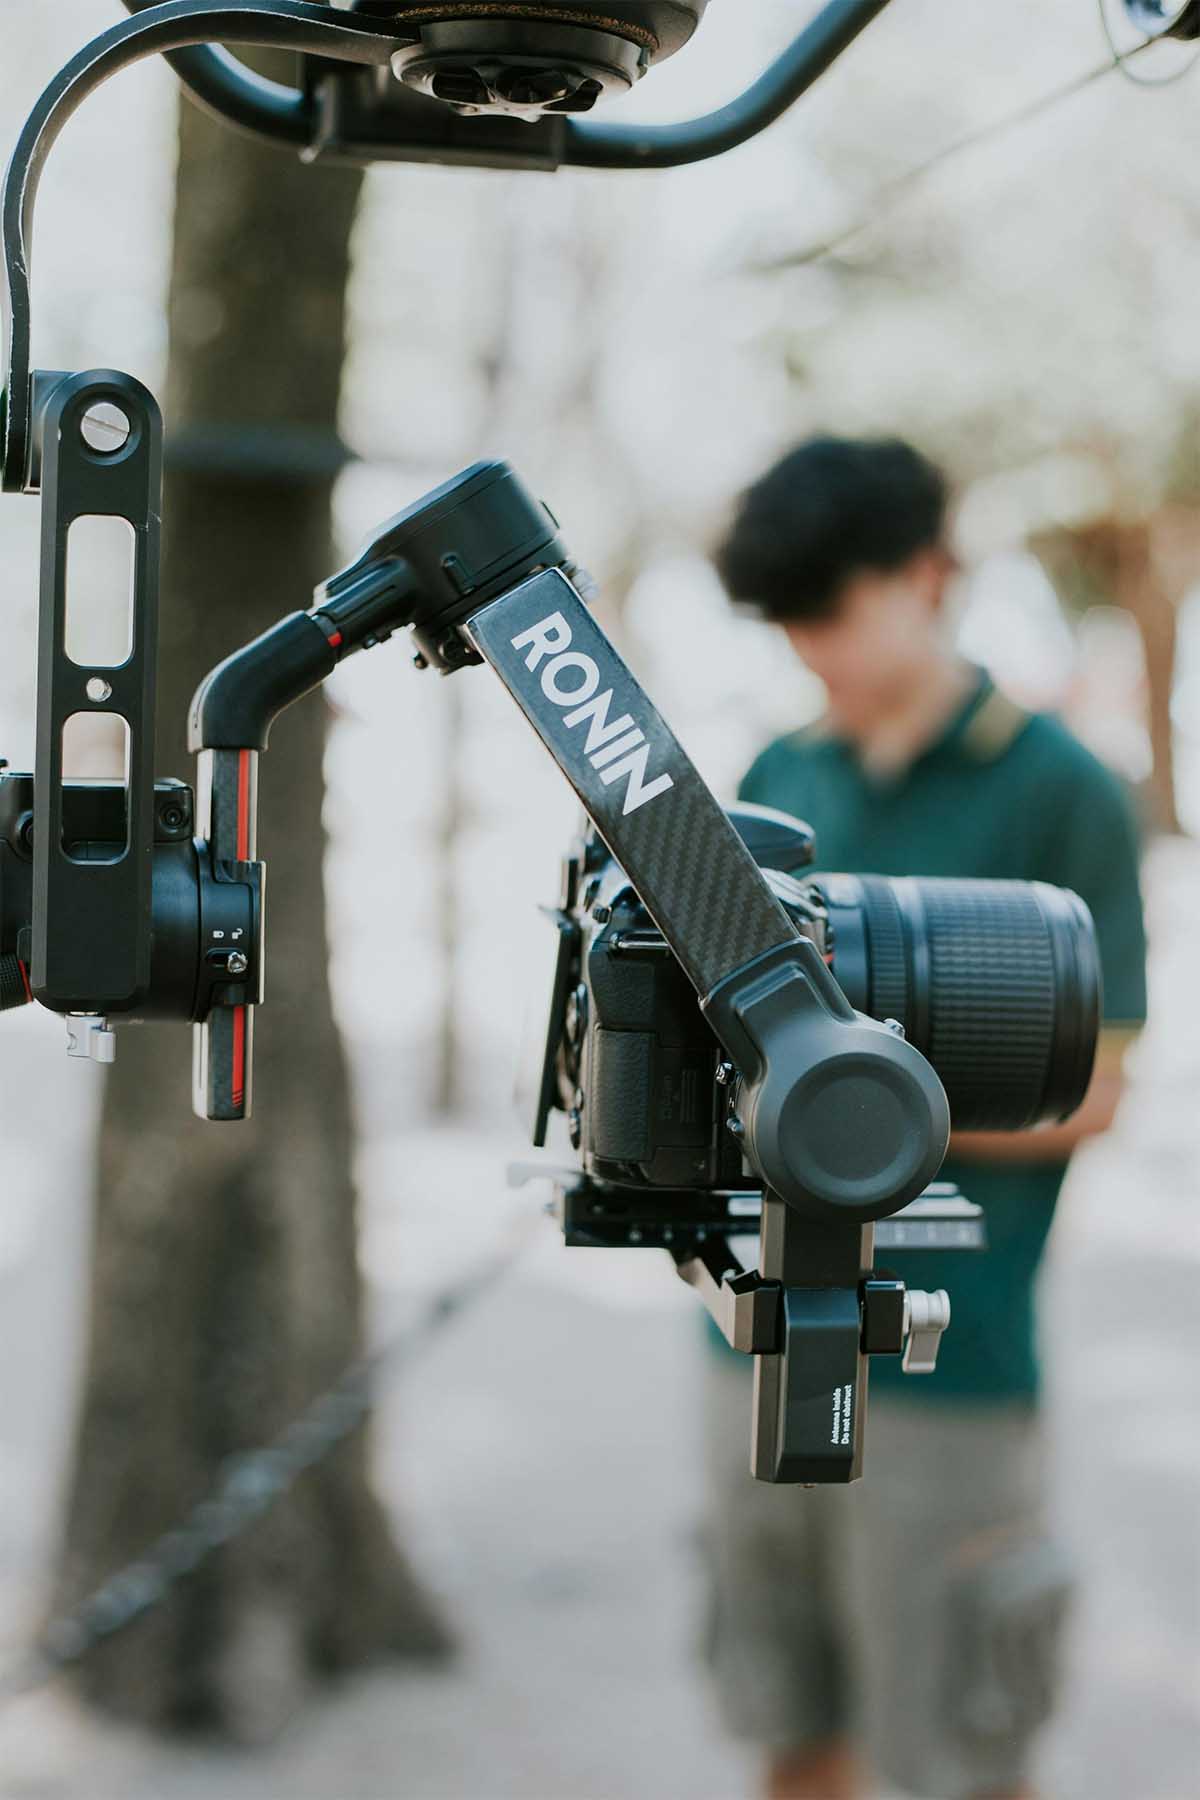 Gimbal shots are not totally safe from shaky movements
While wide lenses are great for depth, they are unforgiving with movement. Every minor wrist tilt or heel-strike is exaggerated. If you are trying to stabilize a property tour video while walking, simply holding the camera with two hands isn't enough.
-
The mistake: Walking normally.
-
The fix: Use a gimbal and learn the "ninja walk": knees bent, gliding your feet, and keeping your upper body as isolated from your legs as possible.
2.2. Poor camera settings (frame rate, shutter speed)
Shakiness doesn’t necessarily mean vibration; sometimes it’s "stutter." Many novice shooters don’t keep their settings in check or even use Auto mode, which can lead to absurdly fast shutter speeds in brighter scenes when the camera tries to balance the exposure.
When your shutter speed is too high (e.g., 1/1000th of a second), there is no room for motion blur between frames. Any minor vibration from your body will translate to a tiny but clearly visible shift in the video frame. This constant random wiggle may fit in an action film, but definitely not a commercial property showcase. To fix shaky real estate video at the source, you need natural motion blur to "hide" the micro-movements.
-
The rule: Your shutter speed should be double your frame rate. If you are shooting at 24fps, your shutter should be 1/50th. If you are shooting at 60fps for slow motion, keep it at 1/120th.
-
The benefit: This creates a cinematic "blending" that makes the movement feel fluid rather than stiff and “cold”.
2.3. Drone footage instability
Aerial shots provide the "wow" factor, but they are highly susceptible to environmental factors. Even a high-end drone can struggle to stabilize drone footage for real estate when being interfered with by 20mph gusts of wind.
Besides wind-related problems, the videographer’s thumb could be a common culprit. We as humans can’t possibly possess the mechanical precision of an automated device. Stopping a pan suddenly or tilting the gimbal too aggressively creates a visible turbulence in the footage that is incredibly difficult to fix in shaky real estate video in post-production.
-
The mistake: using Sport Mode or making sharp stick movements.
-
The fix: fly in "Cinematic Mode" (which smooths out the drone's responsiveness) and always calibrate your drone's gimbal on a flat surface before takeoff.
2.4. Reliant on post-processing “magic”
When you get to the editing stage, it’s tempting to think you can just click a button to stabilize shaky video footage. While tools like Premiere Pro’s Warp Stabilizer are borderline wizardry, they come at a cost: cropping.
To smooth out a shake, the software has to zoom in on your footage and shift the frame around. If your original shot was already a tight close up shot of a bathroom with rather messy handheld movements, the stabilization might crop out some edge details and hinder you from showing the full picture. Worse, over-stabilizing creates a "jello" effect where the walls look like they are morphing mystically.
-
The mistake: "I’ll fix it in post."
-
The professional approach: Aim for 90% stability in-camera. Use real estate video stabilization software only for the final 10% of refinement.
2.5. Agent filming without proper gear and technique
Many agents film property tours using just their smartphone or a mirrorless camera with no cage or handles. This lack of weight makes the camera "floaty" and it feels like your arm and hand have too much freedom to move unconsciously. Small, light cameras are actually harder to keep steady than heavy ones because they lack physical inertia.
 Stable filming requires proper gear and fundamental techniques
If you are filming without a gimbal, you need to create more points of contact with your body.
Pro Tip: Pull the camera strap tight against the back of your neck while pushing the camera forward. This creates a "tension triangle" that helps stabilize real estate video by using your own body as a tripod.
3. How to stabilize real estate video while filming (hardware solutions)
While modern editing software is powerful, the best way to fix shaky real estate video is to prevent it before it happens. Capturing smooth, buttery footage on-site is rewarding as it will save you many head-scratching hours in post-production and ensure your property tours feel premium and inviting.
Here is how you can achieve professional-grade real estate video stabilization right from the moment you hit record.
3.1. Using gimbals for property walkthroughs
For the iconic "walking tour" feel, a 3-axis gimbal is your indispensable equipment. A gimbal uses internal motors to counteract your hand movements, but it isn't magic and still requires technique. To truly stabilize the property tour video, adopt the "ninja walk": keep your knees slightly bent and roll your feet from heel to toe. This minimizes the "bounce" that haunts many gimbal footage.
-
Pro Tip: Use a gimbal with an "Auto-Tune" feature to ensure the motor strength is finely adjusted according to your camera’s weight, preventing the micro-jitters that occur when motors are overworked.
3.2. Tripods & sliders for static shots
Not every shot needs to be a walkthrough. In fact, static or slow-sliding shots can sell the high-end look more convincingly. Using a tripod with a fluid head is the easiest way to stabilize real estate video for pan-and-tilt shots of large living areas.
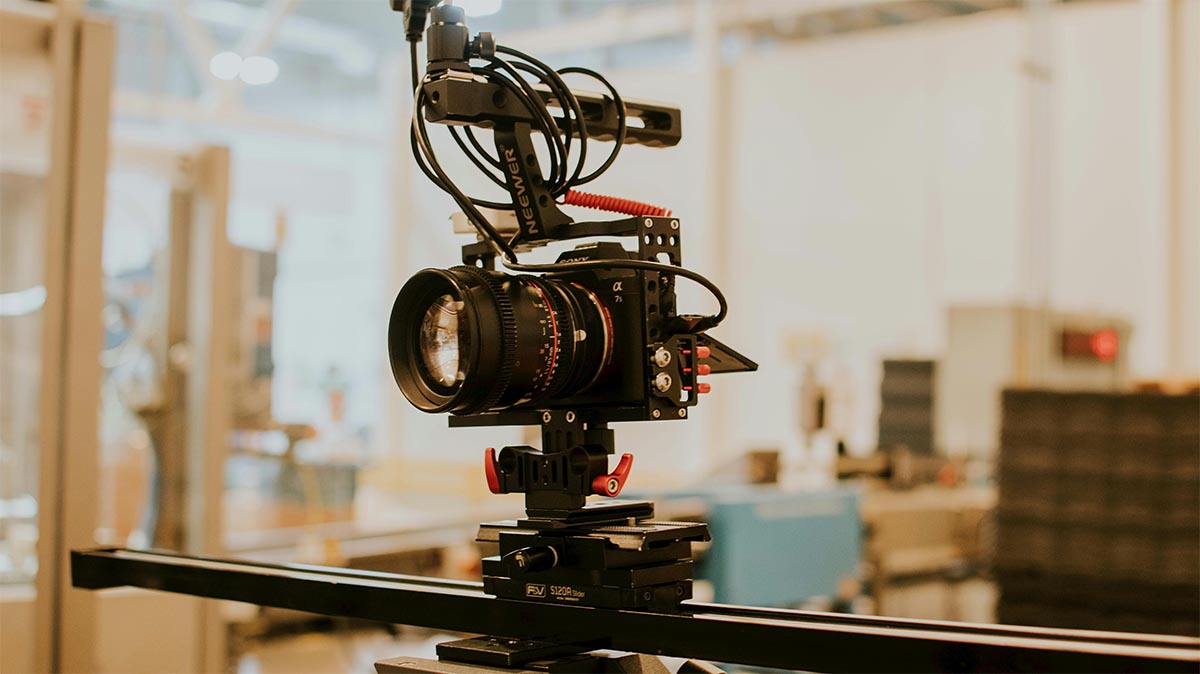 Sliders are solid alternatives to gimbals in real estate shootings
If you want to add cinematic movement without the labor of perfecting a physically demanding gimbal shot, a motorized slider may come in handy. Sliders provide a perfectly linear path, ideal for "revealing" a kitchen island or a master suite. These controlled movements are dead-on stable by nature, requiring zero post-production effort to fix shaky real estate video.
3.3. Best camera settings for stable real estate video
Your technical settings are just as vital as your physical gear when you want to stabilize shaky video footage.
|
Setting |
Recommendation |
Why? |
|
Frame rate |
60 fps |
Allows you to slow down the footage in editing, which naturally smooths out shakes. |
|
Shutter speed |
Double your frame rate |
(e.g., 1/120 for 60fps) This maintains natural motion blur, blending minor jitters in with movements. |
|
Resolution |
4K |
Gives you extra pixels to crop into if you need to fix shaky real estate video using software later. |
|
IBIS |
Turn ON |
Use In-Body Image Stabilization for an extra layer of protection against minor, accidental vibration. |
3.4. How to reduce shaky drone footage during flight
Aerial shots are breathtaking but vulnerable to wind and abrupt stick movements. To get the smoothest flight:
-
Use Cinematic/Tripod mode: These modes dampen the drone's responsiveness, making turns and accelerations much slower in favor of smoothness.
-
Fly forward/backward: Lateral (side-to-side) movements are more susceptible to wind turbulence. A straight, slow push-in toward a house is almost always more stable.
-
Check the forecast: Avoid flying in gusts over 15 mph, as even the best gimbals will struggle to stabilize drone footage for real estate in such strong winds.
Great real estate video stabilization starts in the field, not the editing room. By combining a "ninja walk" with a balanced gimbal and the correct shutter settings, you’ll spend less time trying to stabilize shaky video footage later and more time closing deals.
4. Step-by-step: How to stabilize a shaky property tour video
Up till now you should have known that a polished video tour can lead to a higher chance of a successful sale. However, even with the best preparation and a steady hand, "micro-jitters" and handheld “bounce” can find their way into your footage. These distractions can make a multi-million dollar mansion feel like a low-budget home movie.
Learning how to stabilize real estate video is an essential skill for any agent or videographer looking to elevate their brand. Here is the professional workflow to fix shaky real estate video and create a seamless, cinematic experience.
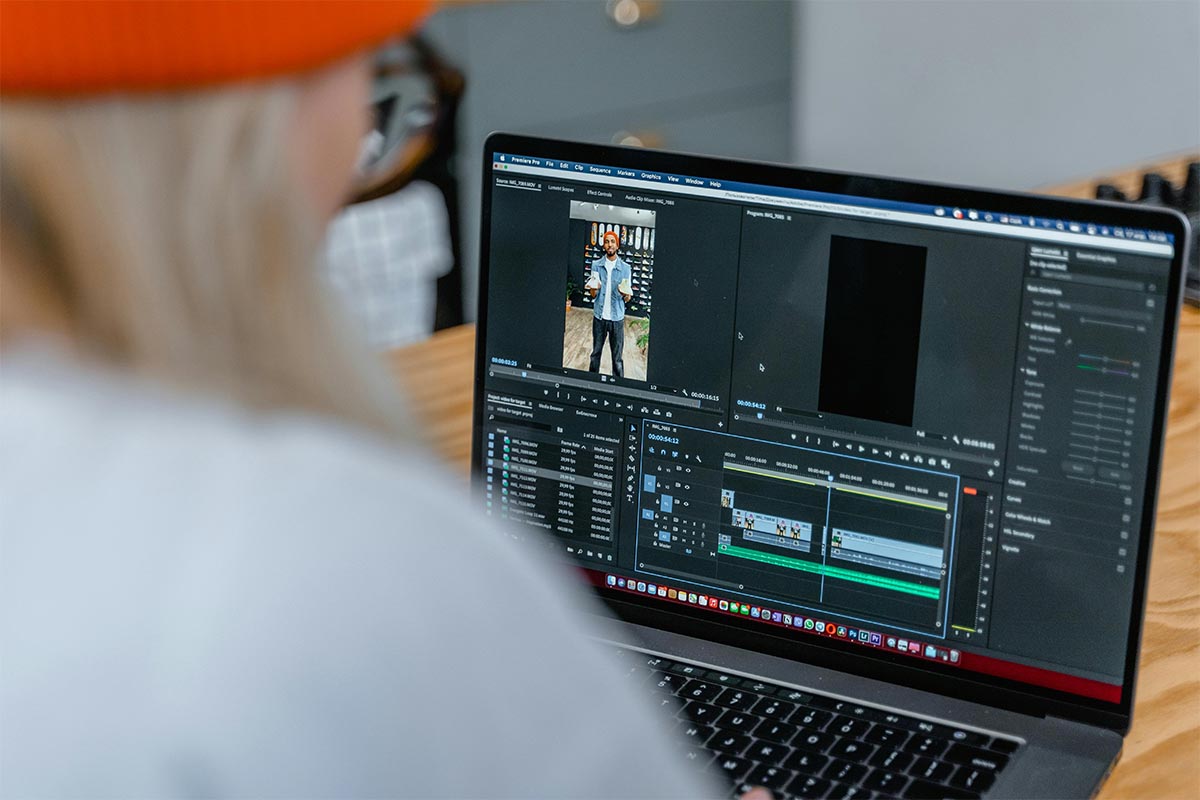
Step 1: Import your footage
The first step in real estate video stabilization is file management. Import your raw files into your editor of choice (such as Adobe Premiere Pro, DaVinci Resolve, or Final Cut Pro).
Pro Tip: If you are working with high-resolution 4K files, consider creating "proxies" (lower-resolution copies) for the editing process. This ensures you can still edit and preview smoothly while the editing app does all the complex math in the background to stabilize shaky video footage.
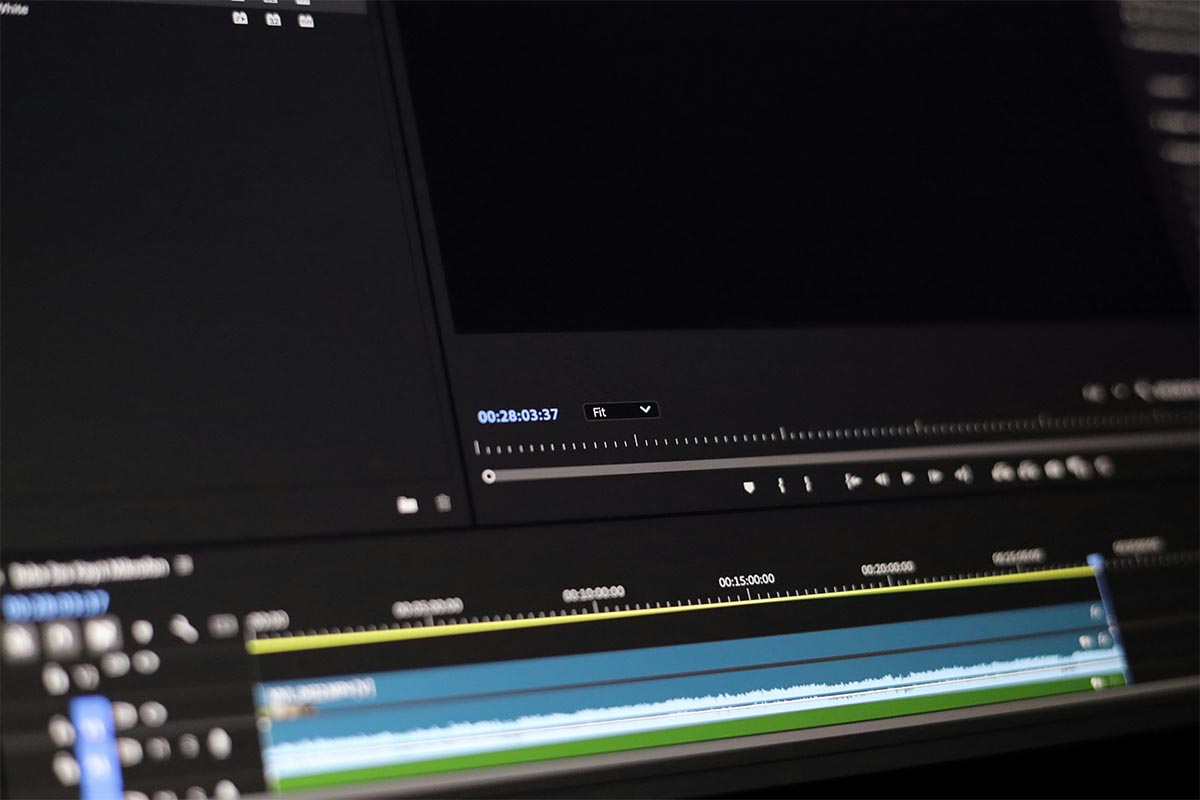 Importing is the first step of real estate video stabilization workflow
Step 2: Analyze the shake
Before clicking "Stabilize," analyze the footage with your own eyes. Is the shake a constant high-frequency vibration (common in drone shots), or is it a slow “pulsing” from walking?
Most professional software will have an "Analyze" button within the stabilization effect. This ignites a tracking process going over thousands of points within the room, like the corners of a fireplace or the lines of a window, to understand how the camera moved in 3D space. This is critical to stabilize the property tour video accurately without altering the architectural representation of the home.
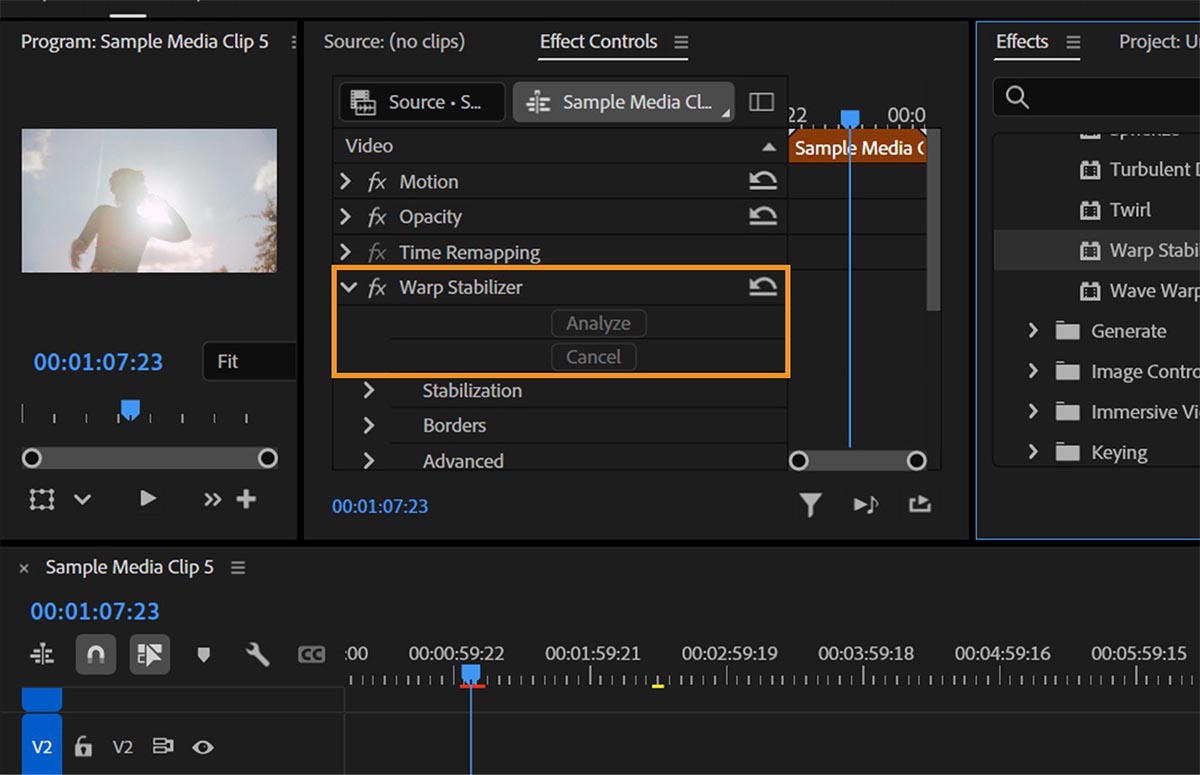 Footage needs to be analyzed before applying invasive adjustments
Step 3: Balance smoothness vs. crop
Stabilization works by "zooming in" on your footage and shifting the frame to counteract the shake. This is a trade-off:
-
High smoothness: Results in a "floating" feel but needs to crop intensively, which might cut out the beautiful crown molding or wide floorboards you want to show off.
-
Low smoothness: Preserves more of the original frame but may leave minor jitters.
For real estate, aim for a "Smoothness" setting between 10% and 20%. This is usually enough to fix shaky real estate video while keeping the room looking spacious.
Step 4: Avoid the "jello effect"
If you try to totally smooth out a very shaky clip, you may encounter the "jello effect," where the walls and floors appear to warp or wobble. This happens because the software is struggling to correct rolling shutter distortion.
To avoid this:
-
Lower the strength: Don't ask the software to do too much.
-
Change the method: Switch from "Subspace Warp" to "Perspective" or "Position/Scale/Rotation." Perspective tracking is often better for real estate video stabilization because it keeps the vertical lines of the house straight.
Step 5: Export Settings for MLS and Social Media
Once your footage is rock-solid, you need to export it correctly. One size does not fit all.
|
Platform |
Resolution |
Aspect Ratio |
Tip |
|
MLS Listings |
1080p (HD) |
16:9 (Horizontal) |
Keep file sizes under 500MB for faster loading. |
|
Instagram/TikTok |
1080 x 1920 |
9:16 (Vertical) |
Use "Auto Reframe" after you stabilize the real estate video. |
|
YouTube |
4K (Ultra HD) |
16:9 (Horizontal) |
High bitrate (40-60 Mbps) ensures the best quality. |
By following these steps, you can stabilize drone footage of real estate including gimbal shots and even handheld walkthroughs, ensuring every viewer can admire the property in the least distracting way.
5. Best apps to stabilize shaky real estate video
To meet the intricate demands of real estate marketing, you definitely can’t use a set-and-forget approach to stabilize shaky video footage. Fortunately, modern editing software has become incredibly capable. Whether you need to stabilize real estate video shot on a mirrorless camera or stabilize drone footage for real estate that was shot in noticeably strong winds, this part will walk you through the professional workflows for Premiere Pro, Final Cut Pro, and DaVinci Resolve, plus the best free alternatives.
Stabilizing real estate video in Adobe Premiere Pro
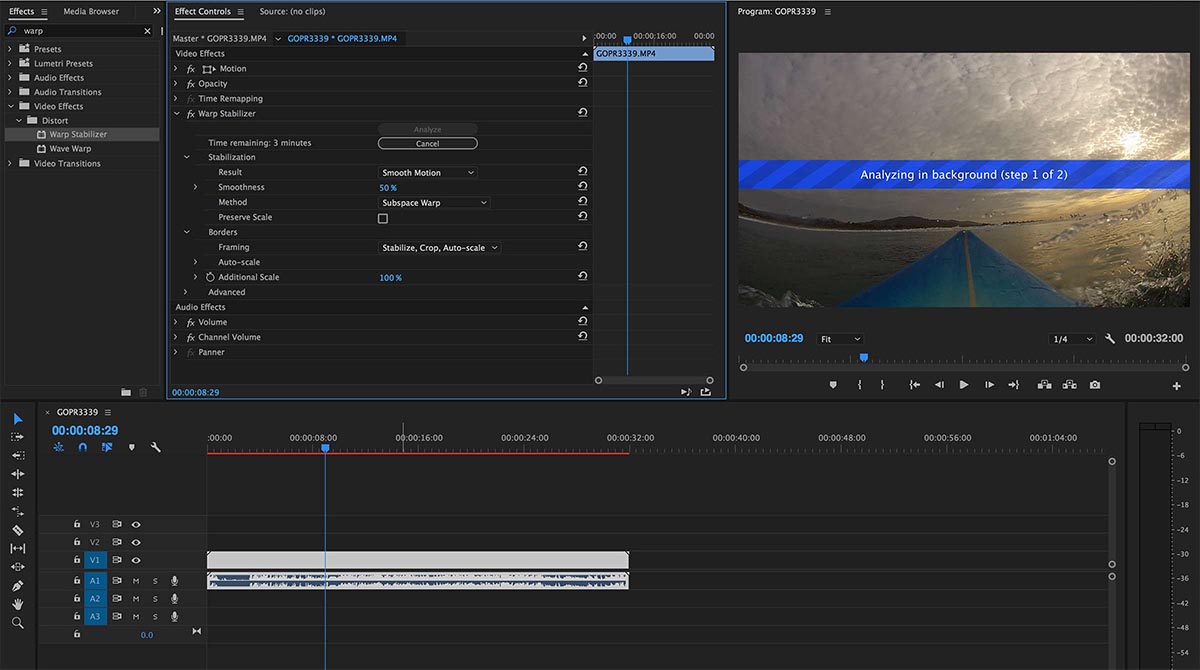
Adobe Premiere Pro is the industry standard for a reason. Its Warp Stabilizer effect is a favorite of many editors to fix shaky real estate video, but using the default settings can often lead to the unappealing "jello" effect where walls appear to warp.
1. Apply the Effect: Go to the Effects panel > Video Effects > Distort > Warp Stabilizer. Drag it onto your clip.
2. Analysis: Premiere will automatically analyze the background pixels to track motion.
3. Refine Settings:
-
Result: Change "Smooth Motion" to "No Motion" if you want to mimic a tripod shot.
-
Method: By default, it uses Subspace Warp. If your edges look distorted, switch to Perspective or Position, Scale, and Rotation.
-
Smoothness: The default is 50%. For real estate, where we want a natural "glide," try dropping this to 5% to 15%. Higher values often look artificial.
Pro Tip: If you have already changed the speed of your clip (e.g., slow motion or speed ramping), Premiere won't allow you to apply Warp Stabilizer. You must Nest the clip first (Right-click > Nest), then apply the effect to the Nested sequence.
 Steps to stabilize real estate video in Adobe Premiere Pro
Stabilizing footage in Final Cut Pro
Apple’s Final Cut Pro (FCP) offers a lightning-fast background rendering engine that makes it easy to stabilize a property tour video without slowing down your edit. FCP uses two primary methods:
-
InertiaCam: Specifically designed for footage with camera moves like pans, tilts, and zooms. This is perfect for real estate "walk-throughs." It even offers a "Tripod Mode" for static shots that accidentally move.
-
SmoothCam: The classic method that tracks the x, y, and z axes.
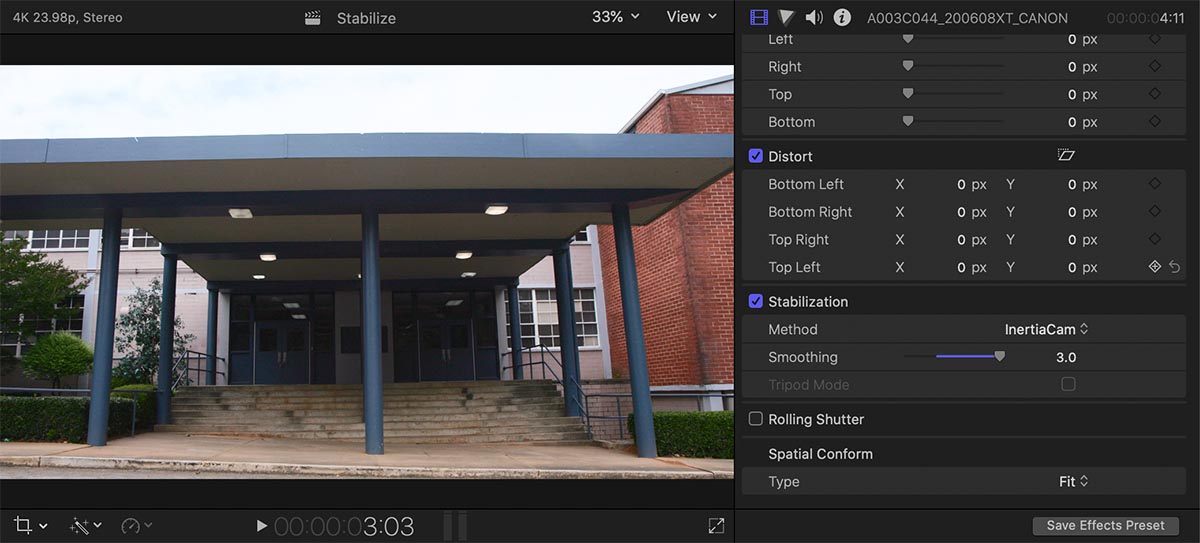 Steps to stabilize real estate video in Final Cut Pro
1. Select your clip in the timeline and open the Video Inspector.
2. Check the Stabilization box.
3. FCP will automatically choose a method. If the result feels "floaty," manually switch to InertiaCam and adjust the Smoothing slider until the motion feels intentional rather than accidental.
Using DaVinci Resolve for video stabilization
DaVinci Resolve is widely considered to have the fastest stabilization engine in the business. Because it is built on a professional color-grading foundation, it does a good job of identifying crucial tracking points in a room, even in low-light basements or bright, blown-out kitchens.
1. In the Edit Tab, select your clip and open the Inspector.
2. Scroll down to Stabilization.
3. Choose your mode: Perspective is usually best for real estate because it handles the wide-angle lens distortion better than the other modes.
4. Hit Stabilize.
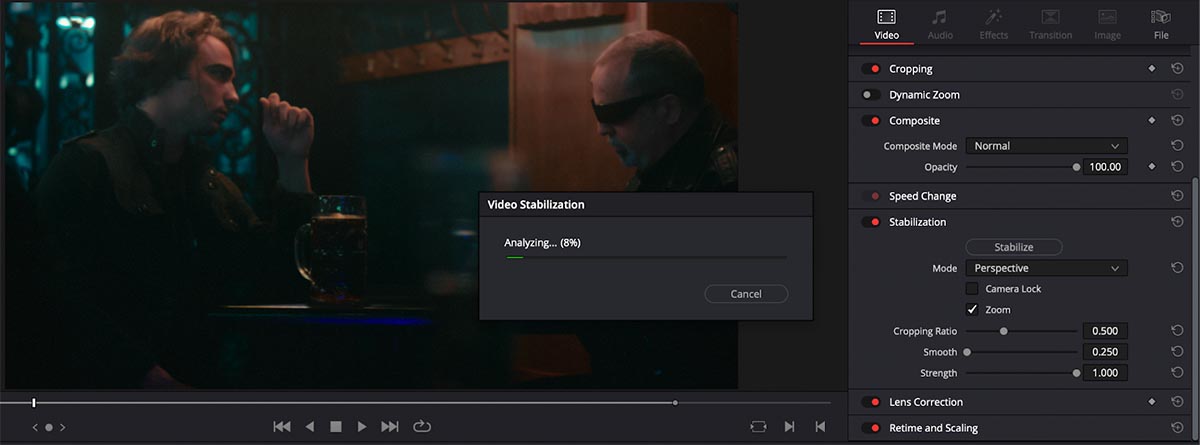 Steps to stabilize real estate video in Davinci Resolve
If this normal method fails, switch to the Color Tab and use the Tracker Window. Here, you can manually tell the software which parts of the room to ignore (like a moving ceiling fan or a reflection in a window) to ensure the real estate video stabilization is based only on the fixed structure of the house.
Cautions when stabilizing drone footage
Drone footage has a prestigious place in modern listings, but wind is the enemy. Even with a 3-axis gimbal, high-altitude gusts can cause "micro-shakes."
When trying to stabilize drone footage in real estate in post-production:
-
Avoid Subspace Warp: Drones often have slight lens distortion. Using "Subspace" can make the horizon line look like it’s waving. Use Position or Perspective instead.
-
Crop Factor: Stabilization requires varying levels of zooming in on the image. If you shoot in 4K, you can stabilize and still export a crisp 1080p video. If you shoot in 1080p, it will not tolerate heavy stabilization as well and footage may turn out blurry.
Free tools to fix shaky real estate videos (limitations)
If you aren't ready to invest in a Creative Cloud subscription or purchase DaVinci Studio, there are free options to fix shaky real estate video.
|
Tool |
Best for |
Limitations |
|
CapCut (Desktop) |
Quick social media edits |
Limited control over "crop" vs "smoothness" balance. |
|
Kdenlive |
Open-source power users |
Steep learning curve; stabilization can be slow. |
|
iMovie |
Basic iPhone walkthroughs |
Very limited settings; often over-crops the image. |
|
Google Photos |
Emergency mobile fixes |
Compresses the video quality significantly; no manual control. |
While these free alternatives can stabilize shaky video footage with straightforward steps, they often lack the "Perspective" tracking required to keep the vertical lines of a house (like doorframes and corners) looking straight. For professional real estate video editing purposes, DaVinci Resolve (Free Version) is the only free tool that offers critically acceptable results.
6. When video stabilization hurts quality (and how to avoid it)
In the quest for perfection, it is tempting to apply real estate video stabilization to every clip in your timeline. However, there is a limit where software correction begins to do harm to your footage, making a luxury listing look overprocessed and distorted. Understanding when and where you can compromise is the difference between a pleasing result and a “crushed” look.
The "jello effect" and artificial warping
The most common issue occurs when software attempts to stabilize a property tour video that was shot with prominent camera shake. To compensate for the movement, the algorithm stretches and warps pixels, which is an abomination for real estate videos because it bends and creates wobbles on straight lines, like doorframes, kitchen islands, and ceiling beams. This "jello effect" is immediately noticeable to the human eye and breaks the viewer’s immersion.
The highly destructive crop
Stabilization works by zooming in on the frame to create more headroom for concealing movements. If you use a high stabilization strength, you might lose 15-20% of your original image. In a small bathroom or a tight hallway, this crop can make the room feel cramped, defeating the purpose of using a wide-angle lens.
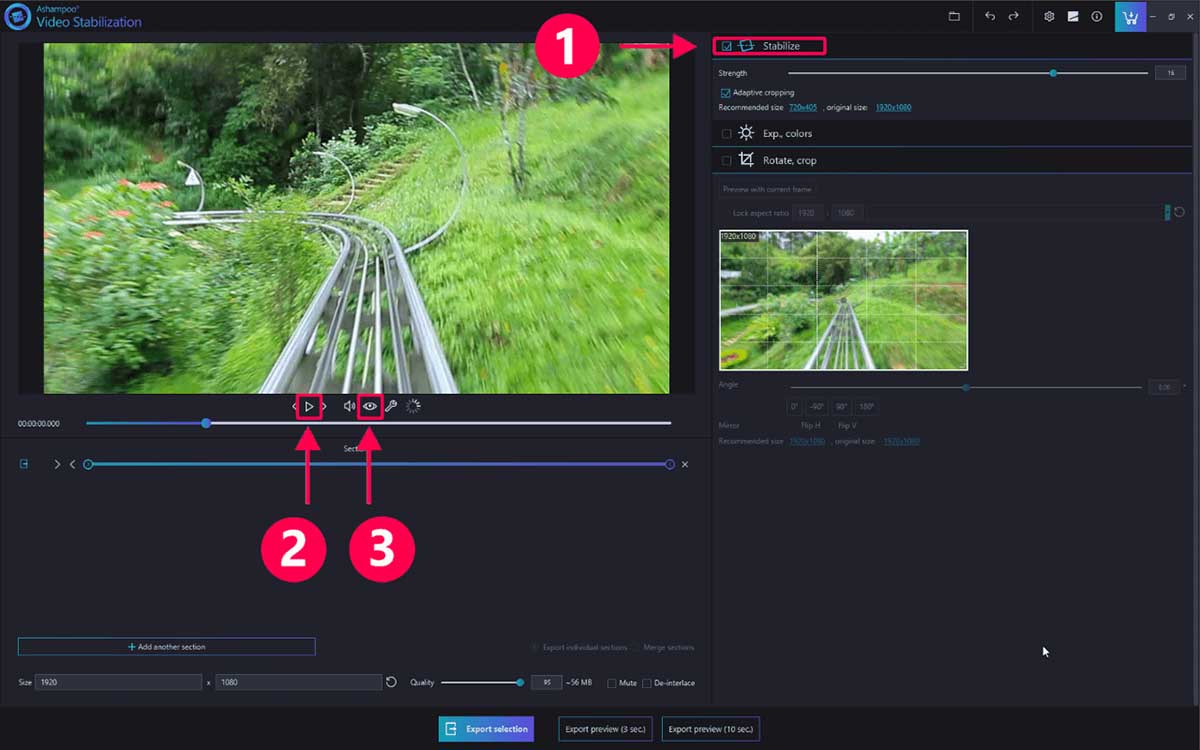 Footage gets cropped more as you increase the effect’s strength
How to avoid quality loss
To maintain high quality while you stabilize drone footage for real estate or interior walkthroughs, follow these rules:
1. Shoot in 4K: This provides "extra" pixels for a crisp 1080p final output. When the software crops in to stabilize, you won't have to sacrifice sharpness.
2. Use the "10% rule": Set your stabilization smoothness at 10%. If the shake is still there, increase it by 10%. Never jump straight to 50% or higher.
3. Choose "Perspective" over "Subspace Warp": In programs like Adobe Premiere, the “Perspective” method is often better for real estate because it focuses on keeping the architectural lines intact.
By treating stabilization as a gentle polish rather than an omnipotent genie, you ensure your properties look both stable and sharp.
7. DIY vs Professional editing: When should you outsource stabilization?
As real estate marketing begins to adopt cinematic standards in 2026, the demand for professional footage has never been higher. A common problem arises for agents and videographers: should you stabilize real estate video yourself, or is it time to pass the files to a specialist?
 DIY approach is viable when the timeframe and requirements are more tolerable
The case for DIY stabilization
For some compact types of real estate video like quick social media reels or property walk-throughs, the DIY approach will suffice most times. Modern software like DaVinci Resolve or AI-integrated mobile apps has simplified the process to fix shaky real estate video to be done within a few clicks.
-
When it works: Minor vibrations in footage already shot on a gimbal.
-
The benefit: Immediate creative control and zero outsourcing costs.
When to outsource to the pros
Despite the advances in the tools that are freely accessible to everyone, there are scenarios where professional assistance is the wiser choice:
1. The seemingly incurable job: If you have severe camera shake or the ugly "jello effect" from a windy drone flight, you need more than a basic filter. Professionals use advanced perspective tracking to stabilize shaky video footage that would otherwise be unusable.
2. Scalability and volume: If you are dealing with multiple listings a week, the hours spent on real estate video stabilization quickly stack up. Outsourcing allows you to save more time for real-life appointments and closing deals instead of wrestling with technical problems.
3. High-end luxury: For multi-million dollar listings, even a 5% "warp" artifact can look amateur. Professional editors with a specialized understanding of real estate ensure architectural lines remain perfectly vertical while the motion stays fluid.
8. Professional real estate video stabilization by Fotober
With the pace of the real estate market getting faster and faster, time is now a valuable commodity. Fotober fills in this growing niche of real estate video and photo editing, providing specialized stabilization services that aim to preserve the property’s structure while turning raw footage into a cinematic and satisfying visual experience.
 Fotober is a real estate video editing team with a keen eye for stabilizing architectural-heavy footage
Fotober’s seasoned team have experience tackling many unstabilized types of raw footage like handheld shots, drone shots and bobbing gimbal shots, ensuring every final product can faithfully present the property with a cinematic touch. Agents can upload raw footage, and Fotober will perform necessary adjustments with care.
Conclusion
In this competitive real estate market, investing the time to stabilize real estate video isn't just about making things look "neat", it's about building trust, retaining attention, and showcasing a property in its best possible light. As always with any form of visual arts, getting it right from the source is the best approach to yield great results. However, whether you use a dedicated gimbal or film handheld, knowing how to perform real estate video stabilization with software like Davinci Resolve, Premiere Pro or finding a trusted partner to save time is the bridge between a simple recording and a converting marketing asset.
With Fotober, you get tailored video stabilization solutions that promote your brand and maximize results. Follow us on social media for more interesting knowledge about real estate videography, see our best works and get up-to-date information about our services!
- Facebook: fotobermedia.co
- Instagram: fotober_media
- YouTube: @Fotober
Related posts

Luxury Real Estate Marketing Trends California Agents Love in 2026
July 27, 2026
Reno Real Estate Photography: Top Studios for Selling Homes Faster
July 27, 2026
Las Vegas Virtual Staging: Best Platforms to Enchant Your Listings
July 23, 2026

Best Austin Real Estate Photography Options for Perfect Listing Photos
July 22, 2026
