
How to Master Lighting for Real Estate Photography in 2025
.png)

Share:
Table of Contents
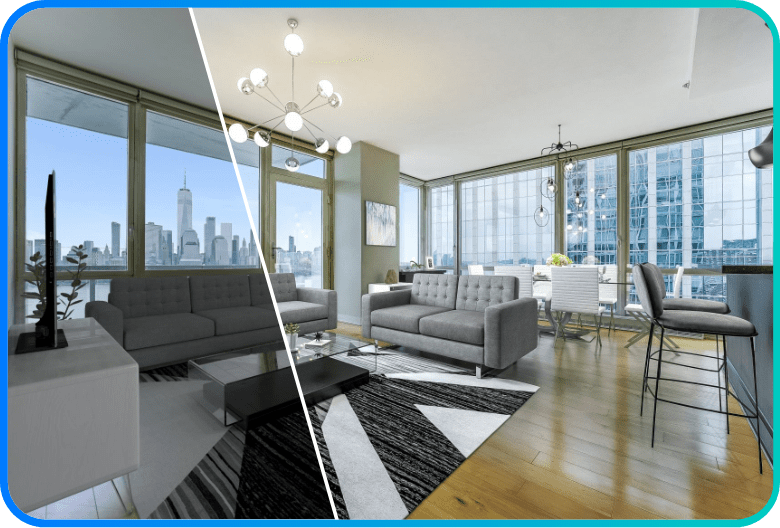
Lighting for real estate photography plays a crucial role in capturing bright, inviting property images that attract buyers. At Fotober, we know how the right balance of natural and artificial light can highlight unique features, create depth, and set the perfect mood. In this guide, we share essential lighting techniques and best practices to help you elevate every real estate shot.
1. Types of Light Sources
Understanding the types of light sources available to you is essential when seeking to improve your real estate photography. Each light source offers distinct advantages and challenges, making it vital to understand how to manipulate them effectively.
Natural Light - Why It’s the Foundation of Good Real Estate Photography
Natural light is one of the most powerful tools in lighting for real estate photography because it enhances colors, creates depth, and brings a natural warmth that artificial light often can’t replicate. Capturing it effectively depends largely on timing and the property’s orientation. The golden hours-just after sunrise and before sunset-offer soft, warm light that can transform interiors into inviting, atmospheric spaces. Understanding how rooms face the sun helps prioritize shooting locations to maximize exposure and visual impact.
To make the most of natural light, photographers should actively compose their shots to embrace it. Opening curtains, rearranging elements, and framing to allow sunlight into the scene can dramatically improve a photo. Weather also plays a role: overcast days provide soft, diffused light perfect for eliminating harsh shadows, while bright sunny days may require careful positioning to avoid glare and maintain balance.
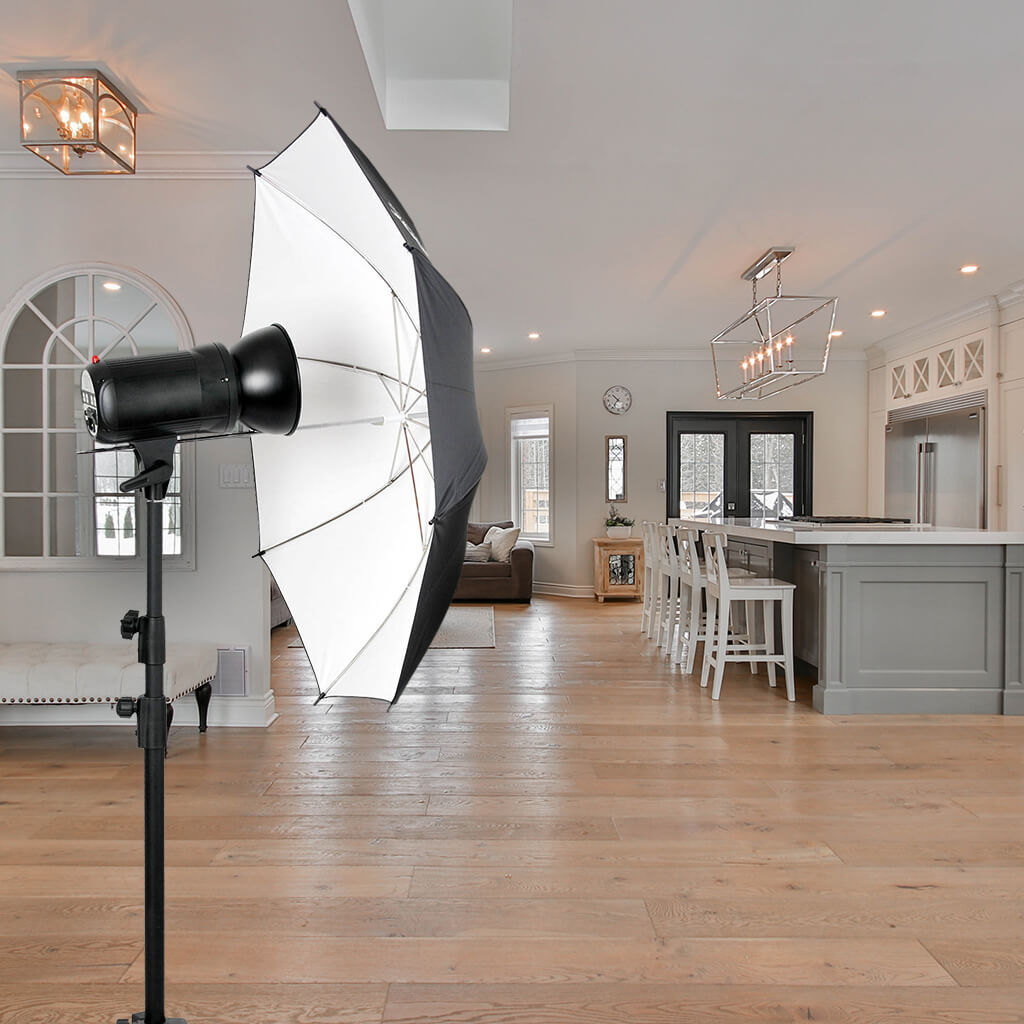
Flash Techniques: On-Camera, Bounced, Off-Camera Strobes
Despite the allure of natural light, sometimes it simply isn’t enough. That's where flash techniques come in. By utilizing on-camera flashes, bounced light, and off-camera strobes, photographers can sculpt their lighting to achieve the desired effect.
- On-Camera Flash: Quick and convenient for low-light situations but can produce harsh results. Using a diffuser or lowering flash intensity helps soften the light and naturally fill in shadows.
- Bounced Flash: Angling the flash toward walls or ceilings creates soft, even illumination. Light-colored surfaces reflect better, while adjusting the bounce angle controls shadow direction and depth.
- Off-Camera Strobes: Offer full control and creative flexibility. A single strobe can create dramatic contrast, while multiple strobes evenly balance light across the space for professional real estate photography.
Continuous Lighting: LED Panels, Softboxes - for Control and Consistency
Continuous lighting offers a level of control that is incredibly useful for interior photography. With continuous lights, you can see how the light interacts with your subject in real-time, allowing for adaptations as you shoot.
Real estate photography equipment like LED panels are beneficial due to their versatility and ease of use. They come in various sizes and brightness levels. The portability of LED lights makes them ideal for real estate photography, allowing you to adjust their positions as you navigate through a property.
Additionally, LED panels maintain consistent color temperatures, which is vital for ensuring uniformity in your images. You can develop a unique style by mixing different LED colors to create mood and drama.
Softboxes are an excellent addition to any continuous lighting setup. They diffuse light, mimicking the softness of natural light, which is critical in lighting for real estate photography. They reduce harsh shadows and distribute light evenly across the scene.
When using softboxes in conjunction with LED panels or strobes, you can create captivating highlights and contours throughout the space, adding to its depth and character.
Reflectors & Modifiers to Shape and Soften Light
Mastering lighting for real estate photography involves more than just positioning your light; it’s also about shaping and modifying it. Reflectors and modifiers are key tools for achieving balanced, professional results.
Reflectors in white, silver, gold, or black each serve a purpose: white gently fills shadows, silver amplifies light, gold adds warmth, and black blocks or absorbs unwanted spill. Positioning a reflector opposite the main light source can help bounce illumination into darker areas, creating even exposure and highlighting key features of the property.
Modifiers like diffusers, umbrellas, and gels further refine light quality. A diffuser softens harsh strobes, while gels help match ambient and flash lighting to avoid unnatural color casts. Using these tools effectively can transform a basic setup into a polished, inviting real estate image.
2. Balancing Natural & Artificial Light in Interiors
Achieving a harmonious balance between natural and artificial light is crucial in lighting for real estate photography. This balance creates a well-rounded image, combining the warmth of sunlight with the precision offered by artificial sources.
Using Daylight as Your Key Light, Then Adding Flash or LED Fill
In most interior photography, daylight serves as the key light. By taking advantage of this, the photo can have a natural feel that prospective homebuyers find appealing. However, relying solely on natural light may not illuminate every area effectively, leading to shadows and poorly lit spaces.

The key is to fill in these shadows without overpowering the natural illumination. When you find a well-lit area, set your exposure, and then add the flash or LED fill to brighten the dark corners and create a more even exposure across the entire image. Ensure that your added light doesn’t clash with the natural light already present—the goal is harmony.
Using a lower power setting on your flash or fill light can achieve this. Keep in mind that subtlety is essential; you don’t want the added light to look artificial or forced.
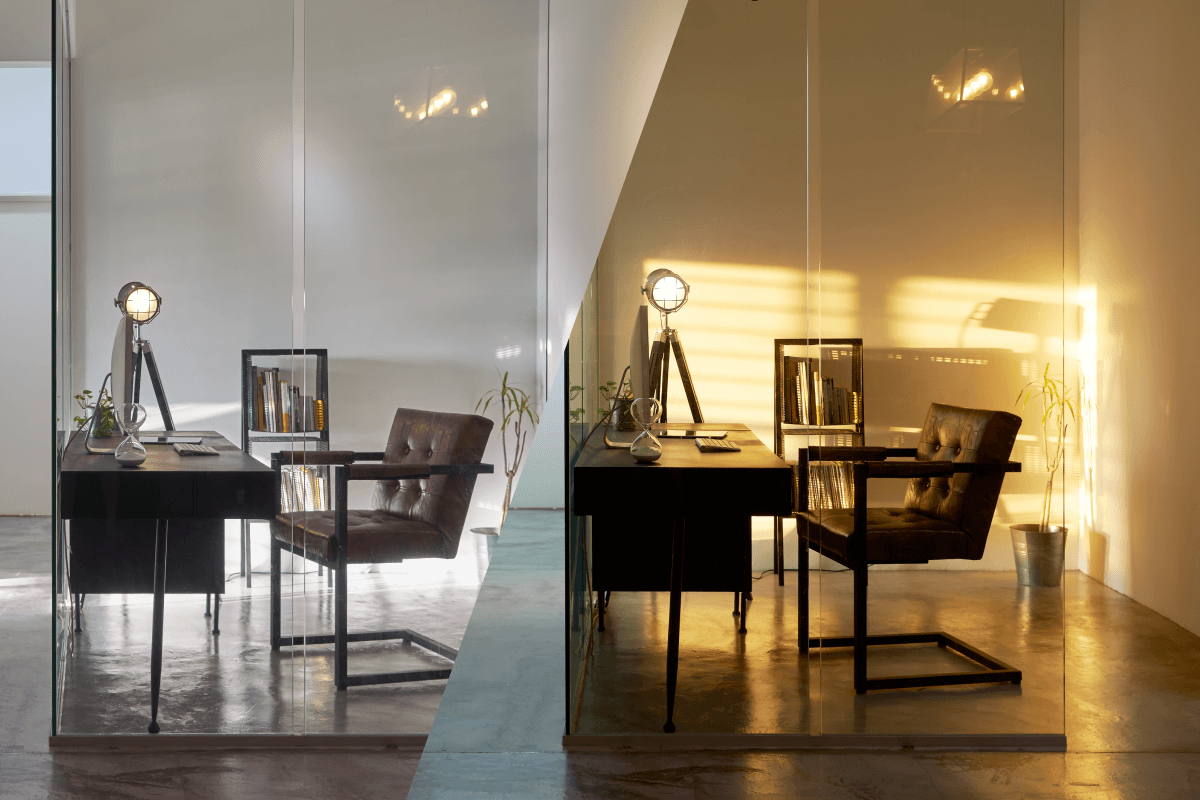
Avoiding Color Temperature Clashes: Tungsten, Daylight, LED
Understanding the different types of light sources and their color temperatures can make or break your interior photography. A common issue arises when combining light sources with varying color temperatures—these can clash and create unattractive color casts in photographs.
Natural daylight sits around 5500K on the Kelvin scale, while tungsten light is typically around 3200K. LEDs can fluctuate across a broad range of temperatures, from warm to cool.
When photographing interiors, taking a moment to identify and adjust the color temperatures can save you time in post-production. Utilizing color balance tools on your camera and ensuring all sources share a similar temperature can enhance the overall aesthetic.
To maintain image consistency, you should either convert your in-camera settings to the type of lighting in the scene or adjust the lighting to match your settings for real estate photography. This may require swapping out bulbs, using gels, or simply opting for a specific time of day for your shoot.
Timing Your Shoot for the Best Natural Lighting (Morning/Evening)
When planning a real estate shoot, timing can significantly impact the results. You want to consider the sun's position as it relates to your property.
Morning light tends to be softer and cooler, made more dynamic with the freshness of the sun breaking the horizon. It’s perfect for bright, airy interiors that welcome the morning sun.
Conversely, evening light is warmer, enveloping spaces in a gentle golden hue. It’s ideal for showcasing spaces that benefit from intimacy and warmth—think cozy living rooms and inviting kitchens.
Be aware of seasonal changes as well. In winter, the sun sits lower in the sky, resulting in longer shadows. In contrast, summer rises higher and faster , which creates less dramatic shadows but can result in hotter, harsher light. Adjust your shooting schedule realistically to accommodate weather conditions, seasons, and sunlight angles.
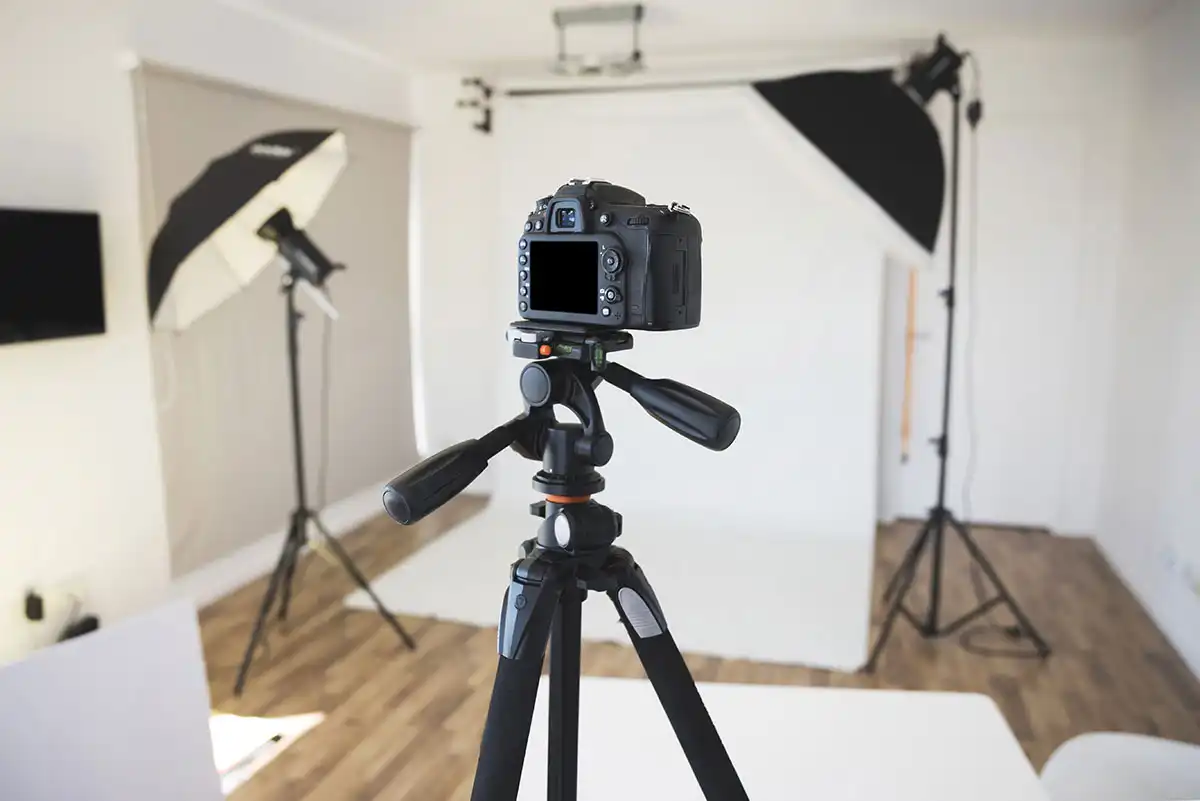
3. Essential Techniques & Gear Setup
Understanding how to set up your gear and apply essential techniques is key to producing professional-grade real estate photography. A solid foundation and preparation can help you meet any lighting challenges you encounter.
Choosing the Right Camera and Lenses
The camera you use plays a significant role in your real estate photography. Ideally, you want to use a camera with manual settings and good low-light performance.
Full-frame cameras tend to provide better image quality and dynamic range, while crop sensors can result in a wider depth of field—consider which factor is more relevant to your goals.
Also, consider the lens. Wide-angle lenses are essential for capturing small spaces and conveying a sense of roominess. Lenses in the 16-35mm range are popular choices among real estate photographers.
Tripod Setup for Stability
A sturdy tripod is indispensable in real estate photography, especially when shooting at slower shutter speeds. A tripod ensures stability, eliminating the risks of camera shake and allowing for consistent shots throughout different lighting conditions.
Set up your tripod to accommodate various heights and compositions, ensuring that you capture your scenes from different angles. Consider using a tripod with a multi-angle head so you can easily position your camera at eye level and manage high or low angles with ease.
Utilizing an External Flash and Light Meter
An external flash can revolutionize your approach to lighting. Use it to fill out shadows, add depth, and create a balanced lighting scheme. As mentioned earlier, adjusting flash power and direction can enhance the results drastically.
Using a light meter can help you achieve accurate exposure settings, ensuring you balance natural and artificial lights effectively. A light meter allows you to determine the precise amount of light emitted from your sources and provides recommendations for adjusting your camera settings.
Workflow for Editing and Enhancing Light
Post-processing can elevate your images significantly, allowing you to refine your lighting further and correct any issues that arise during the shoot.
In software like Adobe Lightroom or Photoshop, use tools to adjust color balance, exposure, and contrast. Pay special attention to maintaining natural color representation, so potential buyers connect with the space accurately.
Utilizing layers and masking tools can effectively manage the temperature variances and shadows. Focus on enhancing the lighter parts of an image without overshadowing the beauty and subtleties of existing shadows.
Post-processing can elevate your images significantly, allowing you to refine your lighting further and correct any issues that arise during the shoot. In software like Adobe Lightroom or Photoshop, use tools to adjust color balance, exposure, and contrast. Pay special attention to maintaining natural color representation, so potential buyers connect with the space accurately. Utilizing layers and masking tools can effectively manage the temperature variances and shadows. Focus on enhancing the lighter parts of an image without overshadowing the beauty and subtleties of existing shadows. This is where professional real estate photo editing comes into play, ensuring that the final image showcases the property at its best.
4. Best Practices for Lighting Interior Spaces
Upon mastering the necessary techniques and equipment, solidifying best practices can help produce consistent and impressive photographs of interior spaces.
- Decluttering for Clearer Shots: Remove distractions, arrange furniture to highlight focal points, and keep windows clean to maximize natural light.
- Utilizing Window Treatments: Use sheer curtains or remove heavy drapes to allow more light in; apply heavier treatments to soften harsh sunlight when needed.
- Keeping Color Temperature Consistent: Match light sources to maintain uniform color balance; use to daylight-spectrum LEDs for consistency between ambient and external lighting.
- Consistency in Image Editing: Use editing presets for a cohesive style, maintain authenticity, and apply subtle touch-ups to enhance features without over-editing.
5. Let Fotober Elevate Your Real Estate Visuals
Fotober specializes in lighting, producing innovative real estate photography that showcases properties at their best. Our expertise ensures you present homes in a manner that leaves a memorable impact on prospective buyers.

Whether you're a real estate agent looking to expand your portfolio or a homeowner showcasing your property, let Fotober elevate your visuals to unparalleled heights. Reach out to us for professional assistance and unlock the potential of stunning real estate photography today.
Conclusion
Mastering lighting for real estate photography means balancing natural and artificial light to showcase properties at their best. With the right techniques and tools, you can create images that attract and inspire buyers. At Fotober, we help photographers elevate every shot, ensuring lighting transforms spaces into compelling, market-ready visuals.
Related posts

Double Your Booking: Airbnb Photography Tips for World Cup Host Cities
July 15, 2026

The Legacy of Sam Neill Real Estate: Vineyard & His Private Sanctuary
July 14, 2026

World Cup 2026 Host City Real Estate: Overview & Marketing Strategies
July 13, 2026
Most Common Photography Mistakes California Realtors Should Avoid
July 10, 2026
